
Related Manuals for Kärcher CVU 120V


Summary of Contents for Kärcher CVU 120V
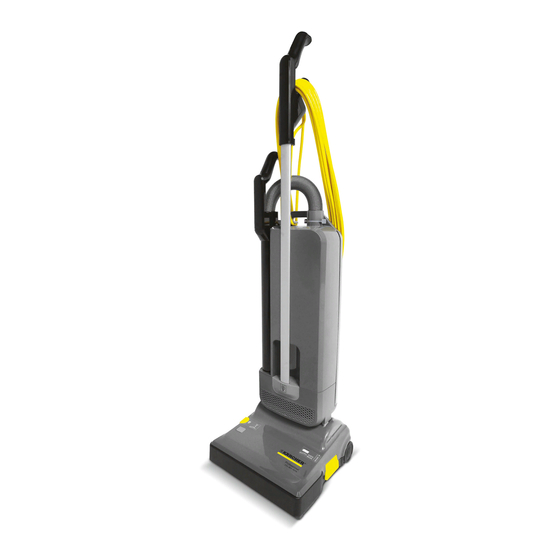
- Page 1 CVU 120V Description Operating instructions (ENG) MODELS: 1.012-595.0 CVU 30/1 120V 1.012-591.0 CVU 36/1 120V 1.012-592.0 CVU 46/1 120V 86399990-C 05/14/15...
-
Page 2: Machine Data Label
Thank you for purchasing a Kärcher product. Warranty registration is quick and easy. Your registration will allow us to serve you better over the lifetime of the product. To register your product go to : http://www.karcher.com/us/warranty/professional.htm For customer assistance: 1-800-444-7654 86399990 - CVU 120V... -
Page 3: Table Of Contents
CVU 36 Power Head..... . 28 CVU 46 Power Head..... . 30 86399990 - CVU 120V... -
Page 4: How To Use This Manual
• NOTES – column for information not noted by the other columns. NOTE: The manual part number is located on the lower right corner of the front cover. 86399990 - CVU 120V... -
Page 5: Safety
19. If used on plush carpet or carpet with thick padding, do not leave machine in one place with machine turned 20. Use of extension cord or light socket with inadequate current-carrying capacity could result in electric shock or fire hazard. READ AND SAVE THESE INSTRUCTIONS 86399990 - CVU 120V... -
Page 6: Hazard Intensity Level
In Flammable or Explosive areas. In areas with possible falling objects WHEN SERVICING MACHINE: Avoid moving parts. Do not wear loose clothing; jackets, shirts, or sleeves when working on the machine. Use manufacturer approved replacement parts. 86399990 - CVU 120V... -
Page 7: Grounding Instructions
NOTE: In Canada, the use of a temporary adapter is not permitted by the Canadian Electrical Code. GROUNDED GROUNDED ADAPTER OUTLET BOX OUTLET TAB FOR METAL SCREW GROUNDING SCREW GROUNDING 86399990 - CVU 120V... - Page 8 The use of non-genuine parts will waive the warranty for this product and could pose a serious safety risk. All repairs within the guarantee period should be performed by an authorized Service Representative. Electrical appliance, do not expose to liquid, moisture or heat. 86399990 - CVU 120V...
-
Page 9: Technical Specifications
39 feet/12m Weight: CVU 30/1 18 pounds/8.2kg CVU 36/1 18.3 pounds/8.3kg CVU 46/1 19.2 pounds/8.7kg Protection Grounded Sound Pressure Level L 76 dB[A] Uncertainty K 2 dB[A] Hand-arm Vibration Value < 2.5 m/s Uncertainty K 0.2 m/s 86399990 - CVU 120V... - Page 10 14. Rear carrying handle 5. Attachment tube handle 15. Cover release latch 6. Hose 16. Cable hook 7. Attachment tube 17. Crevice nozzle 8. Recessed grip 18. Upholstery nozzle 9. Power head 19. Foot pedal 10. On/Off switch 86399990 - CVU 120V...
-
Page 11: Assembling The Vacuum Cleaner
Fit the mains cable into the groove (22) in the dust bag housing located in the attachment wand recess, then to the clamps on the top of the dust bag housing and on the rear of the handle. 86399990 - CVU 120V... - Page 12 (7) only one way. NOTE: If The Machine Does Not Work, Then The Steps Above Have Not Been Executed Correctly. Please Ensure The Parts Are Properly Pushed Together, Especially The Cable Plug And Swivel Neck. 86399990 - CVU 120V...
-
Page 13: Operating Instructions
4 (highest setting) and back. When the brush is new, set it to position 2. If it is hard to push, change to position 3 or 4. For a deep and intensive cleaning performance, setting 1 is recommended. 86399990 - CVU 120V... - Page 14 (17,18) fit either to the end of the hose or the end of the tube. When using accessory tools, keep floor brush off carpet by keeping handle in locked position and lowering handle with one hand to raise brush off floor. Operate accessories with other hand. 86399990 - CVU 120V...
-
Page 15: Maintenance
The Microfilter (37) is located in the dust bag compartment. To change the Microfilter slide it out. Please ensure no particles fall down into the swivel neck. To insert a new Microfilter (37) lift the metal bar (38) to slide the filter in. 86399990 - CVU 120V... -
Page 16: Changing The Brush Strip
Ensure that the new brush strip (42) is fully inserted and press the side plate (44) back into place. NOTE: Please ensure that the side plate (44) is fully pushed home so that it locks in place. 86399990 - CVU 120V... -
Page 17: Clearing Blockages
Check for a blockage in the swivel neck of the power head and under the yellow trap-door (45) on the bottom of the power head. Ensure that the passage between these two openings in the power head is clear. 86399990 - CVU 120V... - Page 18 Parts PARTS 86399990 - CVU 120V...
-
Page 19: Upper Housing
Upper Housing 16 17 86399990 - CVU 120V... - Page 20 50216ZG BOX EXHAUST FILTER 86394490 50215BG BACK COVER CPL. 86394540 50169N HEPA EXHAUST FILTER NON OVERPRINTED 86143300 5036JE MICRO HYGENE FILTER 86284840 5300NN FILTER BAG PACK 86319300 1092SW CREVICE NOZZLE BLK 86319290 1491SW UPHOLSTERY NOZZLE BLK 86399990 - CVU 120V...
-
Page 21: Cvu 36 Power Head
CVU 36 Power Head 86399990 - CVU 120V... -
Page 22: Cvu 46 Power Head
SCREW, M3.9 X 13 DIN7981 86144850 0197ER SCREW, M4 X 12 HWH 86144780 01016ER SCREW, M4 X16-T20 SS 86397540 01010ER SCREW AM4X16 86397550 0104ER SCREW 3,9X 25 86147170 0176ER SCREW, M4-.7 X 30 PHPNHMS ZN DIN7985 86145250 2867 SPRING 86399990 - CVU 120V...
Need help?
Do you have a question about the CVU 120V and is the answer not in the manual?
Questions and answers