Table of Contents
Advertisement
Quick Links
Advertisement
Table of Contents

Related Manuals for Cineversum blackwing mk 2016 r599860


Summary of Contents for Cineversum blackwing mk 2016 r599860
- Page 2 Changes Cineversum provides this manual ‘as is’ without warranty of any kind, either expressed or implied, including but not limited to the implied warranties or merchantability and fitness for a particular purpose. Cineversum may make improvements and/or changes to the product(s) and/or the program(s) described in this publication at any time without notice.
-
Page 3: Table Of Contents
TABLE OF CONTENTS 1.0 SAFETY INSTRUCTIONS ..................... Important Information ........................5 Regional Specific Information......................5 Important Safeguards ........................5 2.0 INSTALLATION GUIDELINES ................... Introduction ............................7 THX-3D Display Certification .......................7 Environment of Use........................8 Air-Flow and Space Requirements ....................8 Ceiling Mounting the Unit ......................8 Projection Distance.........................9 Setting the Lens and using Lens Memories..................9 3.0 ... - Page 4 10.5 Anamorphic (works with 3D).......................26 10.6 High Altitude Mode ........................27 10.7 Screen Adjust and Screen No.......................27 11.0 DISPLAY SETUP ........................12.0 FUNCTION ..........................12.1 Trigger ............................27 12.2 Off-Timer............................27 12.3 ECO Mode ............................27 12.4 Network ............................27 12.5 Remote Code A or B ........................28 12.6 Lamp Reset ...........................28 13.0 ...
-
Page 5: Safety Instructions
FCC Information (USA only) Changes or modification not approved by Cineversum could void the user’s authority to operate the equipment. Note: This equipment has been tested and found to comply with the limits for Class B digital devices, pursuant to Part 15 of the FCC Rules. - Page 6 SAFETY INSTRUCTIONS HAZARD. In order not to defeat the safeguards incorporated into this product, observe the following basic rules for its installation, use and service. The power input is auto-ranging from 100 to 240 VAC. Please read these Important Safeguards carefully before use. • All the safety and operating instructions should be read before the product is operated.
-
Page 7: Installation Guidelines
INSTALLATION GUIDELINES stoves, and other products (including amplifiers) that produce heat. • When connecting other products such as VCR’s, and personal computers, you should turn off the power of this product for protection against electric shock. • Do not place combustible behind the cooling fan. For example, cloth, paper, matches, aerosol cans or gas lighters that present special hazards when over heated. -
Page 8: Environment Of Use
INSTALLATION GUIDELINES inputs. This unit is compatible with the following 3D formats: • 1080p @ 23.98/24Hz - Frame Packing, Top & Bottom and Side-by-Side • 720p @ 50 or 59.94/60Hz - Frame Packing, Top & Bottom and Side-by-Side • 1080i/p @ 50/60Hz - Side-by-Side 2.3 ... -
Page 9: Projection Distance
• Regardless whether the unit is still under guarantee, Cineversum is not liable for any product damage caused by mounting the unit with third party ceiling mount or when the environment is not suitable for ceiling-mount. -
Page 10: Adjust The Picture Zoom
INSTALLATION GUIDELINES This unit comes with a vertical and horizontal shift to suit most installations. Make sure that your installation does not exceed 80% vertical offset and 34% horizontal offset to avoid trapezoidal correction. This unit comes with a optical shift that features vertical and horizontal adjustment of the projection screen position Adjust the picture to your screen. -
Page 11: Remote Control Unit (Rcu)
REMOTE CONTROL UNIT (RCU) 3.0 REMOTE CONTROL UNIT (RCU) STAND BY Stand by Power [On] Selects an [HDMI2] input INPUT Displays [Info] menu Selects an [HDMI1] input HDMI 1 HDMI 1 INFO. MEMORY MEMORY 1 MEMORY 2 MENU Switches, edits [Lens Memory] LENS MEMORY CMD Clear Motion Drive LENS... -
Page 12: Getting Started
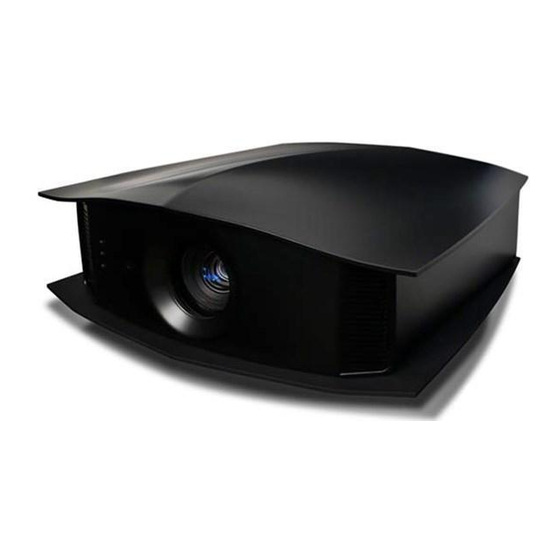
GETTING STARTED 4.0 GETTING STARTED 4.1 General View Front side Optical Lens* Air Inlets Operating LEDs Front IR receiver (*) Optical Lens: On the Blackwing 2&3 models, the optical lens is protected by a motorized lens cover. Rear side Lamp trap Input Panel Navigation buttons... -
Page 13: Operating And Navigation Buttons
CONNECTIONS 4.3 Operating and Navigation Buttons Power button STANDBY/ON Input source INPUT OK button Directional keys MENU BACK Menu Back Button Description Power To turn ON or OFF the projector. Input source To switch input source between HDMI 1 and HDMI 2. OK button To select or to confirm action. -
Page 14: Connecting A Video Source To The Projector
CONNECTIONS 5.2 Connecting a Video Source to the Projector HDMI 1 HDMI 2 RF Dongle 3D syncro Emitter Audio/Video Connection Device to connect HDMI 1, HDMI 2 HDMI or DVI-D sources: Blu-ray Disc player, DVD-player equipped with HDMI (DVI compatible) output, Game Console, Computer with DVI-D output. -
Page 15: Menu Structure
MENU STRUCTURE 6.0 MENU STRUCTURE MAIN MENU SUBMENU AVAILABLE OPTIONS Picture Adjust Picture Mode (Digital Cinema) Cinema (3+6 User) (SF movies or animes) Animation (Video programs) Natural User 1 - 6 Additional picture modes (Movies) Film for Blackwing 2&3 (total of 5 + 6 User + 4 expert*) THX bright(*) THX dark(*) - Page 16 MENU STRUCTURE Picture Adjust Color Temp. Preset value: 5500K - 6500K - 7500K - 9300K High Bright - Custom 1-3 Advanced Color Temp If Custom 1-3, choose Correction Value Gain and Offset settings Reset Confirm Gamma If Color Profile is Film1 to 3 (standard) Film1 (more contrasted)
- Page 17 MENU STRUCTURE Input Signal Mask On, Off Custom 1 - 3 Top, Bottom, Left, Right 0 - 220 3D Setting 3D format Auto / Side-by-Side / Top & Bottom / 2D Parallax -15 +15 Crosstalk Cancel -8 +8 Picture Position (N.A.
-
Page 18: Picture Adjust
PICTURE ADjUST Information Input Source Deep Color Color Space Lamp Time PS Version 7.0 PICTURE ADjUST 7.1 Picture Modes and Color Profiles The preset Picture Modes are available and they can be applied to any input. A picture mode retains the picture adjustments. -
Page 19: Advanced Picture Mode
PICTURE ADjUST 7.2 Advanced Picture Mode Clear Black Smooth out the black areas to obtain clear zone by eliminating electronic white noise in these areas. Turn it Off or set the correction to Low for a mild effect or High for a strong effect. Lamp Power Set the lamp power used by the current Picture Profile. -
Page 20: Color Temperature
PICTURE ADjUST 7.4 Color Temperature Color temperature stands for the spectral properties of a light source. Low color temperature implies warmer ambiance (more yellow/red) while high color temperature implies a colder light (more blue). Depending on the Picture Profile selected, this setting can be set to: • Preset: from 5500K / warm colors, up to 9300K / cold colors. -
Page 21: Multiple Pixel Control Level (Mpc Level)
PICTURE ADjUST Picture Tone It allows a fine adjustment steps of the global picture brightness while maintaining the correct contrast level to keep good black and bright levels. Sets the overall exposure from -16 (under-exposed, darker) up to +16 (over- exposed, brighter) Dark / Bright Level This setting modifies the gamma curve locally in the dark and bright areas. -
Page 22: Contrast
INPUT SIGNAL Motion Enhance This setting enhances the responsiveness of each video frame by reducing the image bluring. Motion Enhance is disable if Keystone or Anamorphic mode A or B are in use. Disable with 3D inputs. 7.10 Contrast The contrast function is used to adjust the contrast between the light and dark areas of the displayed image. -
Page 23: Progressive (Only 480I, 576I, 1080I)
3D CONTENT AND 3D PROjECTION For PC sources a) Auto. Zoom the picture to fill either the screen height or the screen base which ever happens first. b) Just mode. pixel to pixel mapping, without scaling. c) Full. Stretch the picture full screen 8.4 ... -
Page 24: Projector 3D Settings
INSTALLATION 9.2 Projector 3D Settings 3D Formats Use this function to choose the correct 3D input format. Some input signals may contain 3D data such as 1080p Side-by-Side but encoded as if they were in 2D. This unit may treat them as standard 2D signals and will not project correctly. -
Page 25: Pixel Adjust
INSTALLATION 10.2 Pixel Adjust The pixel adjustment is extremely fine: each color can be adjust within 1/16 pixel steps on 121 individual adjustment zones. Adjust Enable the pixel adjustment on Memory 1, Memory 2 or Off. Adjust Area Whole: the entire screen is selected for adjustment. Zone: the screen is divided into 121 adjustment zones. -
Page 26: High Altitude Mode
001 - 009: select a profile between 001 and 009 when watching 3D content with 3D shutter glasses. Profile 001 is recommended when using Cineversum’s active 3D-glasses. b) 010 to 255: select the best compensation profile depending on your screen and environment. -
Page 27: Function
FUNCTION 12.0 FUNCTION 12.1 Trigger The 12V trigger output can be used to control any compatible devices such as motorized screens or anamorphic kits: The 12V trigger output is 12Vcc, 100mA. Select the trigger output behavior: • Off: 12V trigger voltage state is always low. • On (Power): 12V trigger state is high when the projector is powered ON. -
Page 28: Cinemascope Setups
CINEMASCOPE SETUPS Color Space and Color Depth Displays the color space and color depth of the input signal. Lamp Time Displays the accumulated hours of usage of the lamp. Calibrator Stores up to 18 ASCII characters set by the Calibrator. Shown only if set during ISF profile adjustment. 14.0 ... -
Page 29: Maintenance
MAINTENANCE When you press sequentially the [Anamo]rphic button, you change the mode from OFF, Mode A and Mode B. • Mode A is intended to be used with an anamorphic lens to watch 2.35:1 content on a 2.35:1 screen. • Mode B is intended to be used to watch 16:9 content on a 2.35:1 screen and with the Static Cinemascope kit. Anamo Kit installed Mode B 2.35 screen... -
Page 30: Replacing The Lamp
MAINTENANCE 15.3 Replacing the Lamp Light-source Lamp and Lamp Usage Time The life of light-source lamps used for this unit is about 4500 hours when running this unit in low lamp power mode. • When the lamp power is set to Low, the lamp life is approximately 4500 hours. This average lamp life is not guaranteed and may not reach 4500 hours depending on the operating conditions. -
Page 31: Troubleshooting
MAINTENANCE b) Browse into the menu Function => Reset Lamp Time. c) Confirm time reset. CAUTION DURING LAMP RESET Reset the lamp time only when you have replaced the lamp. Never reset it when the lamp is still in use. Otherwise, the approximate standard for gauging replacement time may be inaccurate, lamp performance may deteriorate and lamp blowout may occur. -
Page 32: Miscellaneous
MISCELLANEOUS 16.0 MISCELLANEOUS 16.1 RS-232C protocol Serial communication specifications Control of this unit is possible using a computer or automation device connected with a RS-232 cross cable (female - female D-sub 9 pins cable) or LAN/ RJ-45 cable. Communication specifications for this unit are as follows: Baud Rate 19200 bps... - Page 33 MISCELLANEOUS Function Command Command Data Description Keypad 52h 43h 37h 33h 33h 34h RIGHT 37h 33h 33h 34h LEFT Hide Display 52h 43h 37h 33h 31h 44h Toggle Hide On/Off 37h 33h 44h 30h Switch Hide to On 37h 33h 44h 31h Switch Hide to Off OSD Menu Position 52h 43h...
- Page 34 MISCELLANEOUS Function Command Command Data Description Expert Calibration 52h 43h 37h 33h 43h 36h THX plus - On and Adjust (THX) 37h 33h 43h 37h THX plus - Off 37h 33h 43h 38h THX plus - On locked 37h 33h 38h 35h Switch Picture Mode to THX - Bright 37h 33h 38h 36h Switch Picture Mode to THX - Dark...
-
Page 35: Lan Protocol
MISCELLANEOUS Function Command Command Data Description Lens Memory Select 49h 4Eh 4Dh 4Ch Select Lens Memory 1 Select Lens Memory 2 Select Lens Memory 10 Set Memory1 name 49h 4Eh 4Dh 31h 10 ASCII char. Set custom name to Lens Memory1 Set Memory2 name 49h 4Eh 4Dh 32h 10 ASCII char. -
Page 36: Infra Red, Long Hex-Pronto Compatible Rcu
MISCELLANEOUS `Control Device Projector 1. Openning Connection on port 20554 2. Projector Ready (PJ_OK) 3. Command Type (PJREQ) 4. Projector Acknowledge (PJACK) 5. Command 6. Projector confirms After 5sec, connection is closed LAN communication protocol and timed out Examples You want to... Command to send Switch this unit On 1. -
Page 37: Specifications
MISCELLANEOUS 16.4 Specifications Overview Overview The Blackwing MK2016 uses the latest technology developed to provide the ultimate video-projection experience. LCoS (Liquid Crystal on Silicon) technology based on a reflective principle features an extremely high-definition picture and seamless color gradations. Emission method LCoS (Reflective Active Matrix Principle) Display panel size... - Page 38 MISCELLANEOUS Dimensions 20 cm 7.9” 53 cm 55 cm 20.9” 21.7” 55 cm 21.7” 53 cm 20.9” R599860 - Blackwing MK2016 User Manual...
- Page 39 R599860 - Blackwing MK2016 User Manual...
Need help?
Do you have a question about the blackwing mk 2016 r599860 and is the answer not in the manual?
Questions and answers