True ES700 Owner's Manual
Hide thumbs
Also See for ES700:
- Owner's manual (61 pages) ,
- Owner's manual (67 pages) ,
- Owner's manual (46 pages)

Related Manuals for True ES700


Summary of Contents for True ES700
- Page 1 * Assembly Guide & Warranty Card Included ES700 & ES900 ELLIPTICAL OWNER’S MANUAL Revision 012714...
- Page 2 ES700 & ES900 ELLIPTICAL OWNERS MANUAL IMPORTANT: All Products shown are prototype. Actual product delivered may vary. Product specifications, features & software are subject to change without notice. For the most up to date owner’s manual please visit www.truefitness.com. For documents in additional languages please visit www.truefitness.com/document-library/29/international-manuals IMPORTANTE: Todos los productos mostrados son prototipos.
- Page 3 The proud manufacturing tradition of quality and the culture of innovation at TRUE have given rise to a full line of truly extraordinary treadmills, indoor cycles and elliptical cross-trainers. As a result, people all over the world are benefiting from the TRUE experience.
-
Page 4: Table Of Contents
ES700 & ES900 ELLIPTICAL OWNERS MANUAL TABLE OF CONTENTS : Chapter 1: Safety Instructions Chapter 4B: Emerge Operation Safety Instructions Emerge Overview Space Requirements Console Navigation Grounding Instructions Advanced Console Functions Power Requirements Warning Decals Chapter 5: Care & Maintenance Compliances Care &... -
Page 5: Chapter 1: Safety Instructions
Do not modify the plug provided with this product. If it will not fit an electrical outlet, have a proper outlet installed by a qualified electrician. Your TRUE Fitness product must be properly grounded to reduce risk of shock if the elliptical malfunctions. - Page 6 To disconnect, turn power OFF at the ON/OFF switch if applicable, then remove plug from electrical outlet. • Never operate a TRUE product if it has a damaged power cord or electrical plug, or if it has been dropped, damaged, or even partially immersed in water. Contact TRUE Customer Service.
-
Page 7: Space Requirements
SPACE REQUIREMENTS: • TRUE’s recommendation is to leave a 39” safety zone at rear of elliptical. The sides of the unit should be at least 20” away from the wall or obstructions. (See Fig 1) Truefitness.com / 800.426.6570 / 636.272.7100... -
Page 8: Grounding Instructions
CHAPTER 1: SAFETY INSTRUCTIONS GROUNDING INSTRUCTIONS: This product must be grounded, if it should malfunction or breakdown, grounding provides a path of least resistance for electric current to reduce the risk of electric shock. This product is equipped with a cord having an equipment-grounding conductor and a grounding plug. -
Page 9: Power Requirements
CHAPTER 1: SAFETY INSTRUCTIONS Truefitness.com / 800.426.6570 / 636.272.7100... -
Page 10: Warning Decals
CHAPTER 1: SAFETY INSTRUCTIONS WARNING DECALS: WARNING: Replace warning labels that may be worn, damaged or missing. *To replace any worn or missing warning decals contact TRUE FITNESS by one of the following: www.truefitness.com or contact customer service at 800-883-8783. COMPLIANCES: This equipment complies with all applicable codes and regulations. -
Page 11: Chapter 2: Assembly Instructions
All exercise equipment is potentially hazardous. If attention is not paid to the conditions of the equipment usage, death or serious injury could occur. *Should you need technical assistance in assembly of your TRUE Fitness product, contact TRUE Fitness Technical Support at 1-800-883-8783. -
Page 12: Assembly Steps
Exercise Arms Step 4 Console Side Arms Step 6&7 Step 3 Neck Shroud Step 7 Push Rods Step 1 & 2 TRUE Lock Pedestal Step 1 Boot Step 1 Handle Bars Step 1&9 Base Step 1 Floor Levelers Step 8... - Page 13 CHAPTER 2: ASSEMBLY INSTRUCTIONS ELLIPTICAL ASSEMBLY STEPS (continued): Pre-Assembly STEP 1: Install Transport Handle Bars: a) Important: With machine still on pallet, attach handle bars to the front and rear of machine. Handle Bars will provide assistance in moving machine. Figures 1 & 2 b) Carefully remove Elliptical from pallet.
- Page 14 CHAPTER 2: ASSEMBLY INSTRUCTIONS ELLIPTICAL ASSEMBLY STEPS (continued): STEP 1: Attach Push Rods: a) Rotate crankshaft to the rear on Rotate Crankshaft to the rear the side that you are installing then for push rod installation. insert the push rod as shown. b) Once the pushrod is inside the Align the pushrod so Move crank shaft back...
- Page 15 CHAPTER 2: ASSEMBLY INSTRUCTIONS ELLIPTICAL ASSEMBLY STEPS (continued): STEP 1: Attach Push Rods (continued): d) Place Rubber Cap from Bag 1 in hole after assembly. Hardware Required (Bag1): 2 Rubber Caps STEP 2: Assemble Pedestal to Base: a) Remove front handles before assembling pedestal.
- Page 16 CHAPTER 2: ASSEMBLY INSTRUCTIONS ELLIPTICAL ASSEMBLY STEPS (continued): STEP 2: Assemble Pedestal to Base (continued): c) Use 2 M12x12mm bolts and 8 M8x12mm M8x12mm bolts to attach Pedestal Bolts to Base and connect the 3 cables coming from the right pedestal to the corresponding wires in the base.
- Page 17 CHAPTER 2: ASSEMBLY INSTRUCTIONS ELLIPTICAL ASSEMBLY STEPS (continued): STEP 4: Attach Side Arms: a) Connect Cardio Arm Heart Rate Cable b) CAREFULLY Slide Side Arm into Pedestal and tuck the Heart Rate Cable into the plastic housing. Make sure to not pinch the Heart Rate Cable wires.
- Page 18 CHAPTER 2: ASSEMBLY INSTRUCTIONS ELLIPTICAL ASSEMBLY STEPS (continued): STEP 5: Attach Upper Body Cardio Arms (continued): b1) Attach the inner Cardio Arm Covers using 2 M5x8mm screws. Hardware Required (Bag 5): 4 M5x8mm Screws b2-ES900 ONLY) Attach the outer Cardio Arm Covers using 2 M5x8mm screws.
- Page 19 CHAPTER 2: ASSEMBLY INSTRUCTIONS ELLIPTICAL ASSEMBLY STEPS (continued): STEP 6: Attach Pedal Tubes (continued): b) Attach the Front Pedal Tube Covers using 8 M5x12mm screws. Hardware Required (Bag 6): 8 M5x12mm Screws STEP 7: Attach Console: a) Slide Console cables through Ground Console Mast and attach Mast using Screw Hole...
- Page 20 CHAPTER 2: ASSEMBLY INSTRUCTIONS ELLIPTICAL ASSEMBLY STEPS (continued): STEP 7: Attach Console (continued): a) Attach the wires coming out of the top of the neck to the back of the console as shown under the picture of The Correct Console. Remove the Ground Screw from the plate on the neck and use it to screw the Ground Connector back into the same hole.
- Page 21 STEP 10: Remove Protective Film from Decals: a) Once Elliptical is moved into its final location, remove the protective film from the decals and from the “True” on the lower shroud. Truefitness.com / 800.426.6570 / 636.272.7100...
-
Page 22: Chapter 3: Product Overview
CHAPTER 3: PRODUCT OVERVIEW ELLIPTICAL OVERVIEW: Upper Exercise Arms with Revolving Handles Console Assembly (ES900) Upper Exercise Arms with Multi Grip Handles (ES700) Upper Exercise Arm Height Adjustment Knob (ES900) Side Rails with TRUE Lock Contact Heart Rate Pads Operates using speed independent... - Page 23 Console Assembly The console allows the user to set up a workout program and control the elliptical during a workout. Upper Exercise Arms with Multi Grip Handles (ES700): Ergonomic Multi-Grip Handles that provide resistance to the upper body during a workout.
-
Page 24: Operating Instructions
Operating Instructions: The TRUE Lock knob is designed to be positioned in either the locked or unlocked position. Always make sure it is secured fully in one of these positions. To operate, first pull knob to disengage, and then simply turn in the appropriate direction. -
Page 25: Chapter 4: Programming & Operation Heart Rate Monitoring
HEART RATE CONTROL (HRC): Introduction: You are now the owner of the most sophisticated Heart Rate Control equipment available. TRUE HRC is unique and patented. It accommodates users from rehabilitation to world class athletes, and all those in between. TRUE HRC allows users to do a completely adjustment free heart rate controlled workout. -
Page 26: Target Heart Rate
HEART RATE CONTROL (continued): The TRUE HRC system is unique because users must enter the key parameters of the workout; target heart rate, weight, age, and time, prior to beginning the HRC workout. As users approach their target heart rate, the elliptical’s computer takes full control over the workout and changes the workout intensity automatically to keep users near their target heart rate. -
Page 27: Program Descriptions
CHAPTER 4: PROGRAMMING & OPERATION PROGRAM DESCRIPTIONS: Available programs vary depending on the console option selected. Please refer to the chart below for assistance in determining which programs are available on this unit. Console Options Escalate Emerge Quick Start: ** A workout in which the user controls all settings. -
Page 28: Calorie Goal
CHAPTER 4: PROGRAMMING & OPERATION PROGRAM DESCRIPTIONS (continued): Calorie Goal: ** This workout allows users to choose the number of calories they wish to burn within a specified workout time. The WORKLOAD will adjust automatically to attain this goal. Cardio Challenge: * WORKLOAD and suggested PACE (RPM) increase to a maximum at the mid-point of the workout, then decrease to the finish. - Page 29 CHAPTER 4: PROGRAMMING & OPERATION PROGRAM DESCRIPTIONS (continued): HRC Target: ** Users choose their target heart rate. The workout begins in MANUAL control - gradually increase WORKLOAD until heart rate is within 10 bpm of their target. At this point, the machine takes control of WORKLOAD to maintain the user’s heart rate within a few beats of their target.
-
Page 30: Chapter 4A: Escalate 9 Operation
CHAPTER 4A: ESCALATE OPERATION ESCALATE OVERVIEW: LCD Display Selection Buttons Selection Buttons Decrease Increase Workload Workload Start Stop Reading Warning Rack Decal Headphone 30 Pin iPod® USB Port Numeric Jack Connector Keypad Truefitness.com / 800.426.6570 / 636.272.7100... -
Page 31: Escalate 9 Overview
CHAPTER 4A: ESCALATE OPERATION ESCALATE OVERVIEW (continued): LCD Display: Used to monitor or control a work out and feature navigation. Selection Buttons: Used to navigate menus and make selections via the LCD Display. Workload Keys: Manually increases or decreases the workout intensity. Start: Allows the user to begin a Quick Start workout or preset workout. -
Page 32: Console Navigation
CHAPTER 4A: ESCALATE OPERATION CONSOLE NAVIGATION: Home Screen: The Home Screen is displayed on the console when there is no workout in progress. From this screen the user is able to select from various options to begin a workout. A) Cardio 360™ Quick Start Starts a 20 minute Cardio 360™... - Page 33 CHAPTER 4A: ESCALATE OPERATION CONSOLE NAVIGATION (continued): Selecting a Preset Workout: Preset workouts are accessed by selecting Workout Finder from the home screen. To view the workouts in a category, select the category (A) by using the Scroll Selection Buttons (B) and then press the Next Selection Button (C). *Press and hold the Next Selection Button to return to the previous screen.
- Page 34 CHAPTER 4A: ESCALATE OPERATION CONSOLE NAVIGATION (continued): Workout Data Screens: During any workout a Workout Data Screen will be displayed to give the user a comprehensive visual overview of their current workout data. A) Custom Data Display #1: By Default, this display will show the distance for the current workout. Users can also choose custom data points to be seen in this display.
- Page 35 CHAPTER 4A: ESCALATE OPERATION CONSOLE NAVIGATION (continued): Workout Data Screen Controls: The Workout Data Screens contain various controls that allow users to adjust workout settings and to customize their overall workout experience. These controls are accessed by pressing the Selection Button for the control they wish to use. A) Change View: Switches between the available Workout Data Screens.
- Page 36 CHAPTER 4A: ESCALATE OPERATION CONSOLE NAVIGATION (continued): D) Source: Toggles the iPod® audio source on and off (when connected via the 30 pin iPod connector). When the iPod® audio source is selected the user is given control over volume (A) and the ability to skip tracks (B). E) Show Tools: Pressing the Show Tools Selection Button (A) will display various options.
- Page 37 CHAPTER 4A: ESCALATE OPERATION CONSOLE NAVIGATION (continued): F) Stride Adjust: The adjustable stride feature allows users to select a stride length that is comfortable for them by manually adjusting the stride using the adjustment selection buttons(A) or by using the AutoStride™ feature (B), an electronic adjustable stride feature that will assist you in finding the perfect stride based on your body’s natural movement at various speeds Workout Summary Screen: At the end of a workout the Summary Screen will display an overview of the workout data.
- Page 38 Cardio 360™: TRUE’s unique Cardio 360™ is like having a personal trainer built in to the elliptical, walking users through a full-body workout. In just minutes, users will work their upper-body, lower-body and core. Plus, with the variety that Cardio 360™...
-
Page 39: Advanced Console Functions
CHAPTER 4A: ESCALATE OPERATION ADVANCED CONSOLE FUNCTIONS: Entering Service Mode: Entering Service Mode can be completed by pressing and holding the upper left selection button (A) for 3-5 seconds or until the “Workout Finder” icon (B) blinks. When the “Workout Finder” icon blinks, release the upper right selection button and hold the “Workout Finder”... -
Page 40: Truefitness.com / 800.426.6570 / 636.272.7100
CHAPTER 4A: ESCALATE OPERATION ADVANCED CONSOLE FUNCTIONS (continued): Summary Screen: The Summary Screen provides an overview of the unit’s current settings (values cannot be changed in this screen). A) Product Model: The model number that the console is currently configured to. B) Software Version: The current version of software that is installed on the console. -
Page 41: Truefitness.com / 800.426.6570 / 636.272.7100
CHAPTER 4A: ESCALATE OPERATION ADVANCED CONSOLE FUNCTIONS (continued): Utilities Menu: The Utilities Menu allows users to adjust the time and date settings. Press the Enter Selection Button (A) to set the time and date. Setting Time and Date: Use the Previous and Next Selection Buttons (A) to highlight the field to be changed. Then use the adjustment selection buttons (B) to adjust the selected value. -
Page 42: Truefitness.com / 800.426.6570 / 636.272.7100
CHAPTER 4A: ESCALATE OPERATION ADVANCED CONSOLE FUNCTIONS (continued): Demo Mode: Demo mode is intended for use by sales professionals and should not be used in a home environment. Diagnostics Menu: The Diagnostics menu will display the unit’s current usage data including total distance, in miles, that the unit has traveled as well as the total time, in hours, that the unit has been in use. - Page 43 CHAPTER 4A: ESCALATE OPERATION ADVANCED CONSOLE FUNCTIONS (continued): Options Menu: The options menu contains 5 Settings with various options available for each. To navigate the options menu, use the scroll selection buttons (A) to highlight the option to be changed (B) and use the + and - Selection Buttons (C) to adjust the options.
-
Page 44: Chapter 4B: Emerge Operation
CHAPTER 4B: EMERGE OPERATION EMERGE OVERVIEW: Lower LED Upper LED HRC Cruise Cardio 360™ Target Display Display Control Display Quick Start AutoStride™ Decrease Increase Workload Workload Start Workout Enter Target Change Reading Stride Warning Finder Keys Decal Display Rack Truefitness.com / 800.426.6570 / 636.272.7100... - Page 45 CHAPTER 4B: EMERGE OPERATION EMERGE OVERVIEW (continued): LED Displays: Used to monitor or control a work out and for feature navigation. Workload Keys: Manually increases or decreases the workout intensity. Start: Allows the user to begin a Quick Start workout or preset workout. Workout Finder: Pressing this button scrolls through available workouts.
- Page 46 CHAPTER 4B: EMERGE OPERATION EMERGE OVERVIEW (continued): Stride Keys: Allow the user to adjust the stride length of the unit. AutoStride™ An electronic adjustable stride feature that will assist users in finding the perfect stride based on their body’s natural movement at various speeds. Lower LED Display: Displays the workout profile of the current program.
-
Page 47: Console Navigation
CHAPTER 4B: EMERGE OPERATION CONSOLE NAVIGATION: Selecting a Preset Workout: To begin a preset workout, press the Workout Finder button (A) until the desired program is shown in the Upper LED Display (B) and then press the Enter button (C). *To begin a Target HRC Workout, press the HRC Cruise Control button (D) followed by the Enter button (C) Workout Data Entry: Before beginning a preset workout, the console will ask the user for information in order to give more accurate... -
Page 48: Workout Summary
Cardio 360™: TRUE’s unique Cardio 360™ is like having a personal trainer built in to the elliptical, walking users through a full-body workout. In just minutes, users will work their upper-body, lower-body and core. Plus, with the variety that Cardio 360™... -
Page 49: Advanced Console Functions
ADVANCED CONSOLE FUNCTIONS: WARNING: Misconfiguration of the console may cause damage to the unit and void the manufacturer warranty. If necessary, please contact TRUE Fitness Technical Support at 800-883-8783 for assistance. Entering Diagnostics Mode: With the console powered up Press and hold the + WORKLOAD key for 10 seconds or until the console beeps. NOTE: If the sound is turned off no beep will be emitted from the console. -
Page 50: Chapter 5: Care & Maintenance
CAUTION: Do not use any acidic cleaners. Doing so will weaken the paint or powder coatings and may void the TRUE Fitness Warranty. Never pour water or spray liquids on any part of the elliptical. Allow the elliptical to dry completely before using. -
Page 51: Leveling The Unit
If the elliptical is not level the user may experience knocking or clicking sounds. OTHER SCHEDULED PREVENTIVE MAINTENANCE: TRUE recommends that quarterly scheduled maintenance be performed by a qualified service technician. Please contact your dealer or visit www.truefitness.com to contact a local TRUE authorized service technician. -
Page 52: Chapter 6: Customer Service
HOURS OF OPERATION: 8:30 A.M. - 5:00 P.M. CST E-MAIL: service@truefitness.com CONTACTING SALES: Interested in TRUE Products? Please contact us with any sales or product inquires so that we may direct you to the appropriate sales representative to answer your questions. TRUE FITNESS HOME OFFICE 865 HOFF ROAD ST. -
Page 53: Reporting Freight Claims Or Parts Damage
Severe Damage: Obvious damage to external packaging / internal product. Please refuse the shipment and it will be returned to TRUE Fitness by the carrier. Contact the TRUE Fitness customer support team by calling 800.883.8783 or sales support team by calling 800.426.6570 Monday-Friday during normal business hours to notify us that the shipment has been refused. -
Page 54: Chapter 7: Additional Information
This troubleshooting guide is intended to assist in diagnostics only and is not all inclusive. Technical specifications, error codes and programming are subject to change without notice. TRUE accepts no liability for any damage or loss suffered by persons whom rely wholly or in part on any description or statement contained within this manual. Please visit www.truefitness.com to obtain the most recent version of all manuals and contact the TRUE Service Department at 800-... - Page 55 Corrective Action Loss of communication between Power cycle unit Serial Error the upper board and brake motor. Contact True Fitness Customer Service Department No movement detected from the Power cycle unit Motor Error brake motor. Contact True Fitness Customer Service Department...
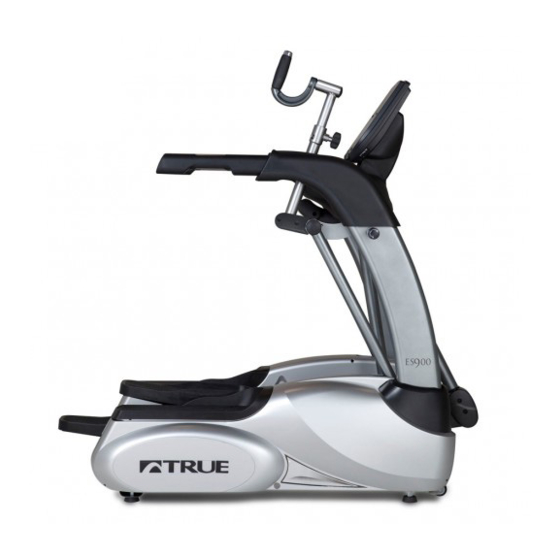
- Page 56 TRUE’s ES700 is equipped with all of the user-friendly interactive and patented TRUE features you need for your home fitness routine. Make the ES700 elliptical your own with multiple console options. Truefitness.com / 800.426.6570 / 636.272.7100...
-
Page 57: Es700 Specification Sheet
Lower Body Isolation Total Body Cardio 360 Workouts SAFTEY Side Steps Standard Extended Handrails Standard TRUE Lock™ Standard REGULATORY APPROVALS ETL UL1647, CSA EXTRAS Accessories Water Bottle Holder, Accessory Tray, Over Molded Reading Rack/Tablet Holder PHYSICAL SPECIFICATIONS Footprint 49"L x 32.5"W (124 cm x 83 cm) Active Footprint 75"L x 32.5"W (191 cm x 83 cm) - Page 58 TRUE directly at: Product. The frame is warranted for labor and freight (for parts shipped from TRUE) for one year from date of purchase. * This TRUE Fitness, Service Department limited warranty on structural frame does not include paint or 865 Hoff Road, St.
-
Page 59: Es700 Warranty Registration
The ES700 ellipticals come with two serial numbers; one on the modification, or failure to provide reasonable and necessary base and one on the display console (see diagram below). The maintenance (as referenced in the owner’s manual.) - Page 60 ES700 Ellipticals Thank you for purchasing a TRUE product. To validate the TRUE product warranty the fast and easy way, please go on-line now to truefitness.com/support and register your product. The information you provide will never be distributed to any other individuals or agencies for any purpose.
- Page 61 P r e m i u m F i t n e s s E q u i p m e n t S i n c e 1 9 8 1 The TRUE ES900 allows you to bring the fitness club experience into your home with commercial quality equipment.
-
Page 62: Es900 Specification Sheet
Lower Body Isolation Total Body Cardio 360 Workouts SAFTEY Side Steps Standard Extended Handrails Standard TRUE Lock™ Standard REGULATORY APPROVALS ETL UL1647, CSA EXTRAS Accessories Water Bottle Holder, Accessory Tray, Over Molded Reading Rack/Tablet Holder PHYSICAL SPECIFICATIONS Footprint 49"L x 32.5"W (124 cm x 83 cm) Active Footprint 75"L x 32.5"W (191 cm x 83 cm) - Page 63 TRUE directly at: Product. The frame is warranted for labor and freight (for parts shipped from TRUE) for one year from date of purchase. * This TRUE Fitness, Service Department limited warranty on structural frame does not include paint or 865 Hoff Road, St.
-
Page 64: Es900 Warranty Registration
BASE SERIAL NUMBER: part of TRUE, under no circumstances shall TRUE be liable by virtue of this Limited Warranty or otherwise from damage to any person or property whatsoever for any special, indirect, incidental, secondary or consequential losses, damages or expenses in connection with exercise products. - Page 65 ES900 Ellipticals Thank you for purchasing a TRUE product. To validate the TRUE product warranty the fast and easy way, please go on-line now to truefitness.com/support and register your product. The information you provide will never be distributed to any other individuals or agencies for any purpose.
Need help?
Do you have a question about the ES700 and is the answer not in the manual?
Questions and answers
Bike has power. Lights up and gets to where you need to press start and no buttons on consel work
The buttons on the True ES700 console may not be working despite the bike having power due to one of the following reasons:
1. Improper Grounding – The bike must be connected to a properly grounded 110V electrical outlet. If grounding is incorrect, it may cause electrical issues.
2. Maintenance or Cleaning Issues – If the bike was recently serviced or cleaned without unplugging it first, this could have affected the console's functionality.
3. Console Handling – If the bike was moved by lifting the console, it may have caused a connection issue. The console should not be used as a handlebar.
4. Modifications or Changes – Any unauthorized modifications to the equipment could void the warranty and affect proper operation.
To resolve the issue, check the power connection, ensure proper grounding, and verify that the console has not been damaged during movement or maintenance. If the problem persists, consult a qualified technician.
This answer is automatically generated
Buttons on right side not working