Table of Contents
Advertisement
Available languages
Available languages
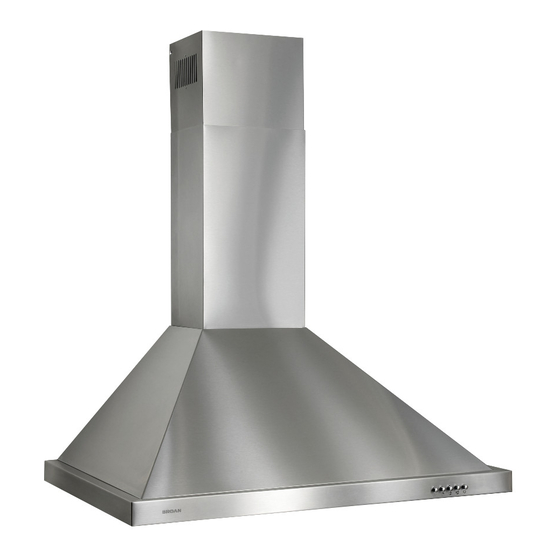
CHIMNEY
RANGE HOOD
READ AND SAVE THESE INSTRUCTIONS
VQ0009
WARNING
!
TO REDUCE THE RISK OF FIRE, ELECTRIC
SHOCK, OR INJURY TO PERSON(S) OBSERVE THE
FOLLOWING:
1. Use this unit only in the manner intended by the manufacturer.
I f you have questions, contact the manufacturer at the
a ddress or telephone number listed in the warranty.
2. Before servicing or cleaning unit, switch power off at service
p anel and lock service disconnecting means to prevent
p ower from being switch on accidentally. When the service
d isconnecting means cannot be locked, securely fasten a
p rominent warning device, such as a tag, to the service
panel.
3. Installation work and electrical wiring must be done by
qualified personnel in accordance with all applicable codes
and standards, including fire-rated construction codes and
standards.
4. Sufficient air is needed for proper combustion and exhausting
o f gases through the flue (chimney) of fuel burning equipment
t o prevent backdrafting. Follow the heating equipment
m anufacturer's guidelines and safety standards such as
t hose published by the National Fire Protection Association
( NFPA), the American Society for Heating, Refrigeration
a nd Air Conditioning Engineers (ASHRAE) and the local
c ode authorities.
5. When cutting or drilling into wall or ceiling, do not damage
e lectrical wiring and other hidden utilities.
6. Ducted fans must always be vented to the outdoors.
7. Do not use this unit with any other solid-state speed control
device.
8. To reduce the risk of fire, use only steel ductwork.
9. This unit must be grounded.
TO REDUCE THE RISK OF A RANGE TOP GREASE
FIRE:
a) Never leave surface units unattended at high settings.
B oilovers cause smoking and greasy spillovers that may
i gnite. Heat oils slowly on low or medium settings.
b) Always turn hood ON when cooking at high heat or when
c ooking flaming foods (i.e. Crêpes Suzette, Cherries Jubilee,
P eppercorn Beef Flambé).
c) Clean ventilating fans frequently. Grease should not be
a llowed to accumulate on fan or filters.
d) Use proper pan size. Always use cookware appropriate for
t he size of the surface element.
INSTALLER: LEAVE THIS GUIDE TO THE HOMEOWNER.
HOMEOWNER: OPERATION AND MAINTENANCE INFORMATION ON PAGE 8.
I
!
ntended for domestIc cookIng only
To register this product visit:
www.broan.com
WARNING
!
VQ0009
TO REDUCE THE RISK OF INJURY TO PERSON(S)
IN THE EVENT OF A RANGE TOP GREASE FIRE,
OBSERVE THE FOLLOWING*:
1. SMOTHER FLAMES with a close-fitting lid, cookie sheet, or
metal t ray, t hen t urn o ff t he b urner. B E C AREFUL T O P REVENT
BURNS. IF THE FLAMES DO NOT GO OUT IMMEDIATELY,
EVACUATE AND CALL THE FIRE DEPARTMENT.
2. NEVER PICK UP A FLAMING PAN – You may be burned.
3. DO NOT USE WATER, including wet dishcloths or towels –
This could cause a violent steam explosion.
4. Use an extinguisher ONLY if:
A. You know you have a Class ABC extinguisher and you
know how to operate it.
B. The fire is small and contained in the area where it
started.
C. The fire department has been called.
D. You can fight the fire with your back to an exit.
* Based on "Kitchen Fire Safety Tips" published by NFPA.
CAUTION
1. For indoor use only.
2. For general ventilating use only. Do not use to exhaust
hazardous or explosive materials and vapors.
3. To avoid motor bearing damage and noisy and/or
unbalanced impeller, keep drywall spray, construction dust,
etc. off power unit.
4. Do not use over cooking equipment greater than 60,000
BTU/hr. as the blower motor will shut down intermittantly.
5. Your hood motor has a thermal overload which will
automatically shut off the motor if it becomes overheated.
The motor will restart when it will cool down. If the motor
continues to shut off and restart, have the hood serviced.
6. The bottom of the hood MUST NOT BE LESS than 30" and
at a maximum of 36" above cooktop for best capture of
cooking impurities.
7. Two installers are recommended because of the size of
this hood.
8. To reduce risk of fire and to properly exhaust air, be sure
to duct air outside. Do not exhaust air into spaces within
walls or ceilings or into attics, crawl spaces, or garages.
9. Be careful when installing the decorative flue and hood,
they may have sharp edges.
10. Please read specification label on product for further
information and requirements.
MODELS B5830SS • B5836SS
.
!
VQ0009
Page 1
Advertisement
Table of Contents

Related Manuals for Broan B5830SS


Summary of Contents for Broan B5830SS
-
Page 1: Range Hood
MODELS B5830SS • B5836SS Page 1 CHIMNEY To register this product visit: www.broan.com RANGE HOOD READ AND SAVE THESE INSTRUCTIONS ntended for domestIc cookIng only VQ0009 VQ0009 WARNING WARNING VQ0009 VQ0009 TO REDUCE THE RISK OF FIRE, ELECTRIC... -
Page 2: Install The Ductwork
MODELS B5830SS • B5836SS Page 2 INSTALL THE DUCTWORK (Ducted Hoods Only) PREPARE THE HOOD Unpack hood and check contents. You should receive: 1. Decide where ROOF CAP 1 - Hood the ductwork 1 - Decorative Flue Assembly will run 6" 1 - Damper / Duct Connector ROUND DUCT between the 1 - Lower Flue Mounting Bracket hood and the 1 - Upper Flue Mounting Bracket outside. 1 - Hood Mounting Bracket 2. A straight, short DECORATIVE 2 - Aluminum Grease Filters (installed in hood) WALL CAP... -
Page 3: Install The Wiring
MODELS B5830SS • B5836SS Page 3 INSTALL THE WIRING INSTALL THE HOOD MOUNTING BRACKET WALL STUDS FRAMING BEHIND DRYWALL 1 4 ” ⁄ ” ⁄ ” ⁄ ” ⁄ ” to 48 ⁄ ” above cooktop ⁄ ” = bottom of hood 30” above cooktop ⁄... -
Page 4: Install Upper Flue Mounting Bracket
MODELS B5830SS • B5836SS Page 4 INSTALL UPPER FLUE MOUNTING INSTALL THE HOOD BRACKET (Horizontally Ducted Hoods Only) 1. DO NOT REMOVE the protective plastic film covering the Ceiling Center of installation decorative flue and the hood at this time. 2. Lay the back side of the hood flat on a table. Use a piece of Recommended distance between cardboard to avoid damaging the table or the hood. ⁄ ” screw holes 3. Attach damper / duct connector to top of hood using (4) #8... - Page 5 MODELS B5830SS • B5836SS Page 5 UPPER FLUE MOUNTING BRACKET 6” ROUND DUCT ELBOW UPPER FLUE 14. Slide the upper flue upward until it is aligned with its upper 10. Measure and install 6” round steel ductwork to roof cap or mounting bracket. The bracket should be inside the flue. wall cap and 90 elbow over duct collar on hood. Use duct Secure the upper flue to the upper flue mounting bracket tape to make all joints secure and air tight.
- Page 6 MODELS B5830SS • B5836SS Page 6 UPPER FLUE MOUNTING BRACKET 6” ROUND STEEL DUCT UPPER DUCT LENGTH FLUE DECORATIVE FLUE 8. Measure and install steel ductwork to hood duct connector. Use duct tape to make all joints secure and air tight. 15. Slide the upper flue upward until it is aligned with its mounting 9. Hold hood up close to wall mounting location and plug bracket. The bracket should be inside the flue. Secure the power cord into wall outlet. upper flue to the upper flue mounting bracket using (2) #8 x 10. Align the hood and center it above the hood mounting 3/8” mounting screws.
- Page 7 MODELS B5830SS • B5836SS Page 7 6. Remove the 14. Hold hood up close to wall mounting location and plug grease filters power cord into wall outlet. by pulling down the 15. Align the hood and center it above the hood mounting bracket. metal latch Gently lower the hood until it securely engages the bracket. tab and tilting filters INSIDE BACK OF HOOD downward to MOTOR/BLOWER remove. ASSEMBLY 7. Attach non-duct collar to non-duct plenum using (4) ST4 x 8 round head screws. 8. Measure distance “A”. This will be the length of the SIDE VIEW extended flex duct.
-
Page 8: Light Bulbs
MODELS B5830SS • B5836SS Page 8 LIGHT BULBS MAINTENANCE Grease Filters Grease filters should be cleaned monthly. Remove grease filters by pulling down on the metal latch tab. This will disengage the filter from the hood. Tilt the filter downward and remove. To clean all-metal filters: Use a warm detergent solution or put them in the dishwasher using a non-phosphate detergent. -
Page 9: Service Parts
BROAN-NUTONE ONE YEAR LIMITED WARRANTY Broan-NuTone warrants to the original consumer purchaser of its products that such products will be free from defects in materials or workmanship for a period of one year from the date of original purchase. THERE ARE NO OTHER WARRANTIES, EXPRESS OR IMPLIED, INCLUDING, BUT NOT LIMITED TO, IMPLIED WARRANTIES OF MERCHANTABILITY OR FITNESS FOR A PARTICULAR PURPOSE. - Page 10 MODÈLES B5830SS • B5836SS Page 10 HOTTE DE Pour enregistrer ce produit, visitez : www.broan.com CUISINE À CHEMINÉE LIRE CES DIRECTIVES ET LES CONSERVER our usage domestIque seulement VQ0009 VQ0009 AVERTISSEMENT AVERTISSEMENT VQ0009 VQ0009 AFIN DE RÉDUIRE LES RISQUES D’INCENDIE, DE CHOC OBSERVEZ LES CONSIGNES SUIVANTES AFIN DE ÉLECTRIQUE OU DE BLESSURES CORPORELLES,...
-
Page 11: Installation Des Conduits
MODÈLES B5830SS • B5836SS Page 11 INSTALLATION DES CONDUITS (hottes avec conduits seulement) PRÉPARATION DE LA HOTTE Déballez la hotte et vérifiez le contenu de la boîte. Celle-ci doit 1. Planifiez CAPUCHON DE TOIT contenir les éléments suivants : la pose du 1 - Hotte conduit en CONDUIT ROND 1 - Conduit décoratif de cheminée déterminant DE 15,2 CM (6 PO) 1 - Clapet / raccord de conduit son tracé entre 1 - Bride de montage de conduit décoratif inférieur la hotte et 1 - Bride de montage de conduit décoratif supérieur... -
Page 12: Installation Du Câblage
MODÈLES B5830SS • B5836SS Page 12 INSTALLATION DU CÂBLAGE INSTALLATION DE LA BRIDE DE MONTAGE DE LA HOTTE POTEAUX MURAUX CHARPENTE DERRIÈRE LA CLOISON SÈCHE 3 5 , ( 1 4 4 cm (1 9⁄16 po) 20 cm (7 7⁄8 po) 10 cm (3 15⁄16 po) -
Page 13: Installation De La Hotte
MODÈLES B5830SS • B5836SS Page 13 INSTALLATION DE LA BRIDE DE MONTAGE INSTALLATION DE LA HOTTE DE CONDUIT DÉCORATIF SUPÉRIEUR (hotte à conduits horizontaux seulement) 1. N’ENLEVEZ PAS À CETTE ÉTAPE la pellicule protectrice en plastique Plafond Centre de l’installation recouvrant la hotte et le conduit décoratif de cheminée. 2. Placez la hotte sur une table, sur le dos. Utilisez un carton pour éviter Distance d’endommager la table ou la hotte. - Page 14 MODÈLES B5830SS • B5836SS Page 14 BRIDE DE MONTAGE DU CONDUIT DÉCORATIF SUPÉRIEUR CONDUIT ROND ET COUDE DE CONDUIT 15,2 CM (6 PO) DÉCORATIF SUPÉRIEUR 14. Glissez le conduit décoratif supérieur vers le haut jusqu’à ce qu’il 10. Mesurez et installez un conduit rond de 15,2 cm (6 po) jusqu’au soit aligné avec sa bride de montage supérieure. La bride doit être à...
- Page 15 MODÈLES B5830SS • B5836SS Page 15 BRIDE DE MONTAGE DE CONDUIT DÉCORATIF SUPÉRIEUR CONDUIT ROND DE 15,2 CM (6 PO) CONDUIT DÉCORATIF LONGUEUR DU CONDUIT SUPÉRIEUR CONDUIT DÉCORATIF 8. Mesurez et fixez le conduit en acier sur le raccord de la hotte.
- Page 16 MODÈLES B5830SS • B5836SS Page 16 6. Enlevez les filtres à graisse 14. Soulevez la hotte, maintenez-la près de son emplacement et en tirant vers branchez son cordon électrique dans la prise. le bas sur 15. Alignez la hotte et centrez-la au-dessus de sa bride de montage. la languette Abaissez doucement la hotte jusqu’à ce qu’elle s’engage solidement métallique de dans la bride. retenue et en INTÉRIEUR DE L’ARRIÈRE DE LA HOTTE...
-
Page 17: Entretien
MODÈLES B5830SS • B5836SS Page 17 AMPOULES ENTRETIEN Filtres à graisses Les filtres à graisses doivent être nettoyés une fois par mois. Enlevez les filtres à graisse en tirant vers le bas sur la languette métallique de retenue. Le filtre se dégagera de la hotte. Inclinez le filtre vers le bas et enlevez-le. Pour laver les filtres métalliques : Utilisez une solution tiède de détergent ou lavez-les au lave-vaisselle avec un détergent sans phosphate. Une décoloration du filtre peut se produire si des détergents phosphatés sont utilisés et selon les conditions locales de l’eau, sans toutefois affecter le rendement du filtre. Cette décoloration n’est pas couverte par la garantie. COUVERCLE DES AMPOULES Filtres de recirculation pour installation sans conduits Remplacez les filtres de recirculation tous les six mois. -
Page 18: Pièces De Rechange
GARANTIE LIMITÉE DE UN AN DE BROAN-NUTONE Broan-NuTone garantit à l’acheteur consommateur original de ses produits qu’ils sont exempts de vice de matériaux ou de fabrication pour une période d’un an à compter de la date d’achat original. IL N’Y A PAS D’AUTRES GARANTIES, EXPRIMÉES OU IMPLICITES, INCLUANT MAIS NON LIMITÉES AUX GARANTIES IMPLICITES DE QUALITÉ... - Page 19 MODELOS B5830SS• B5836SS Página 19 CAMPANA DE Para registrar este producto visite: www.broan.com ESTUFA DE CHIMENEA LEA Y CONSERVE ESTAS INSTRUCCIONES ndIcada solamente Para cocInar en casa VQ0009 VQ0009 ADVERTENCIA ADVERTENCIA VQ0009 VQ0009 PARA REDUCIR EL RIESGO DE INCENDIOS, DESCARGAS...
-
Page 20: Instale Los Conductos
MODELOS B5830SS• B5836SS Página 20 INSTALE LOS CONDUCTOS (sólo en campanas con conductos) PREPARE LA CAMPANA Desempaque la campana y revise el contenido del paquete. Debe 1. Decida dónde TAPÓN DE TECHO contener lo siguiente: instalará el 1 campana conducto entre CONDUCTO REDONDO 1 conjunto del tubo de humos decorativo la campana y el DE 6 pulg. (15.2 cm) 1 conector del regulador de tiro/conducto exterior. 1 soporte de montaje del tubo de humos inferior 2. Un conducto... - Page 21 MODELOS B5830SS• B5836SS Página 21 INSTALE EL CABLEADO INSTALE EL SOPORTE DE MONTAJE DE LA CAMPANA MONTANTES DE PARED MARCO DETRÁS DE LA PLACA DE YESO p u l ( 3 5 . 6 c M Á 1 9⁄16 pulg.
- Page 22 MODELOS B5830SS• B5836SS Página 22 INSTALE EL SOPORTE DE MONTAJE DEL INSTALE LA CAMPANA (sólo para TUBO DE HUMOS SUPERIOR campanas con conductos horizontales) 1. En este momento NO QUITE la película de plástico protector que cubre Cielo raso Centro de la instalación el tubo de humos decorativo y la campana. 2. Deje la parte posterior de la campana plana sobre una mesa. Utilice un Distancia pedazo de cartón para evitar dañar la mesa o la campana. recomendada entre 1 1⁄8 pulg. (2.9 cm) 3. Fije el conector del regulador/conducto en la parte superior de la...
-
Page 23: Instale La Campana
MODELOS B5830SS• B5836SS Página 23 CODO DEL CONDUCTO SOPORTE DE MONTAJE DEL TUBO DE HUMOS SUPERIOR REDONDO DE 6 PULG. (15.2 CM) TUBO DE HUMOS SUPERIOR 14. Deslice el tubo de humos superior hacia arriba, hasta que quede 10. Mida e instale los conductos redondos de acero de 6 pulg. - Page 24 MODELOS B5830SS• B5836SS Página 24 SOPORTE DE MONTAJE DEL TUBO DE HUMOS SUPERIOR CONDUCTO REDONDO DE ACERO DE 6 PULG. (15.2 CM) TUBO DE LONGITUD DEL CONDUCTO HUMOS SUPERIOR TUBO DE HUMOS DECORATIVO 8. Mida e instale los conductos de acero al conector de conductos de la campana. Use cinta para conductos para fijar y sellar todas las uniones. 15. Deslice el tubo de humos superior hacia arriba, hasta que quede 9. Sostenga la campana cerca de la ubicación de montaje en la pared...
- Page 25 MODELOS B5830SS• B5836SS Página 25 6. Retire los filtros de grasa 14. Sostenga la campana cerca de la ubicación de montaje en la pared estirando hacia y conecte el cordón eléctrico en el tomacorriente. abajo la cejilla 15. Alinee la campana y céntrela arriba del soporte de montaje de metálica e la campana. Lentamente baje la campana hasta que se fije con inclinando los seguridad en el soporte. filtros hacia abajo para PARTE INTERIOR TRASERA DE quitarlos.
-
Page 26: Mantenimiento
MODELOS B5830SS• B5836SS Página 26 BOMBILLAS MANTENIMIENTO Filtros de grasa Los filtros de grasa deben limpiarse una vez al mes. Retire los filtros de grasa estirando hacia abajo le cejilla metálica. Esto desprenderá el filtro de la campana. Incline el filtro hacia abajo y quítelo. Para limpiar los filtros totalmente metálicos: Utilice una solución detergente tibia o colóquelos en la máquina lavaplatos, usando un detergente sin fosfatos. El filtro se puede decolorar si se utilizan detergentes con fosfatos o como resultado de la condición del agua local, pero esto no afectará el rendimiento... -
Page 27: Piezas De Repuesto
Esta garantía le proporciona derechos legales específicos, y usted puede también tener otros derechos, los cuales varían de estado a estado. Esta garantía reemplaza todas las garantías anteriores. Para calificar en la garantía de servicio, usted debe (a) notificar a Broan-NuTone al domicilio o al número de teléfono que se menciona abajo, (b) dar el número del modelo y la identificación de la pieza, y (c) describir la naturaleza de cualquier defecto en el producto o pieza. - Page 28 99526964C...
Need help?
Do you have a question about the B5830SS and is the answer not in the manual?
Questions and answers
Looking for filters for Model B5830SS
You can find filters for the Broan model B5830SS from eReplacementParts.com and Sears PartsDirect.
This answer is automatically generated