Table of Contents
Advertisement
Quick Links
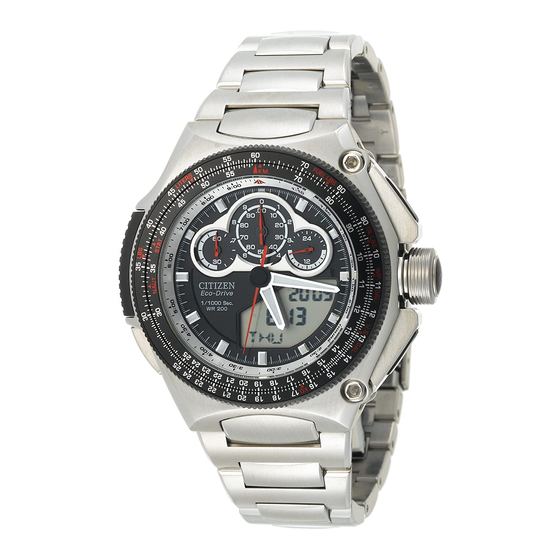
Features
The combination
watch of the
analog and digital
display
Solar-powered—
no need for battery
replacement
This watch is powered by light.
If the watch is not exposed to light for a long time, it stops moving.
See page 9 for charging the battery.
You can view explanations of the operation of this watch by accessing the Citizen web
site and viewing the "Service&Support. "
URL: http://www.citizenwatch.jp/
Lap time measurement
per 1/1000 second
(→ page 18) with the
lap recording function
(→ page 22)
World time—easy to see the
time of 43 cities all over the
world (→ page 24)
1
Advertisement
Table of Contents

Related Manuals for Citizen Eco-Drive U700


Summary of Contents for Citizen Eco-Drive U700
- Page 1 If the watch is not exposed to light for a long time, it stops moving. See page 9 for charging the battery. You can view explanations of the operation of this watch by accessing the Citizen web site and viewing the “Service&Support. ”...
- Page 2 Race mode quick guide Setting the distance of the course Press button M to change the mode to Race. (“RAC”) Button M Pull out the crown to position 1. Press button A to display “YES,” Button B then press and hold button M for more Crown than 2 seconds.
- Page 3 Measuring lap times Checking the records Press button M to change the Press button M to mode to Race. (“RAC”) change the mode to Lap Record. Press button B to start “FAS” is displayed. measurement. Press button A to change the Press button A to measure lap record displayed.
-
Page 4: Table Of Contents
Contents Before use ........6 Measuring lap times— Part names ..........6 Race mode ........18 How to use the screw down crown ..7 Setting the distance of the course ..18 Checking the battery ......8 Measuring lap times ......20 How to charge the battery .... - Page 5 Using the timer—Timer mode ..28 Resetting the watch ....42 Indication of each mode after resetting Charging the battery ....30 the watch ..........43 When the battery becomes short of Precautions ........44 power—Insufficient charge warning function ..........30 Maintenance ........51 Charging time ........
-
Page 6: Before Use
Before use 7 Part names Chronograph 1/10 Button B second hand/ Chronograph 1/100 second hand Chronograph second 24-hour hand hand Minute hand Hour hand Crown Second hand Digital section Rotating bezel (→ page 12) (→ page 56) Button M Button A The illustrations in this instruction manual may differ from the actual appearance of your watch. -
Page 7: How To Use The Screw Down Crown
7 How to use the screw down crown The screw down crown is equipped on some models. When a normal crown is equipped, you can operate the crown without unlocking it. Checking the crown type Pull out the crown. • If you CANNOT pull it out easily, it is a screw down crown. Turn the crown to the right. -
Page 8: Checking The Battery
Before use 7 Checking the battery Check your watch as follows before using it: Check the movement of the second hand. Moving at 1-second intervals. Moving at 2-second intervals or has stopped. Check the digital section. “ ” is not displayed. “... -
Page 9: How To Charge The Battery
7 How to charge the battery This watch has a battery which is charged by exposing the dial to light such as direct sunlight or fluorescent lamps. To obtain the best performance: • Expose the dial to direct sunlight for several hours at least once a month. •... -
Page 10: Checking The Reference Position
Before use 7 Checking the reference position Check whether the reference position is correct or not. Chronograph 1/10 second Check and adjust the reference position Chronograph and 1/100 second hands second hand also in the following cases: • The correct time is not displayed on the analog section even after the time setting. - Page 11 Pull out the crown to Correct reference position position 1. “0” is displayed and all hands move to indicate the current reference position. Check the reference position. • Go to step on page 40 if the 1 Chronograph second hand points reference position is incorrect.
-
Page 12: Changing The Mode Of The Digital Section
Changing the mode of the digital section Press button M repeatedly to Time and Calendar mode change the mode. (→ page 14) Year Button B Month, day Day of the week Timer mode (→ page 28) Button M While calendar or world time is displayed, the digital section is Timer indicator lighted for 2 seconds by pressing... - Page 13 Chronograph mode Race mode Lap Record mode (→ page 16) (→ page 18) (→ page 22) “CHR” (Chronograph) “RAC” (Race) Kind of the records Alarm mode World Time mode (→ page 26) (→ page 24) A (AM)/P (PM) indicator (for 12-hour clock) Daylight saving time Alarm indicator indicator...
-
Page 14: Time And Calendar Mode
Setting the time and calender—Time and Calendar mode • The time on the digital section set here Button M is the basic time of the watch—the home time. • The analog section indicates the home time corresponding to the setting. Button B Press button M to change the Crown... - Page 15 Press button M to select an item, and press button A or B to adjust the selected item. City Daylight saving Second, minute, Time system Month, day, time (“ON/OFF”) hour (“12H/24H”) year • If you press and hold button A or B, the item changes continuously. •...
-
Page 16: Using The Chronograph-Chronograph Mode
Using the chronograph—Chronograph mode You can measure times up to 23 hours 59 minutes 59 seconds 999, per 1/1000 second. • When the measurement time passes Chronograph 1/10 over 23 hours 59 minutes 59 seconds second and 1/100 Chronograph second hands 999, the measurement stops and the second hand measurement time is reset. - Page 17 Press button M to change the mode to Chronograph. (“CHR”) • If the chronograph hands do not point to “0/.00” or “60, ” adjust the reference position. (→page 39) Press button B to start measurement. • To display a split time, press button A. It is displayed for 10 seconds.
-
Page 18: Measuring Lap Times-Race Mode
Measuring lap times—Race mode You can measure lap times and the average speed of each lap. The records of the latest 20 laps are stored in the Lap Record mode. (→ page 22) 7 Setting the distance of the course Button M •... - Page 19 Pull out the crown to position 1. Press button A to display “YES,” then press and hold button M for more than 2 seconds. The past lap records are deleted and the last distance setting is displayed. Press button A or B to adjust the current digit, and press button M to go to the next one.
-
Page 20: Measuring Lap Times
Measuring lap times—Race mode 7 Measuring lap times • The records of the latest 20 laps Button M are stored in the Lap Record mode. (→ page 22) • Set the distance of the course to Button B calculate speed. (→page 18) •... - Page 21 Press button A to measure lap times. Each time you press button A, the lap time and its number (“01” to “99”) are displayed for 7 seconds, then the speed for three Lap number “KMh” or “MPH” seconds. (The unit is different •...
-
Page 22: Checking The Records Of Lap Times-Lap Record Mode
Checking the records of lap times—Lap Record mode After the lap measurement, you can check the records of the latest 20 laps. 7 Checking the records Button M The best time, the average time, and the worst time are displayed, calculated from Button B the stored records. -
Page 23: Deleting The Records
Best time (“FAS”) Average (“AVG”) Worst time (“LAT”) All lap times from old to new • If you press button B while a lap time is displayed, the speed is displayed for three seconds. • “FAS” or “LAT” and the lap number are displayed alternately. 7 Deleting the records Press button M to change the mode to Lap Record. -
Page 24: Checking The Time Of Another City-World Time Mode
Checking the time of another city—World Time mode You can display a local time selected among 43 cities or UTC. Button M • The local time is calculated based on the time difference from the home time. • If you press buttons A and B at the same time while the crown is set to Button B position 0, you can set the local time... -
Page 25: Selecting A City
7 Selecting a city Press button M to change the mode to World Time. Pull out the crown to position 1. Press button A or B to select a city, then press button M to go to the daylight saving time setting. •... -
Page 26: Using The Alarm-Alarm Mode
Using the alarm—Alarm mode You can set the alarm based on the time of the selected city. Button M To monitor the alarm sound, press and hold button A for more than 2 seconds while the crown is set to position 0. You can monitor it for up to 10 seconds. - Page 27 Press button M to select an item, and press button A or B to adjust the selected item. Alarm ON/OFF City Alarm time (Hour, minute) (“AL ON/AL OF”) Alarm indicator • Use button A for the alarm ON/OFF setting. • If you press and hold button A or B, the item changes continuously (for the city and alarm time setting).
-
Page 28: Using The Timer-Timer Mode
Using the timer—Timer mode You can set the countdown timer from 1 minute up to 99 minutes per 1 minute. Button M Press button M to change the mode to Timer. (“TMR”) The last timer setting is displayed. Button B •... - Page 29 Push in the crown to position 0 after the adjustment. Press button B to start countdown. Set time Remaining time “ ” appears. • Each time you press button B, the countdown starts or stops. • To restart the countdown from the set time, press button A while the countdown is running.
-
Page 30: Charging The Battery
Charging the battery 7 When the battery becomes short of power—Insufficient charge warning function Function and the movement of the watch When the battery becomes short of power—Insufficient charge warning function 1 “ ” appears on the digital section. The chronograph hands do not move (except the chronograph second hand). - Page 31 When the battery becomes short of power, insufficient charge warning function 1 and 2 are activated in order. Charge the battery by exposing the dial to light. While the battery is charged: Insufficient charge “ ” disappears. warning function 1 indication The second hand starts to move normally.
-
Page 32: Charging Time
Charging the battery 7 Charging time Below are the approximate values for when exposing the dial to light continuously. Charging time needed for Time for charging fully Illuminance 1-day movement (while Environment when the battery is (Lx) the second hand moves empty (approx.) normally) (approx.) 20 cm (8 in.) under... - Page 33 To charge the battery enough, expose the dial to brighter light for a long time. Sunlight is more effective than fluorescent lamps. • You can put the watch under direct sunlight for a long time if the temperature of the watch is kept under 50˚C/122˚F. <After the battery is fully charged—Overcharge prevention function>...
-
Page 34: Power Saving Function
Power saving function When the dial is not exposed to light for a certain period of time, the power saving function 1 and 2 are activated as follows: Condition when the function is activated Button B When the dial is not exposed to light for more than 30 minutes—Power saving function 1 When the dial is not exposed to light... - Page 35 Caution Charge the battery if the second hand is moving once every 2 seconds after the power saving function is canceled. (→page 30) Movement of the watch To cancel the function The digital section is turned Expose the dial to light or press any button. off.
-
Page 36: Troubleshooting
Troubleshooting If you have a problem with your watch, check the table below. Symptoms Remedies Page The hands do not work properly The second hand moves only once every 2 seconds. Charge the battery. 9, 30 The chronograph 1/10 second and 1/100 second hands do not move. -
Page 37: The Digital Section Seems Unusual
Symptoms Remedies Page The hands start turning rapidly The watch is canceling the power when you take the watch out of saving function. Wait until the the case. hands indicate the current time. The digital section seems unusual The digital section is turned off The power saving function is when you take the watch out of activated. -
Page 38: Others
The movement or indication is Reset the watch. not normal. If the watch still does not work properly, contact the Citizen The watch does not work properly Service Center or the store where even if you have tried the remedies you purchased your watch. -
Page 39: Adjusting The Reference Position
Adjusting the reference position Adjust the reference position in the following cases: • The correct time is not displayed on the Chronograph 1/10 analog section even after the time setting. second and 1/100 Chronograph second hands • Each chronograph hand does not point second hand to “0/.00”... - Page 40 Adjusting the reference position Chronograph 1/10 second Press button B for more than 2 and 1/100 second hands Chronograph seconds. second hand “CRS” is displayed. 24-hour hand Button B Press button M to select hands, Crown and press button A or B to adjust the position of the selected hands.
- Page 41 Chronograph Chronograph 1/10 Hour and 24-hour Second and minute second hand second and 1/100 hands (“HR”) hands (“MIN”) (“CRS”) second hands (“CRM”) • Each time you press button M, the adjustable hands move. • If you press and hold button A or B, the hands move continuously. •...
-
Page 42: Resetting The Watch
Resetting the watch The watch may not work properly if it is affected by static electricity or shock. In this case, reset the watch. Caution Button M If you reset the watch, the indication of each mode changes as the table on the right and the records in the Lap Record Button B mode are deleted. -
Page 43: Indication Of Each Mode After Resetting The Watch
After resetting, the indication of each mode changes as follows. Adjust the time and calendar, and other settings. 7 Indication of each mode after resetting the watch Time and Calender mode January 1, 2008/ Tuesday Chronograph mode 0:00:00:000 Race mode 0:00:00:000 Lap Record mode World Time mode... -
Page 44: Precautions
Precautions WARNINGS Water-resistance performance Before use, confirm the water-resistance level of your watch indicated on the dial and case. Indication Specifications Dial Case (case back) WATER RESIST(ANT) or Water-resistant to 3 WATER RESIST(ANT) no indication atmospheres WR 50 or WATER Water-resistant to 5 WATER RESIST(ANT) 5bar RESIST 50... - Page 45 The unit “bar” is roughly equal to 1 atmosphere. “WATER RESIST(ANT) xx bar” may also be indicated as “W.R. xx bar. ” Examples of use Moderate exposure Minor exposure Operation of the to water (washing, Marine sports Scuba diving to water (washing crown when the kitchen work, (skin diving)
- Page 46 Precautions • Water-resistance for daily use (up to 3 atmospheres): This type of watch is resistant to minor exposure to water. For example, you may wear the watch while washing your face; however, it is not designed to be used underwater.
-
Page 47: Keep Your Watch Clean
• If water has penetrated the watch, or if the inside of the glass is fogged up and does not become clear in a day, take the watch to your dealer or Citizen Service Center for repair. Leaving the watch in such a state will rust the internal parts and cause malfunction. - Page 48 Precautions WARNINGS Handling the secondary battery • Do not remove the battery. When it is required, keep the battery out of the reach of children to prevent them from swallowing it. • If the battery is swallowed, consult a doctor and seek medical treatment. CAUTIONS Cautions about charging •...
-
Page 49: To Avoid Malfunction
To avoid injury • DO NOT wear the watch where the temperature becomes extremely high—such as in a sauna. Otherwise the watch may become hot and cause skin burn. To avoid malfunction • DO NOT use the watch where the temperature is lower or higher than the operation temperature specified in the instruction manual. - Page 50 Precautions • DO NOT place the watch nearby household appliances generating static electricity. Timekeeping may become inaccurate if the watch is exposed to such strong static electricity as that which is emitted from a TV screen. • DO NOT apply any strong shock, for example, by dropping it onto a hard floor. •...
-
Page 51: Maintenance
Your watch needs an inspection once every two or three years for safety and longer usage. To keep your watch water-resistant, the packing needs to be replaced regularly. Other parts need to be inspected and replaced if necessary. Ask for genuine Citizen parts upon replacement. -
Page 52: Specifications
Specifications Model U70* (Indication of unit: U700: km/U706: mile) Type Combination solar-powered watch Timekeeping Within ±15 seconds per month on average (when accuracy worn at normal temperatures between +5˚C/41˚F and +35˚C/95˚F) Operating 0˚C/32˚F to +50˚C/122˚F temperature range Display functions Analog section: •... - Page 53 Display functions • World time • Alarm • Timer Battery duration Fully charged to empty: without recharging • Approx. 7 years (with the power save function) • Approx. 8 months (without the power save function) Two seconds interval movement to stopping: Approx. 3 days Battery Secondary battery, 1pc.
-
Page 54: Table Of City Names
Table of city names Time Time abbr. City name abbr. City name difference difference — Dubai ±0 London Kabul +4.5 Madrid Karachi Paris Delhi +5.5 Rome Dhaka Berlin Yangon +6.5 Cairo Bangkok Athens Singapore Johannesburg Hong Kong Moscow Beijing Riyadh Taipei Tehran +3.5... - Page 55 Time Time abbr. City name abbr. City name difference difference Tokyo Los Angeles –8 Adelaide +9.5 Denver –7 Sydney Mexico City –6 Noumea Chicago Auckland New York –5 Suva Montreal Midway Island –11 Santiago –4 Honolulu –10 Rio de Janeiro –3 Fernando de Anchorage...
-
Page 56: How To Use The Rotating Bezel
How to use the rotating bezel The rotating bezel is equipped on some models. Using the bezel, you can easily calculate the followings: 1. Speed, driving distance, and required time 2. Fuel consumption rate, fuel consumption, and driving time 3. Conversion (weight/volume/distance) •... - Page 57 1. Calculating speed, driving distance, and required time (Speed index) always indicates a speed. Speed Driving distance Speed Driving distance Required time Speed index Required time In the circle A, the speed index points to “80. ” Then any other part indicates a pair of driving distance and required time with the speed of 80 km/h.
- Page 58 How to use the rotating bezel 2. Calculating fuel consumption rate, fuel consumption, and driving time (Speed index) always indicates a Fuel consumption per hour Fuel fuel consumption rate. (Fuel consumption rate) consumption Fuel Fuel consumption consumption rate Driving time Driving time Speed index In the circle A, the speed index points to “80.
- Page 59 3. Conversion <Weight/Volume> Unit indexes of the Base point distance OIL LBS. : FUEL LBS. : oil pounds KM. : kilometer fuel pounds STAT. : mile NAUT. : nautical mile IMP GAL. : imperial gallon Figures LITERS. : US. GAL. : liters US gallon Unit indexes...
-
Page 60: Glossary
Glossary Terms (page) Descriptions AVG (3, 23) AVERAGE: the average lap time. FAS (3, 22) FASTEST: the best lap time. LAT (3, 23) LATEST: the worst lap time. “Coordinated Universal Time” is the standard time (24, 43, 54) around the world maintained by international agreement. - Page 61 Terms (page) Descriptions Screw down crown Crown fixed with a screw. Locking the crown prevents accidental operation or submergence. Full auto calendar Function to adjust the date automatically at the end of (53) each month including February 29. Home time Time displayed on the main display part.
Need help?
Do you have a question about the Eco-Drive U700 and is the answer not in the manual?
Questions and answers
ondanks reset klokje blijven wordt de analoge tijd niet aangepast aan de diitale tijd. Nu is het bv 4.14 uur en de analoge klok staat op 7 over 2 hoe wordt dit gesynchroniseerd
To synchronize the analog time with the digital time on a Citizen U700 watch after a reset, follow these steps:
1. Press and release the lower left button to enter calendar mode.
2. Pull the crown out one click. The city will flash.
3. Use the upper or lower right button to select your local time zone.
4. Press the lower left button to move to Daylight Saving Time (DST) setting. "On" or "Off" will flash.
5. Press the lower right button to turn DST on or off.
6. Press the lower left button again. The seconds will flash.
7. Press the lower right button to reset the seconds to 00.
8. Continue pressing the lower left button to set minutes, hours, year, month, and date as needed using the upper or lower right button to adjust each.
9. Push the crown back in to complete the setting.
The analog hands will automatically synchronize to the set digital time. They cannot be set independently.
This answer is automatically generated