Table of Contents
Advertisement
Models:
CFX-IN
CFX-Grand
WARNING: IF THE INFORMATION
IN THESE INSTRUCTIONS IS NOT
FOLLOWED EXACTLY, A FIRE OR
EXPLOSION MAY RESULT CAUS-
ING PROPERTY DAMAGE, PER-
SONAL INJURY, OR DEATH.
- Do not store or use gasoline or other flam-
mable vapors and liquids in the vicinity of this
or any other appliance.
- What to do if you smell gas
• Do not try to light any appliance.
• Do not touch any electrical switch.
• Do not use any phone in your building.
• Immediately call your gas supplier from a
neighbor's phone. Follow the gas supplier's
instructions.
• If you cannot reach your gas supplier, call
the fire department.
- Installation and service must be performed by a
qualified installer, service agency, or the gas
supplier.
Printed in U.S.A. Copyright 2001,
Heat-N-Glo, a division of Hearth Technologies Inc.
20802 Kensington Boulevard, Lakeville, MN 55044
This product is covered by one or more of the following patents: (United States) 4,112,913; 4,408,594; 4,422,426; 4,424,792; 4,520,791; 4,793,322;
4,852,548; 4,875,464; 5,000,162; 5,016,609; 5,076,254 5,191,877; 5,218,953; 5,328,356; 5,429,495; 5,452,708; 5,542,407; 5,613,487; (Australia)
543790; 586383; (Canada) 1,123,296; 1,297,746; 2,195,264; (Mexico) 97-0457; (New Zealand) 200265; or other U.S. and foreign patents pending.
READ THIS MANUAL BEFORE INSTALLING OR
OPERATING THIS APPLIANCE. THIS INSTALLERS
GUIDE MUST BE LEFT WITH APPLIANCE FOR
FUTURE REFERENCE.
WARNING: IMPROPER INSTALLA-
TION, ADJUSTMENT, ALTERATION,
SERVICE OR MAINTENANCE CAN
CAUSE INJURY OR PROPERTY DAM-
AGE. REFER TO THIS MANUAL. FOR
ASSISTANCE OR ADDITIONAL INFOR-
MATION CONSULT A QUALIFIED IN-
STALLER, SERVICE AGENCY, OR THE
GAS SUPPLIER.
1. This appliance may be installed in an after-
market, permanently located, manufactured
(mobile) home, where not prohibited by lo-
cal codes.
2. This appliance is only for use with the type
of gas indicated on the rating plate. This
appliance is not convertible for use with
other gases, unless a certified kit is used.
Please contact your Heat-N-Glo dealer with any
questions or concerns. For the number of your
nearest Heat-N-Glo dealer, please call 952-985-6000.
1
Installers Guide
Underwriters
Laboratories Listed
568-900E 3/01
Advertisement
Table of Contents

Subscribe to Our Youtube Channel
Related Manuals for Heat & Glo CFX-IN


Summary of Contents for Heat & Glo CFX-IN
- Page 1 Installers Guide Models: CFX-IN CFX-Grand Underwriters Laboratories Listed READ THIS MANUAL BEFORE INSTALLING OR OPERATING THIS APPLIANCE. THIS INSTALLERS WARNING: IF THE INFORMATION GUIDE MUST BE LEFT WITH APPLIANCE FOR IN THESE INSTRUCTIONS IS NOT FUTURE REFERENCE. FOLLOWED EXACTLY, A FIRE OR...
-
Page 2: Safety And Warning Information
SAFETY AND WARNING INFORMATION These units MUST use one of the vent systems READ and UNDERSTAND all instructions carefully described in the Installing the Fireplace section of before starting the installation. FAILURE TO the Installers Guide. NO OTHER vent systems or FOLLOW these installation instructions may result components MAY BE USED. -
Page 3: Table Of Contents
TABLE OF CONTENTS Safety and Warning Information ..........2 Service Parts Lists ..............4 Section 1: Approvals and Codes ..........8 Appliance Certification..............8 Installation Codes ................8 High Altitude Installations ............... 8 Section 2: Getting Started ............9 Introducing the Heat-N-Glo Gas Appliances ........9 Pre-installation Preparation ............ -
Page 4: Section 1: Approvals And Codes
(in the United States), it may be necessary to decrease the input rating by changing the existing burner orifice to a MODELS: CFX-IN, CFX-GRAND smaller size. Input should be reduced four percent (4%) for LABORATORY: Underwriters Laboratories each 1,000 feet above sea level, unless the heating value of... -
Page 5: Section 2: Getting Started
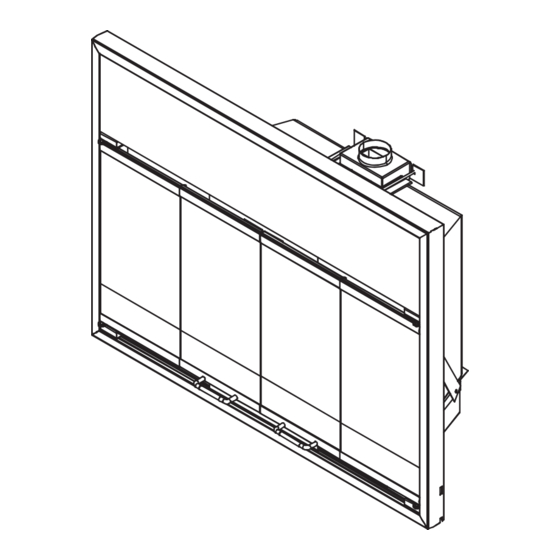
Getting Started Introducing the Heat-N-Glo Gas Appliances WARNING: Under no circumstances is cutting of sheet metal surfaces allowed for installation. Heat-N-Glo direct vent gas appliances are designed to operate with all combustion air siphoned from outside of If the factory built fireplace has no gas ac- the building and all exhaust gases expelled to the outside. - Page 6 NOTE: If exhaust collar on insert and fireplace damper do not line up, add 4 inches (102mm) to minimum fireplace height for bends in vent pipe. 30” (762mm) Figure 1. Diagram of the CFX-IN 24 1/4 (616mm) 1 5/8 (42mm) 12 1/8 (308mm)
-
Page 7: Section 3: Installing The Insert
Additionally, the use of kit FLASH-DAMP will Models: Vent System seal off the damper opening when terminating the inlet air CFX-IN LINK-DV30, LINK- DV4-30 vent pipe just above the damper. These 2 kits are recommended for zero clearance, factory built woodburning... - Page 8 WARNING: DO NOT FORCE HORIZONTAL OVERHANG COLLAR ATTACHMENT INTO PLACE. THE FIREPLACE IS MADE OF A FRAGILE MATERIAL, AND MAY BREAK. READJUST FLEXI- VERTICAL WALL 2 FT. 2 FT. MIN. BLE VENT PIPES IF NECESSARY. MIN. LOWEST Attach the pipe-to-cap adaptor to the DISCHARGE termination cap and to the top of the OPENING...
- Page 9 This option shows both exhaust and inlet air vent pipes attached to the adaptor. TERMINATION ADAPTOR EXHAUST COLLAR INLET AIR COLLAR EXHAUST VENT PIPE V= 14 FT. MINIMUM 40FT. MAXIMUM 3 INCH COLLAR (Factory installed to stainless steel section) WARNING: DO NOT BLOCK PIPE END WITH INSULATION OR ANY OTHER SEALING MATERIAL...
- Page 10 3 INCH COLLAR 3 INCH STAINLESS STEEL GASKET FLEXIBLE VENT EXHAUST COLLAR (45 ELBOW) The retainer pin secures the collar attachment bracket to the fireplace from inside the combustion chamber. T-HANDLE NOTE: Inspect for exhaust collar gasket RETAINER PIN to insure positive exhaust seal. Figure 5.
-
Page 11: Step 2 Positioning, Leveling, And Securing The Insert
• After the gas line installation is complete, use a soap solution to carefully check all gas connections for leaks. WARNING: DO NOT USE AN OPEN FLAME TO CHECK FOR GAS LEAKS. Figure 7. Gas Controls System FLEXIBLE CONTROLS SHUT-OFF GAS LINE Figure 8. Gas Supply Line (CFX-IN shown) -
Page 12: Step 5 Gas Pressure Requirements
Step 6. Wiring the Fireplace Step 5. Gas Pressure Requirements NOTE: Electrical wiring must be installed by a licensed Pressure requirements for these gas appliances are shown electrician. in the table below. CAUTION: DISCONNECT REMOTE CONTROLS IF AB- Pressure Natural Gas Propane SENT FOR EXTENDED TIME PERIODS. -
Page 13: Step 7 Installing Logs And Ember Material
• Place a dime size piece of glowing ember material near port holes in burner top, sides and front (see Figure 11). Positioning the Logs The logs for models CFX-IN and CFX-Grand have been packaged separately. Refer to the installation instructions BURNER PAN that accompany this manual. -
Page 14: Step 9 Before Lighting The Appliance
Step 9. Before Lighting the Appliance 3. Reconnect the low voltage wires to the ON/OFF switch. 4. Attach surround assembly by hooking the support brack- Before lighting the appliance, be sure to do the following: et on the locating tabs on top of the gas insert fireplace Remove all paperwork from underneath the fireplace. -
Page 15: Section 4: Maintaining And Servicing Your Appliance
Maintaining and Servicing Your Appliance Appliance Maintenance Although the frequency of servicing and maintenance will depend on use and the type of installation, you should have a qualified service technician perform an appliance check- up at the beginning of each heating season. See the table below for specific guidelines regarding each fireplace main- tenance task.
Need help?
Do you have a question about the CFX-IN and is the answer not in the manual?
Questions and answers