Table of Contents
Advertisement
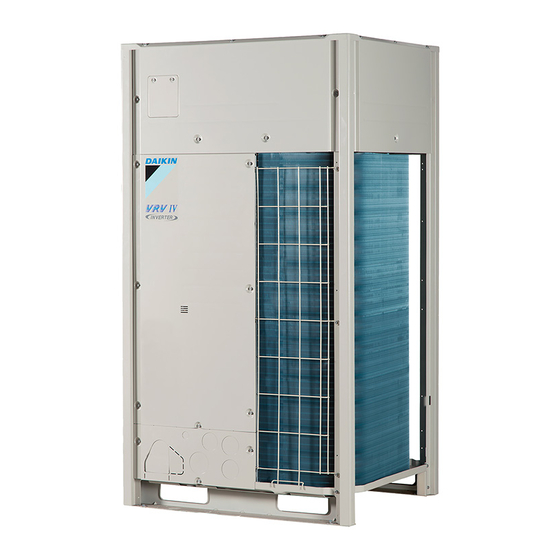
INSTALLATION MANUAL
System air conditioner
RXQ5M9W1B
RXQ8M9W1B
RXQ10M9W1B
RXYQ5M9W1B
RXYQ8M9W1B
RXYQ10M9W1B
RXYQ12M9W1B
RXYQ14M9W1B
RXYQ16M9W1B
RXYQ18M9W1B
RXYQ20M9W1B
RXYQ22M9W1B
RXYQ24M9W1B
RXYQ26M9W1B
RXYQ28M9W1B
RXYQ30M9W1B
RXYQ32M9W1B
RXYQ34M9W1B
RXYQ36M9W1B
RXYQ38M9W1B
RXYQ40M9W1B
RXYQ42M9W1B
RXYQ44M9W1B
RXYQ46M9W1B
RXYQ48M9W1B
Advertisement
Table of Contents

Subscribe to Our Youtube Channel
Related Manuals for Daikin RXQ5M9W1B


Summary of Contents for Daikin RXQ5M9W1B
- Page 1 INSTALLATION MANUAL System air conditioner RXQ5M9W1B RXQ8M9W1B RXQ10M9W1B RXYQ5M9W1B RXYQ8M9W1B RXYQ10M9W1B RXYQ12M9W1B RXYQ14M9W1B RXYQ16M9W1B RXYQ18M9W1B RXYQ20M9W1B RXYQ22M9W1B RXYQ24M9W1B RXYQ26M9W1B RXYQ28M9W1B RXYQ30M9W1B RXYQ32M9W1B RXYQ34M9W1B RXYQ36M9W1B RXYQ38M9W1B RXYQ40M9W1B RXYQ42M9W1B RXYQ44M9W1B RXYQ46M9W1B RXYQ48M9W1B...
- Page 2 RXYQ5 RXYQ8+10 RXYQ12~16 (mm) ≥100 ≥100 RXYQ5~16 RXYQ18~48...
- Page 3 RX(Y)Q5~16 RX(Y)Q5~16 RX(Y)Q18~48 RX(Y)Q18~48 A B C F1 F1 F2 F2 Q1 Q2 F2 Q1 Q2 A B C F A B C C/H SELECTOR TO IN/D UNIT TO OUT/D UNIT TO MULTI UNIT F1 F2 F1 F2 F1 F2 A B C F1 F2 F1 F2 Q1 Q2 Q1 Q2 Q1 Q2...
- Page 4 TO IN/D UNIT A B C F1 F2 F1 F2 F1 F2 A B C 3 5 7 1 10 RX(Y)Q5~10 RX(Y)Q12~16 ±15˚...
- Page 5 3PW22005-1...
-
Page 6: Table Of Contents
14.0 to 135 kW and nominal heating capacities ranging from 16.0 to 150 kW. 10. Caution for refrigerant leaks ............ 20 The RX(Y)Q-M9 units can be combined with Daikin VRV indoor 11. Disposal requirements............. 21 units for air conditioning purposes, and suitable for R-410A. -
Page 7: Standard Supplied Accessories
Total capacity/quantity of indoor units Outdoor unit multi connection piping kit (For R-410A only: Always use an appropriate kit dedicated for your system.) Total capacity of Total quantity of Outdoor unit indoor units indoor units Number of outdoor units connected RX(Y)Q5 62.5 162.5... -
Page 8: Inspecting And Handling The Unit
10 When installing the unit in a small room, take measures in order Use a belt sling of ≤20 mm wide that adequately NOTE to keep the refrigerant concentration from exceeding allowable bears the weight of the unit. safety limits in the event of a refrigerant leak. Excessive refrigerant concentrations in a closed room can lead Bring the unit as close to its final installation position in its to oxygen deficiency. -
Page 9: Refrigerant Piping
6. R 6.1. Selection of piping material EFRIGERANT PIPING Foreign materials inside pipes (including oils for fabrication) must be 30 mg/10 m or less. Use R-410A to add refrigerant. Use the following material specification for refrigerant piping: All field piping must be installed by a licensed refrigeration Size: determine the proper size referring to chapter technician and must comply with relevant local and "6.3. - Page 10 One outdoor unit installed: In case of RX(Y)Q5~16 Precautions when knocking out knock holes Front connection: Be sure to avoid damaging the casing Remove the stop valve cover to connect. (See figure 6) Side (bottom) connection: After knocking out the holes, we recommend you paint the edges and areas around the edges using the repair paint to Remove the knock holes on the bottom frame and route the piping prevent rusting.
- Page 11 See the following table for tightening torque. Cautions for installation of multiple outdoor units (Applying too much torque may cause the flares to crack.) The piping between the outdoor units must be routed level or slightly upward to avoid the risk of oil detention into the piping side. After all the piping has been connected, use nitrogen to perform a gas leak check.
- Page 12 Change as shown in the figure below Unit A Unit B Unit C Not allowed Allowed To indoor unit Oil collects to the stopping outdoor unit. Oil collects to the outdoor unit C when the system stops. If the piping length between the outdoor unit-connecting pipe kits or between the outdoor units exceeds 2 m, create a rise of 200 mm or more in the gas line within a length of 2 m from the kit.
-
Page 13: Example Of Connection
6.3. Example of connection RXQ5~10 + RXYQ5~48M9W1B Installation manual VRVII System air conditioner 4PW21816-1A... - Page 14 Installation manual RXQ5~10 + RXYQ5~48M9W1B VRVII System air conditioner 4PW21816-1A...
-
Page 15: Leak Test And Vacuum Drying
6.4. Leak test and vacuum drying One outdoor unit installed The units were checked for leaks by the manufacturer. When multiple outdoor units installed figure 9 and refer to "Additional refrigerant charge" on page 11 Liquid line stop valve for nomenclature of the parts in figure 9. Gas line stop valve •... -
Page 16: Additional Refrigerant Charge
Opening stop valve Gas line stop valve Remove the cap and turn the valve counterclockwise with the Liquid line stop valve hexagon wrench. stop valve service port Turn it until the shaft stops. Charge hose Do not apply excessive force to the stop valve. Doing so may break Indoor unit the valve body, as the valve is not a backseat type. -
Page 17: Field Wiring
When the specified amount of refrigerant is charged, push the K2......Magnetic contactor (MIC) button. Then operation stops. BS3 RETURN K2M-3M ....Magnetic contactor (M2C-M3C) The operation automatically stops within 30 minutes. K1R-15R ....Magnetic relay If the refrigerant charge cannot be finished within 30 minutes, L1R ...... -
Page 18: Optional Parts Cool/Heat Selector
7.2. Optional parts cool/heat selector 7.4. General cautions S1S ......Selector switch (fan, cool/heat) Up to 3 units can be connected by crossover power source wiring between outdoor units. However, units of smaller capacity S2S ......Selector switch (cool/heat) must be connected downstream. For details, refer to the equipment design data and technical data. -
Page 19: Examples
7.5. Examples Precautions when laying power wiring System example (See figure 11) Use round pressure terminals for connections to the power terminal block. Field power supply When none are available, follow the instructions below. Main switch Do not connect wiring of different thicknesses to the Earth leakage breaker power terminal block. - Page 20 In case of RXYQ18~48 (See figure 15) For low-noise operation, it is necessary to get the optional 'External control adaptor for outdoor unit' (DTA104A61/62). Unit A (Base unit) For details, see the installation manual attached to the Unit B adaptor. Unit C To cooler/heater selector Picking power line and transmission line...
-
Page 21: Before Operation
8. B Never connect 400 V to the terminal block of the interconnecting EFORE OPERATION wiring. Doing so will break the entire system. The wiring from the indoor units must be connected to the F1/F2 (In-Out) terminals on the PC board in the outdoor unit. 8.1. -
Page 22: Field Setting
Setting the push button switch (BS1~5) Additional refrigerant charge The amount of refrigerant to be added to the unit should be Function of the push button switch which is located on the outdoor written on the included "Added Refrigerant" plate and attached unit PCB (A1P): to the rear side of the front cover. - Page 23 Setting mode 2 Confirmation of the set mode The H1P led is on. The following items can be confirmed by setting mode 1 (H1P led is off) Setting procedure Check the led indication in the field marked Push the button according to the required function BS2 SET (A~G).
-
Page 24: Test Operation
8.4. Test operation Measure to be taken when operation finishes abnormally 1. Confirm the error code on the remote controller. 2. Correct what is abnormal. NOTE In case of 18~48 type: check the setting and the (See the installation manual and operation manual or contact indication results. -
Page 25: Temperature Adjustment Operation Confirmation
8.5. Temperature adjustment operation confirmation 10. C AUTION FOR REFRIGERANT LEAKS After the test run is over, operate the unit normally. (Heating is not (Points to note in connection with refrigerant leaks.) possible if the outdoor temperature is 24°C or higher.) Make sure the indoor and outdoor units are operating normally Introduction (If a knocking sound can be heard in the liquid compression of... -
Page 26: Disposal Requirements
Calculate the smallest room volume (m OTES In a case such as the following, calculate the volume of (A), (B) as a single room or as the smallest room. Where there are no smaller room divisions Where there is a room division but there is an opening between the rooms sufficiently large to permit a free flow of air back and forth. - Page 27 NOTES NOTES...
- Page 28 Zandvoordestraat 300, B-8400 Oostende, Belgium 4PWEN21816-1A...
Need help?
Do you have a question about the RXQ5M9W1B and is the answer not in the manual?
Questions and answers