
Related Manuals for Friedrich PDH07K3SB1


Summary of Contents for Friedrich PDH07K3SB1
- Page 1 INSTALLATION & OPERATION GUIDE PTAC PACKAGED TERMINAL AIR CONDITIONERS & HEAT PUMPS Standard Control Remote Thermostat Seacoast Protected 920-087-06 (4-08)
-
Page 2: Table Of Contents
Your Safety and the safety of others ..............................2 Unit Components ....................................3 Model Number Code ...................................4 Installation Recommendations ................................5 Friedrich Digital Control Features ..............................6-7 Drain Kit Installation ..................................8-9 Wall Sleeve Installation ................................10-11 Deep Wall Installation ..................................12 Standard Grille Installation ................................13 Electrical Rating Tables ..................................14... -
Page 3: Unit Components
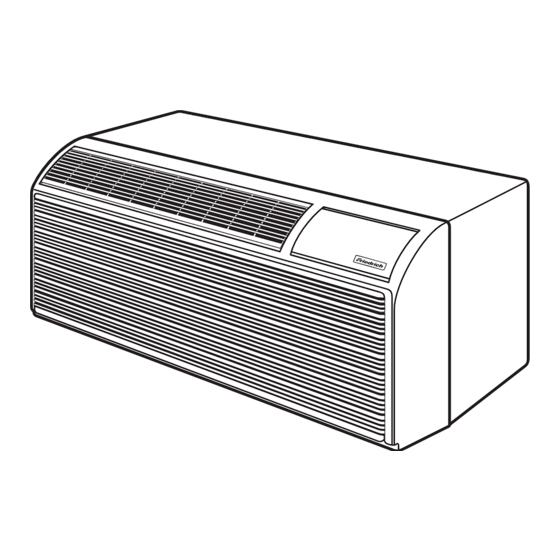
920-087-06 Typical Unit Components Outdoor grille Wall sleeve Chassis Front cover... -
Page 4: Model Number Code
920-087-06 Thank you for your decision to purchase the newly designed Friedrich Packaged Terminal Air Conditioner (PTAC). We are confi dent that you will fi nd this unit a quiet and effi cient example of Friedrich reliability. This Installation and Operation Manual has been designed to insure maximum satisfaction in the performance of your unit. -
Page 5: Installation Recommendations
The above suggestions are for reference only and do not represent all possible installations. Please contact the factory for information regarding affects of other installation arrangements. By following these simple recommendations you can be confi dent that your Friedrich PTAC will provide years of worry free operation. -
Page 6: Friedrich Digital Control Features
Friedrich Digital Control Features The new Friedrich digital PTAC has state of the art features to improve guest comfort, indoor air quality and conserve energy. Through the use of specifi cally designed control software for the PTAC industry Friedrich has accomplished what other Manufacturer’s have only attempted –... -
Page 7: Friedrich Digital Control Features
High effi ciency rotary compressors are used on all Friedrich PTACs to maximize durability and effi ciency. The Friedrich PTAC features a 24V AC terminal for connection to an auxiliary fan that may be used to transfer air to adjoin- Auxiliary Fan Ready ing rooms. - Page 8 920-087-06 Installation Instructions PXDR10 Drain Kit NOTE: Determine whether drain will be located within the wall, on the indoor side, or will drain to the exterior of the building. Follow appropriate instructions below depending on your particular type of installation. Internal Drain (optional for new construction) NOTE: If installing an internal drain, you MUST install a drain kit on the wall sleeve before the wall sleeve is installed.
-
Page 9: Drain Kit Installation
920-087-06 External Drain (for new construction or unit replacement) When using an external drain system, the condensate is removed through either of two drain holes on the back of the wall sleeve. Select the drain hole which best meets your drainage situation and install the drain kit. Seal off the other with a cover plate. Drain Tube Installation Cover Plate Installation Peel the backing tape off the gaskets and apply the... -
Page 10: Wall Sleeve Installation
920-087-06 WARNING Falling Object Hazard Not following Installation Instructions for mounting your air conditioner can result in property damage, injury, or death. Wall Sleeve Installation Instructions (PDXWS) NOTE: Insure that the unit is only installed in a wall structurally adequate to support the unit including the sleeve, chassis and accessories. - Page 11 920-087-06 Figure 6 Dimensions Dimension* Allow Allow for fl oor fi nishing for wall (6.4 cm) min. fi nishing (Minimum) Min. No Accessories ¼" ¼" (6.4 mm)* (6.4 mm) With Subbase 1¾" 3½" 5" (4.5 cm) (8.9cm) (12.7cm) 13¾ " With Lateral Duct ¾"...
-
Page 12: Deep Wall Installation
920-087-06 Deep Wall Installation (PXWE) If the wall is thicker than allowed in the notes in Figure 6, a sheet 6. Condensate notches and overfl ow slots must be kept clear metal wall sleeve extension or custom deep wall sleeve and of sealant and gaskets so condensate can fl... -
Page 13: Standard Grille Installation
920-087-06 Installation Instructions Model PXGA Standard Grille 1. Remove the center support and weatherboard if still 4. Grasp the grille by the attached plastic handles. Position installed in the sleeve. it with the condensate drain knockouts facing down. From inside the building, maneuver the grille through the 2. -
Page 14: Electrical Rating Tables
Failure to do so can result in property damage, personal injury and/or death. B. Power Cord Information (230/208V models only) All Friedrich 230/208V PTAC units are shipped from the factory with NOTE: The LCDI device is not intended to be used as a switch. -
Page 15: Installation Checklist
2. Remove the front cover contained in a protective plastic bag from chassis. Remove the bag and dispose of it properly. IMPORTANT: When installing a Friedrich P-Series PTAC into an If the control door is not installed, follow these steps: existing sleeve, it is important to ensure that the unit is installed •... - Page 16 920-087-06 4. Center the chassis in the pre-installed sleeve and carefully located at the bottom back corners of the cover. Tighten push the chassis until the chassis fl ange and gasket contact them into the quick nuts located on the chassis to secure the sleeve fl...
-
Page 17: Digital Control User Input Confi Guration
Temperature Display will monitor the indoor room conditions and in the event that the The Friedrich digital PTAC is shipped from the factory to display room falls below 40°F the unit will cycle on high fan with the the desired room temperature on the LED readout. - Page 18 Optional Hand Held Remote Control Operation 5 controls the fan mode, see page 16 for setting. Friedrich PTAC units can be confi gured to operate via an op- Emergency Heat Operation tional hand held remote control for added convenience. The...
-
Page 19: Remote Control Operating Range
920-087-06 Remote Control Operating Range The hand held remote has an operating range of up to 25 feet. The infrared remote control signal must have a clear path to transmit the command to the PTAC unit. The remote signal has some ability to “bounce” off of walls and furniture similar to a television remote control. -
Page 20: Remote Thermostat And Low Voltage Control Connections
Remote Thermostat Note: To revert back to the Smart Center control of the unit All Friedrich PD model PTAC units are factory confi gured to be replace the jumper wire between the ‘GL’ and ‘GH’ terminals controlled by either the chassis mounted Smart Center or a 24V that was removed in step 1. -
Page 21: Desk Control Terminals
920-087-06 Desk Control Terminals Auxiliary Fan Control The Friedrich PD model PTAC has built-in provisions for The Smart Center also has the ability to control a 24VAC relay connection to an external switch to control power to the unit. The to activate an auxiliary, or transfer, fan. -
Page 22: Start-Up Checklist
Installation Manual, all accessory installation instructions and the name, address and telephone Strictly follow installation instructions concerning number of the Authorized Friedrich Warranty clearances around the unit. Service Company in the area for the owner or operator. -
Page 23: Appendix A: Electrical Wiring For 265 V Models
920-087-06 Appendix A: Electrical Wiring for 265 Volt Models NOTE: It is recommended that the PXSB subbase assembly, the PXCJ conduit kit (or equivalent) be installed on all hardwired units. If installing a fl ush-fl oor mounted unit, make provisions for all the line voltage power leads and conduit to be removed for ease of maintenance and service to the chassis. -
Page 24: Routine Maintenance
920-087-06 Routine Maintenance NOTE: Units are to be inspected and serviced by qualifi ed service personnel only. 1. Clean the unit air intake fi lter at least every 300 to 350 hours 3. Periodically (at least yearly or bi-yearly): inspect all control of operation. -
Page 25: Basic Troubleshooting Techniques
Friedrich recommends that you consult with sizing of the unit. Friedrich recommends that you consult with an applications engineer for proper sizing. -
Page 26: Digital Control Diagnostics And Test Mode
Digital Control Diagnostics and Test Mode Diagnostics Test Mode The Friedrich Smart Center continuously monitors the PTAC unit For service and diagnostic use only, the built-in timers and operation and will store service codes if certain conditions are delays on the PTAC may be bypassed by pressing the ‘Cool’... -
Page 27: Accessories
Features backlit display Auto Cool Off Heat and multiple confi guration modes. For use on PD-series Friedrich PTACs only. REMOTE THERMOSTAT ESCUTCHEON KIT This kit contains ten escutcheons that can be placed over the factory control buttons PDXRT when a remote wall mounted thermostat is used. -
Page 28: Accessories
SLEEVE EXTENSION RETROFIT KIT Galvanized zinc coated steel, 2.4" sleeve extension attached to the room side of the PXSE sleeve to allow for the installation of a PD-Series Friedrich PTAC in a T-Series sleeve. LATERAL DUCT ADAPTER Attaches to the PTAC/PTHP... -
Page 29: Warranty
For international warranty information, contact the Friedrich Air Conditioning Company - International Division. Reasonable proof must be presented to establish the original purchase date, otherwise the beginning date of this certificate will be considered to be our shipment date plus sixty days.
Need help?
Do you have a question about the PDH07K3SB1 and is the answer not in the manual?
Questions and answers