Advertisement
Advertisement
Table of Contents

Related Manuals for WeldCorp MIG 100


Summary of Contents for WeldCorp MIG 100
- Page 1 OWNER’S OPERATING MANUAL MIG 100 GASLESS WELDER...
-
Page 3: Table Of Contents
TABLE OF CONTENTS Page Safety instructions MIG Welders Welder Information Gasless welder set up Operation 6-10 Troubleshooting Guide 11-12 Spare parts list 13-14 Warranty 15-16... -
Page 4: Safety Instructions
SAFETY INSTRUCTIONS When using power equipment, basic safety precautions should always be followed to reduce the risk of fire, electric shock and personal injury, including the following. If used correctly, welders pose little risk to the operator; however, care should always be taken to ensure safety and proper performance. - Page 5 • DON’T OVERREACH: Keep proper footing and balance at all times. • DRESS PROPERLY: DO NOT wear loose clothing or jewellery. They can be caught in moving parts. Wear protective hair covering to cover long hair, and gloves and non-slip footwear is recommended when working outdoors.
-
Page 6: Mig Welders
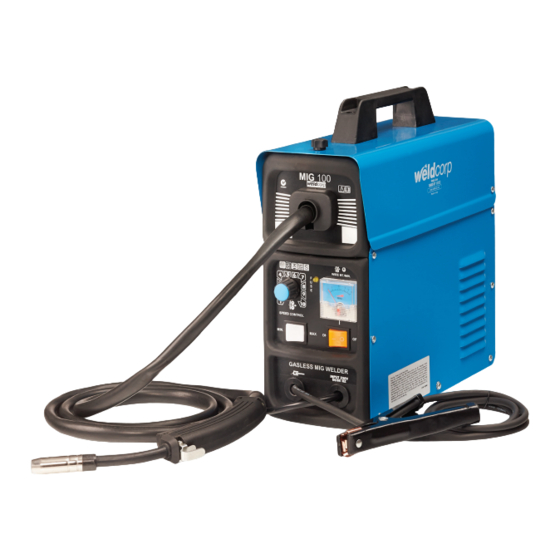
MIG 100 GASLESS WELDERS This model is a portable MIG Gas and Gasless Welder which is compact. The robust format makes it a versatile and efficient for a variety of uses. The welder compliance to current regulations and the optimum quality of materials used will ensure a long working life with complete safety. -
Page 7: Gasless Welder Set Up
MIG 100 GASLESS WELDER SET UP OPERATION- Mounting of the refill wire spool Remove empty spool and replace with refill spool as pictured to the right. Set the wire reel onto the spool and ensure that the turns are not crossed on one another on the reel and that they can easily unwind. - Page 8 OPERATION- Key Points to feeding the welding wire Ensure that you choose the correct wire size groove on the wire feed roller It is critical that you choose the right size wire feed roller size. Using the incorrect wire feed roller size will result in issues such as the wire not feeding correctly or irregular welding due to incorrect wire speed.
- Page 9 OPERATION- Key Points to feeding the welding wire Always extend the MIG torch lead fully when feeding the wirethrough the torch tip Always ensure that you always extend the welding torch lead to enable the MIG wire to pass through the welding torch lead inner tube. The inner tube allows the MIG wire to pass between the MIG welder and the welding torch without creating drag.
- Page 10 OPERATION- Feeding the welding wire 2) Unwind the welding wire and feed it through the plastic guide tube. 3) Align the welding wire to the feed rollers and continue feeding the welding wire through the intake tube. 4) Tighten the welding wire clamp nut to fasten the welding wire into position.
- Page 11 OPERATION- Feeding the welding wire 6) Press the trigger switch to engage the MIG welding wire feed and wait until the wire is automatically fed through the wire hose, ensuring the feeding tube is straight and not coiled, as this may cause a wire blockage.
-
Page 12: Troubleshooting Guide
TROUBLESHOOTING GUIDE Page 11... - Page 13 TROUBLESHOOTING GUIDE If you are still having difficulty with your welder, do not hesitate to contact our service team on: 1800 011 812 Page 12...
-
Page 14: Spare Parts List
SPARE PARTS LIST - MIG 100 GASLESS Product Code: WCM0001 Page 13... - Page 15 SPARE PARTS LIST - MIG 100 GASLESS Product Code: WCM0001 Page 14...
-
Page 16: Warranty
1YEAR WARRANTY Subject to the warranty conditions below, this Weldcorp product (“the Product”) is warranted by Cyclone Tools Pty Ltd (“the Company”) to be free from defects in material or workmanship for a period of 12 months from the date of original purchase (“the Warranty Period”). - Page 17 WARRANTY FORM THIS WARRANTY FORM SHOULD BE REAINED BY THE CUSTOMER AT ALL TIMES For your record and to assist in establishing date of purchase (necessary for in warranty service) please keep your purchase docket and this form completed with the following particulars. PURCHASED FROM SUBURB DATE...
- Page 18 Manufactured in Italy Cyclone Tools Pty Ltd ABN 89 169 427 061 73C Elizabeth Street Wetherill Park NSW 2164 www.weldcorp.com.au AUS Helpline: 1800 001 812...
Need help?
Do you have a question about the MIG 100 and is the answer not in the manual?
Questions and answers