
Related Manuals for OneTouch UltraEasy


Summary of Contents for OneTouch UltraEasy
- Page 1 OneTouch ® UltraEasy ™ Owner’s Booklet Symbols Caution symbol: See instructions for use. Serial number symbol Lot Number In Vitro Diagnostic Medical Device Expiration Date Sterilized by irradiation...
- Page 3 The right products and services can help make life with diabetes just a little bit easier. At LifeScan, our priority is to ensure that you have the right blood glucose meter to meet your needs. That’s why we design products like the OneTouch ® UltraEasy ™...
-
Page 4: Table Of Contents
• Getting to know your If the code on the meter does strip. Make sure the three OneTouch ® UltraEasy ™ not match the code on the contact bars are facing you. Blood Glucose Meter and vial, press ▲ or ▼ to change... - Page 5 Getting a blood sample pg. 10 Prepare the OneTouch Get a drop of blood ® Lancing Device Hold the OneTouch ® Lancing Device firmly against your Remove the blue cap and put finger. Press the release button. a new lancet in the lancing device.
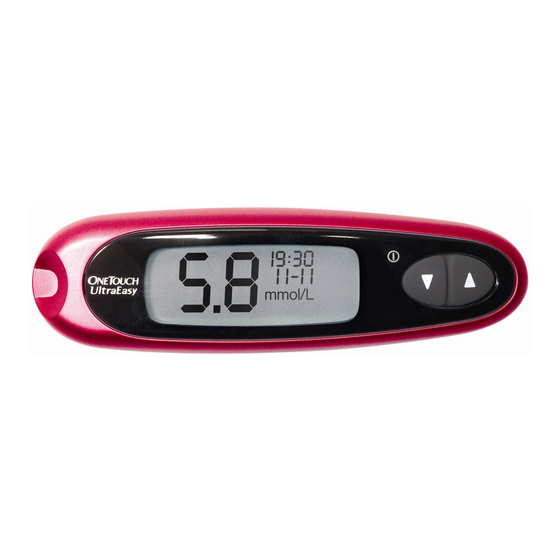
- Page 6 Applying blood and reading results pg. 22 Touch and hold the drop The meter will begin to count of blood to the narrow down from 5 to 1. Then, your channel in the top edge of blood glucose level appears the test strip on the display along with the unit of measure, and the date...
- Page 7 Reviewing past results pg. 27 Control solution testing pg. 28 Caring for your system pg. 33 Understanding error and other messages pg. 37 Detailed information about your system pg. 43 Index pg. 47...
- Page 8 See pages 28–32 in the Control solution testing section. Intended use The OneTouch ® UltraEasy™ Blood Glucose Monitoring System is intended to be used for the quantitative measurement of glucose (sugar) in fresh capillary whole blood. The OneTouch ®...
- Page 9 ™ Clear Cap e. OneTouch ® UltraSoft ® Sterile Lancets f. Carrying Case g. You will also need OneTouch ® Ultra ® Test Strips. Some kits do not include strips. Strips are sold separately. æ WARNING: Keep the meter and testing Documents in your kit include this supplies away from young children.
-
Page 10: Setting Up Your System
Setting up your system Getting to know your OneTouch UltraEasy Blood Glucose Meter and test strips ® ™ mmol/L is the pre-set unit of measure Display FRONT Edge to apply sample Confirmation window Test port Up and down buttons Insert test strip... -
Page 11: Turning Your Meter On And Off
Turning your meter on CAUTION: If any information æ To perform a test, insert a test strip as far as it will is missing from the start-up test go. The display will turn on and the meter will briefly screen, there may be a problem perform system checks. - Page 12 Setting the time and date Your OneTouch ® UltraEasy ™ Meter comes with the time, date and unit of measure pre-set. Before using your meter for the first time or if you change the meter battery, you should check and update the time and date. Make sure you complete steps 1 to 6 below to ensure your desired settings are saved.
- Page 13 Step 2 Set the hour With the hour flashing on the display, press and release ▲ or ▼ to go forward or backward one hour. To move faster, hold the ▲ or ▼ buttons down. When the correct hour appears on the display, wait five seconds.
- Page 14 Step 5 Set the month Press ▲ or ▼ to change the month. When you have the correct month on the display, wait five seconds to move to the next setting. The day will now start flashing. Step 6 Set the day Press ▲...
-
Page 15: Starting The Test Process
• Testing must be done within the operating temperature range (6–44°C). For the most accu- rate results, try to test as close to room temperature (20–25°C) as you can. • You can perform a blood glucose test while your OneTouch ®... -
Page 16: Insert A Test Strip
Hold the meter as shown and insert the test strip into the test port. Make sure the three contact bars are facing you. Push the strip in as far as it will go. Do not bend the strip. CAUTION: OneTouch æ ®... -
Page 17: If The Code On The Meter Does
Step 3 Match the code on the meter with the code on the test strip vial If the code on the meter does not match the code on the test strip vial, press ▲ or ▼ to match the code number on the test strip vial. The new code number will flash on the display for three seconds, and then stay constant for three seconds. -
Page 18: Lancing Device
Blue cap* (for fingertip sampling) OneTouch UltraSoft Sterile Lancet ® ® Lancet point *The blue cap and OneTouch ® ™ Clear Cap are also used for depth adjustment. NOTE: If you do not CAUTION: To reduce the chance of infection: æ... - Page 19 Choosing the right sampling site at the right time The OneTouch ® UltraEasy ™ Meter allows you to sample blood from your fingertip, forearm or palm. Forearm and palm sampling is also referred to as “alternate site testing” (AST). At times, results obtained at the forearm or palm may be different from a fingertip measurement.
- Page 20 CAUTION: Do not test on your forearm or palm when: æ • You think your blood glucose is rapidly falling, such as within two hours of exercise or a rapid-acting insulin injection or insulin pump bolus. Testing with a fingertip sample may identify hypoglycaemia or an insulin reaction sooner than testing with a forearm or palm sample.
- Page 21 Choose a different puncture site each time you test. Repeated punctures in the same spot may cause soreness and calluses. If bruising occurs at an alternate site or you have difficulty getting a sample, consider sampling from a fingertip instead. You may want to review the choice of sites with your healthcare professional.
- Page 22 Step 2 Insert a sterile lancet into the OneTouch ® Lancing Device Insert the lancet into the holder and push in firmly. Twist the protective disk until it separates from the lancet and save the disk for later use. Do not twist the lancet.
- Page 23 Step 6 Puncture your finger Hold the OneTouch ® Lancing Device firmly against the side of your finger. Press the release button. Remove the OneTouch ® Lancing Device from your finger.
- Page 24 Step 7 Get a round drop of blood Gently squeeze and/or massage your fingertip until a round drop of blood of at least one microlitre ( actual size) forms on your fingertip. If the blood smears or runs, do not use that sample. Wipe the area and gently squeeze another drop of blood or puncture a new site.
- Page 25 Forearm sampling Choose a fleshy area of the forearm away from bone, visible veins and hair. Sometimes there is less blood flow to the forearm than to the fingertips. To help you get a large enough drop of blood, you may gently massage or apply warmth to the site to increase blood flow.
- Page 26 Step 1 Remove the blue cap by snapping it off Step 2 Insert a sterile lancet into the OneTouch ® Lancing Device Insert the lancet into the holder and push in firmly. Twist the protective disk until it separates from the lancet and...
- Page 27 ® Lancing Device by snapping it on Step 4 Adjust the depth setting You may have to adjust the OneTouch ® Lancing Device to a deeper setting to get a large enough drop of blood from your forearm or palm. Twist the OneTouch ®...
- Page 28 ( actual size) before you release pressure and remove the lancing device. Palm Step 7 Remove the OneTouch ® Lancing Device Carefully lift the lancing device away from your skin. Do not smear the blood sample.
- Page 29 NOTE: • You may need to wait a little longer to get a large enough drop of blood from the forearm or palm. Do not squeeze the site excessively. • If the sample drop of blood runs or spreads due to contact with hair or with a line in your palm, do not use that sample.
-
Page 30: Drop Icon R
Applying blood and reading results Once you have a blood sample and your meter shows the screen with the flashing blood drop icon , you are ready to obtain a blood glucose result. If your meter does not show the screen with the flashing blood drop icon , remove the unused test strip and re-start the test process. - Page 31 Step 2 Top edge Apply the sample Touch and hold the drop of blood to the narrow channel in the top edge of the test strip. Blood will be drawn into the strip. Keep holding the drop of blood to the top edge of the test strip until the confirmation window is full.
-
Page 32: Unexpected Test Results
CAUTION: You may get an Er 5 message or an inaccurate result if the blood sample does not æ fill the confirmation window completely. See page 42. Discard the strip and re-start the test process. WARNING: If mmol/L does not appear with the test result, call Customer Care. Use of æ... - Page 33 CAUTION: High glucose results æ If your test result is higher than 10.0 mmol/L, it may mean hyperglycaemia (high blood glucose). If you are uncertain about this test result, consider re-testing. Your healthcare professional can work with you to determine what actions, if any, you should take if your results are higher than 10.0 mmol/L.
- Page 34 After getting a result Once you have read your result, you may: • Review your meter memory by pressing ▼ to enter memory mode, see page 27, or • Turn the meter off by removing the test strip. Removing the used lancet Remove the lancing device cap by snapping it off.
-
Page 35: Reviewing Past Results
Reviewing past results The meter stores a maximum of 50 blood glucose test results. When the meter memory is full, the oldest result is dropped as the newest is added. Results are stored automatically when you test, along with the time, date and unit of measure. You can review the results stored in the meter memory, starting with the most recent. -
Page 36: Control Solution Testing
• if you drop or damage the meter. NOTE: • Use only OneTouch ® Ultra ® Control Solution with your OneTouch ® UltraEasy ™ Meter • Control solution tests must be done at room temperature (20–25°C). Make sure your meter, test strips, and control solution are at room temperature before testing... - Page 37 CAUTION: Do not swallow control solution; it is not for human consumption. æ Do not apply control solution to the skin or eyes as it may cause irritation. Performing a control solution test Start with the meter off. If you have turned the meter on to change settings or review past results, turn it off.
- Page 38 Step 3 Match the code on the meter with the code on the test strip vial If the code on the meter does not match the code on the test strip vial, press ▲ or ▼ to match the code number on the test strip vial. The new code number will flash on the display for three seconds, and then stay constant for three seconds.
- Page 39 If you decide not to do a control solution test, press ▲ again to remove CtL from the display. Step 5 Prepare and apply control solution Shake the control solution vial before each test. Remove the cap and squeeze the vial to discard the first drop. Then wipe the tip with a clean tissue or cloth.
- Page 40 • use of a test strip or control solution past its discard date, or • a problem with the meter. CAUTION: The control solution range printed on the test strip vial is for æ OneTouch ® Ultra ® Control Solution only. It is not a recommended range for your blood glucose level.
-
Page 41: Caring For Your System
Caring for your system Your OneTouch ® UltraEasy ™ Blood Glucose Monitoring System does not need any special maintenance. Storing your system Store your meter, strips and control solution in your carrying case after each use. Store each item in a cool, dry place below 30°C, but do not refrigerate. Keep all items away from direct sunlight and heat. - Page 42 ™ Clear Cap To clean these items, wipe them with a soft cloth dampened with water and mild detergent. Do not immerse the OneTouch ® Lancing Device in any liquid. To disinfect these items, prepare a solution of one part household bleach to ten parts water.
- Page 43 Battery Your OneTouch ® UltraEasy ™ Meter uses one 3.0 Volt CR 2032 lithium battery (or equivalent). Replacement batteries can be found in most stores where batteries are sold. Your meter comes with the battery already installed. The meter shows a battery icon in the far right-hand side of the display to indicate the condition of the battery.
- Page 44 Step 2 Insert the new battery With the “+” side facing up toward you, place the battery in the compartment within the fold of the ribbon. Push the battery until it snaps into place. Insert the two battery door tabs into the matching holes, and push down until you hear the door click into place.
-
Page 45: Understanding Error And Other Messages
Understanding error and other messages ® ™ The OneTouch UltraEasy Meter displays messages when there are problems with the test strip, with the meter, or when your blood glucose levels are higher than 33.3 mmol/L or lower than 1.1 mmol/L. Messages do not appear in all cases when a problem has occurred. - Page 46 Message What it means What to do The meter has detected Repeat the test after the meter that the temperature is and test strips have reached a above the system temperature within the operating range. Do not operating range. perform a test until the meter and test strips reach a temperature within the operating...
- Page 47 Message What it means What to do No result in memory, You can still perform a blood such as the first time use glucose test and get an accurate of the meter. test result. Contact Customer Care to report this occurrence if Your meter was unable to this is not your first time use of recall this result.
- Page 48 Message What it means What to do Error message indicates Repeat the test with a new test that the blood or control strip. Apply a blood or control solution sample was solution sample only after the applied before the meter flashing blood drop icon was ready.
- Page 49 Message What it means What to do There may be a problem If you tested in a normal or with the test strip. warm environment, repeat the For example, it may test with a new test strip; see have been damaged or pages 22–23.
- Page 50 Message What it means What to do The meter has detected Repeat the test with a new a problem with the test test strip. Refer to pages 22–23 strip. Possible causes for information on sample are test strip damage or application.
-
Page 51: Detailed Information About Your System
If you have been using another type of meter one that provides whole-blood-calibrated — results you may notice that your test results with the OneTouch ® UltraEasy ™ Meter are —... - Page 52 • Your hæmatocrit (percentage of blood that is red blood cells) is high (above 55%) or low (below 30%). • You are suffering from severe dehydration. • You tested at a temperature near the low end of the operating range (6°C) and you get a high glucose result (i.e., greater than 10.0 mmol/L).
- Page 53 Technical specifications Reported result range 1.1–33.3 mmol/L Calibration Plasma-equivalent Sample Fresh capillary whole blood Sample size Minimum 1 microlitre Test time 5 seconds Assay method Glucose oxidase biosensor Meter power source One replaceable 3.0 Volt CR 2032 lithium battery (or equivalent) Unit of measure mmol/L Memory...
- Page 54 IEC 61000-4-2. This meter has been tested for immunity to radio frequency interference over the frequency range 80MHz to 2.5GHz at 3V/m as specified in IEC 61000-4-3. Degree of protection rating: IP32 Guarantee LifeScan guarantees that the OneTouch ® UltraEasy ™...
-
Page 55: Index
........Drop of blood, proper size v, 16, 20, 21 Lancing device, OneTouch ® ™ .. - Page 56 Low battery icon 35, 42 Test screen iv, 3, 8 ............Low battery message 35, 42 Test strip, applying drop of blood...
- Page 57 Reminders Time of day Your target ranges from your healthcare professional Before breakfast Before lunch or dinner 1 hour after meals 2 hours after meals Between 2 a.m. and 4 a.m.
Need help?
Do you have a question about the UltraEasy and is the answer not in the manual?
Questions and answers