Table of Contents
Advertisement
Quick Links
Download this manual
See also:
Quick Manual
Warning: To reduce a risk of fire or electric shock, do not
expose this product to rain or moisture.
Vicon Industries Inc. does not warrant that the functions contained in this
equipment will meet your requirements or that the operation will be entirely
error free or perform precisely as described in the documentation. This
system has not been designed to be used in life-critical situations and
must not be used for this purpose.
Copyright © 2002 Vicon Industries Inc. All rights reserved.
Product specifications subject to change without notice.
Vicon and its logo are registered trademarks of Vicon Industries Inc.
VICON INDUSTRIES INC., 89 ARKAY DRIVE, HAUPPAUGE, NEW YORK 11788
TEL: 631-952-CCTV (2288) FAX: 631-951-CCTV (2288) TOLL FREE: 800-645-9116
24-Hour Technical Support: 800-34-VICON (800-348-4266)
UK: 44/(0) 1489-566300 INFOFAX: 800-287-1207 WEB: www.vicon-cctv.com
Vicon Part No. 8009-8091-01-01
XX091
Digital Recorder
Rev 902 Section 5
Advertisement
Table of Contents

Related Manuals for Vicon AuroraCord


Summary of Contents for Vicon AuroraCord
- Page 1 Warning: To reduce a risk of fire or electric shock, do not expose this product to rain or moisture. Vicon Industries Inc. does not warrant that the functions contained in this equipment will meet your requirements or that the operation will be entirely error free or perform precisely as described in the documentation.
-
Page 4: Table Of Contents
Selecting Playback Source and Audio Parameters..................30 Starting and Stopping Playback from the Menu System ................30 Motion “Museum” Search ...........................31 Schedules..............................32 Disk Functions..............................35 Serial Ports..............................35 Operation ...........................37 Organization..............................37 Applying Power ............................37 Entering Passcodes .............................38 Checking Available Disk Space ........................38 Contents • i XX091-01-01 Rev 902 AurorAcorD... - Page 5 AurorANet ......................... 50 Host PC Configurations ....................52 Maintenance........................58 Troubleshooting & FAQs ....................59 Resetting the AurorAcorD .......................... 59 Testing Front Panel Keys & LEDs ......................59 Additional System Setup & Reset History....................60 Fine Tuning Cameras ..........................60 Calibrating Cameras ............................
-
Page 6: Quick Installation
Otherwise, remove appropriate jumpers before using the AurorANet AurorANet Termination Box RS-232/RS-422 Termination Box termination box as discussed in the Reference chapter. (part # 1298-3190-01-00) (part # 1298-3140-01-00) • iii XX091-01-01 Rev 902 AurorAcorD... - Page 7 Note: Depending upon your programming choices, the AurorAcorD immediately begins recording to the hard drive when power is applied. Single Channel Audio Microphone Speaker Main Display Monitors 3.5 mm phono type plug 3.5 mm phono type plug powered type passive type 8 Ω...
-
Page 8: Quick Programming: Easy Setup
Quick Programming: Easy Setup Note: The AurorAcorD is shipped with preprogrammed factory defaults. Programming the AurorAcorD customizes it to your specific requirements but is not mandatory. Follow these instructions to use the Easy Setup menus to quickly and easily perform basic programming procedures. - Page 9 For example, if the minimum number of active zones is set to 14, then 14 zones must pass the detection threshold before the AurorAcorD has detected motion. Make your selection and then access the Motion Zone Setup screen.
-
Page 10: Quick Programming: Using Loopback Mode To Optimize Parameters
Quick Programming: Using Loopback Mode to Optimize Parameters MENU SELECTION 1 Easy Setup Menu Note: Use the AurorAcorD Calculator, available on the AurorAcorD CD, to see how 2 Main Menu PLAY 3 Camera Calibration changing recording settings will change your recording duration. - Page 11 (30 Kb) The second table shows the estimated number of days that the AurorAcorD can be expected to record before hard drives of various sizes are filled. “Max” frame rate changes from 18 fps to 24 fps, depending upon the synchronization of all cameras in the system.
-
Page 12: Quick Operation
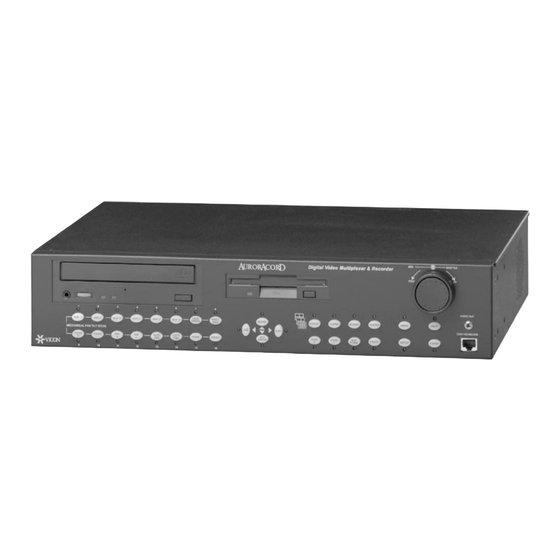
MONITOR Note: The figure above includes a CD-RW drive. Your AurorAcorD may or may not include this feature, depending upon the model. • ix... - Page 13 This page intentionally left blank. x • XX091-01-01 Rev 902 AurorAcorD...
-
Page 14: Introduction
The multiplexer portion is based on Vicon's AurorA2000 and the digital recorder portion is a new addition targeted to replace the current requirement for system VCRs. The AurorAcorD is a powerful surveillance tool applicable for large and small CCTV installations. It is available in the models described in the next section. - Page 15 2 host computers Note: With AurorANet, you may connect up to 32 AurorAcorDs on a 2-wire RS-485 bus. Using a host computer and Vicon’s serial port commands, you may connect up to 999 AurorAcorDs various configurations. 2 • Introduction XX091-01-01 Rev 902 AurorAcorD...
-
Page 16: Installation
Otherwise, remove appropriate jumpers before using the AurorANet AurorANet Termination Box RS-232/RS-422 Termination Box termination box as discussed in the Reference chapter. (part # 1298-3190-01-00) (part # 1298-3140-01-00) Installation • 3 XX091-01-01 Rev 902 AurorAcorD... - Page 17 Note: Depending upon programming choices, the AurorAcorD immediately begins recording to the hard drive when power is applied. For RS-232 or RS-422, use the supplied RS-232/RS-422 termination box or the upgrade/RS-232 cable (purchased separately by calling Vicon at 1-800-645-9116, product code 7721).
- Page 18 AurorAcorDs that are in the middle of the communications line. The box is used as supplied (resistors intact) for the last AurorAcorD in the line. Jumpers must be set in the first A2K-KBD Keyboard to define it as end-of-line, as discussed in Instruction Manual XX081.
-
Page 19: Programming
Using the PC Keyboard to map the AurorAcorD’s keys to your PC keyboard’s keys. Programming Note: The AurorAcorD is shipped with preprogrammed factory defaults. Programming the AurorAcorD customizes it to your specific requirements but is not mandatory. Organization... -
Page 20: Preliminary Steps
Screen Navigation Keys The AurorAcorD menus include all of the navigation instructions needed to move to, from and within a menu, as well as how to scroll through and select parameters. In general, the arrow and number keys are the most... -
Page 21: Using Passwords
5. Although passwords were defined in the previous steps, they will not be required until you enable them as described in this step. Set the FPanel Password setting to Enabled if you want the AurorAcorD’s front panel keys to be inoperable until the Front Panel password or the Menu/Setup Password (if enabled and defined) is entered. -
Page 22: Setting The Time And Date Display
If you forget your Menu/Setup password or you have set only the Front Panel password, press the HELP while the AurorAcorD is in one of the following password entry screens: Enter Front Panel Password or Enter Menu/Setup Password. The help system will display an encrypted version of your Menu/Setup password. Call Vicon Technical Support at 1-800-34-VICON (1-800-348-4266) and give them the encrypted password so that they can determine the password for you. - Page 23 Time by selecting Yes for Auto DST Adjust. Then set the DST settings to reflect when Daylight Saving should start and stop, referring to a calendar if necessary. If you select No, you do not need to define DST settings, as you will have to change the time on the AurorAcorD manually using the Set Time screen.
-
Page 24: Defining Colors And Grid Thickness
Defining Colors and Grid Thickness Note: This section describes customization of your AurorAcorD display (text, grid, etc), which is not mandatory. Use this section to change these settings to suit your own preferences. You may customize the display on text, borders and background on your Main Display and Spot monitors as described in the following procedure. - Page 25 3. Access the Main Display Menu Text screen. To define the colors and size of text on the AurorAcorD menus, use the following figure and trial-and-error to determine which settings are desired. These choices are for the Main Display monitors only. Use the onscreen instructions to make choices and then return to the Display Setup screen.
-
Page 26: Optimizing Display Parameters
Field Sync setting using the onscreen instructions. 3. To increase the update rate, the AurorAcorD captures the next field of video whether or not it is odd or even. This may offset the image by one line shift if an odd field is captured after an even field. This causes offset motion in the image that may be corrected using the Field Sync setting set to Yes. -
Page 27: Saving Current Settings Or Using Factory Defaults
AurorAcorD software, as discussed in the Reference chapter. -
Page 28: Enabling Communication Failure Messages
Enabling Communication Failure Messages Perform the following procedure to enable or disable announcement of communication failure for each of the 16 receivers. 1. Follow the menu path shown here to the Receiver Communication Failure screen. Programming • 15 XX091-01-01 Rev 902 AurorAcorD... -
Page 29: Setting Receiver Type And Status Display
4. If all of your receivers have 4 pan-and-tilt speeds, select Set all to V1301R w/PV option. If you have fixed (1) speed and variable-speed receivers (such as Surveyor domes), select Set all to Other Receiver. If you 16 • Programming XX091-01-01 Rev 902 AurorAcorD... -
Page 30: Defining Update Priority For Live Display
Setting Setting Live Display Detection Normal Alarm Normal Normal Normal Higher Update or Normal High Alarm + Higher Update High Alarm High High High Higher Update or High High Alarm + Higher Update Programming • 17 XX091-01-01 Rev 902 AurorAcorD... -
Page 31: Defining The Camera Lock List
Motion detection in a camera’s field of view activates alarms and/or increases the update rate of the AurorAcorD. The camera’s field of view is divided onscreen into motion detection “zones”. Motion must be detected in a user-defined number of zones in the video image before alarms activate and alarm recording takes place. - Page 32 For example, if the minimum number of active zones is set to 14, then 14 zones must pass the detection threshold before the AurorAcorD has detected motion. Make your selection and then access the Motion Zone Setup screen.
-
Page 33: Alarms
Alarms The AurorAcorD will go into alarm mode if alarms are enabled and then activated by the following sources: • receiver alarms (alarm input) • video loss on any camera (alarm input) • motion detected in the field of view of a camera (alarm input) •... -
Page 34: Alarm Outputs
7. Select In/Out Contacts from the Alarm Contacts screen to define each contact individually. 8. Define each alarm connected to the 37-pin alarm connector as an input to the AurorAcorD or as an output from the AurorAcorD, using the definitions in the step above for normally open/closed and active high/low. -
Page 35: Alarm Format, Sequencing And Messages
4. Select In/Out Contacts from the Alarm Contacts screen to define each contact individually. 5. Define each alarm connected to the 37-pin alarm connector as an input to the AurorAcorD or as an output from the AurorAcorD, using the definitions in the step above for normally open/closed and active high/low. -
Page 36: Alarm Acknowledgement
Note: The following settings, Format, Main Display Sequencing and Spot Monitor Sequencing, will not take place if the AurorAcorD is displaying a menu, help screen or mechanical pan/tilt/zoom mode when an alarm activates. 4. Define the display format when alarms are active: No change (stays in the current display format), Full screen, Full screen + Alarm, 2x2, 3x3, 4x4, mixed border or split. -
Page 37: Preset And Macro Functions Activated On Alarm
Preset and Macro Functions Activated on Alarm The AurorAcorD may be programmed to recall presets and run macros for specfied alarm conditions. Preset recall is a convenient function that returns the pan-and-tilt drive to a pre-defined pan-and-tilt position (and zoom/focus settings, if the camera includes a motorized zoom lens). The pan-and-tilt drive and lens must be equipped with preset potentiometers in order to use preset functions. -
Page 38: Record Function
Operation chapter. How do I set the AurorAcorD as an event recorder? Perform the following procedure if you wish to use the AurorAcorD as an event recorder, which records only when alarms are active in the system. - Page 39 4. Access the High Priority setting and set it to More Often, No Change or Only. The Only setting will cause the AurorAcorD to only record cameras with their Update Priority set to High (refer to the Defining Update Priorities for Live Display section). The More Often setting will re-order the list of recorded cameras so that cameras with Update Priority set to High are recorded more often than those set to Normal.
- Page 40 To see at a glance how these settings will change your recording duration, use the AurorAcorD Calculator, available from the AurorAcorD CD. All of the settings are defined on the Record Control screen except for the Quality setting. It is accessed from the Record Control screen and set on the Record Camera Quality screen.
- Page 41 8. The message “Loopback Mode Active” should display at the top of the screen. 9. Change the quality setting of the same camera and repeat the procedure to view the video at this setting. 28 • Programming XX091-01-01 Rev 902 AurorAcorD...
- Page 42 8. Change the Sensitivity setting and repeat the step above. 9. Select the best Sensitivity setting for your system. 10. Select Setup Record Cameras and disable loopback mode. Screen Field Choices Default Record Control Sensitivity Low, Lowest, Normal, High, Highest Normal Programming • 29 XX091-01-01 Rev 902 AurorAcorD...
-
Page 43: Playback
Playback The playback function of the AurorAcorD allows you to review recorded video. You may search through recorded video by time and date, alarms and by detected motion using the motion “museum” search feature discussed below. Selecting Playback Source and Audio Parameters Use the following procedure to select the playback source and define the audio parameters. -
Page 44: Motion "Museum" Search
Motion “Museum” Search Using the Playback Control screen’s Playback Search submenus, the AurorAcorD allows you to search through video recorded to the hard disk or archived to the CD-RW by three methods: • by a user-defined time and date •... -
Page 45: Schedules
Low, Lowest, Normal, High, Highest Normal Schedules You may define up to eight unique schedules in the AurorAcorD. Scheduling allows you to define the time and day for four types of actions to occur automatically. These actions are: • changing the Record List. Normally you will define which cameras will be recorded by pressing the Record key to display the Record List Selection screen, as discussed in the Recording sections of the Programming and Operation chapters. - Page 46 If you do not want a particular action to be performed, make sure that it is disabled by checking the settings on the appropriate screen. 5. Access the Schedule Record List screen. Programming • 33 XX091-01-01 Rev 902 AurorAcorD...
- Page 47 Alarm “X” Enabled, Disabled Enabled Contacts Schedule “X” Receiver Receiver “X” Alarm Enabled, Disabled Enabled Alarms Schedule “X” Motion Camera “X” Motion Higher Update, Alarm, Higher Update + Higher Update Processing Alarm, Disabled 34 • Programming XX091-01-01 Rev 902 AurorAcorD...
-
Page 48: Disk Functions
1-16 to Select. or 1-16 to Select. MORE HOST SETUP 1 Print Time Broadcast: No 2 Host Address: 0 3 Command Terminator: CR to Choose. to Go Back. or 1-16 to Select. Programming • 35 XX091-01-01 Rev 902 AurorAcorD... - Page 49 AurorAcorDs. 6. Choose a host address from 1 to 999 if you will control more than one AurorAcorD with a PC. Note that the upper range of the host address parameter is 65535; make sure that you do not use an address higher than 999.
-
Page 50: Operation
The switching power supply allows operation from 100-240 VAC at 47-63 Hz, thus accommodating both 110 VAC and 220 VAC. The AurorAcorD contains a backup battery to protect your programming choices during a power interruption. The estimated life of the battery is approximately 2-3 years and may be replaced by the user as discussed in the Maintenance chapter. -
Page 51: Entering Passcodes
Entering Passcodes Note: Passwords are not required the first time that you use the AurorAcorD (passwords are disabled at the factory). To define and enable passwords, refer to the Programming chapter. If you have enabled password(s), you must enter the defined password(s) before you can use the front panel keys (Front Panel password) or access menus (Menu/Setup password). - Page 52 1, 2, 3, 5, 10, 15, 30, 60 seconds 1 second Sequence Steps 1 – 16 Sequence List Step “XX”, where “XX” 1-16 1-16 in ascending is the step number camera number order Operation • 39 XX091-01-01 Rev 902 AurorAcorD...
-
Page 53: Viewing Disk Status
No Floppy Disk, Ready (blank DOS formatted floppy), Disk Contains Data, Waiting for Update Note: Use the Refresh Disk Status function if your floppy drive status is Waiting for Update or you have just replaced a floppy. 40 • Operation XX091-01-01 Rev 902 AurorAcorD... -
Page 54: Inserting/Ejecting A Cd Or Floppy
Windows Media Player or by using the AurorAcorD Floppy Player software, or on the AurorAcorD (the Select Source field must be set to Floppy on the Playback Control screen). Audio is not available from the floppy. For CD, you may playback the archived images on the AurorAcorD (the Select Source field must be set to CDRW on the Playback Control screen) or on a PC using the AurorAcorD CD Player software. -
Page 55: Erasing The Cd-Rw Or Hard Disk
Go Back. to Choose. to Go Back. to Choose. to Go Back. to Choose. to Go Back. or 1-16 to Select. or 1-16 to Select. or 1-16 to Select. or 1-16 to Select. 42 • Operation XX091-01-01 Rev 902 AurorAcorD... -
Page 56: Clearing Receiver Communication Failures
In the screen below, note that if no data is received from the hard disk or CD for more than 5 seconds, a “No Data” message will display on the screen. Operation • 43 XX091-01-01 Rev 902 AurorAcorD... -
Page 57: Messages
Selecting a Monitor There are three monitors for the AurorAcorD system, the spot monitor and two main display monitors. The spot monitor is used as a monitoring station and does not have the capability of multi-picture display. Use the main display monitors to take advantage of all AurorAcorD features. -
Page 58: Freezing And Restoring Video Images
For Auto Only mode: Press to start the display of sequencing video at the sequence dwell SEQUENCE rate, • For Manual Only mode: Press and then press to advance one sequence step. SEQUENCE ENTER Operation • 45 XX091-01-01 Rev 902 AurorAcorD... -
Page 59: Viewing Live Video
• Windows Media Player. To install the AurorAcorD Floppy Player on your PC, insert the AurorAcorD CD into your PC and use the Windows Start Menu to select “setup.exe” from the FloppyPlayer folder. Follow the onscreen instructions. Note: The AurorAcorD CD contains documentation on the Floppy Player in the help file. You may also find this information in the Reference chapter of this manual. -
Page 60: Playing Back Video & Audio
Playback Control screen (refer to the Programming chapter for more information). This will also play back audio on the CD or hard disk, if enabled during programming and connected properly to the AurorAcorD. Audio is not available from floppy disk. -
Page 61: Defining And Running Macros
3. You may use a macro to change a menu setting. To view the menus while running the macro, select No for Hide Menus On Playback. Otherwise, to hide the menus, select Yes. 4. To run a macro when the AurorAcorD boots, select the macro number for the Playback Macro at Reset setting. To disable this setting, select 0. -
Page 62: Using The Pc Keyboard
The PC keyboard may be used to easily type titles for your cameras and macros. It may also be used to key in any function that you can initiate from the AurorAcorD front panel. Use the figure below to determine which key on the PC keyboard correlates to an AurorAcorD key. -
Page 63: Auroranet
AurorANet polls by selecting List Active Keyboards. This can be of assistance during troubleshooting procedures. 4. Set the address of this unit. Each AurorAcorD must have a separate address from 1 to 32 and may not be the same address as any VCR in your system. - Page 64 AurorAcorD that you will control from your AurorAcorD. Note: To avoid operational problems, make sure that you do not create a loop by setting one AurorAcorD to control a second AurorAcorD and then setting the second AurorAcorD to control the first one.
-
Page 65: Host Pc Configurations
(refer to the following tables). Should only one user be needed, this user can control the AurorAcorD from the host PC using commands from any of the tables listed at the end of this chapter. These two scenarios are illustrated in the following figures. - Page 66 Using the serial port protocol, you may send commands from the host PC to 999 AurorAcorDs. The block diagrams below illustrate some of the possible configurations. Using RS-232 In the simplest case, you might have one AurorAcorD connected to a PC. RS-232/RS-422 PC RS-232 RS-232 Term.
- Page 67 Daisy chain AurorAcorDs using the 4-wire RS-485 connections below. Connect like signals together; for example, RS-485 R+ to RS-485 R+ from one AurorAcorD to another. Continue in the same manner with the other signals. Make sure that you have selected “RS-485” as the Type on the appropriate Serial Port screen.
-
Page 68: Command Format
All commands must be followed by a <CR> or <CR><LF>. A <CR> is ASCII value 13 and a <LF> is ASCII value 10. Note: If you only have one AurorAcorD, you do not need to send the Annn portion of the command format as discussed above. Just send the normal command followed by the command terminator. However, the host address of the AurorAcorD must be set to zero in the More AurorANet Setup menu. - Page 69 9 using the commands below (refer to the tables on the following pages). This is the method that you must use if you have one user on the host PC and another at the AurorAcorD front panel at the same time.
- Page 70 Jog frame advance reverse (minus). Note: To stop an active shuttle command, send the command again (for example, send “SF” to start shuttle fast forward and then “SF” again to stop the fast forward operation). Host PC Configurations • 57 XX091-01-01 Rev 902 AurorAcorD...
-
Page 71: Maintenance
Dispose of used batteries according to the manufacturer’s instructions. The AurorAcorD contains a 2-3 year backup battery. To replace the battery, remove the top cover and locate the battery, which is approximately 2 inches behind the Sequence key. Replace the battery with Vicon part number 8000-7228-01 or Panasonic CR1632. -
Page 72: Troubleshooting & Faqs
Resetting the AurorAcorD If the AurorAcorD does not boot and run normally, you may need to force a return to the factory default configuration. Note that this will erase any passwords and restore all AurorAcorD settings back to the factory defaults. -
Page 73: Additional System Setup & Reset History
Additional System Setup & Reset History Perform the following procedure to customize your AurorAcorD for the features discussed below and to view and/or clear reset history data. 1. Access the More System Setup screen. MAIN MENU SYSTEM SETUP MORE SYSTEM SETUP... -
Page 74: Calibrating Cameras
1-16 to Select. or 1-16 to Select. 2. Use the first menu option to adjust the vertical sync of each camera under the supervision of a Vicon Technical Support representative. 3. Show Image Rate is useful to see the image rates for each board in the system. The upper left corner of the main display monitor will show three numbers separated by dashes. -
Page 75: Frequently Asked Questions
If you forget your Menu/Setup password or you have set only the front panel password, press the HELP while the AurorAcorD is in one of the following screens: Enter Menu/Setup Password screen, Front Panel Password or Menu/Setup Password. The help system will display an encrypted version of your Menu/Setup password. -
Page 76: Reference
What type of authentication is used on the AurorAcorD? It does a basic data validity check. Can the hard drive be upgraded at the enduser’s site? No. The AurorAcorD must be returned to Vicon for this type of upgrade. - Page 77 CD Player Video and audio data may be played back on a PC using the AurorAcorD CD Player. Data must have been archived to CD using the Archive CD function. In order to record and subsequently play back audio, audio recording must be enabled and the audio AGC must be set.
-
Page 78: Select Camera
You can use the Start Time and End Time messages as reference points. Floppy Player Video images may viewed on a PC using the AurorAcorD Floppy Player or Windows Media Player. These images must have been saved to a floppy disk using the Archive Floppy function. This function is discussed in the Archiving section of this manual. -
Page 79: Playback Speed
Codec Driver To view video archived to a floppy disk, you may use the Floppy Player included on the AurorAcorD CD or you may use Windows Media Player. To use Media Player (version 6.4 and newer), first install the codec driver by selecting it from the AurorAcorD CD. -
Page 80: Frame Rate
Results. To set the Sensitivity in the AurorAcorD menus, refer to How do I define how much motion is required before recording takes place? in the Programming chapter and/or use the Quick Programming section. -
Page 81: Downloading Software Updates
AurorAcorDs. You can set the time from one AurorAcorD as follows. 1. On the Serial Port screen, set the Mode to Printer on the AurorAcorD that will set the time for all AurorAcorDs. Set the Mode to Host on all of the other AurorAcorDs. - Page 82 9. If you have not already done so, connect a monitor to the spot monitor BNC or main display monitor BNC on the rear of the AurorAcorD. 10. Apply power to the AurorAcorD. While the unit is booting, the monitor will display “Booting…” and the LEDs on the front panel will flash.
- Page 83 Note: Vicon provides an AurorANet termination box as discussed in the Installation chapter. This box is a convenient wiring junction but is not required. Using the AurorANet termination box and leaving the jumpers installed will result in double termination.
- Page 84 Coaxial Cable Recommendations Caution: Careful selection of proper cable is essential to obtain the best performance from this equipment. Vicon assumes no responsibility for poor performance when cables other than those recommended, or equivalent, are installed. In all cases, coaxial cable impedance should be 75 ohms.
-
Page 85: Technical Information
(30 Kb) The second table shows the estimated number of days that the AurorAcorD can be expected to record before hard drives of various sizes are filled. “Max” frame rate changes from 18 fps to 24 fps, depending upon the synchronization of all cameras in the system. - Page 86 One selected video channel may be exported to the internal floppy disk drive in a hybrid AVI format with no audio. The floppy disks may be played back on AurorAcorD or on a PC Pentium grade computer Windows Media Player or the AurorAcorD Floppy Player.
- Page 87 84 dB, based on an audio dynamic range digital sampling rate of approximately 8000 14-bit samples. COMMUNICATIONS Protocol: RS-232, RS-422 and RS-485 (AurorANet). Ports: COM1 and/or COM2 configured via menus, jumpers and/or AurorANet termination box. 74 • Reference XX091-01-01 Rev 902 AurorAcorD...
- Page 88 Number of Hardwired Alarm Inputs: 16. Each of these can be set as an output. Hardwired Alarm Input Type: Alarm equipment connected to AurorAcord through the provided DB- 37 connector. Should provide voltage-free contact pairs or the equivalent as the output.
-
Page 89: Shipping Instructions
Shipping Instructions Use the following procedure when returning a unit to the factory: 1. Call or write Vicon for a Return Authorization (R.A.) at one of the locations listed below. Record the name of the Vicon employee who issued the R.A. - Page 90 Vicon Industries Inc. Offices Corporate Headquarters 89 Arkay Drive Hauppauge, New York 11788 631-952-CCTV (2288) 800-645-9116 Fax: 631-951-CCTV (2288) Infofax: 800-287-1207 Vicon Europe Headquarters Brunel Way Fareham, PO15 5TX United Kingdom +44 (0) 1489 566300 Fax: +44 (0) 1489 566322...
Need help?
Do you have a question about the AuroraCord and is the answer not in the manual?
Questions and answers