Table of Contents
Advertisement
Quick Links
Download this manual
See also:
User Manual
QUICK MANUAL
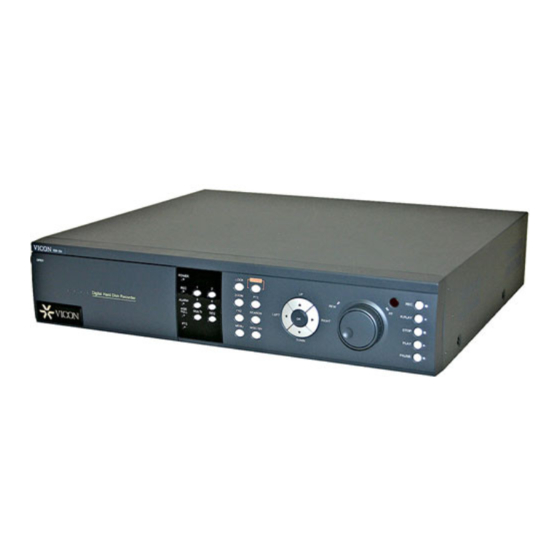
Digital Hard Disk Recorder
* Default system password: 111111
(for RAMS, Record stop, Menu setup, System off, Auto key lock)
* Default ID: admin (for RAMS)
VICON INDUSTRIES INC., 89 ARKAY DRIVE, HAUPPAUGE, NY 11788
TEL: 631-952-CCTV (2288) FAX: 631-951-CCTV (2288)
24-Hour Technical Support: 800-34-VICON (800-348-4266)
UK: 44 (0) 1489-566300 WEB: www.vicon-cctv.com
VDR-204
TOLL FREE: 800-645-9116
Advertisement
Table of Contents

Related Manuals for Vicon VDR-204


Summary of Contents for Vicon VDR-204
- Page 1 * Default system password: 111111 (for RAMS, Record stop, Menu setup, System off, Auto key lock) * Default ID: admin (for RAMS) VICON INDUSTRIES INC., 89 ARKAY DRIVE, HAUPPAUGE, NY 11788 TEL: 631-952-CCTV (2288) FAX: 631-951-CCTV (2288) TOLL FREE: 800-645-9116 24-Hour Technical Support: 800-34-VICON (800-348-4266) UK: 44 (0) 1489-566300 WEB: www.vicon-cctv.com...
- Page 3 To prevent fire or shock hazard, do not expose the unit to rain or moisture. WARNING The symbol is intended to alert the user to the presence of important operating and maintenance (servicing) instructions in the literature accompanying the unit. The symbol is intended to alert the user to the presence of uninsulated "dangerous voltage"...
-
Page 4: Safety Instructions
Safety Instructions 1) Read these instructions. 2) Keep these instructions. 3) Heed all warnings. 4) Follow all instructions. 5) Do not use this apparatus near water. 6) Clean only with dry cloth. 7) Do not block any ventilation openings. Install in accordance with the manufacturer’s instructions. 8) Do not install near any heat sources such as radiators, heat registers, stoves, or other apparatus (including amplifiers) that produce heat. -
Page 5: Packing List
1. Packing list The following items are included with the VDR-204. Please be certain that all items are included as soon as you open the box: 1.1 Components VDR-204 (Main Assembly) : Removable HDD Rack or CD-RW Driver Power cable... -
Page 6: Features And Specifications
2. Features & specifications 2.1 Features 4-channel Embedded Digital Video Recorder MPEG-2 compression Quadplex mode for simultaneous recording, playback, backup, and networking Live remote viewing, on-the-fly recording, and control over the network Dynamic IP support (DHCP & PPPoE) Alarm triggered FTP and E-mail alert function Motion detection, Video loss, and sensor alarm function User defined setting for recording frame rate &... -
Page 7: Specifications
2.2 Specifications Item Description Image System NTSC, PAL selectable Video Input 4CH Composite, 4CH Loop through, BNC Video Output 1CH Composite, BNC, 1CH S-Video Video Compression MPEG-2 NTSC: 720x480 (30fps) Quad PAL : 720x576 (25fps) Recording Resolution NTSC: 720x480 (30fps), 360x240 (120fps) PAL : 720x576 (25fps), 360x288 (100fps) Recording Quality 4 Levels (Normal, Enhanced, Fine, Super Fine) -
Page 8: Name, Function & Connections
3. Name, function & connections 3.1 Front view Description: 1. HDD Slot Users can install one removable hard disk 2. LED indicator POWER: Power Off status is indicated by a Red light and ON status is indicated by a Green light. - Page 9 ZOOM: Zoom In/Out on the images during Live Viewing. FRZ : Freeze. - Press button once to freeze the frame at live mode. Press again to return. - To take a still image capture at playback mode. - Exchange of video input type : Press power button with FRZ button from NTSC to Pal or PAL to NTSC.
-
Page 10: Rear Panel View
8. Recording/Playback buttons RECORD: Press once to begin recording all active channels. Press again to end recording. R-PLAY: Reverse Playback. Press to begin reverse playback. Under PTZ control menu, used to decrease the speed of Pan, Tilt, Zoom, Focus. STOP: Stop playback. - Page 11 OUT: Audio line output 6. VIDEO OUT Terminals for composite video and s-video to connect with monitor 7. CAMERA Video input (to connect with camera output) OUT: Video output (Loop-through output for video input) 8. FAN Heat protection fan to reduce heat in the unit 9.
-
Page 12: Remote Control Function
3.3 Remote control function MUTE POWER INFO LOCK NUMBER SEARCH MULTI MENU DIRECTION / OK REVERSE PLAY PAUSE STOP PLAY ZOOM 4 Division MUTE: Audio Mute HDD: HDD status information NET: Network connection status & user connection information INFO: Hardware & Software version... -
Page 13: Installation And Connection
4. INSTALLATION 4.1 Installation and connection AUX OUT Sensor 1 Camera 1 Network AUX IN RS-485 Sensor 2 Reciever Monitor Speak Camera 2 Alarm Sensor 3 Camera 3 Sensor 4 Camera 4 4.1.1 Camera The unit comes with 4 video IN and 4 video OUT for up to four camera connection. -
Page 14: Video Out
4.1.2 Video Out The unit has one composite video output and one S-video output. Use either output for display monitors. 4.1.3 Audio Use IN for a Line input and OUT for speaker output. 4.1.4 RS-232 Use this connector to connect RS-232 cable to the serial port on your PC to control the DVR or to perform Quick Installation. - Page 15 4.1.5.3 Alarm Out (NO, COM, NC) The Alarm output is activated using a relay contact point when an alarm event occurs for the duration of the alarm event. Select from Normal Open Relay or Normal Close Relay. N.O. (Normal Open) is disconnected from COM during normal status and connected to COM during alarm event.
-
Page 16: Basic Operation Procedures
5. Basic operation procedures 5.1 Power On/Off 5.1.1 Power on Using either the keypad or the remote control, press the “Power” button. (Note: In case of power outage or rare instance of system failure, the DVR will reboot automatically) The Power LED light will turn from red to green when it has turned on properly. In a standby mode, the LED is red. -
Page 17: Press The Play Button
You will hear audio when video files containing audio is selected for playback. 5.7 Search 5.7.1 Search mode The VDR-204 has 3 types of search modes: SEARCH BY TIME: Displays recorded data by recording time and camera number. STILL IMAGE SEARCH: Displays recorded still images. -
Page 18: Removable Hdd
5.8.1 Removable HDD If there are two hard disk drives equipped in the DVR, the removable HDD will be used as a backup drive. MANUAL BACKUP, AUTO BACKUP will be selectable for backup. MANUAL BACKUP: Execute backup during user’s preferable setting. AUTO BACKUP: Execute backup accordingly whenever new recording file was made. -
Page 19: Client Program
There are two types of upgrading S/W for DVR. One is to upgrade S/W over the RAMS and the other is to upgrade S/W through the USB memory (thumb drive). You can download the latest software from the following ftp server address. - ftp://ftp.udrdns.net/VICON/VDR-204/Software/... - Page 20 5.10.1 Over RAMS Click this icon to check program version or do S/W upgrade of DVR system. ① ② ③ ① Display the name & version of program ② Close the RAMS information window ③ Display S/W update window of DVR system S/W upgrade window is activated on pushing S/W upgrade button in the program version check screen ①...
- Page 21 => Display status of SW Upgrade 5.10.2 Through USB Memory (thumb drive) - Download the latest software from the ftp server and copy the files to the root directory for ● the USB memory. - Connect the USB memory to the USB port and select 'S/W Upgrade' on the 'System Setup'. - Select target files to upgrade.
-
Page 22: Menu Setup
Camera Channel Channel No CH-1~CH-4 Setup Camera Name CH-1~CH-4 Camera Hide PTZ Setup Model No NONE URX-500, PELCO-D, SENSORMATIC, VICON, SUNGJIN MRX-1000 SRX-100B PTZ ID Channel No Reverse Control Tilt Zoom Focus RS-485 Setting Baud Rate 9600 Picture Setting Default... - Page 23 Target Path FTP Length of Image 5 sec 5, 6, 7, 8, 9, 10 sec Trigger Sensor CH1~CH4 Setting Motion CH1~CH4 E-Mail Address Receiver Address Blank Setting Sender Address Blank E-Mail Setting Send (Period) Prohibition Setting YES / NO Start Hour End Hour SMTP Server IP Blank...
- Page 24 End Date (m/d) 01/01 Apply Hour Buzzer Sensor Motion Video Loss Language ENGLISH System Log HDD Setup Mounted HDD 1 or 2 Write Mode Overwrite Forced Deletion (days 1~100 ago) Internal HDD Capacity Used Cap. / Total Cap. Format Removable HDD Capacity Used Cap.
-
Page 25: Installing Hdd
6. Installing HDD 6.1 Installing single hard disk drive The following procedure is for installing either one internal HDD or one removable HDD. Please note that the Jumper setting must be set to MASTER. To Install a single HDD in the Removable Bay, please follow these steps Prepare one HDD. -
Page 26: Installing Two Hard Disk Drives
Slide-in the Removable Bay in to the DVR Lock the Removable Bay. 6.2 Installing two hard disk drives. The Jumper setting should be done as follows: - The Internal HDD: Master - The Removable Bay HDD: Slave Mount the HDD in the internal slot. - Page 27 Once the HDD has been firmly mounted in the DVR, connect the power cable and the data cable. To install the second HDD in the Removable Bay, set the Jumper setting on the removable HDD to Slave. Follow the procedure as listed in paragraph 7.1 6.3 Installing CD-RW drives.
- Page 28 The CD-RW drive installed in the DVR system...
-
Page 29: Terminal Information
7. Terminal Information 7.1 DSUB-9P (RS-232) Name Description Receive Data Transmit Data Signal Ground 7.2 DSUB-15P (PTZ / AUX / ALARM / SENSOR) Name Description Name Description RS-485+ RS-485 Transmit Data + Alarm Out Alarm Out (NO) RS-485- RS-485 Transmit Data - Alarm Out Alarm Out (COM) AUX1... - Page 30 Vicon Industries Inc. Corporate Headquarters 89 Arkay Drive Hauppauge, New York 11788 631-952-CCTV (2288) 800-645-9116 Fax: 631-951-CCTV (2288) Vicon Europe Headquarters Brunel Way Fareham, PO15 5TX United Kingdom +44 (0) 1489 566300 Fax: +44 (0) 1489 566322 Brussels Office Planet II - Unit E...
Need help?
Do you have a question about the VDR-204 and is the answer not in the manual?
Questions and answers