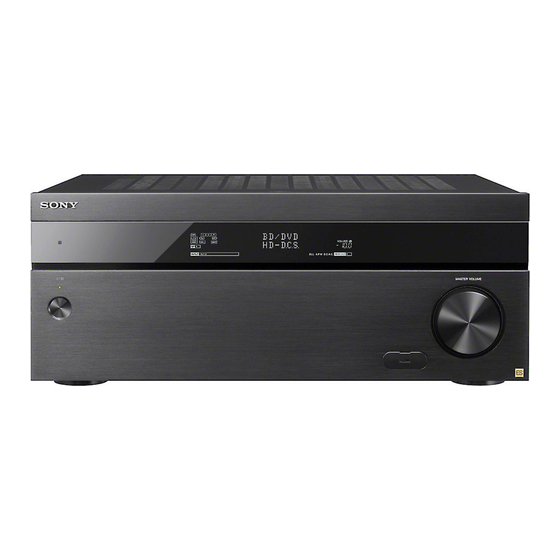
Sony STR-ZA3000ES User Manual
Multi channel av receiver
Hide thumbs
Also See for STR-ZA3000ES:
- Installation manual (61 pages) ,
- Startup manual (51 pages) ,
- Service manual (126 pages)
Table of Contents
Advertisement
Quick Links
MULTI CHANNEL AV RECEIVER
STR-ZA3000ES/STR-ZA2000ES/STR-
ZA1000ES
Preparation
Before using
Procedure to start using the receiver [1]
Supplied accessories [2]
Notes on installing the receiver [3]
Function for conversion of video signals [4]
Digital audio formats supported by the receiver [5]
Notes on connecting cables [6]
Using HDMI connections [7]
Installing and connecting speakers
Installing speakers [8]
Connecting speakers (for STR-ZA3000ES) [9]
Connecting speakers (for STR-ZA2000ES/STR-ZA1000ES) [10]
Connecting the speakers in zone 2 [11]
Connecting audio-visual devices and the antennas (aerials)
Connecting a TV (for STR-ZA3000ES) [12]
Connecting a TV (for STR-ZA2000ES/STR-ZA1000ES) [13]
Connecting devices with HDMI jacks (for STR-ZA3000ES) [14]
Connecting devices with HDMI jacks (for STR-ZA2000ES/STR-ZA1000ES) [15]
Connecting devices with jacks other than HDMI jacks [16]
Connecting the antennas (aerials) [17]
Connecting another amplifier in zone 2/3 [18]
Advertisement
Table of Contents

Related Manuals for Sony STR-ZA3000ES


Summary of Contents for Sony STR-ZA3000ES
- Page 1 Connecting audio-visual devices and the antennas (aerials) Connecting a TV (for STR-ZA3000ES) [12] Connecting a TV (for STR-ZA2000ES/STR-ZA1000ES) [13] Connecting devices with HDMI jacks (for STR-ZA3000ES) [14] Connecting devices with HDMI jacks (for STR-ZA2000ES/STR-ZA1000ES) [15] Connecting devices with jacks other than HDMI jacks [16]...
-
Page 2: Enjoying Video And Sound
Connecting to the network System requirements for a wired LAN connection [19] Connecting the receiver to the network (for STR-ZA3000ES) [20] Connecting the receiver to the network (for STR-ZA2000ES/STR-ZA1000ES) [21] Turning on the receiver/preparing the remote control Inserting batteries into the remote control [22]... -
Page 3: Configuring Video And Sound Settings
Enjoying high-fidelity sound (Pure Direct) [36] Using the Multi-Zone Features Enjoying sound in two rooms (multi-zone feature using the receiver with 2 pairs of speakers) Connecting the speakers in zone 2 [37] Setting the speakers for zone 2 [38] Enjoying sound in zone 2/3 [39] Enjoying sound in two rooms (multi-zone feature using the receiver and another amplifier) Connecting another amplifier in zone 2/3 [40]... -
Page 4: Adjusting Settings
About Custom Preset [52] Recalling the settings saved to the scene [53] Saving the settings to a preset [54] Items for which you can save settings and the default values for each item [55] Configuring speaker settings Adjusting the sound balance automatically (Auto Calibration) [56] Using bi-amplifier connections [57] Using the sleep timer Using the sleep timer (Sleep) [58]... - Page 5 Setting the crossover frequency of the speakers (Crossover Frequency) [71] Adjusting the equalizer (Equalizer) [72] Lifting up the sound of the center speaker (Center Speaker Lift Up) [73] Setting the height from the floor to the ceiling speakers (Ceiling Speaker Height) [74] Selecting the unit of measurement (Distance Unit) [75] Network Setup Setting up a network (Internet Setup) [76]...
-
Page 6: Zone Setup
Setting the tuner (Tuner Setup) [113] Install Setup Turning on control mode for maintenance (External Control) [114] Switching on/off the 12V trigger output (Trigger 1/2/3) (STR-ZA3000ES) [115] Switching on/off the 12V trigger output (Trigger) (STR-ZA2000ES/STR-ZA1000ES) [116] Displaying a test screen (Test Picture) [117]... -
Page 7: Using The Menu On The Display Panel
Reverting to the factory default settings Reverting to the factory default settings [122] Parts and Controls Receiver Front panel [123] Rear panel (STR-ZA3000ES) [124] Rear panel (STR-ZA2000ES/STR-ZA1000ES) [125] Indicators on the display panel [126] Remote control Remote control [127] Announcements... -
Page 8: Troubleshooting
Troubleshooting Error messages PROTECTOR [132] UPDATE FAILED [133] FAN STOPPED (for STR-ZA3000ES) [134] List of messages after Auto Calibration measurements [135] Network features message list [136] Power The receiver is turned off automatically. [137] The receiver does not turn on after performing USB Update. [138] Image No image appears on the TV. -
Page 9: Procedure To Start Using The Receiver
screen. [153] No sound is output from the TV when the receiver is in standby mode. [154] Tuner The FM reception is poor. [155] The FM stereo reception is poor. [156] You cannot tune to radio stations. [157] USB devices A USB device is not recognized. - Page 10 Connecting devices with HDMI jacks (for STR-ZA2000ES/STR-ZA1000ES) 5. Connecting devices with jacks other than HDMI jacks 6. Connecting the receiver to the network (for STR-ZA3000ES) Connecting the receiver to the network (for STR-ZA2000ES/STR-ZA1000ES) 7. Attaching the front cover onto the front panel 8.
-
Page 11: Function For Conversion Of Video Signals
Optimizer microphone (1) Front cover (1) [3] Preparation Before using Notes on installing the receiver Do not install the appliance in a confined space, such as a bookcase. Sufficient space around the receiver is needed to release heat. When placing the receiver in a rack, leave more than 44.45 mm (1.75 in) space above the receiver, and more than 44.45 mm (1.75 in) space along the sides of the receiver. -
Page 12: Digital Audio Formats Supported By The Receiver
VIDEO IN: HDMI OUT (*1), MONITOR VIDEO OUT (*2), ZONE2 VIDEO OUT (*2) Video signals are upconverted and upscaled (up to 4K) when outputting to HDMI OUT A jack. Video signals are upconverted but video resolution is the same as the input video source when outputting to HDMI OUT B jack. -
Page 13: Notes On Connecting Cables
Maximum number of channels: 7.1 Connection with the receiver: HDMI Dolby TrueHD [DOLBY TrueHD] (*) Maximum number of channels: 7.1 Connection with the receiver: HDMI DTS [DTS] Maximum number of channels: 5.1 Connection with the receiver: COAXIAL/OPTICAL, HDMI DTS-ES Discrete [DTS-ES Dscrt] Maximum number of channels: 6.1 Connection with the receiver: COAXIAL/OPTICAL, HDMI DTS-ES Matrix [DTS-ES Mtrx]... -
Page 14: Using Hdmi Connections
Digital audio signals transmitted by HDMI can be output from the speakers and the PRE OUT jacks on this receiver (the PRE OUT jacks are only for STR-ZA3000ES). This signal supports Dolby Digital, DTS, DSD, and Linear PCM. For details, see “Digital audio formats supported by the receiver.”... -
Page 15: Installing Speakers
from the HDMI OUT B jack when [HDMI Out B Mode] is set to [Zone2]. This receiver supports High Bitrate Audio (DTS-HD Master Audio, Dolby TrueHD), Deep Color, “x.v.Color,” and 4K or 3D transmission. To enjoy 3D images, connect a 3D-compatible TV and video device (Blu-ray Disc Player, Blu-ray Disc recorder, PlayStation 3, etc.) to the receiver using High Speed HDMI cables, put on 3D glasses, and then play 3D-compatible content. - Page 16 [9] Preparation Installing and connecting speakers Connecting speakers (for STR-ZA3000ES) Connect each speaker as illustrated below. Be sure to disconnect the AC power cord (mains lead) before connecting cables. For details on how to connect speaker cables to the receiver, see “How to connect speaker cables.”...
-
Page 17: Connecting Speakers
1. Select [Speaker Pattern] in the Speaker Setup menu, then select a speaker pattern that does not have surround back and front high speakers. 2. Set [SB Speaker Assign] in the Speaker Setup menu to [Front B]. You can select the front speaker system you want by using the SPEAKERS button on the receiver. - Page 18 Monaural audio cable (not supplied) Speaker cable (not supplied) If you connect a subwoofer with an auto standby function, turn off this function when watching movies. If the auto standby function is turned on, it switches to standby mode automatically based on the level of the input signal to the subwoofer, and the sound may not be output.
- Page 19 [12] Preparation Connecting audio-visual devices and the antennas (aerials) Connecting a TV (for STR-ZA3000ES) Connect a TV to the HDMI OUT or MONITOR VIDEO OUT jack. You can operate this receiver using a GUI (Graphical User Interface). GUI is used only for HDMI OUT A jack.
- Page 20 To use the ARC function, set [HDMI Out B Mode] to [Main] and [Control for HDMI] to [On]. HDMI cable (not supplied) Sony recommends that you use an HDMI-authorized cable or HDMI cable made by Sony. Connecting a TV and a projector HDMI cable (not supplied) Sony recommends that you use an HDMI-authorized cable or HDMI cable made by Sony.
- Page 21 Optical digital cable (not supplied) HDMI cable (not supplied) Sony recommends that you use an HDMI-authorized cable or HDMI cable made by Sony. Connecting a TV without HDMI jacks The solid lines show recommended connections and the dashed lines show alternative...
- Page 22 Video cable (not supplied) Component video cable (not supplied) Optical digital cable (not supplied) Audio cable (not supplied) Note Connect a TV monitor or a projector to the HDMI OUT or MONITOR VIDEO OUT jack on the receiver. Depending on the status of the connection between the TV and the antenna (aerial), the image on the TV screen may be distorted.
- Page 23 To use the ARC function, set [HDMI Out B Mode] to [Main] and [Control for HDMI] to [On]. HDMI cable (not supplied) Sony recommends that you use an HDMI-authorized cable or HDMI cable made by Sony. Connecting a TV and a projector...
- Page 24 HDMI cable (not supplied) Sony recommends that you use an HDMI-authorized cable or HDMI cable made by Sony. Note For this connection, set [HDMI Out B Mode] in the HDMI Setup menu to [Main]. Connecting a TV incompatible with the Audio Return Channel (ARC)
- Page 25 Video cable (not supplied) Component video cable (not supplied) Optical digital cable (not supplied) Audio cable (not supplied) Note Connect a TV monitor or a projector to the HDMI OUT or MONITOR VIDEO OUT jack on the receiver. Depending on the status of the connection between the TV and the antenna (aerial), the image on the TV screen may be distorted.
-
Page 26: Connecting Devices With Hdmi Jacks
TV or a player. Refer to the operating instructions of the connected device for details. HDMI cable (not supplied) Sony recommends that you use an HDMI-authorized cable or HDMI cable made by Sony. Super Audio CD player, CD player DVD recorder... - Page 27 Set-top box Note This HDMI connection is an example. You can connect each HDMI device to any HDMI input, including the HDMI input on the front panel. Hint The image quality depends on the connecting jack. We recommend that you connect your devices via an HDMI connection if they have HDMI jacks.
-
Page 28: Connecting Devices With Jacks Other Than Hdmi Jacks
HDMI cable (not supplied) Sony recommends that you use an HDMI-authorized cable or HDMI cable made by Sony. Super Audio CD player, CD player DVD recorder Blu-ray Disc Player, DVD player 4K Media Player Set-top box Note This HDMI connection is an example. You can connect each HDMI device to any HDMI input, including the HDMI input on the front panel (for STR-ZA2000ES only). - Page 29 Connect devices to the receiver as illustrated below. The solid lines show recommended connections and the dashed lines show alternative connections. Be sure to disconnect the AC power cord (mains lead) before connecting cables. Audio cable (not supplied) Video cable (not supplied) Component video cable (not supplied) Optical digital cable (not supplied) Coaxial digital cable (not supplied)
-
Page 30: Connecting The Antennas (Aerials)
Hint The image quality depends on the connecting jack. We recommend that you connect your devices via an HDMI connection if they have HDMI jacks. [17] Preparation Connecting audio-visual devices and the antennas (aerials) Connecting the antennas (aerials) Connect the supplied antennas (aerials) to the receiver as illustrated below. Be sure to disconnect the AC power cord (mains lead) before connecting the antennas (aerials). - Page 31 OUT jack TV monitor Speakers Other amplifier/receiver Video cable (not supplied) Audio cable (not supplied) Note Stream input signals cannot be output even when outputting optical/coaxial audio signals. When outputting optical/coaxial audio signals, set the audio output to PCM on the connected device.
-
Page 32: System Requirements For A Wired Lan Connection
Note The following settings are required for this connection. Set [HDMI Out B Mode] in the HDMI Setup menu to [Zone2] Set [Zone2 Audio Out] in the HDMI Setup menu to [Zone2 AMP] When outputting optical/coaxial audio signals, set the audio output to PCM on the connected device. - Page 33 Some flat-type LAN cables are easily affected by noise. A CAT5e or greater Ethernet cable is required for transmission speed of 1,000 Mbps. (CAT6 is recommended.) (for STR-ZA3000ES) [20] Preparation Connecting to the network Connecting the receiver to the network (for STR-...
-
Page 34: Inserting Batteries Into The Remote Control
Connect a router to one among ports 1 to 8 of the receiver using only one LAN cable. Do not connect the same router to the receiver using more than one LAN cable. It may cause a malfunction. Ports No. 1 and No. 2 support PoE (Power over Ethernet, Alternative A). If you connect a PoE-compatible device to one of these ports, power will be supplied to the device from the receiver. -
Page 35: Turning On The Receiver
Insert two R03 (size AAA) batteries (supplied) into the remote control. Make sure that the + and - ends are in the correct position when installing batteries. Note Do not leave the remote control in an extremely hot or humid place. Do not use a new battery with an old one. -
Page 36: Setting Up The Receiver Using The Easy Setup
Space remains between the plug and the rear panel even when the power cord (mains lead) is inserted firmly. The cord is supposed to be connected this way. This is not malfunction. 2. Press (on/standby) to turn on the receiver. You can also turn on the receiver using MAIN (on/standby) on the remote control. -
Page 37: Using The Menu On The Tv Screen
manually, you can display it by selecting [Setup] - [Easy Setup] from the home menu. [25] Enjoying Video and Sound Basic operations Using the menu on the TV screen You can display the menu of the receiver on the TV screen. 1. - Page 38 1. Switch the input of the TV to the input to which the receiver is connected. 2. Press HOME. The home menu is displayed on the TV screen. Depending on the TV, the home menu may take some time to appear on the TV screen.
-
Page 39: Listening To Fm/Am Radio
To make fine adjustments Turn the knob slowly. Press one of the buttons and release it immediately. [27] Enjoying Video and Sound Listening to the radio Listening to FM/AM radio You can listen to FM and AM broadcasts through the built-in tuner. Before operation, be sure you have connected the FM and AM antennas (aerials) to the receiver. -
Page 40: Presetting Fm/Am Radio Stations (Preset Memory)
1. Band indication You can select [FM] or [AM] by pressing repeatedly. 2. Frequency indication You can tune to a station automatically by pressing repeatedly (Auto Tuning). Press to scan from lower to higher frequency stations or press to scan from higher to lower stations. -
Page 41: Tuning To A Station Directly (Direct Tuning)
FM band: FM 1 to FM 30 [29] Enjoying Video and Sound Listening to the radio Tuning to a station directly (Direct Tuning) You can enter the frequency of a station directly. 1. Select [Listen] - [FM TUNER] or [AM TUNER] from the home menu. If the Simple mode screen appears, switch to the Full mode screen. -
Page 42: Changing The Am Tuning Scale
[30] Enjoying Video and Sound Listening to the radio Changing the AM tuning scale You can change the AM tuning scale to either 9 kHz or 10 kHz using the buttons on the receiver. Be sure to use the buttons on the receiver to perform this operation. 1. -
Page 43: Resetting Sound Fields To The Default Settings
The sound fields for movie may not work, depending on the input or the speaker pattern you select, or with audio formats. The receiver may play signals at a lower sampling frequency than the actual sampling frequency of the input signals, depending on the audio format. [Pro Logic IIx] may not appear, depending on the speaker pattern you select. - Page 44 Level (dB) Frequency (Hz) Bass Treble 1. Select [Setup] - [Speaker Setup] from the home menu. 2. Select [Equalizer]. 3. Select [Front Speaker], [Center Speaker], [Surround] or [Front High]. 4. Select [Bass] or [Treble]. 5. Adjust the gain. Note This function does not work in the following cases: [2ch Analog Direct] is selected.
- Page 45 processed highly. Note This function does not work in the following cases: [2ch Analog Direct] is selected. [Pure Direct] is set to [On]. The receiver may play signals at a lower sampling frequency than the actual sampling frequency of the input signals, depending on the audio format. Hint You can also select [Sound Optimizer] in [Sound Effects] from the home menu.
-
Page 46: Enjoying High-Fidelity Sound (Pure Direct)
You can also switch this function on/off for each input on the Input Setup screen. You can also select [In-Ceiling Speaker Mode] in [Sound Effects] from the home menu. You can also switch the function on/off by pressing IN-CEILING SP on the remote control or the receiver. - Page 47 using the receiver with 2 pairs of speakers) Connecting the speakers in zone 2 You can enjoy sound from a device connected to the receiver in a zone other than the main zone. For example, you can watch a DVD in the main zone and listen to a CD in zone 2. Connect each speaker as illustrated below.
- Page 48 using the receiver with 2 pairs of speakers) Setting the speakers for zone 2 When the speakers in zone 2 are connected to the SPEAKERS SURROUND BACK/FRONT HIGH/FRONT B/BI-AMP/ZONE 2 terminals of the receiver, configure the settings so that the sound selected in zone 2 is output from the speakers connected to the SPEAKERS SURROUND BACK/FRONT HIGH/FRONT B/BI-AMP/ZONE 2 terminals.
- Page 49 the receiver in zone 2 or zone 3. If you set [Zone2 Line Out] or [Zone3 Line Out] to [Variable], you can also adjust the volume in zone 2 or zone 3 using MASTER VOLUME on the receiver while [ZONE2 INPUT - xxx (input name)] is shown on the display panel.
- Page 50 For a connection using the HDMI OUT B jack only Connecting another amplifier using the ZONE 2 VIDEO/AUDIO OUT jack TV monitor Speakers Other amplifier/receiver Video cable (not supplied) Audio cable (not supplied) Note Stream input signals cannot be output even when outputting optical/coaxial audio signals. When outputting optical/coaxial audio signals, set the audio output to PCM on the connected device.
- Page 51 Other amplifier/receiver HDMI cable (not supplied) Note The following settings are required for this connection. Set [HDMI Out B Mode] in the HDMI Setup menu to [Zone2] Set [Zone2 Audio Out] in the HDMI Setup menu to [Zone2 AMP] When outputting optical/coaxial audio signals, set the audio output to PCM on the connected device.
- Page 52 2. Select [Zone2 Line Out] or [Zone3 Line Out]. 3. Select the setting you want. Variable: Select when you cannot adjust the volume level on the amplifier in zone 2 or zone 3. The volume level of the receiver output in zone 2 or zone 3 will become adjustable. Fixed: Select to adjust the volume on the amplifier in zone 2 or zone 3.
- Page 53 OUT jacks. Note You can only configure this setting only when [HDMI Out B Mode] is set to [Zone2]. When a video device (projector, etc.) is connected to the ZONE 2 HDMI OUT jack, sound may not be output from the receiver. In this case, set [Zone2 Audio Out] to [AMP]. When a TV which does not support audio content protection is connected to the HDMI OUT B jack, specific audio may not be output from the receiver.
- Page 54 Note This function is enabled only when [HDMI Out B Mode] is set to [Zone2]. [44] Using the Multi-Zone Features Enjoying sound in two rooms (multi-zone feature using the receiver and another amplifier) Enjoying sound in zone 2/3 You can enjoy sound from the receiver in zone 2 or zone 3 by the following procedure. 1.
-
Page 55: What Is "Bravia" Sync
Interlocking with BRAVIA TV and other devices (“BRAVIA” Sync) What is “BRAVIA” Sync? The “BRAVIA” Sync function allows communication between products made by Sony such as TVs, Blu-ray Disc Players, DVD players, and AV amplifiers that support the Control for HDMI function. - Page 56 Operating the receiver menu using the TV remote control (Remote Easy Control) Note The “One-Touch Play,” “System Audio Control,” and “System Power-Off” functions can be used with devices not made by Sony. However, compatibility with all devices not made by Sony is not guaranteed.
-
Page 57: Enjoying Sound Of Tv Broadcasts From The Receiver
The “Scene Select” and “Home Theatre Control” functions are Sony's proprietary functions. These cannot operate with devices not made by Sony. Devices incompatible with “BRAVIA” Sync cannot activate these features. The Control for HDMI function does not work on devices connected to the HDMI OUT B jack of the receiver. -
Page 58: Switching Between Digital And Analog Audio (Input Mode)
1. Turn on the receiver and the two monitors. 2. Press HDMI OUTPUT. Each time you press the button, the output will be switched as follows: HDMI A - HDMI B (*) - HDMI A+B (*) - HDMI OFF Unavailable when [HDMI Out B Mode] is set to [Zone2]. Note [HDMI A+B] may not work if the compatible video formats of the monitors connected to the HDMI OUT A jack and the HDMI OUT B jack of the receiver are different. -
Page 59: Using Other Video/Audio Input Jacks (Input Assign)
4. Press repeatedly to select [IN 1] under [COMPONENT] and repeatedly to select [IN 2]. Assignable HDMI input jacks (for STR-ZA3000ES/STR-ZA2000ES) IN 1: BD/DVD (*), SAT/CATV, GAME, STB, VIDEO, AUX, TV, SA-CD/CD IN 2: BD/DVD, SAT/CATV (*), GAME, STB, VIDEO, AUX, TV, SA-CD/CD... - Page 60 BD/DVD, SAT/CATV, GAME (*), STB, VIDEO, AUX, TV, SA-CD/CD None: BD/DVD, SAT/CATV, GAME, STB, VIDEO, AUX (*), TV (*), SA-CD/CD Assignable HDMI input jacks (for STR-ZA1000ES) IN 1: BD/DVD (*), SAT/CATV, GAME, STB, VIDEO, AUX, TV, SA-CD/CD IN 2: BD/DVD, SAT/CATV (*), GAME, STB, VIDEO, AUX, TV, SA-CD/CD IN 3: BD/DVD, SAT/CATV, GAME (*), STB, VIDEO, AUX, TV, SA-CD/CD IN 4:...
-
Page 61: About Custom Preset
Note When you assign the digital audio input, the Input Mode setting may change automatically. One reassignment is allowed for each input. If no sound is output from the assigned jacks, also check the Input Mode settings. [52] Using Other Features Saving and recalling various settings for the receiver (Custom Preset) About Custom Preset... -
Page 62: Saving The Settings To A Preset
[54] Using Other Features Saving and recalling various settings for the receiver (Custom Preset) Saving the settings to a preset 1. Select [Custom Preset] from the home menu. 2. Press OPTIONS with a preset for which you want to edit settings among from [1: Movie], [2: Music], [3: Party] or [4: Night] selected. - Page 63 Tuner Preset: No Change Volume: No Change HDMI OUT: No Change Party Mode: No Change Sleep: No Change Sound Field: HD-D.C.S. Sound Optimizer: No Change In-Ceiling Speaker Mode: No Change Pure Direct: No Change Calibration Type: No Change Front Bass: No Change Front Treble: No Change Center Bass: No Change Center Treble: No Change...
- Page 64 Tuner Preset: No Change Volume: -23.0 dB HDMI OUT: No Change Party Mode: On Sleep: Off Sound Field: Multi Stereo Sound Optimizer: Off In-Ceiling Speaker Mode: No Change Pure Direct: No Change Calibration Type: No Change Front Bass: No Change Front Treble: No Change Center Bass: No Change Center Treble: No Change...
-
Page 65: Using Bi-Amplifier Connections
Adjusting the sound balance automatically (Auto Calibration) This receiver is equipped with a D.C.A.C. (Digital Cinema Auto Calibration) function which allows you to perform automatic calibration. For details on performing this function, see the following topics: Before you perform Auto Calibration Connecting the optimizer microphone Selecting the front speakers Performing automatic calibration (Auto Calibration) -
Page 66: Using The Sleep Timer (Sleep)
After you have made the bi-amplifier connection, set [SB Speaker Assign] in the Speaker Setup menu to [Bi-Amp]. Note You can only set [SB Speaker Assign] if the speaker pattern is set to a setting that does not have surround back and front high speakers. [58] Using Other Features Using the sleep timer Using the sleep timer (Sleep) -
Page 67: Changing The Assignment And Display For The Input Jacks
[OPTICAL / COAXIAL], [COMPONENT], [VIDEO IN], [AUDIO IN], [Input Mode], [Preset Sound Field], [In-Ceiling Speaker Mode], [A/V Sync], [Subwoofer Low Pass Filter], [Subwoofer Level], [Trigger 1] (for STR-ZA3000ES), [Trigger 2] (for STR-ZA3000ES), [Trigger 3] (for STR-ZA3000ES) and [Trigger] (for STR-ZA2000ES/STR-ZA1000ES) for the desired input. - Page 68 Icon You can set the icon displayed on the Watch/Listen menu. Name You can change the name displayed on the Watch/Listen menu. For details on how to set the name for each input, see “Changing the name for each input (Name).” Watch/Listen You can set whether an input is displayed on the Watch menu or the Listen menu.
-
Page 69: Changing The Name For Each Input (Name)
HDMI connection. You can set the level for each input to which an HDMI input jack is assigned independently. Trigger 1 to 3 (for STR-ZA3000ES) Trigger (for STR-ZA2000ES/STR-ZA1000ES) You can select input options for use of the 12V Trigger function. - Page 70 3. Select [Name]. An on-screen keyboard appears on the TV screen. 4. Press to select characters one by one to enter the name. 5. Select [Enter]. The name you entered is registered. [62] Adjusting Settings Speaker Setup Performing automatic calibration (Auto Calibration) You can perform automatic calibration from where you are sitting.
-
Page 71: Automatic Phase Matching
If an error code or warning message appears on the screen in step 3, see “List of messages after Auto Calibration measurements.” Hint You can also perform automatic calibration by pressing the AUTO CAL button on the remote control. If you use the AUTO CAL button, the following restrictions apply to the operation: Prior settings relating to the Auto Calibration will be skipped. -
Page 72: Selecting The Auto Calibration Type (Calibration Type)
3. Select the setting you want. Full Flat: Makes the measurement of frequency from each speaker flat. Engineer: Sets to “the Sony listening room standard” frequency characteristics. Front Reference : Adjusts the characteristics of all of the speakers to match the characteristics of the front speaker. - Page 73 3. Select the speaker pattern you want. [66] Adjusting Settings Speaker Setup Setting the assignment for the speaker terminals (SB Speaker Assign) You can set the assignment for the SPEAKERS SURROUND BACK/FRONT HIGH/FRONT B/BI-AMP/ZONE 2 terminals. 1. Select [Setup] - [Speaker Setup] from the home menu. 2.
- Page 74 You can adjust the size of each speaker (front left/right, front high left/right, center, surround left/right, surround back left/right). 1. Select [Setup] - [Speaker Setup] from the home menu. 2. Select [Size]. 3. Select the speaker on the screen for which you want to adjust the size. 4.
-
Page 75: Outputting A Test Tone From Each Speaker (Test Tone)
[69] Adjusting Settings Speaker Setup Adjusting the speaker level (Level) You can adjust the level of each speaker (front left/right, front high left/right, center, surround left/right, surround back left/right and subwoofer). 1. Select [Setup] - [Speaker Setup] from the home menu. 2. -
Page 76: Setting The Crossover Frequency Of The Speakers (Crossover Frequency)
case, you can only use the display panel for the operation. To adjust the level of all speakers at the same time, press +/–. You can also use MASTER VOLUME on the receiver. The adjusted value is shown on the TV screen during adjustment. [71] Adjusting Settings Speaker Setup Setting the crossover frequency of the speakers... - Page 77 Level (dB) Frequency (Hz) Bass Treble 1. Select [Setup] - [Speaker Setup] from the home menu. 2. Select [Equalizer]. 3. Select [Front Speaker], [Center Speaker], [Surround] or [Front High]. 4. Select [Bass] or [Treble]. 5. Adjust the gain. Note This function does not work in the following cases: [2ch Analog Direct] is selected.
-
Page 78: Selecting The Unit Of Measurement (Distance Unit)
Hint This function does not work in the following cases: There is no center speaker. There are no front high speakers. The [2ch Stereo], [2ch Analog Direct], and [Multi Stereo] sound fields are being used. [74] Adjusting Settings Speaker Setup Setting the height from the floor to the ceiling speakers (Ceiling Speaker Height) Set the height from the floor to the ceiling speakers. -
Page 79: Checking The Network Information (Information)
feet: The distance is displayed in feet. [76] Adjusting Settings Network Setup Setting up a network (Internet Setup) You can set up a wired LAN connection by the following procedure. 1. Select [Setup] - [Network Setup] from the home menu. 2. - Page 80 [78] Adjusting Settings Network Setup Enabling the network function even when this receiver is in standby mode (Network Standby) 1. Select [Setup] - [Network Setup] from the home menu. 2. Select [Network Standby]. 3. Set to [On] or [Off]. On : The network function works even when the receiver is in standby mode, and the receiver resumes operation when controlled over the network.
- Page 81 Preset Volume: Select the default volume for Music Connect input. Output Zone: Select the output zone of the Hi-Fi System device. Note For details on how to configure settings for this function, consult your nearest Sony dealer. [80] Adjusting Settings...
- Page 82 [81] Adjusting Settings Audio Setup Enjoying clear and dynamic sound at a low volume (Sound Optimizer) You can enjoy clear and dynamic sound at low volume levels using the Sound Optimizer. After the Auto Calibration is performed, the sound level is optimized to suit your environment. 1.
-
Page 83: Selecting The Hd-D.c.s. Effect Type (Hd-D.c.s. Type)
For details on each sound field, see the following topics. 2-channel sound mode Auto Format Direct (A.F.D.) Movie mode Multi Stereo Note The sound fields for movie may not work, depending on the input or the speaker pattern you select, or with audio formats. The receiver may play signals at a lower sampling frequency than the actual sampling frequency of the input signals, depending on the audio format. - Page 84 This function works only when the sound field is set to [HD-D.C.S.]. [84] Adjusting Settings Audio Setup Enjoying more natural sound with speakers installed in the ceiling (In-Ceiling Speaker Mode) Set whether or not to use in-ceiling speaker mode with the current input. In a setup where the front and center speakers are installed in the ceiling, lowering the audio output position to the screen height allows you to enjoy a more natural experience.
-
Page 85: Subwoofer Low Pass Filter
You can enjoy higher-fidelity sound from all inputs using the Pure Direct function. When the Pure Direct function is on, the display panel lights off to suppress noise that affects sound quality. 1. Select [Setup] - [Audio Setup] from the home menu. 2. -
Page 86: Synchronizing Audio With Video Output (A/V Sync)
On: Always activates the low-pass filter with a cutoff frequency of 120 Hz. Off: Does not activate the low-pass filter. Note This function does not work when [2ch Analog Direct] is being used. [87] Adjusting Settings Audio Setup Synchronizing audio with video output (A/V Sync) You can delay the output of audio to minimize the time gap between audio output and a visual display. -
Page 87: Compressing The Dynamic Range (Dynamic Range Compressor)
1. Select [Setup] - [Audio Setup] from the home menu. 2. Select [Dual Mono]. 3. Select the setting you want. Main: Sound in the main language will be output. Sub: Sound in the sub language will be output. Main/Sub: Sound in the main language will be output through the front left speaker and sound in the sub language will be output through the front right speaker simultaneously. -
Page 88: Controlling Hdmi Devices (Control For Hdmi)
You can up-convert video signals to 4K and output them through the HDMI OUT A jack of the receiver. 1. Select [Setup] - [HDMI Setup] from the home menu. 2. Select [4K Scaling]. 3. Select the setting you want. Auto: Enables video scaling control of 4K HDMI output automatically if you connect a 4K-compatible TV. -
Page 89: Passing Hdmi Signals Through (Pass Through)
Auto: The receiver outputs HDMI signals to the TV from the HDMI OUT jack when the TV is turned on while the receiver is in the standby mode. Sony recommends this setting if you are using a “BRAVIA” Sync-compatible Sony TV. This setting saves power in the standby mode compared to the [On] setting. - Page 90 You can set the HDMI audio signal output of playback devices connected to the receiver via an HDMI connection. 1. Select [Setup] - [HDMI Setup] from the home menu. 2. Select [Audio Out]. 3. Select the setting you want. AMP: HDMI audio signals from playback devices are only output to the speakers connected to the receiver.
-
Page 91: Setting The Level Of The Subwoofer (Subwoofer Level)
Recommended setting when a TV is connected directly to HDMI OUT B jack. Sound is output from the TV speakers and the speakers connected to the receiver. Zone2 AMP: Recommended setting when another amplifier is connected to HDMI OUT B jack. Sound is output from the another receiver connected to HDMI OUT B jack. - Page 92 2. Select [Subwoofer Level]. 3. Select the setting you want. Auto: Automatically sets the level to 0 dB or +10 dB, depending on the audio stream. +10 dB 0 dB [96] Adjusting Settings HDMI Setup Selecting the method to use the HDMI OUT B jack (HDMI Out B Mode) The HDMI OUT B jack can be used for zone 2.
-
Page 93: Speeding Up The Display When Switching The Hdmi Input (Fast View)
Lets you set the priority when you select the same input for both the main zone and zone 2. 1. Select [Setup] - [HDMI Setup] from the home menu. 2. Set [Priority]. Main & Zone2: You can enjoy the same input in the main zone and zone 2. However, there may be some interference in the audio and video signals in the main zone and zone 2. - Page 94 [99] Adjusting Settings Zone Setup Presetting the volume in the main zone (Main Preset Volume) Set the volume to be used when the receiver is turned on. 1. Select [Setup] - [Zone Setup] from the home menu. 2. Select [Main Preset Volume]. 3.
- Page 95 You can select the source signals for zone 2 or zone 3 using the following procedure. 1. Press ZONE2 or ZONE3 on the remote control or on the receiver. 2. Press the input button of the source signals you want to output. The power turns on in zone 2 or zone 3, then the input switches to the selected input.
- Page 96 [103] Adjusting Settings Zone Setup Presetting the volume in zone 2/3 (Zone2/3 Preset Volume) Set the volume in zone 2 or zone 3 when turning on the receiver. 1. Select [Setup] - [Zone Setup] from the home menu. 2. Select [Zone2 Preset Volume] or [Zone3 Preset Volume]. 3.
-
Page 97: Selecting The Language (Language)
Selecting the language (Language) You can select the language of messages on the screen. 1. Select [Setup] - [System Setup] from the home menu. 2. Select [Language]. 3. Select the language you want. [106] Adjusting Settings System Setup Tuning on/off the display for the volume level or sound field (Auto Display) This function allows you to turn the information display which appears on the TV screen on or off when the volume level or sound field, etc. - Page 98 2. Select [Auto Standby]. 3. Select the setting you want. On: The receiver switches to standby mode after approximately 20 minutes. Note This function does not work in the following cases: [FM TUNER] or [AM TUNER] is selected as the input. The software of the receiver is being updated.
-
Page 99: Checking The Software Version (Software Version)
3. Select the setting you want. 100% [110] Adjusting Settings System Setup Using the sleep timer (Sleep) You can set the receiver to turn off automatically at a specified time. 1. Select [Setup] - [System Setup] from the home menu. 2. - Page 100 You can check the current software version of the receiver. 1. Select [Setup] - [System Setup] from the home menu. 2. Check [Software Version]. [112] Adjusting Settings System Setup Updating the software using the USB flash drive (USB Update) Update the receiver software using the USB flash drive. 1.
- Page 101 [115] Adjusting Settings Install Setup Switching on/off the 12V trigger output (Trigger 1/2/3) (STR-ZA3000ES) Lets you select various options for using the 12V Trigger output function. 1. Select [Setup] - [Install Setup] from the home menu. 2. Select [Trigger 1]/[Trigger 2]/[Trigger 3].
- Page 102 Turns on the 12V trigger output when the STB input is selected. VIDEO Turns on the 12V trigger output when the VIDEO input is selected. Turns on the 12V trigger output when the AUX input is selected. Turns on the 12V trigger output when the TV input is selected. SA-CD/CD Turns on the 12V trigger output when the SA-CD/CD input is selected.
- Page 103 1. Select [Setup] - [Install Setup] from the home menu. 2. Select [Trigger]. 3. Select the item you want to set. Main Zone Turns on/off the 12V trigger output according to the power status in the main zone. Zone 2 Turns on/off the 12V trigger output according to the power status in zone 2.
-
Page 104: Displaying A Test Screen (Test Picture)
unavailable. If you set 12V trigger output as unavailable for all inputs, switching input will have no affect on 12V trigger outputs. If you set 12V trigger output as unavailable for all of HDMI OUT A, HDMI OUT B and HDMI OUT OFF, the HDMI OUT settings will have no affect on 12V trigger outputs. -
Page 105: Operating The Receiver With The Menu On The Display Panel
Hint To set this function to [Off], press PING, AMP MENU and ENTER on the receiver at the same time. [119] Adjusting Settings Easy Setup Setting up the receiver using the Easy Setup When you turn on the receiver for the first time or after the receiver is initialized, the Easy Setup screen appears on the TV screen. - Page 106 4. Press repeatedly to select the setting you want, then press To return to the previous display Press or RETURN. To exit the menu Press AMP MENU. Note Some parameters and settings may appear dimmed on the display panel. This means that they are either unavailable or fixed and unchangeable.
-
Page 107: Reverting To The Factory Default Settings
[122] Adjusting Settings Reverting to the factory default settings Reverting to the factory default settings You can clear all memorized settings and restore the receiver to the factory default settings by the following procedure. This procedure can also be used to initialize the receiver before you use it for the first time. - Page 108 Receives signals from remote control. 3. MASTER VOLUME Turns to adjust the volume level. 4. HDMI jack cover (for STR-ZA3000ES/STR-ZA2000ES only) Open the cover when you use HDMI IN 6 (GAME) jack. Without the front cover 1. Fixing point of the front cover Attaches the front cover using this fixing point.
- Page 109 20. SOUND FIELD (2CH/A.DIRECT, A.F.D., MOVIE, MULTI ST.) Selects the sound field you want. 21. HDMI IN 6 (GAME) jack (for STR-ZA3000ES/STR-ZA2000ES only) Connect to a video game console. The video and sound from your video game console is input.
- Page 110 Rear panel (STR-ZA3000ES) 1. FM ANTENNA terminal 2. AM ANTENNA terminal 3. HDMI IN/OUT (*1) jacks 4. PRE OUT jacks Connect to an external power amplifier and a subwoofer. 5. Giga-bit Ethernet HUB (*2) 6. AC IN terminal Connect the supplied AC power cord (mains lead).
- Page 111 This is a control expansion terminal for custom installation. [125] Parts and Controls Receiver Rear panel (STR-ZA2000ES/STR-ZA1000ES) 1. FM ANTENNA terminal 2. AM ANTENNA terminal 3. HDMI IN/OUT (*1) jacks 4. DIGITAL OPTICAL IN jacks 5. DIGITAL COAXIAL IN jack 6.
-
Page 112: Indicators On The Display Panel
15. ZONE 2/ZONE 3OUT jacks 16. Video/audio input jacks You must connect your TV to HDMI OUT or MONITOR VIDEO OUT jack to watch images from the selected input. This is a control expansion terminal for custom installation. [126] Parts and Controls Receiver Indicators on the display panel 1. - Page 113 Surround Left Surround Right Surround Back Left Surround Back Right Indicates currently available operation on the display panel using on the remote control. 6. IN-CEILING Lights up when the In-Ceiling Speaker Mode is activated. 7. Tuning indicator Lights up when the receiver tunes to a radio station. The receiver tunes to a stereo broadcast.
-
Page 114: Remote Control
processing. This matrix surround decoding technology can enhance input signals. PLII : Dolby Pro Logic II PLIIx : Dolby Pro Logic IIx 19. SLEEP Lights up when the sleep timer is activated. 20. Input indicator Lights up to indicate the current input. AUTO [Input Mode] is set to [Auto]. - Page 115 1. MAIN (on/standby) Turns the receiver on or sets it to the standby mode. Saving power in standby mode Save power by setting the receiver as follows: Set [Control for HDMI], [Pass Through], and [Network Standby] to [Off]. Turn off the receiver in zone 2 and zone 3. 2.
- Page 116 Displays the auto calibration menu on the display panel of the receiver to perform Auto Calibration. 11. MEMORY Press to enter the Memory mode of the tuner. 12. PRESET +/– Press to select the preset stations. 13. FM/AM Press to select the band you want. 14.
-
Page 117: Specifications
POWER OUTPUT AND TOTAL HARMONIC DISTORTION (for USA and Canadian models only): STR-ZA3000ES With 6 ohm loads, both channels driven, from 20 – 20,000 Hz; rated 100 watts per channel minimum RMS power, with no more than 0.09% total harmonic distortion from 250 milliwatts to rated output. - Page 118 SURROUND BACK: 120 W + 120 W Reference Power Output (8 ohms 1 kHz, THD 0.9%) FRONT: 110 W + 110 W CENTER: 110 W SURROUND: 110 W + 110 W SURROUND BACK: 110 W + 110 W Reference Power Output at Surround Mode (*3) (6 ohms, 1 kHz, THD 0.9%) 150 W per channel STR-ZA2000ES...
- Page 119 (8 ohms 20 Hz – 20 kHz, THD 0.09%): 70 W + 70 W Reference Power Output (6 ohms 1 kHz, THD 0.9%) FRONT: 120 W + 120 W CENTER: 120 W SURROUND: 120 W + 120 W SURROUND BACK: 120 W + 120 W Reference Power Output (8 ohms 1 kHz, THD 0.9%) FRONT: 90 W + 90 W...
-
Page 120: Fm Tuner Section
Outputs ZONE 2 , ZONE 3 (AUDIO OUT): Voltage: 2 V Impedance: 1 kohm FRONT L/R, CENTER, SURROUND L/R, SURROUND BACK L/R, SUBWOOFER (for STR-ZA3000ES): Voltage: 2 V Impedance: 1 kohm SUBWOOFER (for STR-ZA2000ES/STR-ZA1000ES) Voltage: 2 V Impedance: 1 kohm FM tuner section Tuning range: 87.5 MHz –... - Page 121 All HDMI IN/OUT jacks support 4K resolution. The following HDMI jacks support High-bandwidth Digital Content Protection System Revision 2.2 (HDCP 2.2). HDMI IN 2/IN 3, HDMI OUT A/OUT B (for STR-ZA3000ES) HDMI IN 2, HDMI OUT A (for STR-ZA2000ES/STR-ZA1000ES) 4096 × 2160p @ 59.94/60 Hz: 2D (*1) 4096 ×...
- Page 122 3D: Frame packing 3D: Side-by-Side (Half) 3D: Over-Under (Top-and-Bottom) 1920 × 1080p @ 23.98/24 Hz: 3D: Frame packing 3D: Side-by-Side (Half) 3D: Over-Under (Top-and-Bottom) 1920 × 1080i @ 59.94/60 Hz: 3D: Frame packing 3D: Side-by-Side (Half) 3D: Over-Under (Top-and-Bottom) 1920 × 1080i @ 50 Hz: 3D: Frame packing 3D: Side-by-Side (Half) 3D: Over-Under (Top-and-Bottom)
-
Page 123: General Section
430 mm × 174 mm × 410 mm (17 in × 6 7/8 in × 16 1/4 in) including projecting parts and controls Mass (including the front cover) (Approx.) STR-ZA3000ES: 13.4 kg (29 lb 9 oz) STR-ZA2000ES: 13.0 kg (28 lb 11 oz) STR-ZA1000ES: 12.3 kg (27 lb 2 oz) Design and specifications are subject to change without notice. - Page 124 This receiver incorporates High-Definition Multimedia Interface (HDMI™) technology. The terms HDMI and HDMI High-Definition Multimedia Interface, and the HDMI Logo are trademarks or registered trademarks of HDMI Licensing LLC in the United States and other countries. “x.v.Color” and “x.v.Color” logo are trademarks of Sony Corporation.
-
Page 125: Software License Information
“BRAVIA” is a trademark of Sony Corporation. “PlayStation®” is a registered trademark of Sony Computer Entertainment Inc. All other trademarks and registered trademarks are of their respective holders. In this manual, ™ and ® marks are not specified. [131] Announcements... - Page 126 Redistribution and use in source and binary forms, with or without modification, are permitted provided that this copyright notice and disclaimer are retained. THIS SOFTWARE IS PROVIDED BY KALLE KAUKONEN AND CONTRIBUTORS “AS IS” AND ANY EXPRESS OR IMPLIED WARRANTIES, INCLUDING, BUT NOT LIMITED TO, THE IMPLIED WARRANTIES OF MERCHANTABILITY AND FITNESS FOR A PARTICULAR PURPOSE ARE DISCLAIMED.
- Page 127 (eay@cryptsoft.com)” The word 'cryptographic' can be left out if the rouines from the library being used are not cryptographic related :-). 4. If you include any Windows specific code (or a derivative thereof) from the apps directory (application code) you must include an acknowledgement: “This product includes software written by Tim Hudson (tjh@cryptsoft.com)”...
- Page 128 GOODS OR SERVICES; LOSS OF USE, DATA, OR PROFITS; OR BUSINESS INTERRUPTION) HOWEVER CAUSED AND ON ANY THEORY OF LIABILITY, WHETHER IN CONTRACT, STRICT LIABILITY, OR TORT (INCLUDING NEGLIGENCE OR OTHERWISE) ARISING IN ANY WAY OUT OF THE USE OF THIS SOFTWARE, EVEN IF ADVISED OF THE POSSIBILITY OF SUCH DAMAGE.
- Page 129 ARE DISCLAIMED. IN NO EVENT SHALL THE AUTHOR OR CONTRIBUTORS BE LIABLE FOR ANY DIRECT, INDIRECT, INCIDENTAL, SPECIAL, EXEMPLARY, OR CONSEQUENTIAL DAMAGES (INCLUDING, BUT NOT LIMITED TO, PROCUREMENT OF SUBSTITUTE GOODS OR SERVICES; LOSS OF USE, DATA, OR PROFITS; OR BUSINESS INTERRUPTION) HOWEVER CAUSED AND ON ANY THEORY OF LIABILITY, WHETHER IN CONTRACT, STRICT LIABILITY, OR TORT (INCLUDING NEGLIGENCE OR OTHERWISE) ARISING IN ANY WAY OUT OF THE USE OF THIS SOFTWARE, EVEN IF ADVISED OF THE...
- Page 130 All rights reserved. This file is part of an SSL implementation written by Eric Young (eay@mincom.oz.au). The implementation was written so as to conform with Netscapes SSL specification. This library and applications are FREE FOR COMMERCIAL AND NON-COMMERCIAL USE as long as the following conditions are aheared to. Copyright remains Eric Young's, and as such any Copyright notices in the code are not to be removed.
- Page 131 The implementation was written so as to conform with Netscapes SSL. This library is free for commercial and non-commercial use as long as the following conditions are aheared to. The following conditions apply to all code found in this distribution, be it the RC4, RSA, lhash, DES, etc., code;...
- Page 132 i.e. this code cannot simply be copied and put under another distribution licence [including the GNU Public Licence.] $KAME: crypto_openssl.c, eaytest.c v 1.70 2001/09/11 14:21:12 sakane Exp $ Copyright (C) 1995, 1996, 1997, and 1998 WIDE Project. All rights reserved. Redistribution and use in source and binary forms, with or without modification, are permitted provided that the following conditions are met: 1.
- Page 133 If this package is used in a product, Eric Young should be given attribution as the author of the parts of the library used. This can be in the form of a textual message at program startup or in documentation (online or textual) provided with the package.
- Page 134 1. Redistributions of source code must retain the above copyright notice, this list of conditions and the following disclaimer. 2. Redistributions in binary form must reproduce the above copyright notice, this list of conditions and the following disclaimer in the documentation and/or other materials provided with the distribution.
- Page 135 and the following disclaimer. 2. Redistributions in binary form must reproduce the above copyright notice, this list of conditions and the following disclaimer in the documentation and/or other materials provided with the distribution. 3. All advertising materials mentioning features or use of this software must display the following acknowledgement: “This product includes cryptographic software written by Eric Young (eay@cryptsoft.com)”...
- Page 136 software. A.3 md4c.c MD4C.C - RSA Data Security, Inc., MD4 message-digest algorithm Copyright (C) 1990-2, RSA Data Security, Inc. All rights reserved. License to copy and use this software is granted provided that it is identified as the “RSA Data Security, Inc. MD4 Message-Digest Algorithm” in all material mentioning or referencing this software or this function.
- Page 137 removed. If this package is used in a product, Eric Young should be given attribution as the author of the parts of the library used. This can be in the form of a textual message at program startup or in documentation (online or textual) provided with the package.
- Page 138 1. Redistributions of source code must retain the above copyright notice, this list of conditions and the following disclaimer. 2. Redistributions in binary form must reproduce the above copyright notice, this list of conditions and the following disclaimer in the documentation and/or other materials provided with the distribution.
- Page 139 conditions and the following disclaimer in the documentation and/or other materials provided with the distribution. 3. All advertising materials mentioning features or use of this software must display the following acknowledgement: “This product includes cryptographic software written by Eric Young (eay@cryptsoft.com)”...
- Page 140 THIS SOFTWARE IS PROVIDED BY THE PROJECT AND CONTRIBUTORS “AS IS” AND ANY EXPRESS OR IMPLIED WARRANTIES, INCLUDING, BUT NOT LIMITED TO, THE IMPLIED WARRANTIES OF MERCHANTABILITY AND FITNESS FOR A PARTICULAR PURPOSE ARE DISCLAIMED. IN NO EVENT SHALL THE PROJECT OR CONTRIBUTORS BE LIABLE FOR ANY DIRECT, INDIRECT, INCIDENTAL, SPECIAL, EXEMPLARY, OR CONSEQUENTIAL DAMAGES (INCLUDING, BUT NOT LIMITED TO, PROCUREMENT OF SUBSTITUTE GOODS OR SERVICES;...
- Page 141 conditions and the following disclaimer in the documentation and/or other materials provided with the distribution. 3. Neither the name of the project nor the names of its contributors may be used to endorse or promote products derived from this software without specific prior written permission.
- Page 142 this file under the terms of any one of the MPL, the GPL or the LGPL. ***** END LICENSE BLOCK ***** */ FIPS pub 180-2: Secure Hash Standard based on: http://csrc.nist.gov/publications/fips/fips180-2/fips180-2.pdf trtwofsh.c Copyright (c) 2002 by Niels Ferguson. The author hereby grants a perpetual license to everybody to use this code for any purpose as long as the copyright message is included in the source code of this or any derived work.
- Page 143 THIS SOFTWARE IS PROVIDED BY THE REGENTS AND CONTRIBUTORS “AS IS” AND ANY EXPRESS OR IMPLIED WARRANTIES, INCLUDING, BUT NOT LIMITED TO, THE IMPLIED WARRANTIES OF MERCHANTABILITY AND FITNESS FOR A PARTICULAR PURPOSE ARE DISCLAIMED. IN NO EVENT SHALL THE REGENTS OR CONTRIBUTORS BE LIABLE FOR ANY DIRECT, INDIRECT, INCIDENTAL, SPECIAL, EXEMPLARY, OR CONSEQUENTIAL DAMAGES (INCLUDING, BUT NOT LIMITED TO, PROCUREMENT OF SUBSTITUTE GOODS OR SERVICES;...
- Page 144 trsscanf.c Copyright (c) 1992, 1993 The Regents of the University of California. All rights reserved. Redistribution and use in source and binary forms, with or without modification, are permitted provided that the following conditions are met: 1. Redistributions of source code must retain the above copyright notice, this list of conditions and the following disclaimer.
- Page 145 provided with the distribution. 3. All advertising materials mentioning features or use of this software must display the following acknowledgement: This product includes software developed by the University of California, Berkeley and its contributors. 4. Neither the name of the University nor the names of its contributors may be used to endorse or promote products derived from this software without specific prior written permission.
- Page 146 IMPLIED WARRANTIES OF MERCHANTABILITY AND FITNESS FOR A PARTICULAR PURPOSE ARE DISCLAIMED. IN NO EVENT SHALL THE REGENTS OR CONTRIBUTORS BE LIABLE FOR ANY DIRECT, INDIRECT, INCIDENTAL, SPECIAL, EXEMPLARY, OR CONSEQUENTIAL DAMAGES (INCLUDING, BUT NOT LIMITED TO, PROCUREMENT OF SUBSTITUTE GOODS OR SERVICES;...
- Page 147 Copyright (C) 1995-2010 Jean-loup Gailly and Mark Adler For conditions of distribution and use, see copyright notice in zlib.h ALGORITHM The “deflation” process depends on being able to identify portions of the input text which are identical to earlier input (within a sliding window trailing behind the input currently being processed).
- Page 148 jloup@gzip.org Mark Adler madler@alumni.caltech.edu The data format used by the zlib library is described by RFCs (Request for Comments) 1950 to 1952 in the files http://www.ietf.org/rfc/rfc1950.txt (zlib format), rfc1951.txt (deflate format) and rfc1952.txt (gzip format). trinfback.c Copyright (C) 1995-2009 Mark Adler For conditions of distribution and use, see copyright notice in zlib.h This code is largely copied from inflate.c.
- Page 149 wrote the original software. If you use this software in a product, an acknowledgment in the product documentation would be appreciated but is not required. 2. Altered source versions must be plainly marked as such, and must not be misrepresented as being the original software. 3.
- Page 150 applications, and to alter it and redistribute it freely, subject to the following restrictions: 1. The origin of this software must not be misrepresented; you must not claim that you wrote the original software. If you use this software in a product, an acknowledgment in the product documentation would be appreciated but is not required.
- Page 151 the product documentation would be appreciated but is not required. 2. Altered source versions must be plainly marked as such, and must not be misrepresented as being the original software. 3. This notice may not be removed or altered from any source distribution. Jean-loup Gailly jloup@gzip.org Mark Adler...
- Page 152 The SSL documentation included with this distribution is covered by the same copyright terms except that the holder is Tim Hudson (tjh@cryptsoft.com). Copyright remains Eric Young's, and as such any Copyright notices in the code are not to be removed. If this package is used in a product, Eric Young should be given attribution as the author of the parts of the library used.
- Page 153 Copyright (C) 1995-1998 Eric Young (eay@cryptsoft.com) All rights reserved. This package is an SSL implementation written by Eric Young (eay@cryptsoft.com). The implementation was written so as to conform with Netscapes SSL. This library is tm_kernel_free for commercial and non-commercial use as long as the following conditions are aheared to.
- Page 154 POSSIBILITY OF SUCH DAMAGE. The licence and distribution terms for any publically available version or derivative of this code cannot be changed. i.e. this code cannot simply be copied and put under another distribution licence [including the GNU Public Licence.]" $KAME: crypto_openssl.c, eaytest.c v 1.70 2001/09/11 14:21:12 sakane Exp $ Copyright (C) 1995, 1996, 1997, and 1998 WIDE Project.
- Page 155 2. Redistributions in binary form must reproduce the above copyright notice, this list of conditions and the following disclaimer in the documentation and/or other materials provided with the distribution. 3. The names of its contributors may not be used to endorse or promote products derived from this software without specific prior written permission.
-
Page 156: Update Failed
After checking the above items and fixing any problems, plug in the AC power cord (mains lead) and turn on the receiver. If the problem persists, consult your nearest Sony dealer. -
Page 157: Network Features Message List
Code 31: Front speakers are not selected properly. Select the front speakers using SPEAKERS and perform the Auto Calibration again. For details on selecting the front speakers, see “Selecting the front speakers.” Code 32, Code 33: Speakers were not detected or not connected properly. None of the front speakers are connected or only one front speaker is connected. -
Page 158: The Receiver Is Turned Off Automatically
The USB Update procedure may not have been completed. While a USB flash drive containing the package file for updating the receiver is inserted, disconnect the AC power cord (mains lead) and connect it again. If the problem persists, consult your nearest Sony dealer. [139] Troubleshooting Image No image appears on the TV. -
Page 159: No 3D Image Appears On The Tv
case, set to [HDMI A], [HDMI B], or [HDMI A + B]. You can only select [HDMI B] or [HDMI A+B] when [HDMI Out B Mode] is set to [Main]. If you want to playback HDCP 2.2 content, be sure to connect the playback device and TV to the HDCP 2.2 capable HDMI input and output of the receiver. -
Page 160: The Gui Menu Does Not Appear On The Tv Screen
When [Control for HDMI] is set to [On], playing the connected device just with the One- Touch Play operation automatically switches the input to the connected device even while the receiver is in the standby mode. [143] Troubleshooting Image The GUI menu does not appear on the TV screen. GUI is only available when you connect the TV to the HDMI OUT A jack. -
Page 161: There Is Severe Humming Or Noise
If you want to listen to sound from the TV speaker in the main zone, set [Audio Out] to [TV+AMP] in the HDMI Setup menu. If you cannot play multi-channel audio source, set [AMP]. However, the sound will not be output through the TV speaker. If you want to listen to sound from the TV speaker in zone 2, set [Zone2 Audio Out] to [Zone2 TV + AMP] in the HDMI Setup menu. -
Page 162: There Is No Sound From A Specific Device
[148] Troubleshooting Sound There is no sound from a specific device. Check that the device is correctly connected to the corresponding audio input jacks. Check that the cable(s) used for the connection is (are) fully inserted into the jacks on both the receiver and the device. -
Page 163: The Left And Right Sound Is Unbalanced Or Reversed
connected via HDMI connection to the receiver. Change the TV channel if you want to watch a TV broadcast. Be sure to select the correct device or input when watching a program from a device connected to the TV. Refer to the section on this operation in the operating instructions of the TV. Sound is not output if you use [2ch Analog Direct] when an HDMI input or digital input (COAXIAL, OPTICAL) is selected. -
Page 164: A Test Tone Is Not Output From The Speakers
Make sure you have selected a sound field for movies. [Pro Logic II], [Pro Logic IIx], and [Neo:6] do not work when the speaker pattern is set to 2/0 or 2/0.1. If you connect your TV via an HDMI connection and enable the Control for HDMI function, the sound field automatically switches to [Multi Stereo] when you start using the Social Viewing function on your TV. -
Page 165: The Fm Stereo Reception Is Poor
the receiver is in the standby mode. [155] Troubleshooting Tuner The FM reception is poor. Use a 75-ohm coaxial cable (not supplied) to connect the receiver to an outdoor FM antennas (aerial) as shown below. Receiver Outdoor FM antenna (aerial) [156] Troubleshooting Tuner The FM stereo reception is poor. -
Page 166: A Usb Device Is Not Recognized
panel. [158] Troubleshooting USB devices A USB device is not recognized. Turn off the receiver, then disconnect the USB device. Turn on the receiver again and reconnect the USB device. Connect a compatible USB device. USB devices are only supported when formatted with the FAT16 or FAT32 file systems. -
Page 167: The Control For Hdmi Function Does Not Work
connection again. [162] Troubleshooting “BRAVIA” Sync (Control for HDMI) The Control for HDMI function does not work. Check the HDMI connection. Make sure [Control for HDMI] is set to [On] in the HDMI Setup menu. Make sure the connected device supports the Control for HDMI function. Check the Control for HDMI settings on the connected device. -
Page 168: The Remote Control Does Not Function
[164] Troubleshooting Remote control The remote control does not function. Point the remote control at the remote control sensor on the receiver. Remove any obstructions between the remote control and the receiver. Replace both of the batteries in the remote control with new ones if they are weak. [165] Troubleshooting If the problem is not solved Reverting to the factory default settings... -
Page 169: Customer Support Websites
[167] Troubleshooting If the problem is not solved Customer support websites Refer to the following websites for the latest information on the receiver. For customers in the USA: http://esupport.sony.com/ For customers in Canada: http://esupport.sony.com/CA/ For customers in Latin America: http://esupport.sony.com/LA For customers in Australia and New Zealand: http://www.sony.com.au/section/support... - Page 170 Center speaker Surround speaker (Left) Surround speaker (Right) Subwoofer Hint As the subwoofer does not emit highly directional signals, you can place it wherever you want. 7.1-channel speaker system using surround back speakers You can enjoy high-fidelity reproduction of recorded sound from DVD or Blu-ray Disc software in 6.1-channel or 7.1-channel format.
- Page 171 7.1-channel speaker placement Place the surround back speakers as shown in the illustration below. The angles shown by should be the same. Hint As the subwoofer does not emit highly directional signals, you can place it wherever you want. 5.1 -channel speaker system and zone 2 If you make a 5.1ch connection in the main zone, you can also enjoy the sound in another location (“Zone 2”) by connecting additional zone 2 speakers.
-
Page 172: How To Connect Speaker Cables
Front speaker (Left) Front speaker (Right) Center speaker Surround speaker (Left) Surround speaker (Right) Subwoofer Zone 2 speaker (Left) Zone 2 speaker (Right) Hint As the subwoofer does not emit highly directional signals, you can place it wherever you want. How to connect speaker cables Connect speaker cables as illustrated below. - Page 173 Strip the jacket to 10 mm (13/32 in) at each end of the speaker cables. About Auto Calibration Auto Calibration allows you to perform automatic calibration as follows. Check the connection between each speaker and the receiver. Adjust the speaker level. Measure the distance of each speaker from your seating position.
-
Page 174: Connecting The Optimizer Microphone
adjusted. Be considerate of your neighbors and any children who are present. If the muting function has been activated before you perform Auto Calibration, the muting function will shut off automatically. It may not be possible to take the correct measurements or to perform Auto Calibration at all if special speakers such as dipole speakers are used. -
Page 175: Selecting The Front Speakers
To select [SP B] or [SP AB], set the assignment for the SPEAKERS SURROUND BACK/FRONT HIGH/FRONT B/BI-AMP/ZONE 2 terminals to [Front B] by using [SB Speaker Assign] in the Speaker Setup menu. The PRE OUT jacks are only for STR-ZA3000ES. - Page 176 Checking Auto Calibration results To check error codes or warning messages received in [Auto Calibration], proceed with the following steps: If an error code appears Check the error and perform Auto Calibration again. 1. Select [Retry]. 2. Follow the instructions on the TV screen and then press to select [Start].
- Page 177 Presets the sound as it was recorded/encoded without adding any surround effects. However, this receiver will generate a low-frequency signal for output to the subwoofer when there is no LFE signals. 2-channel sound mode You can switch the output sound to 2-channel sound regardless of the recording formats of the software you are using, the playback device connected, or the sound field settings of the receiver.
-
Page 178: Movie Mode
They bring the exciting and powerful sound of movie theaters into your home. HD-D.C.S.: HD Digital Cinema Sound (HD-D.C.S.) is Sony’s new innovative home theater technology using the latest acoustic and digital signal processing technologies. It is based on the precise response measurement data of a mastering studio. - Page 179 Enjoying an input source from a connected device immediately (One-Touch Play) When you play content on a device connected to the receiver via an HDMI connection, the receiver is also automatically turned on and switched to the appropriate HDMI input. Note Depending on the TV, the start of the content may not appear.
-
Page 180: Home Theatre Control
If the TV, receiver and any connected devices are connected to each other via HDMI connections, you can turn them off simultaneously by pressing either of the following buttons: The power button on the remote control of the TV Note Turn on the power supply interlock function of the TV before using the System Power-Off function. - Page 181 based applications appears on the connected TV. You can switch an input of the receiver or switch sound fields by using the remote control of your TV. You can also adjust the level of the center speaker or the subwoofer, or adjust the settings of [Sound Optimizer], [Dual Mono], or [A/V Sync].
- Page 182 The name you entered is registered. Canceling naming input Press RETURN. Note Some letters that can be displayed on the TV screen cannot be displayed on the display panel. Menu list (on the display panel) The following options are available in each menu. 1.
- Page 183 Test Tone [2.9. TEST TONE] (*5) OFF, AUTO XXX -10.0 dB to XXX +10.0 dB (1 dB interval), FIX XXX -10.0 dB to XXX +10.0 dB (1 dB interval) (*4) Crossover Frequency [2.10. CROSSOVER FREQUENCY] XXX 40 Hz to XXX 200 Hz (10 Hz interval) (*3) (*6) Equalizer [2.11 .
- Page 184 AUTO, ON, OFF 5. HDMI Setup [5. HDMI SETUP] 4K Scaling [5.1. 4K SCALING] AUTO, OFF Control for HDMI [5.2. CONTROL FOR HDMI] ON, OFF Pass Through [5.3. PASS THROUGH] AUTO, ON, OFF HDMI Audio Out [5.4. AUDIO OUT] AMP, TV+AMP HDMI Zone2 Audio Out [5.5.
- Page 185 Tuner Setup [7.9. TUNER SETUP] 8. Install Setup [8. INSTALL SETUP] External Control [8.1. EXTERNAL CONTROL] ON, OFF Trigger 1 [8.2. TRIGGER 1] (for STR-ZA3000ES) Trigger 2 [8.3. TRIGGER 2] (for STR-ZA3000ES) Trigger 3 [8.4. TRIGGER 3] (for STR-ZA3000ES) Trigger [8.2. TRIGGER] (for STR-ZA2000ES/STR-ZA1000ES) USE, --- Test Picture [8.5.
- Page 186 Internet Setup [9.2. INTERNET SETUP] You can select this setting only when you have performed Auto Calibration and saved the settings. You can only select this parameter if [SP PATTERN] is not set to a pattern with surround back and front high speakers. XXX represents a speaker channel (FRONT, CENTER, SURROUND, FRONT HIGH).
- Page 187 2. Select a station on the FM band. 3. Press OPTIONS. 4. Select [FM Mode] from the options menu. 5. Select [Monaural]. Note You can set FM mode in the options menu if the frequency indication is selected in step Hint You can also set FM mode with [Tuner Setup] in the System Setup menu.
Need help?
Do you have a question about the STR-ZA3000ES and is the answer not in the manual?
Questions and answers