Danfoss TP5000 + RF Installation Instructions Manual
Hide thumbs
Also See for TP5000 + RF:
- Installation and user instructions manual (14 pages) ,
- User instructions (2 pages)
Advertisement
Table of Contents
- 1 Installation Instructions
- 2 Product Specification
- 3 Installation
- 4 Commissioning (RF Models Only)
- 5 Your Programmable Room Thermostat
- 6 Preset Programmes
- 7 User Instructions
- 8 Before You Start
- 9 Setting the Clock & Day
- 10 Running Your Programme
- 11 Before You Change the Preset Programmes
- 12 Changing the Preset Programmes
- 13 User Overrides
- 14 Frost Protection
- 15 Battery Replacement
- Download this manual
Electronic 5/2 day programmable room thermostat
Certification Mark
Installation Instructions
GB
User Instructions
Instructions d'installation
F
Instructions d'utilisateur
Installationsanweisungen
D
Inbetriebnahme-Instruktion
Instrucciones de instalación
ES
Instrucciones del usuario
Instruktions vejledning
DK
Brugervejleding
TP5000 + RF
NL
GR
Installatie handleiding
Instructiesevoor Gebruik
Ïäçãßåò åãêáôÜóôáóçò
Ïäçãßåò ÷ñÞóçò
Instrukcja instalacji
P
Instrukcja Użytkownika
Montavimo instrukcijos
LT
Informacija Vartotojui
Istruzioni per l'uso
I
Istruzioni per l'utente
Advertisement
Table of Contents

Subscribe to Our Youtube Channel
Related Manuals for Danfoss TP5000 + RF


Summary of Contents for Danfoss TP5000 + RF
- Page 1 TP5000 + RF Electronic 5/2 day programmable room thermostat Certification Mark Installation Instructions Installatie handleiding User Instructions Instructiesevoor Gebruik Ïäçãßåò åãêáôÜóôáóçò Instructions d’installation Ïäçãßåò ÷ñÞóçò Instructions d’utilisateur Installationsanweisungen Instrukcja instalacji Inbetriebnahme-Instruktion Instrukcja Użytkownika Instrucciones de instalación Montavimo instrukcijos Instrucciones del usuario...
- Page 2 Installation Instructions User Instructions 7-13 Instructions d’installation 14-17 Instructions d’utilisateur 18-23 Installationsanweisungen 24-27 Inbetriebnahme-Instruktion 28-33 Instrucciones de instalación 34-37 Instrucciones del usuario 38-43 Instruktions vejledning 44-47 Brugervejleding 48-53 Installatie handleiding 54-57 Instructiesevoor Gebruik 58-63 Ïäçãßåò åãêáôÜóôáóçò 64-67 Ïäçãßåò ÷ñÞóçò 68-73 Instrukcja instalacji 74-77 Instrukcja Użytkownika...
-
Page 3: Installation Instructions
Installation Instructions Please Note: This product should only be installed by a qualifi ed electrician or competent heating installer and should be in accordance with the current edition of the IEEE wiring regulations. Product Specifi cation Thermostat features TP5000 TP5000-RF Power supply 2 x AA/MN1500/LR alkaline cells Memory back-up... -
Page 4: Installation
Installation First, remove the wallplate from the back of the unit. From the top left hand corner of the wallplate, there must be clearances of at least 140mm to the right, 15mm to the left, 30mm above and 100mm below in order to mount the plug- in module. - Page 5 2) Chrono-Proportional - energy saving feature which fi res the boiler at regular intervals to maintain a set temperature, achieving a constant ambient environment for the user. Thermostat Wiring (not RF models) Some existing thermostats will have a Neutral and/or Earth wire connected. These are not required by the TP5000 and must NOT be connected to any TP5000 terminals.
-
Page 6: Commissioning (Rf Models Only)
Commissioning (RF models only) If the thermostat and the receiver have been supplied together in a combined pack, the units have been paired in the factory and no commissioning is required (RX1 only). To tune the RX receiver to the frequency of the thermostat signal, follow steps 1-5 below. - Page 7 What is a programmable room thermostat? ... an explanation for householders A programmable room thermostat is both a programmer and a room thermostat. A programmer allows you to set ‘On’ and ‘Off’ time periods to suit your own lifestyle. A room thermostat works by sensing the air temperature, switching on the heating when the air temperature falls below the thermostat setting, and switching it off once this set temperature has been reached.
-
Page 8: Your Programmable Room Thermostat
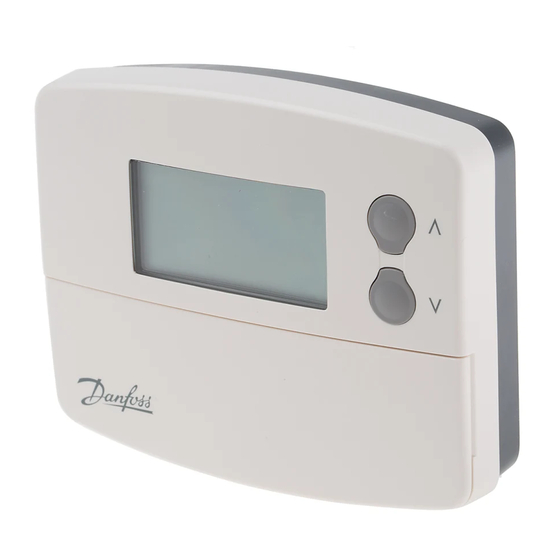
User Instructions Your programmable room thermostat The TP5000 allows you to programme up to 6 times and temperatures at which your heating will come on and go off each day. You can programme one set of times and temperatures for weekdays and another set for weekends. -
Page 9: Before You Start
Before you start Open the fl ap on the front of the programmer. Press the + & – AND & buttons simultaneously to reset the unit. This will reinstate the preset programmes and will set the time to 12:00 on Day 1 and the temperature to 20°C. -
Page 10: Running Your Programme
Running your programme If you are happy to use the preset programmes on page 8, you don’t need to do anything else. To accept the presets close the front cover i2 24 and after 2 minutes the pre settings will automatically be accepted (&... -
Page 11: Changing The Preset Programmes
Changing the preset programmes For Days 1-5 (weekdays) a) Press PROG until 1st pre-set time and temperature (Event 1, Days 1,2,3,4,5) appears in display. 6 30 b) Use + or – buttons to adjust the TIME (press and hold to change in 10 min increments). -
Page 12: User Overrides
Running your programme Press PROG – the colon in the LCD display i2 24 will start to fl ash. The heating will now come on and go off at the programmed times. User Overrides Sometimes you may need to change the way you use your heating temporarily, i.e.due to unusually cold weather. -
Page 13: Frost Protection
Frost Protection A constant low temperature between 5°C-30°C can be selected whilst away from home. Press together twice. buttons to set the desired low temperature. - At 5°C a snowfl ake symbol appears ° indicating frost protection mode. - At all other temperatures an °...
Need help?
Do you have a question about the TP5000 + RF and is the answer not in the manual?
Questions and answers