Table of Contents
Advertisement
Available languages
Available languages
Español p. 29
This appliance is for
outdoor use only.
This is not a
commercial appliance.
ASSEMBLY, CARE AND USE INSTRUCTIONS
READ CAREFULLY
IMPORTANT:
5005342
RETAIN THESE INSTRUCTIONS FOR FUTURE REFERENCE
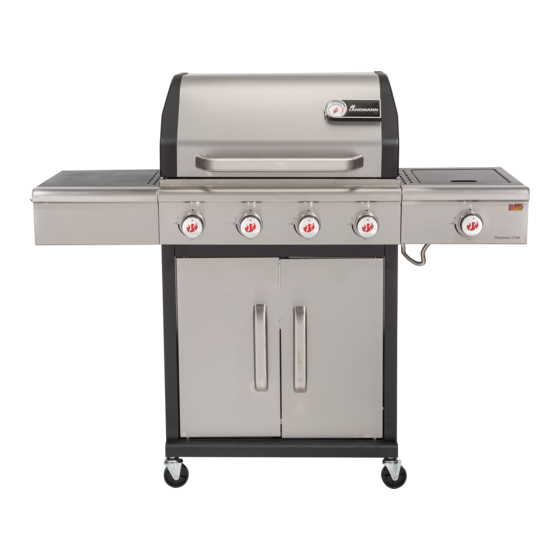
4 Burner LP Barbecue Grill
MODEL 42224
Questions, problems, missing parts? Before returning to your retailer, call our customer
service department at: 1-800-321-3473 8:00 AM - 5:00 PM (EST) English Only,
or Email CustomerService@landmann-usa.com
1
Advertisement
Chapters
Table of Contents

Subscribe to Our Youtube Channel
Related Manuals for Landmann 42224


Summary of Contents for Landmann 42224
- Page 1 5005342 RETAIN THESE INSTRUCTIONS FOR FUTURE REFERENCE 4 Burner LP Barbecue Grill MODEL 42224 Questions, problems, missing parts? Before returning to your retailer, call our customer service department at: 1-800-321-3473 8:00 AM - 5:00 PM (EST) English Only, or Email CustomerService@landmann-usa.com...
-
Page 2: Table Of Contents
Table of Contents Connecting Gas Cylinder ........18 Important Safety Information ........3-4 Lighting Instructions ..........19 Liquid Propane (LP) Safety Information....5 Care and Maintenance .........20-21 Package Contents ..........6-7 Cooking Methods and Grilling Tips ....22 Preparation..............8 Troubleshooting ..........23 Hardware Contents ..........8 Grilling Guidelines ........24-25 Tools Required............8 Replacement Parts ........26-27 Assembly Instructions ........8-17... -
Page 3: Important Safety Information
Any requirements for a replacement regulator and hose assembly must be made through the manufacturer, LANDMANN-USA. DO NOT enlarge the valve orifices or burner • • This grill is an outside appliance and SHOULD ports when cleaning the valves or burners. - Page 4 Important Safety Information • If you see, smell or hear hissing of gas escaping To avoid the possibility of tipping over the grill, from the LP gas cylinder, move away from the NEVER place more than 10 pounds on the side table. LP gas cylinder.
-
Page 5: Liquid Propane (Lp) Safety Information
Liquid Propane (LP) Safety Information Please review the below guidelines and safety information when using Liquid Propane (LP) gas. General Information • If the LP cylinder is kept in the grill between • This grill is designed certified by ETL for use with a uses, make sure to keep both the grill and standard 20 lb. -
Page 6: Package Contents
Package Contents Part Description Quantity Cart Base Panel Cart Base Front Trim Cart left side panel Cart right side panel Locking Caster Non-Locking Caster Caster Support Left Caster Support Right LP Tank Bolt Grease Tray Support Right Grease Tray Support Left Cart Door Right Cart Door Left Cart Door Handle... - Page 7 Package Contents...
-
Page 8: Preparation
Preparation Before beginning assembly of this grill, please remove all packing material and verify that all of the assembly parts are included (see Package Contents on page 6). If any part is missing or damaged, DO NOT attempt to assemble the product. Estimated assembly time: 45 minutes with two people. - Page 9 Assembly Instructions B M6X12 mm Screw (x4) A M4X10 mm Screw (x4) A M4X10 mm Screw (x4)
- Page 10 Assembly Instructions A M4X10 mm Screw (x4) F M6X10 mm Screw (x4) G M10X12 mm Screw (x2)
- Page 11 Assembly Instructions A M4X10 mm Screw (x4) B M6X12 mm Screw (x12) 1/4˝ 1/4˝...
- Page 12 Assembly Instructions C M5X10 mm Screw (x6) A M4X10 mm Screw (x1)
- Page 13 Assembly Instructions A M4X10 mm Screw (x1) D M4X6 mm Screw (x2) A M4X10 mm Screw (x1)
- Page 14 Assembly Instructions B M6X12 mm Screw (x4) C M5X10 mm Screw (x1)
- Page 15 Assembly Instructions B M6X12 mm Screw (x2) H (x2)
- Page 16 Assembly Instructions...
- Page 17 Assembly Instructions...
-
Page 18: Connecting Gas Cylinder
Connecting Gas Cylinder 1. ALWAYS place the propane cylinder on the tank To prevent fire or explosion hazard holder under the cart. when testing for a leak: 2. ALWAYS confirm that all burner control knobs 1. ALWAYS perform the 'leak test' are in OFF position before activating the gas before lighting the grill and each time supply. -
Page 19: Lighting Instructions
Lighting Instructions Prior to the first use, it is important to clean your grill with heat. Match Lighting This will clean the internal parts by burning off any residue and odor from the manufacturing process. To perform this cleaning, operate the grill for approximately 15-20 minutes at the highest heat setting with the cooking hood closed. -
Page 20: Care And Maintenance
Care and Maintenance Grease cup Please use the following guidelines to keep your grill clean and looking new. Before any cleaning, make The grease cup is located below the grill and should • sure the control knob is in the position and be cleaned after each use to prevent heavy buildup grill is cool to the touch. - Page 21 Care and Maintenance To Reinstall Burner 1. Be sure the gas valve orifices are correctly positioned inside the burner inlet. 2. Reattach the electrode and wire to the burner. 3. Reattach the screw/nut combination. 4. Reposition flame tents, cooking racks, and warming rack.
-
Page 22: Cooking Methods And Grilling Tips
Cooking Methods And Grilling Tips Direct Heat During Grilling Direct heat cooking means that the food is placed • The temperature gauge on the lid indicates the on grill grates directly over the lighted burners. cooking temperature inside the grill. •... -
Page 23: Troubleshooting
Troubleshooting Problem Cause Solution Grill will not light. 1. LP cylinder valve is closed. 1. Turn ON LP cylinder valve. 2. LP cylinder gas level is low. 2. Replace LP cylinder. 3. “Match lighting” may be necessary. 3. “Match lighting” light grill per this manual’s instructions. -
Page 24: Grilling Guidelines
Grilling Guidelines Cooking Burner Type Description Thickness Total time Instructions Method setting BEEF NY Strip, Rib eye, Turn meat only once, Steaks 1 in / Porterhouse, T-Bone, Direct High 10-15 min halfway through the 2.5 cm Sirloin, Filets grilling time NY Strip, Rib eye, Turn meat only once, 2 in /... - Page 25 Grilling Guidelines Cooking Burner Type Description Thickness Total time Instructions Method setting Shrimp 18-20 oz / 510-566 g Direct High 3-6 min VEGETABLES Corn on the In Husk Direct Medium 20-30 min Husked Direct Medium 12-15 min Individually wrapped in Potatoes Baking, whole Direct...
-
Page 26: Replacement Parts
Replacement Parts 42224 Replacement Parts... - Page 27 Replacement Parts Part Description Quantity Part # Part Description Quantity Part # Side burner PC0108 Temperature gauge 2.25” PC0101 Logo plate PC0102 Side burner electrode PC0109 Side burner shelf PC0170 Grill lid PC0159 lid handle insulating spacer PC0112 Side burner shelf PC0106 Lid handle PC0116...
-
Page 28: Warranty
Our customer service department can be reached at 1-800-321-3473 8:00 AM - 5:00 PM (EST) English Only, or Email CustomerService@landmann-usa.com Please note for the United States, that some states do not allow the exclusion or limitation of incident or consequential damages or limitations on how long an implied warranty lasts, so the above limitations or exclusions may not apply to you. - Page 29 MODELO 42224 ¿Preguntas, problemas, piezas faltantes? Antes de devolverlo a su vendedor minorista, llame a nuestro departamento de atención al cliente al: 1-800-321-3473 entre 8:00 a.m. y 5:00 p.m. (EST) Sólo en inglés, o envíe un correo electrónico a CustomerService@landmann-usa.com...
- Page 30 Contenido Conexión del tanque de gas ......46 Información importante sobre la Instrucciones para el encendido ......47 seguridad............30-32 Cuidado y mantenimiento ......48-49 Información de seguridad sobre el Métodos de cocción y consejos propano líquido (PL)..........33 para asar a la parrilla .........50 Contenido del empaque ........34-35 Resolución de problemas ........51 Preparación..............36...
-
Page 31: Información Importante Sobre La Seguridad
Levante la cubierta y LANDMANN-USA. espere cinco minutos antes de intentar volver a encender la parrilla según las instrucciones de... - Page 32 Información importante sobre la seguridad • NO utilice tanques de gas PL que tengan la Para evitar la posibilidad de vuelcos de la parrilla, válvula dañada. NUNCA coloquemás de 10 librasen la mesa lateral. • NO agrande los orificios de la válvula o los puertosde los quemadores al limpiar las válvulas o NUNCA deje la cocción de alimentos sin los quemadores.
-
Page 33: Información De Seguridad Sobre El Propano Líquido (Pl)
Información de seguridad sobre el propano líquido (PL) Por favor, revise las indicaciones siguientes y la información sobre la seguridad cuando use gas de propano líquido (PL). Información general • NO almacene los tanques de PL • Esta parrilla está diseñada para usarse con tanque desconectados dentro de un edificio, estándar de gas PL de 20 libras. -
Page 34: Contenido Del Empaque
Contenido del empaque Pieza Descripción Cantidad Panel de base del carrito Ajuste del frente de la base del carrito Panel lateral izquierdo del carrito Panel lateral derecho del carrito Rueda con bloqueo Rueda sin bloqueo Soporte de rueda izquierdo Soporte de rueda derecho Perno de tanque de LP Apoyo derecho de bandeja para grasa Apoyo izquierdo de bandeja para grasa... - Page 35 Contenido del empaque...
-
Page 36: Preparación
Preparación Antes de comenzar el montaje de esta parilla, quite todo el material de embalaje y verifique que todas las pieas del montaje estén incluidas (ver Contenidos del paquete en la página 6). Si alguna pieza falta o está dañada, NO intente montar el producto. Tiempo aproximado de montaje: 45 minutos con dos personas. - Page 37 Instrucciones de montaje B M6X12 mm Screw (x4) A M4X10 mm Screw (x4) A M4X10 mm Screw (x4)
- Page 38 Instrucciones de montaje A M4X10 mm Screw (x4) F M6X10 mm Screw (x4) G M10X12 mm Screw (x2)
- Page 39 Instrucciones de montaje A M4X10 mm Screw (x4) B M6X12 mm Screw (x12) 1/4˝ 1/4˝...
- Page 40 Instrucciones de montaje C M5X10 mm Screw (x6)
- Page 41 Instrucciones de montaje A M4X10 mm Screw (x1) D M4X6 mm Screw (x2) A M4X10 mm Screw (x1)
- Page 42 Instrucciones de montaje B M6X12 mm Screw (x4) C M5X10 mm Screw (x1)
- Page 43 Instrucciones de montaje B M6X12 mm Screw (x2) H (x2)
- Page 44 Instrucciones de montaje...
- Page 45 Instrucciones de montaje...
-
Page 46: Conexión Del Tanque De Gas
Conexión del tanque de gas 1. SIEMPRE coloque el tanque de gas en el Para evitar el riesgo de incendio o portatanque que se encuentra debajo del carro. explosión, cuando compruebe si hay 2. Antes de abrir el suministro de gas, asegúrese alguna fuga: SIEMPRE de que las perillas de control de 1. -
Page 47: Instrucciones Para El Encendido
Instrucciones para el encendido Antes de usar por primera vez, es importante limpiar la parrilla Encendido con fósforos. con calor. Esto limpiará las partes internas al quemar todos los residuos y olores del proceso de fabricación. Para realizar la limpieza, ponga a funcionar la parrilla aproximadamente 15-20 minutos al calor máximo, con la cubierta cerrada. -
Page 48: Cuidado Y Mantenimiento
Cuidado y mantenimiento Revisión de la manguera Por favor, siga las indicaciones siguientes para mantener su parrilla limpia y que luzca como nueva. La manguera se debe revisar periódicamente para Antes de limpiar, asegúrese de que todos los identificar cualquier indicio de grietas, rayones, •... - Page 49 Cuidado y mantenimiento Para reinstalar el quemador 1. Asegúrese de que los orificios de la válvula degas estén colocados correctamente dentro de la entrada del quemador. 2. Vuelva a colocar la unidad perno/tuerca. 3. Vuelvaaajustar el tornillo y la tuerca. 4.
-
Page 50: Métodos De Cocción Y Consejos Para Asar A La Parrilla
Métodos de cocción y consejos para asar a la parrilla Calorinfrarrojo • Para la carne y las aves con alto contenido Utilice el quemadorinfrarrojo para de grasa, retire el exceso de grasa y reduzca dorarlosalimentosrápi-damente sin perderlosjugosni el tiempo de precalentamiento. Ambas cosas el sabor. -
Page 51: Resolución De Problemas
Resolución de problemas Problema Causa Solución 1. La válvula del tanque de PL está cerrada. 1. Abra la válvula del tanque de PL. 2. El nivel de gas del tanque de PL está bajo. 2. Sustituya el tanque de PL. La parrilla no se enciende. -
Page 52: Indicaciones Para Asar A La Parrilla
Indicaciones para asar a la parrilla Método de Confiu-ración Tipo Descripción Espesor Tiempo total Instrucciones coc-ción del quemador CARNE DE RES NY Strip, Rib eye, Voltee la carne sólo Bistecs 1 pulg. / Porterhouse, T-Bone, Directo Alto 10-15 min. una vez a la mitad del 5 cm solomillo, filets tiempo para asar... - Page 53 Indicaciones para asar a la parrilla Método de Confiu-ración Tipo Descripción Espesor Tiempo total Instrucciones coc-ción del quemador Gambas 18 – 20 oz / 510 – 566 g Directo Alto 3-6 min. VERDURAS Mazorca de Con la cáscara Directo Medio 20-30 min.
-
Page 54: Repuestos
Repuestos 42224 Replacement Parts... - Page 55 Repuestos Part Description Quantity Part # Part Description Quantity Part # Side burner PC0108 Temperature gauge 2.25” PC0101 Logo plate PC0102 Side burner electrode PC0109 Side burner shelf PC0170 Grill lid PC0159 lid handle insulating spacer PC0112 Side burner shelf PC0106 Lid handle PC0116...
-
Page 56: Garantía
Esta garantía le otorga derechos legales específicos y también es posible que tenga oros que puedan variar de un estado a otro. Landmann USA, Inc. 7405 Graham Rd Fairburn, Ga 302130 www.landmann-usa.com...
Need help?
Do you have a question about the 42224 and is the answer not in the manual?
Questions and answers