
Related Manuals for ProScan PSB3713-OP


Summary of Contents for ProScan PSB3713-OP
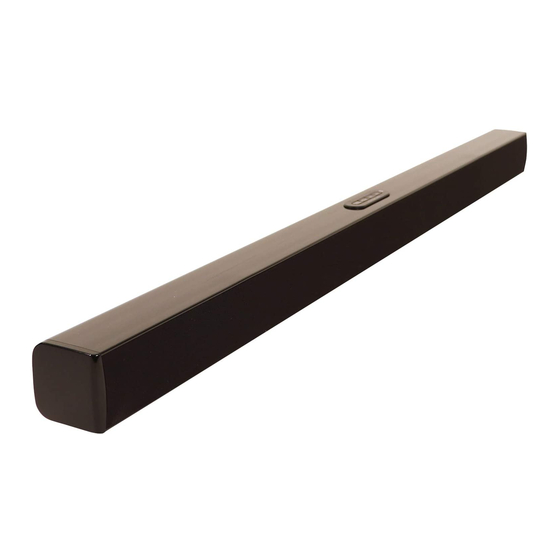
- Page 1 Bluetooth 37'' Soundbar MODEL:PSB3713-OP Please read this instruction manual carefully and keep it for future reference...
-
Page 2: Important Safety Instructions
IMPORTANT SAFETY INSTRUCTIONS CAUTION: TO REDUCE THE ELECTRIC SHOCK, DO NOT REMOVE THE COVER (OR BACK). NO USER SERVICEABLE PARTS INSIDE. REFER SERVICING TO QUALIFIED SERVICE PERSONNEL. DANGEROUS VOLTAGE: The lighting flash with arrowhead symbol within an equilateral triangle is intended to alert the user to the presence of uninsulated “dangerous voltage”... - Page 3 -- Reorient or relocate the receiving antenna. -- Increase the separation between the equipment and receiver. -- Connect the equipment into an outlet on a circuit different from that to which the receiver is connected. -- Consult the dealer or an experienced radio/TV technician for help. To assure continued operation, follow the attached installation instructions and use only shielded cables when connecting to other devices.
- Page 4 provided for your safety. If the provided plug does not fit into your outlet, consult an electrician for replacement of the obsolete outlet. 10. Protect the power cord from being walked on or pinched particularly at plugs, convenience receptacles, and the point where they exit from the apparatus. 11.
-
Page 5: Placement And Mounting
PLACEMENT AND MOUNTING 1. Placing the device on table - Ventilation When placing the Sound Bar on an entertainment center, bookshelf, or any type of enclosed space, be sure to allow at least 2-3 inches of space around the Sound Bar for ventilation. -
Page 6: Mounting To A Wall
Mounting to a wall 2.1 Mounting to a wooden wall A. Mark the position of the mounting screws on the wall using a pencil. B. Drill the supplied screws directly into the marks that you have made on the wall and leave approx. -
Page 7: Location Of Controls
LOCATION OF CONTROLS: Front View 1. Indicator 3. Speaker 3. Speaker 2. Remote sensor Rear View AUX 1 AUX 2 12V,2.0A OPTIC AL 8. DC IN jack 4. Antenna 5. AUX 2 7. AUX 1 6. OPTICAL Audio Input Top View Standby FM Scan Vol-... -
Page 8: Remote Control
REMOTE CONTROL STANDBY STANDBY button 2. VOL(Volume) - button 3. SOURCE button 4. BASS down button 5. PAIR button 6. TREBLE down button BASS - PAIR BASS + 7. EQ (Equalizer) button (Previous)/ TUNE- button TREBLE + TREBLE - / MO/ST(mono/stereo) button TUNE- MO/ST TUNE+... -
Page 9: General Operation
GENERAL OPERATION 1. Connect the AC/DC adapter to the unit and wall outlet. The red indicator will light but unit is OFF and in standby mode. 2. Press the Standby/Source button on the unit or press the SOURCE button on the remote control repeatedly to switch to desired mode. -
Page 10: Fm Radio Operation
FM RADIO OPERATION Before listening to the radio, please unwind and extend FM antenna or relocate the unit to get better reception. 1. Power ON the unit as previously explained. 2. Press the Standby/Source button on the unit or press the SOURCE button on the remote control until the indicator turns Green. -
Page 11: Bluetooth Pairing And Connection
2. Turn on the BT function of the external BT Device. 3. Touch PROSCAN and wait a few seconds until the unit pairs to the external BT Device automatically. The Blue indicator will stop blinking. 4. Play the music in the connected BT Device as usual. -
Page 12: Audio Device
AUX 2: LISTEN EXTERNAL AUDIO DEVICE An external (Auxiliary) audio source (ie.,personal CD player or MP3 player) can be connected to this unit and heard through the speakers. 1. Plug one side of the Aux In cable into the AUX 2 jack on the rear of the unit. 2.Plug the other end of the Aux In cable into headphone or line out socket of the external audio source. - Page 13 AUX 1: LISTEN TO TV/DVD/VCR/DVR An external Video/Audio player (such as TV, DVD player, VCR, etc.) can be connected to this unit and heard through the speakers. 1. Plug one side of RCA White and Red cable into the AUX 1 jacks on the rear of the unit.
-
Page 14: Rear View Of The Unit
OPTICAL DIGITAL AUDIO IN 1. Connect the Optical out jack from the external audio Player (such like TV, DVD Player BD Player …etc.) to the OPTICAL IN jack on the top of unit by the Optical Connection Cable (not supplied) as the figure below: ( F or PCM format only ) Rear view of the unit AUX 1 AUX 2... -
Page 15: Troubleshooting Guide
TROUBLESHOOTING GUIDE PROBLEM POSSIBLE CAUSE POSSIBLE SOLUTION No power Power AC/DC Adapter Connect the power AC/DC adapter not connected to the unit or wall outlet. The unit is in standby mode Press the Standby/Source button on the unit or button on the Remote Control to turn on the unit from Standby mode. -
Page 16: General Specifications
GENERAL SPECIFICATIONS Power Input..............AC 100-240V~; 50/60Hz Power Output..............DC12V Audio Power.....................10Wx2 Bluetooth Effective Range in Open Area.........Up to 32 feet Remote Effective Range..............Up to 16 feet FM Frequency................87.5-108.0MHz 1 x AC/DC Adapter 1 x Remote Control 1 x Stereo Audio Connection Cable with 3.5mm stereo plugs 1 x RCA Cable 1 x User's Manual 2 x Plastic Inserts (For Wall Mount) - Page 17 Barre de son Bluetooth 37" MODÈLE : PSB3713-OP Lisez ce mode d'emploi avec attention, et conservez-le pour référence future.
-
Page 18: Importantes Mesures De Sécurité
IMPORTANTES MESURES DE SÉCURITÉ ATTENTION RISQUE DE CHOC ÉLECTRIQUE NE PAS OUVRIR ATTENTION : AFIN DE RÉDUIRE TOUT RISQUE DE CHOC ÉLECTRIQUE, NE PAS RETIRER LE BOITIER (NI LA PARTIE ARRIÈRE). AUCUNE PIÈCE REMPLAÇABLE PAR L'UTILISATEUR. VEUILLEZ CONTACTER LE PERSONNEL QUALIFI É EN CAS DE DÉFAILLANCE. - Page 19 constaté en l'allumant et en l'éteignant, alors il vous est conseillé d'y remédier d'une des manières suivantes : --Réorientez ou déplacez l'antenne réceptrice. --Augmentez la distance entre l'équipement et le récepteur. --Connectez l'équipement à une prise ou circuit différent de celui du récepteur. --Prenez conseil auprès du revendeur ou d'un technicien qualifié...
- Page 20 Installez l'appareil de manière à ne pas gêner son aération correcte. Par exemple, l'appareil ne doit pas être installé sur un lit, un sofa, un tapis ou une surface similaire susceptible d'en obstruer les ouvertures d'aération. Il ne doit également pas être installé à l'intérieur d'un environnement fermé...
- Page 21 INSTALLATION ET MONTURE 1. Installation de l'appareil sur une table - Aération Installez la barre de son sur votre centre multimédia, sur une étagère ou un cabinet en veillant à laisser un espace libre d'au moins 5 à 8 cm (2-3 pouces) sur tout son pourtour pour garantir son aération correcte.
- Page 22 Monture sur un mur 2.1 Fixation sur un mur en bois A. Utilisez un crayon pour marquer l'endroit où seront fixées les vis. B. Vissez les vis directement à l'endroit marqué en laissant un espace d'environ 0.7 cm (0,3 pouce) entre la tête de vis et le mur pour accrocher la barre de son. C.
-
Page 23: Vue Avant
EMPLACEMENT DES CONTRÔLES Vue avant Voyant 2. Récepteur de la télécommande 3.Haut-parleur Vue arrière AUX 1 AUX 2 12V,2.0A OPTIC AL 6. Entrée audio OPTIQUE 7. AUX 1 4. Antenne FM 5. AUX 2 8. Prise alimentation secteur Vue de dessus Standby FM Scan Vol-... - Page 24 TÉLÉCOMMANDE Bouton VEILLE STANDBY 2. Bouton VOL (Volume) - 3. Bouton SOURCE 4. Bouton BASSE - 5. Bouton PAIR BASS - PAIR BASS + 6. Bouton AIGU - 7. Bouton EQ (égaliseur) TREBLE + TREBLE - Bouton (Précédent)/FRÉQUENCE - TUNE- MO/ST TUNE+ Bouton MO/ST(Mono/Stéréo)
- Page 25 COMMENCER 1. Branchez l'adaptateur secteur à l'unité et à la prise murale correctement. Le voyant rouge s'illumine, mais l'appareil est ÉTEINT et en veille. 2. Appuyez sur le bouton Veille/SOURCE sur l'appareil ou sur le bouton SOURCE de la télécommande à plusieurs reprises afin de passer au mode désiré. La couleur du voyant s'illuminera de différentes couleurs : Vert.................FM Radio Violet................AUX 1...
-
Page 26: Utilisation De La Radio
UTILISATION DE LA RADIO Avant d'écouter la radio, découlez et étendez l'antenne FM et déplacez l'appareil si nécessaire pour améliorer la qualité de réception. 1. ALLUMEZ l'appareil selon les procédures précédentes. 2. Appuyez sur le bouton Veille/SOURCE sur l'appareil ou sur le bouton SOURCE de la télécommande jusqu'à... - Page 27 1. Une fois la recherche effectuée par l'appareil BT externe, l'unité doit apparaître sous le nom « PROSCAN » sur l'écran du dispositif Bluetooth externe. 2. Si le dispositif BT demande un mot de passe, saisissez le code « 0000 » pour confirmer la connexion au «...
- Page 28 AUX 2 : DIFFUSER DEPUIS DES PÉRIPHÉRIQUES AUDIO EXTERNES Une source audio externe (Auxilliaire) (par exemple un lecteur CD ou MP3) peut être raccordé à cette unité et en diffuser le son via ses enceintes. 1. Branchez une extrémité du câble Aux In dans la prise AUX 2 située à l'arrière de l'unité.
- Page 29 AUX 1 : VERS TV/DVD/ DIFFUSER VCR/DVR Vous pouvez raccorder un lecteur audio/vidéo externe (par exemple une TV, un lecteur DVD, un magnétoscope, etc.) à cette unité pour en diffuser le son. 1. Branchez une extrémité du câble RCA blanc et rouge dans la prise AUX 1 située à...
- Page 30 OPTIQUE NUMÉRIQUE ENTRÉE AUDIO 1. Branchez la prise de sortie Optique du lecteur audio externe (par exemple une TV, un lecteur DVD, un lecteur BD ... etc) aux prises d'entrée ENTRÉE OPTIQUE sur le dessus de l'unité avec le câble de branchement Optique fourni comme illustré...
-
Page 31: Guide De Dépannage
GUIDE DE DÉPANNAGE PROBLÈME CAUSE POSSIBLE SOLUTION POSSIBLE Pas d'alimentation L'adaptateur secteur n'est Branchez l'adaptateur pas connecté secteur à l'unité et à la prise murale correctement L'unité est en mode veille Appuyez sur le bouton Veille/Source sur l'appareil ou sur de la télécommande afin de le sortir du mode veille. -
Page 32: Caractéristiques Générales
CARACTÉRISTIQUES GÉNÉRALES Alimentation............... CA 100-240V, 50/60Hz Alimentation de sortie..........CD12V Puissance audio..................10W x 2 Portée effective du Bluetooth sans obstacle......Jusqu'à 10 mètres Portée effective de la télécommande..........Jusqu' à 5 m Fréquence FM................87.5-108.0MHz 1 adaptateur secteur 1 Télécommande 1 Câble de connexion Audio avec prises stéréo 3,5 mm 1 Câble RCA...
Need help?
Do you have a question about the PSB3713-OP and is the answer not in the manual?
Questions and answers