Mitsubishi Heavy Industries SRR25ZM-S User Manual
Hide thumbs
Also See for SRR25ZM-S:
- Technical manual (90 pages) ,
- Technical manual (379 pages) ,
- Technical manual (358 pages)
Table of Contents
Advertisement
SRR25ZM-S
SRR35ZM-S
SRR50ZM-S
SRR60ZM-S
This air-conditioner complies with EMC Directive 2004/108/EC,
LV Directive 2006/95/EC.
Ce climatiseur est conforme à la Directive EMC: 2004/108/EC, LV
Directive 2006/95/EC.
Dieses Kimagerät erfüllt die EMC Direktiven 2004/108/EC, LV
Direktiven 2006/95/EC.
Questo condizionatore d'aria è conforme alla Direttiva EMC:
2004/108/EC, LV Direttiva 2006/95/EC.
USER'S MANUAL
AIR-CONDITIONER
РУКОВОДСТВО ПО ЭКСПЛУАТАЦИИ
MANUEL DE L'UTILISATEUR
ANWENDERHANDBUCH
ISTRUZIONI PER L'USO
CONDIZIONATORE D'ARIA
MANUAL DEL PROPIETARIO
ACONDICIONADOR DE AIRE
GEBRUIKERSHANDLEIDING
MANUAL DO UTILIZADOR
APARELHO DE AR CONDICIONADO
ΟΔΗΓΙΕΣ ΧΡΗΣΗΣ
КОНДИЦИОНЕР ВОЗДУХА
KULLANIM KILAVUZU
Este acondicionador de aire cumple con la directiva EMC:
2004/108/EC, LV Directiva 2006/95/EC.
Deze airconditioner voldoet aan EMC Directive 2004/108/EC, LV
Directive 2006/95/EC.
Este aparelho de ar condicionado está em conformidade com a
Directiva EMC 2004/108/EC e a Directiva LV 2006/95/EC.
Αυτό το κλιματιστικό είναι σύμφωνο με τις προδιαγραφές της
Οδηγίας EMC 2004/108/EK και της Οδηγίας LV 2006/95/EK.
ORIGINAL INSTRUCTIONS
ENGLISH
FRANÇAIS
CLIMATISEUR
DEUTSCH
KLIMAGERA ¨ T
ITALIANO
ESPAN ˜ OL
NEDERLANDS
AIRCONDITIONING
PORTUGUÊS
ΕΛΛΗΝΙΚΑ
ΚΛΙΜΑΤΙΣΤΙΚΟ
РУССКИЙ
TÜRKÇE
RJJ012A001
Advertisement
Table of Contents

Subscribe to Our Youtube Channel
Related Manuals for Mitsubishi Heavy Industries SRR25ZM-S


Summary of Contents for Mitsubishi Heavy Industries SRR25ZM-S
- Page 1 ORIGINAL INSTRUCTIONS USER’S MANUAL AIR-CONDITIONER ENGLISH MANUEL DE L’UTILISATEUR FRANÇAIS CLIMATISEUR ANWENDERHANDBUCH DEUTSCH KLIMAGERA ¨ T ISTRUZIONI PER L’USO ITALIANO SRR25ZM-S SRR35ZM-S CONDIZIONATORE D’ARIA SRR50ZM-S ESPAN ˜ OL MANUAL DEL PROPIETARIO SRR60ZM-S ACONDICIONADOR DE AIRE GEBRUIKERSHANDLEIDING NEDERLANDS AIRCONDITIONING MANUAL DO UTILIZADOR PORTUGUÊS...
-
Page 2: Table Of Contents
Thank you for purchasing a MITSUBISHI HEAVY INDUSTRIES, LTD. Air-Conditioner. To get the best long-lasting performance, please read and follow this User’s Manual carefully before using your air-conditioner. After reading, please store the Manual in a safe place and refer to it for operational questions or in the event of any irregularities. -
Page 3: Safety Precautions
Safety precautions • Before starting to use the system, please read these “Safety precautions” carefully to ensure proper operation of the system. • When you have read this instruction manual, please keep it safely. If someone else takes over as operator, make sure that the manual is also passed on to the new operator. Improper handling could lead to drastic results like death, WARNING serious injury, etc. -
Page 4: Operation Precautions
❚ Safety precautions ❚ OPERATION PRECAUTIONS WARNING • Children shall not play with the • Cleaning and user maintenance shall appliance. not be made by children without • Do not expose yourself to the cooling supervision. • Do not insert anything into the air inlet. air for a long period. - Page 5 ❚ Safety precautions CAUTION • Do not touch the aluminum fi ns on the • Do not shut off the power source air heat exchanger. immediately after stopping the operation. It may result in injury. • Do not place household electrical Wait at least 5 minutes, otherwise there appliances or household items under is a risk of water leakage or breakdown.
- Page 6 ❚ Safety precautions ❚ PRECAUTIONS FOR RELOCATION OR REPAIRS WARNING • Do not perform any repairs or modifi cations by yourself. Consult the dealer if the unit requires repair. If you repair or modify the unit, it can cause water leaks, electric shocks or fi re. •...
-
Page 7: Name Of Each Part And Its Function
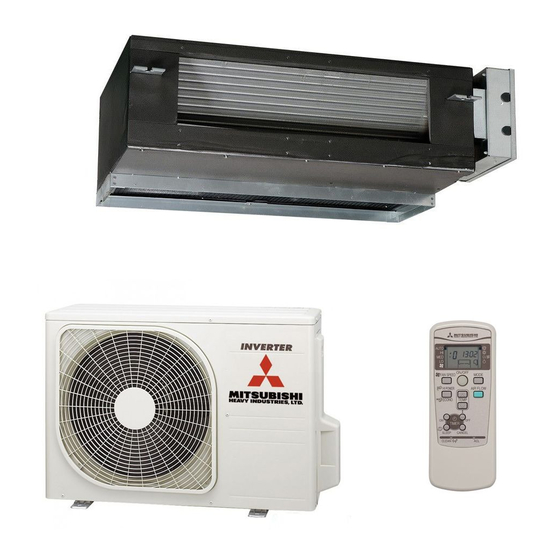
Name of each part and its function INDOOR UNIT Air inlet Air outlet Air blows out of here. Air fi lter Removes dust or dirt from the inlet air. Page 24 Refrigerant piping connection and electric wire Unit display section (Remote control signal receiver) Drain hose Drains water from the indoor unit. - Page 8 Name of each part and its function Unit display section RUN (HOT KEEP) light (green) • Illuminates during operation. Remote control signal receiver • Blinks when airfl ow stops due to the ‘HOT KEEP’ and ‘CLEAN operation’. 1.5 sec. Unit ON/OFF button HOT KEEP This button can be used for turning on/ off the unit when a remote control is not...
-
Page 9: Remote Control Handling
Remote control handling Replacing the batteries The following cases show exhausted batteries. Replace old batteries with new ones. • Receiving beep is not emitted when a signal is transmitted. • Display fades away. NOTE Pull out the cover and take out old batteries. -
Page 10: Installing Two Air-Conditioners In The Same Room
Installing two air-conditioners in the same room ■ When two air-conditioners are installed in the same room, use this setting when the two air-conditioners are not operated with one remote control. Set the remote control and indoor unit. Setting the remote control Setting an indoor unit Pull out the cover and take out bat- Turn off the power source, and turn it on after 1 minute. -
Page 11: Operation And Display Section For Remote Control
Operation and display section for remote control Transmission section OPERATION MODE select button Each time the button is pressed, the mode changes. ON/OFF (luminous) button Page 11,13 Press to start operation, press again to stop. TEMPERATURE button FAN SPEED button This button sets the room temperature. -
Page 12: Current Time Setting
Current time setting ■ When inserting the batteries, the current time is automatically set to time setting mode. Mon and 13:00 are displayed as the current time. Set a correct day of the week and a time. Example: Set to Sat 10:30. Press the TIME SET UP switch. -
Page 13: Temperature Adjustment During Auto
Temperature adjustment during AUTO ■ Air temperature adjustment is possible even during automatic operation. There are 6 levels of adjustment possible with the button or button.During automatic operation, 24°C is preset both for heating and cooling. Press the“ or (TEMP)” button. When it is a little cold Press the button. -
Page 14: Cool/Heat/Dry/Fan Mode Operation
COOL/HEAT/DRY/FAN mode operation Press the MODE button. Set to a required mode. (Cool), (Heat), (Dry), (Fan) Press the ON/OFF button. Press the TEMP button. Press button for the preferred temperature. Recommendation Press the FAN SPEED button Set the fan speed as preferred. A fan speed cannot be set under Dry operation. -
Page 15: Sleep Timer Operation
SLEEP TIMER operation ■ The unit will stop automatically after the set time lapses. The set temperature is automatically adjusted according to the lapse time in order to avoid too much cooling or heating. Page 16 Press the SLEEP button. ■... -
Page 16: On-Timer Operation
ON-TIMER operation ■ Operation starts 5 to 60 minutes before the set time so that the room temperature reaches the optimum temperature at the set time. Page 16 ON-TIMER operation can be set regardless of whether the air-conditioner is running or not. Example: When the preferred room temperature is required at 8:00. -
Page 17: On-Timer + Off-Timer Operation
ON-TIMER + OFF-TIMER operation ■ The timer operations of the combination of ON and OFF-TIMER. Example: Present time is 21:00. The air-conditioner running. When it is prefered to stop at 22:30, and then start operation at 8:00, near the set temperature. -
Page 18: Weekly Timer Operation
WEEKLY TIMER operation ■ Up to 4 programs with timer operation (ON-TIMER / OFF-TIMER) are available for each day of the week. Max 28 programs per week are available. Once this has been set, the timer operation will be repeated at the same programs every week unless the WEEKLY TIMER is canceled. - Page 19 Setting mode <Individual setting> Set after setting the current day of the week and the time. Press the PROGRAM button. and current day of the week blink. Press the “ or (TIMER)” button. Select a day of the week to be reserved. Every time the button is pressed, the display is switched in the order of:...
- Page 20 Press the “ or (TIMER)” button. Set a time. Every time the button is pressed, the display is switched in the order of: 0:00 0:10 0:20 1:00 1:10 (Units of ten minutes) Every time the button is pressed, the display is switched in the order of: 0:00 23:50 23:40 23:00 22:50...
- Page 21 How to cancel the setting <Individual setting> Press the PROGRAM button. and current day of the week blink. Press the “ or (TIMER)” button. Select a day of the week to be canceled. Press the SET button. The day of the week is determined and the program number blinks. Press the “...
-
Page 22: High Power/Economy Operation
HIGH POWER/ECONOMY operation Press the ON/OFF button. Press the HI/ECO button. • When the operating mode is AUTO, COOL or HEAT Every time the HI/ECO button is pressed, the display is switched in the order of: No display (HIGH POWER) (ECONOMY) (Normal operation) •... -
Page 23: Night Setback Operation
NIGHT SETBACK operation ■ During the cold season, the room temperature can be maintained at a comfortable level during the absence, at night, and while the room is unattended. The air-conditioner maintains the constant temperature at about 10°C. Press the NIGHT SETBACK button. Every time the NIGHT SETBACK button is pressed, the display is switched in the order of: No display... -
Page 24: Self Clean Operation
SELF CLEAN operation ■ CLEAN operation should be run after AUTO, COOL and DRY operation to remove the moisture from inside the indoor unit and control the growth of mold and bacteria. In order to active CLEAN operation, press the CLEAN switch with the tip of a ballpoint pen. -
Page 25: Maintenance
Maintenance Before maintenance Do not spill any liquid. Turn off the power source. Do not use the following articles: • Hot water (40°C or more) • There's a danger of It may deform or discolour the unit. electric shock. • Petrol, paint thinner, benzine or •... -
Page 26: Proper Installation
Proper installation Suitable installation position • Do not put any obstruction in front of the indoor unit, preventing proper ventilation and functioning. • Do not install the unit in any of the following places: • Where there is a danger of leaking fl ammable gases. •... -
Page 27: Notice
Notice Air fl ow Airfl ow is not blown out when starting the HEATING Airfl ow has stopped to prevent blowing out of cold air until the operation. indoor heat exchanger has warmed up. (2 to 5 min.) (HOT KEEP program) RUN light blinks slowly (1.5 sec ON, 0.5 sec OFF) Airfl... -
Page 28: Contact Your Dealer
Contact your dealer ■ Turn off the power switch immediately and inform your dealer in any of the following situations: The fuse or switch blows continu- The cable becomes extremely hot. ously. The covering of the cable is cracked. CAUTION Fuse often blows. -
Page 29: Self Diagnosis Function
Self diagnosis function ■ We are constantly trying to do better service to our customers by installing such judges that show abnormality of each function as follows: RUN light Description of trouble Cause • Broken heat exchanger sensor 1 wire, poor connector Heat exchanger sensor 1 error 1-time flash connection... -
Page 30: Dred (For Australia)
DRED (For Australia) ■ This air-conditioner complies with the DRED (Demand Response Enabling Devices) standard AS/NZS4755.3.1 and supports demand response modes 1, 2, and 3 (DRM1, 2, and 3). Since the air-conditioner limits the electric power or energy by receiving the DRED input signal, the sense of cooling operation or heating operation may deteriorate over time. - Page 31 – 30 –...
- Page 32 7 Roundwood Avenue, Stockley Park, Uxbridge, Middlesex, UB11 1AX, United Kingdom Tel : +44-20-7025-2750 Fax : +44-20-7025-2751 http://www.mhiae.com MITSUBISHI HEAVY INDUSTRIES AIR-CONDITIONERS AUSTRALIA, PTY. LTD. 9C Commercial Road Kingsgrove NSW 2208 PO BOX 318 Kingsgrove NSW 1480 Tel : +61-2-8571-7977 Fax : +61-2-8571-7992 http://www.mhiaa.com.au...
Need help?
Do you have a question about the SRR25ZM-S and is the answer not in the manual?
Questions and answers