RCA H5400 User Manual
900 mhz cordless handset with caller id
Hide thumbs
Also See for H5400:
- User manual (64 pages) ,
- User manual (56 pages) ,
- User manual (28 pages)
Table of Contents
Advertisement
Quick Links
Download this manual
See also:
User Manual
Advertisement
Table of Contents

Related Manuals for RCA H5400


Summary of Contents for RCA H5400
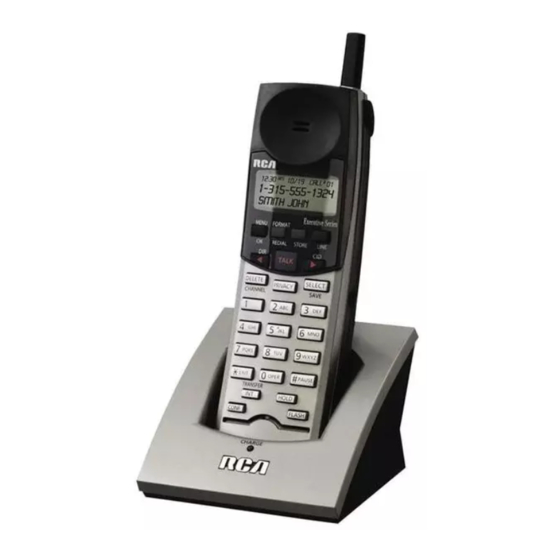
- Page 1 900 MHz Cordless Handset with Caller ID User’s Guide This accessory handset is only for use with Model 25413, 25414, or 25415 base units. Please read this manual before operating product for the first time. Model H5400...
-
Page 2: Important Information
INSTRUCTIONS provided with this product and save them for future reference. Congratulations on purchasing this RCA telephone. This system operates in the 900 MHz frequency range. This accessory handset will expand the phone systems for Models 25413/25414/25415 to cordless when the RF module (packed with this cordless handset) is plugged into the back of the base unit. -
Page 3: Table Of Contents
Table of Contents ............2 ....8 MPORTANT NFORMATION ECEIVING AN NCOMING ELEPHONE URING AN NTERCOM ............8 ..............2 SING NTERCOM WITH A ELEPHONE NTERFERENCE NFORMATION Two-Way Intercom Calls..................8 (HAC) ............2 EARING OMPATIBILITY ............... 3 Three-Way Intercom Calls................. 8 ABLE OF ONTENTS ........ -
Page 4: Before You Begin
Digital Security System Your cordless phone uses a digital security system to protect against false ringing, unauthorized access, and charges to your phone line. It is necessary to register the cordless handset to the base (RCA 25413/25414/25415) before use. Important Installation Information •... -
Page 5: Connecting The Rf Module
Connections and Setup Connecting the RF Module Insert the RF module into the back of the base unit until it snaps into place. The display will show when the RF module is connected properly. Registering the Handset NOTE: Handset must be registered to the base to be operational. Once a handset is registered it can use the base phone’s connection. -
Page 6: Telephone Set Up
Telelphone Operation Telephone Set Up There are five programmable menus available for the handset: Language, Local Area Code, Regional Area Code, Clear All Memories and Registration. Pressing the FLASH/EXIT button will remove you from the menu selection process without changing the feature you are in. Language 1. -
Page 7: Making A Call
Telelphone Operation Making a Call 1. Press the TALK button to access an available line automatically, If you want to select a desired line, press LINE button plus a number button (1-4) to select the desired line. 2. Wait for a dial tone then dial the desired number. 3. -
Page 8: Battery Low
Telephone Operation Battery Low If the handset battery is low, the unit will emit the alert tone and show BATTERY LOW in the display to remind you that the battery needs charging. If the battery voltage is very low, the handset will automatically shut down. Place handset in the charge cradle to recharge battery. Paging All Extension from the Cordless Handset In the standby mode, press the INT button and then press zero (0) button twice to activate page all extensions function. -
Page 9: Toring Aedial Umber
Telelphone Operation 3. Press the SELECT button. The display shows ENTER NAME. 4. Use the touch-tone pad to enter a name (up to 21 characters). More than one letter is stored in each of the number keys. For example, to enter Bill Smith, press the 2 key twice for the letter B. Press the 4 key 3 times for the letter I. Press the 5 key 3 times for the letter L. Press the 5 key 3 times for the second letter L, and press the 1 key to insert a space between the first and last name. -
Page 10: Caller Id (Cid)
Telephone Operation The Number For Memory Location Long Distance Access Number Authorization Code Frequently called long distance number Make sure the phone is ON. 1. Press DIR/ button and then press 0 followed by 7. 2. Press SELECT/SAVE to dial the displayed number. 3. -
Page 11: Transferring Cid Records To Memory
Telelphone Operation Transferring CID Records to Memory You may transfer a Caller ID record to your phone’s memory. NOTE: It is important that you format CID records correctly before storing in memory. It is not possible to reformat CID records stored in memory. 1. -
Page 12: Changing The Battery
Telephone Operation Changing the Battery Make sure the telephone is OFF (not in TALK mode) before you replace battery. 1. Remove the battery compartment cover. 2. Disconnect the battery plug from the jack inside the battery compartment and remove the battery pack from the handset. -
Page 13: Display Messages
Troubleshooting Tips Display Messages The following indicators show the status of a message or of the unit. REGISTRATION: Prompt telling you to enter registration mode of handset. ENTER NUMBER: Prompt telling you to enter number. ENTER NAME: Prompt telling you to enter the name. ENTER LOCATION: Prompt telling you to assign the memory location(from 01 to 40). -
Page 14: Caller Id Solutions
Troubleshooting Tips Dial tone is OK, but can’t dial out • Make sure the type of phone service you are subscribed to is TONE. This handset is TONE only. Handset does not ring • Make sure the handset ringer switch is turned on. •... -
Page 15: General Product Care
Other Information General Product Care To keep your unit working and looking good, follow these guidelines: • Avoid putting the phone near heating appliances and devices that generate electrical noise (for example, motors or fluorescent lamps). • DO NOT expose to direct sunlight or moisture. •... -
Page 16: Service
Other Information Service ATLINKS Communications Canada, Inc., warrants to the purchaser or gift recipient that if any manufacturing defect becomes apparent in this product within 1 year from the original date of purchase, it will be replaced free of charge, including return transportation. This warranty does not include damage to the product resulting from accidents, misuse or leaking batteries. -
Page 17: Ndex
Index Accessory Information 16 Language 6 Answering an Intercom Call 8 Local Area Code 6 Answering a Call 6 Making an Intercom Call with Other Extensions 8 Basic Operation 6 Making a Call 7 Battery Low 8 Manual Channel Selection 7 Battery Safety Precautions 12 Memory 8 Battery Solutions 14... - Page 18 Visit the RCA web site at www.rca.com Please do not send any products to the Indianapolis address listed in this manual or on the carton. This will only add delays in service for your product. ATLINKS Communications Canada Inc. © 2005 ATLINKS Communications Canada, Inc.
Need help?
Do you have a question about the H5400 and is the answer not in the manual?
Questions and answers