
Related Manuals for Jensen JiTS-300i


Summary of Contents for Jensen JiTS-300i
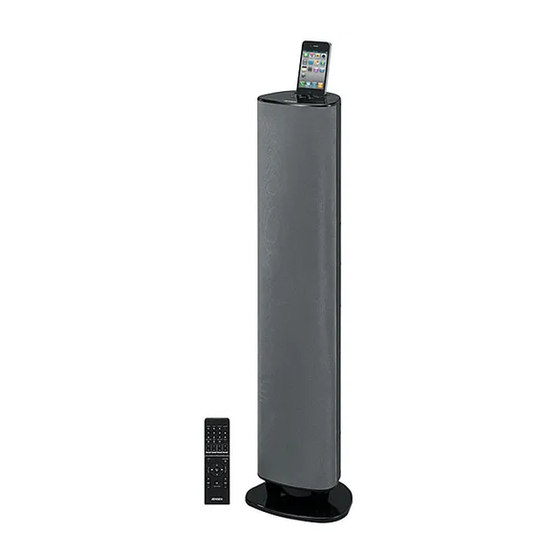
- Page 1 ® DOCKING DIGITAL MUSIC SYSTEM FOR iPod AND iPhone USER MANUAL JiTS-300i (iPhone/iPod Not Included) PLEASE READ THIS USER MANUAL COMPLETELY BEFORE OPERATING THIS UNIT AND RETAIN THIS BOOKLET FOR FUTURE REFERENCE.
-
Page 2: Dear Jensen® Customer
The serial number of this product is found on its back cover. You should note the serial number of this unit in the space provided as a permanent record of your purchase to aid in identification in the event of theft of loss. Model Number: JiTS-300i Serial Number: ____________________... -
Page 3: Important Safety Instructions
WARNINGS WARNING: To reduce the risk of fire or electric shock, do not expose this appliance to rain or moisture. CAUTION: Use of controls or adjustments or performance of procedures other than those specified may result in hazardous radiation exposure. CAUTION - TO REDUCE THE RISK OF ELECTRIC SHOCK, DO NOT REMOVE COVER (OR BACK). - Page 4 7) Do not block any ventilation openings. Install in accordance with the manufacturer’s instructions. Minimum distances 2 cm around the apparatus for sufficient ventilation. The ventilation should not be impeded by covering the ventilation openings with items, such as newspapers, table-cloths, curtains, etc. 8) Do not install near any heat sources such as radiators, heat registers, stoves, or other apparatus (including amplifiers) that produce heat.
- Page 5 IMPORTANT NOTES Avoid installing the unit in locations described below: • Places exposed to direct sunlight or close to heat radiating appliances such as electric heaters. • Places subject to constant vibration. • Dusty, humid or moist places. Protect Your Furniture This product is equipped with non-skid rubber 'feet' to prevent the product from moving when you operate the controls.
-
Page 6: Main Unit
LOCATION OF CONTROLS MAIN UNIT 1. VOLUME - BUTTON 10. REMOTE INFRARED SENSOR 2. VOLUME + BUTTON 11. A/V INPUT JACKS 12. COMPONENT VIDEO OUTPUT JACKS 3. POWER ON/STANDBY BUTTON 13. LINE IN JACK 4. PLAY/PAUSE BUTTON 14. SUBWOOFER OUTPUT JACK 5. -
Page 7: Remote Control
REMOTE CONTROL 1. MUTE BUTTON 2. POWER ON/STANDBY BUTTON 3. NUMERIC BUTTONS 4. VIDEO OUT/NUMERIC 0 BUTTON 5. TIME SYNC/NUMERIC 9 BUTTON 6. PLAY LIST UP/DOWN BUTTONS 7. ALBUM UP/DOWN BUTTONS 8. SLEEP BUTTON 9. SKIP BACK / TUNING - button 10. -
Page 8: Getting Started
GETTING STARTED CONNECTING THE JiTS-300i TO EXTERNAL VIDEO DEVICES You can connect the JiTS-300i output to your television or video display. Other video input devices like an iPod/iPhone or external video players can also be connected and played through the JiTS-300i and displayed your television or video display. Please see figure as below. -
Page 9: Connecting The Ac Power Cord
CONNECTING THE AC POWER CORD After connecting the speakers fully unwind the AC power cord and connect it to any convenient household 240V~ 50Hz AC outlet. REMOTE CONTROL BATTERY INSTALLATION The remote control operates on 2 X AAA (UM-4) batteries (included). 1.) Open the battery compartment cover. -
Page 10: Listening To The Radio
2. Your iPod/iPhone will communicate with the JiTS-300i. When it finished, press and hold the TIME SYNC button on the remote control for 3 seconds. It will sync the time with your iPod/iPhone time and show it on the LCD display after about 3 seconds. -
Page 11: Fm & Fm-Stereo Reception
button on the remote repeatedly. Use the manual tuning method to tune to weaker stations that are bypassed during Automatic Tuning. 4. To automatically tune to the next radio station with the strongest signal, press and hold the button for 1-2 seconds until frequency readout on the display begins to scan and then release the button. -
Page 12: Listening To Your Iphone/Ipod
LISTENING TO YOUR iPhone/iPod iPod/iPhone Bracket The JiTS-300i comes with a removable 5 insert brackets for iPod and iPhone. If the included adaptors do not fit your iPod/iPhone, you can still use the dock without an adapter or use the original adaptor included with your iPod instead by inserting it into the docking area. - Page 13 an iPod. No Bracket is required if you use an iPhone 4. 2. Carefully place your iPhone/iPod into the docking bay by placing the connector on the bottom of the iPhone/iPod onto the connector in the docking bay. 3. To remove/replace an Bracket, first remove your iPhone / iPod, then grip the Bracket and pull gently upwards.
-
Page 14: Composite Video Output
Press and hold the SHUFFLE button to enable or disable the shuffle play function of your iPhone/iPod. Press the PLAY LIST button to select the desired playlist folder on the connected iPod/iPhone to play. Press ALBUM button to select your desired album in the selected playlist folder to play. -
Page 15: Component Video Output
COMPONENT VIDEO OUTPUT 1. Securely dock your iPhone or iPod with video. 2. Connect one end of a component video cable (not included) to COMPONENT OUT jacks on the rear of the unit. Make sure the color codes of the plugs are correct to the connectors. - Page 16 external amplifier: 1. Use a RCA audio cable (not included) to connect the SUBWOOFER INPUT of your external amplifier to the SUBWOOFER OUTPUT jack on the rear of the unit. 2. Power on the unit and the external amplifier. 3. When audio is played on this unit, the sound will be produced from the unit and the connected external amplifier synchronously for enhancing the bass sound effect.
-
Page 17: Auxiliary Input
AUXILIARY INPUT This unit provides an auxiliary audio signal input jack for connecting external audio devices like MP3 players, CD players and listen to them through the speakers of this unit. 1. Use an audio cable (not included) with one 3.5 mm stereo plug on each end of the cable. -
Page 18: Care And Maintenance
CARE AND MAINTENANCE 1. Do not subject the unit to excessive force, shock, dust or extreme temperature. 2. Do not tamper the internal components of the unit. 3. Clean your unit with a dry cloth. Solvent or detergent should never be used. 4. - Page 19 Please make sure that your iPod / iPhone is working properly before Your iPod / iPhone is locked docking into the unit. Please refer to your iPod / iPhone manual for details. Remove your iPod / iPhone from the dock and check for obstruction on iPod / iPhone is not installed the connectors in the dock and on properly.
-
Page 20: Specification
SPECIFICATION Power requirement: Main Unit AC 240V~, 50Hz Power Consumption Remote Control 2 X DC 1.5V AAA (UM-4) Batteries Frequency Range Radio Band FM 87.5 ~ 108 MHz "Made for iPod" and “Made for iPhone” mean that an electronic accessory has been designed to connect specifically to iPod and iPhone respectively, and has been certified by the developer to meet Apple performance standards.
Need help?
Do you have a question about the JiTS-300i and is the answer not in the manual?
Questions and answers