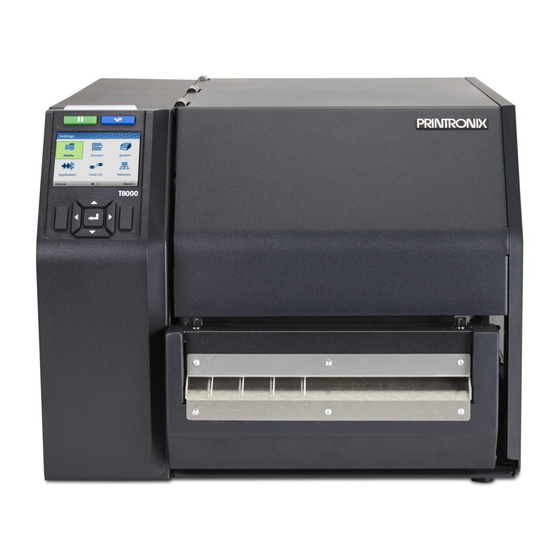
Printronix T8000 Administrator's Manual
Hide thumbs
Also See for T8000:
- Administrator's manual (327 pages) ,
- Administrator's manual (338 pages)
Table of Contents
Advertisement
Quick Links
Download this manual
See also:
Administrator's Manual
Advertisement
Table of Contents

Subscribe to Our Youtube Channel
Related Manuals for Printronix T8000


Summary of Contents for Printronix T8000
- Page 1 Administrator’ s Manual T8000 Thermal Printers...
-
Page 3: Trademark Acknowledgements
Printronix makes no representations or warranties of any kind regarding this material, including, but not limited to, implied warranties of merchantability and fitness for a particular purpose. Printronix shall not be held responsible for errors contained herein or any omissions from this material or for any damages, whether direct, indirect, incidental or consequential, in connection with the furnishing, distribution, performance or use of this material. -
Page 5: Table Of Contents
Table of Contents Introduction ..............13 The T8000 Family of Printers ................13 Standard Features ..................... 14 Optional Features ....................15 Thermal Printer Technology ................16 The Printing Process ................... 16 Dynamic Print Control ................. 16 ... - Page 6 Sensing Media with Gaps, Notches, or Holes (Gap) ........36 Sensing Media with Dark Background Labels with Gaps (Advanced Gap) 37 Sensing Dark Background Media with Notches or Holes (Advanced Notch) ........................38 Sensing Different Media Types ..............39 ...
- Page 7 Media > Handling ..................67 Media > Ribbon ................... 71 Media > Top of Form................... 72 Media > Faults .................... 74 Media > Auto Label Map ................75 Auto Label Map Examples ................77 ...
- Page 8 Application > LP+ SETUP ................. 139 Application > P-SERIES Setup ..............144 Application > P-SERIES XQ Setup ............150 Application > Serial Matrix Setup .............. 154 Application > Proprinter Setup ..............159 Application > Epson FX Setup ..............162 ...
- Page 9 Sending Firmware via Serial ..............207 Downloading Files to the Main File System ............ 208 Filename Extensions Not Shown in Menus ............. 208 File Properties Not Shown in Menus ............... 209 Web Page Download ..................209 ...
- Page 10 Printronix Wide Spectrum Wax Ribbon 8300 ........... 258 Printronix Wax Resin Blend Ribbon 8500 ..........258 Printronix Flood-Coat Specialty Wax Resin Blend Ribbon 8550 ....258 Printronix Specialty Resin Ribbon 8600 ........... 258 Printronix Harsh Environment Resin Ribbon 8700 ........258 ...
- Page 11 Updating the QCMC Image ................... 286 Erasing the QCMC Image ..................286 Customer Support ............289 Printronix Customer Support Center ............... 289 Printronix Supplies Department ..............289 Corporate Offices ..................290 Glossary ..............291 ...
- Page 12 Limited Software Product Warranty ..............307 Remedy ..................... 307 Disclaimer of Warranties and Limitation of Remedies ......307 Termination of License Agreement ............307 U.S. Government Restricted Rights ............308 Acknowledgement of Terms and Conditions ..........308 ...
-
Page 13: Introduction
The T8000 Family of Printers NOTE: As used in this manual, the terms “T8000” and “printer” refer to all models within the series. The T8000 series consists of a family of high quality, direct thermal and thermal transfer printers specifically designed for printing labels and tags from multiple environments: •... -
Page 14: Standard Features
512MB DRAM memory (fixed). 128MB Flash memory (fixed). Auto Label Mapping®: For compatibility with programs written for Printronix line matrix printers. Bar Codes: Supports over multiple types of 1-D and 2-D bar codes. Download: Fonts, forms, and graphics to printer memory. -
Page 15: Optional Features
SD card). The Andale fonts will become active when the SD card is installed. GPIO (General Purpose Input/Output): Enables a T8000 printer to interface with an external device such as a label applicator system. GPIO is available as a factory option or field installable kit that also includes a mating connector for field interface, installation instructions, and operation manual. -
Page 16: Thermal Printer Technology
Thermal Printer Technology Quiet and fast, with excellent print quality, your multifunction thermal printer uses an inline thermal printhead. The thermal printer operates differently from a line matrix or laser printer, because the thermal printer uses a printhead with heating elements and special paper or ribbon. The Printing Process The thermal printhead allows two modes of operation: ... -
Page 17: Manual Conventions
Manual Conventions Operator panel keys are printed in uppercase letters. Example: Press the PAUSE key and then press ENTER. Operator panel keys are often shown by their symbol or icon (located on the control panel directly be- low the key). Example: Press the key for ENTER. -
Page 19: Operation
Operation Controls and Indicators Power Switch The power switch is located on the bottom back panel of the printer. To apply power, place the switch in the | (ON) position. When you first power on the printer, an initialization sequence will immediately appear on the color LCD control panel. -
Page 20: Operating Modes
Button Description Functionality PAUSE Key When ONLINE, sets printer to OFFLINE Mode Toggles the printer between and the UI to the Home Screen. ONLINE and OFFLINE Modes. When OFFLINE, returns the printer to the Home Screen first and then a second press will put the printer back ONLINE. -
Page 21: Online Screen
Online Screen When the printer is ONLINE and ready to receive data, the ONLINE screen is shown. By default, this will be the first screen the user sees after the power-up process has completed. In order to demonstrate the full features of the ONLINE Screen, the following options are assumed: •... -
Page 22: Offline (Home) Screen
Using the navigational keys, the user can move among three options: • Wizard – Provides Setup Instruction, Web Resources, and other links to the Printronix website via QR barcodes for Product Support. •... - Page 23 Config 1 when completed. The Wizard also has support available in the form of QR barcodes for the other categories such as “Web Links”, “Order Supplies”, etc. These QR barcodes provide links to the Printronix website www.printronix.com to view online videos, manuals, drivers, including places where they can order supplies and register their product.
- Page 24 To view the full contents of a particular subsection or edit their menus, the user can either press ENTER or use the RIGHT ARROW key to get into the Edit Level. Conversely, the user can hit the LEFT ARROW key to return to the previous screen. When in the Edit Level, the user can scroll the menus and their values using the up/down arrow keys.
-
Page 25: Job In Process
Users can follow the simple instructions shown in the screen or request additional help with the faults by using the RIGHT SOFT key “Fault Help” if available. When Fault Help is selected, the user will be provided a set of screens to help them through the process. However, Fault Help is only offered for faults that are complex or require several steps with the printer mechanism. -
Page 26: Using The Optional Internal Rewinder
Tear-Off Strip. Prints on the media and sends it out the front until the print buffer is empty. It then po- sitions the last label over the tear bar for removal. Tear-Off. After each label is printed, the printer positions the label over the tear bar and waits for you to tear off the label before printing the next label (on-demand printing). -
Page 27: Installing The Paper Path
Installing the Paper Path The paper path must be installed when using Batch Rewind mode. Front Door Paper Path Hook Groove To install the paper path: Open the front door by pulling it upwards, then forward. The bottom of the plastic paper path is shaped like a hook and the top has a groove: Hook the bottom of the paper path under the bottom edge of the front door Snap the groove on the paper path to the top edge of the front door Close the front door... -
Page 28: Loading Media
Loading Media Back Flange Raised Ridge Media Cover Slot Media or Liner Rewinder Rewinder Release Lever Media Damper Guide Printhead Deck Lock Lever Figure 1 Loading Media To load media, refer to Figure 2 and follow “Loading Media” steps 1 through 9 on page 29. Media Slot Rewinder... -
Page 29: Removing Printed Media From The Rewinder
1. Thread the media over the front of the paper path and through the opening under the front door to- ward the internal rewinder IMPORTANT If you do not complete the following step, it will be extremely difficult to remove the printed labels from the rewinder. 2. - Page 30 2. Open the media cover and refer to the Label Peel-Off illustration on the Ribbon and Media Loading instruction label on the inside of the cover. Pivoting Deck Bottom Roller Deck Lock Lever Paper Path Tear Bar 1. Open the front door by pulling it upward, then forward. 2.
-
Page 31: Removing Label Liner From The Rewinder
IMPORTANT The rewinder supports a maximum diameter of 5 inches of liner. Exceeding this diameter can cause the liner to rub on the bottom pan. The rewinder is designed to support the full amount of liner from a standard 8 inch diameter media roll. -
Page 32: Printing Adjustments
4. Open the pivoting deck and load paper and ribbon normally. Printing Adjustments Printhead Pressure Adjustment Active Pressure Setting Printhead Pressure Adjustment Dial Sometimes you will need to adjust printhead pressure because of variations in media thickness and width. The printhead pressure adjustment dial is shown above. The value shown at the bottom of the dial is the active setting. -
Page 33: Printhead Pressure Block Adjustments
Printhead Pressure Block Adjustments Right Pressure Block Right Pressure Left Pressure Block Pointer Block Lead Screw Knob Pressure Block Adjustment Scale Left Pressure Block Handle Printhead pressure block adjustments are used to obtain a uniform print density across the width of the installed media under a variety of media and ribbon conditions. -
Page 34: Positioning The Media Sensors
4. Press the ENTER key to start the Grey test pattern. The pattern will start and continue to print. 5. Press ENTER again to stop printing. 6. Check the test pattern. If necessary reposition the pressure blocks to obtain a uniform print density across the media width. -
Page 35: Sensing Media With Horizontal Black Mark(S) Or Media With No Label Length
Sensing Media with Horizontal Black Mark(s) or Media with No Label Length Indicators (Disable) Visible Red Beam Black Mark from Lower Sensor (underside of media) Lower Sensor Sensor Handle Media Guard Opening Sensing Media with Horizontal Black Marks Position the lower media sensor for detecting horizontal black marks located on the underside of media, and position the upper sensor above the lower sensor to provide a consistent background. -
Page 36: Sensing Media With Gaps, Notches, Or Holes (Gap)
NOTE: The 4 inch T8000 media guard is divided into three open sensor areas. Make sure the media sensor is placed in an open area. 1. Position the lower sensor directly under the center of the gap, notch, or hole. -
Page 37: Sensing Media With Dark Background Labels With Gaps (Advanced Gap)
Sensing Media with Dark Background Labels with Gaps (Advanced Gap) Upper Sensor Visible Red Beam Lower Sensor Upper Sensor Handle Media Guard Opening NOTE: Ribbon is not displayed in this illustration. The upper and lower sensors are designed to function with or without ribbon installed. The upper sensor and lower sensor are used together to detect liner gaps between die cut labels that have a black or dark background on white or clear liner. -
Page 38: Sensing Dark Background Media With Notches Or Holes (Advanced Notch)
Sensing Dark Background Media with Notches or Holes (Advanced Notch) Upper Sensor Upper Sensor Handle Visible Red Beam Lower Sensor Black line on underside of media Media Guard Opening NOTE: Ribbon is not displayed in this illustration. The upper and lower sensors are designed to function with or without ribbon installed. -
Page 39: Sensing Different Media Types
Sensing Different Media Types The printer’s media sensors can detect the different types of label length indicators on a large variety of media types. This is accomplished by selecting the correct sensor option: Gap, Mark, Advanced Gap, Advanced Notch, or Disable under Sensors > Control > Gap/Mark Sensor menu or within the “Printer Setup” Wizard. -
Page 40: Running Auto Calibrate
Auto or Manual Calibrate is completed successfully when the displayed Sensed Distance value correctly matches that of the installed media. When Gap is selected, the Sensed Distance should match the length from the trailing edge of one gap to the trailing edge of the next gap (or one label + one gap). When Mark is selected, the Sensed Distance should match the length from the leading edge of one black mark to the leading edge of the next black mark. -
Page 41: Running Media Profile
NOTE: After a form feed, the position of the leading edge of the next label depends on the type of Media Handling mode selected under Media > Handling > Media Handling menu. Tear-Off and Tear-Off Strip Media Handling will position the label edge at the tear bar, while Continuous will position the label edge under the printhead. -
Page 42: Gap Sensing
1023 0767 Paper Out (578) 0511 Gap Mark (421) 0255 0000 1023 0767 Figure 3 Media Profile Printout Gap Sensing This figure shows a Media Profile printout of a smart label where Gap/Mark Sensor is set to Gap in the Sensors >... - Page 43 Media Sensor Position 1023 0767 0511 Paper Out (441) 0255 Gap (209) 0000 Detected Amplitude Indicates Type of Gap/Mark Detected Amplitude of the Gap Sensing Selected of the Antenna...
- Page 44 To avoid this problem, increase the Threshold Range value to 60% or 70% in the Sensors > Control > Gap/Mark Thresh menu (the default is 50%), then run a Running Auto Calibrate again, page 40. Any changes to Threshold Range will not take effect until you run an Auto Calibrate again. This will raise the Gap/Mark threshold high enough so that the printer will not falsely use the antenna as the gap (top-of-form).
-
Page 45: Advanced Gap Sensing
Advanced Gap Sensing This figure shows a Media Profile printout of a smart label where Sensors > Control > Gap/Mark Sensor menu is set to Advanced Gap. In this example, the gap threshold value the printer selected (represented by the Gap/Mark dotted line) is too close to the baseline (die cut label). -
Page 46: Running Manual Calibrate
Media Sensor Position 1023 0767 0511 Paper Out (301) 0255 Gap (160) 0000 Detected Amplitude Detected Amplitude of the Gap Indicates Type of Gap/Mark of the Antenna Sensing Selected Running Manual Calibrate Manual Calibrate should be performed only when the values derived from Auto Calibrate fail to improve the media sensors’... -
Page 47: Cleaning
8. During the last step of Manual Calibrate, the printer will advance the media and attempt to detect the label length indicators and stop at the Top-of-Form position. The Sensed Distance value will then display for one second. The calibrate is successful when the Sensed Distance value correctly matches that of the installed media. -
Page 48: Interior Cleaning
As you use your printer, the printhead may become dirty with ribbon residue and label adhesives which can result in poor print quality. Keeping the printhead clean will help maintain its life. Cleaning Agent - Clean the printhead using a Printhead Cleaning Pen, Printronix PN 203502-002 or an Isopropyl Alcohol Wipe, Printronix PN 254945-901. ... -
Page 49: Media Sensor Cleaning
Cleaning Agent - Use an isopropyl alcohol wipe or small amount of isopropyl alcohol on a clean cloth to clean the platen roller. Schedule - Clean the platen roller each time you clean the printhead. 3. Clean the platen roller by first removing any label parts from its surface by hand. Then use an isopropyl alcohol wipe or clean cloth moistened with isopropyl alcohol to remove any remaining paper dust, debris, or label adhesive. -
Page 50: Media Damper Cleaning
Print Element Upper Sensor Media Damper Cleaning The media damper and its media width guides (see Media Sensor Cleaning page 49) can accumulate parts of labels, adhesive and paper dust residue that can prevent the proper guiding of labels. Cleaning Agent - Use an isopropyl alcohol wipe or isopropyl alcohol on a clean cloth. - Page 51 5. Use a vacuum or can of compressed air with a nozzle around the area of the cutter blade to remove any dust or debris. 6. Use a cloth with a light amount of WD-40 oil to clean adhesive from the cutter blade and upper or lower stainless steel cutter guides.
-
Page 52: Configurations
Settings section is where the complete set of menus or configuration parameters are located. The T8000 menu system is three levels deep and consists of the ICON Level, View Level, and Edit Level. The ICON Level. The top level of the menu system is known as the ICON Level and consists of two screens as shown below. - Page 53 When the right submenu is highlighted, the user can press ENTER or the RIGHT ARROW key to move into the Edit Level. Likewise, the user can use the left arrow key to move back to the ICON Level. The Edit Level.
-
Page 54: Saving A Configuration
When users are in Edit Mode, they can change to new value by either pressing the ENTER key, or using the RIGHT SOFT key to “Apply”. Likewise, the users can exit Edit Mode without any modification to the menu by using the LEFT SOFT key to “Cancel” the operation. ... -
Page 55: Auto Save Configuration
Auto Save Configuration If you make any changes to the current configuration menu items and do not save them manually via the Configs > Control > Save Config menu, you will be prompted to save the changes just before you place the printer ONLINE with the screen shown below. -
Page 56: Loading A Configuration
When a configuration to name is selected, a virtual keyboard will be provided for the user to enter the name desired. The navigation keys can be used to find characters with the ENTER button used to select them. When the string is complete, the user should use the RIGHT SOFT key labelled “Apply”. Loading a Configuration You can specify any one of the nine configurations (1-8 or Factory) to load into DRAM using the Configs >... -
Page 57: Specifying A Power-Up Configuration
Specifying a Power-Up Configuration You can specify any one of the nine configurations (1-8 or Factory) as the power-up configuration using the Configs > Control > Power-Up Config menu. If the selected configuration has not been saved, the user will be warned with a “CONFIG DOES NOT EXIST” message on the panel. Modifying a Saved Configuration Configurations can be modified and saved (updated) as often as desired. -
Page 58: Settings Organization
Settings Organization This section will show how the configuration menus are organized under the icons in the Settings section. Screen #1 Media Sensors System Speed Control Control Image Calibrate Energy Star Handling Diagnostics Flash File View Ribbon Flash File Edit Top of Form SD File View Faults... -
Page 59: Media
Media IMPORTANT All distances under Media can be represented in inches or millimeters based on the menu System > Control > Media Units. Intro: Label Length Understanding your media and application is very important when configuring the parameters in the menu system. -
Page 60: Media > Speed
The printer starts to print one label and then another all on the same physical label, especially at the end of a roll where the media is severely curled. An occasional blank label appears within a print job (in between printed labels). When Clip Page is “Disable”, the printer ignores any pre-printed dark marks or multiple gaps on a label that could mistakenly be detected as the next top-of-form position based on the specified Media >... -
Page 61: Media > Image
Media > Speed > Slew Speed The speed at which the printer moves media without actually printing on it. Automatic Always the same as the print speed. Allows you to set the slew speed. The range is consistent Manual with Print Speed. Allows you to set the slew speed. - Page 62 Media > Image > Paper Feed Shift This option represents the distance to advance (+ shift) or pull back (– shift) the stop position of a label when Tear-Off Strip, Tear-Off, Peel-Off, or Cut Media Handling option is enabled. Allows .01 inch increments. Minimum -1.00 inches Maximum...
- Page 63 Media > Image > Label Width This option specifies the physical width of the image to be printed. Minimum 0.1 inches Maximum Maximum based on printer model/printhead. T8x04: 4.1 inches Factory Default T8x06: 6.6 inches T8x08: 8.5 inches Media > Image > Set Label Length This feature selects whether the Sensed Distance value derived from an Auto or Manual Calibrate will be used to set the Label Length menu.
- Page 64 Media > Image > Clip Page This option determines how the printer handles images that are too large for one physical page length when using gap or black mark media. When the user-selected page length (logical length) is greater than the physical page length dictated by the Disable gap, notch, hole, or black mark on media, the printer continues to print the remaining excess data onto the...
- Page 65 Media > Image > Orientation This menu item selects the image orientation to be used when printing the label. See picture below for an illustration. Portrait refers to vertical page orientation, where the Portrait top of the page is at the leading edge. Landscape is a rotation of the logical page at 90 de- Landscape grees clockwise from Portrait.
- Page 66 Media > Image > Print Direction This option is the compass for print orientation. Not all IGP Emulation lan- guages have the same definition of Portrait, Landscape, etc. The illustration below shows how Portrait is defined for both Head First and Foot First. With Orientation set to Portrait, the top of the label will Head First come out of the printer first.
-
Page 67: Media > Handling
Media > Handling Media > Handling > Print Mode This option specifies the type of printing to be done. Transfer Indicates Thermal Transfer printing (ribbon installed). Indicates Direct Thermal printing (no ribbon) and re- Direct quires special heat sensitive media. Factory Default Transfer Media >... - Page 68 Media > Handling > Media Handling Printer prints on the media and sends it out the front. Continuous See Media > Handling > Continuous Mode table page 68 for more information. Factory Default Tear-Off Strip Media > Handling > Continuous Mode Allows selection of special media modes when Continuous Media Handling mode (see Continuous media page 62) is selected.
- Page 69 Media > Handling > Peel Present This feature allows you to select which part of a label gets presented to the peel bar. Media is moved to next TOF after image printing be- fore presenting media to the peel-off position. This op- Next TOF tion is for standard labels where the gap/mark length is less than the printhead to peel bar distance (about...
- Page 70 Media > Handling > Pre-Peel Mode Pre-Peel Mode adds a forward and reverse motion to each label prior to printing. The added forward pre-peel motion temporarily breaks the die cut label from the liner, and the reverse motion places the label back on the liner prior to printing, peeling, or dispensing the label.
-
Page 71: Media > Ribbon
Media > Ribbon Media > Ribbon > Ribbon Width Sets the ribbon operating parameters automatically based on the label set- tings or manually if the media width is less than the ribbon width. The printer automatically adjusts the ribbon operating Same as Paper parameters to match the installed media width. -
Page 72: Media > Top Of Form
Media > Ribbon > Ribbon Calibrate Determines the amount of ribbon remaining by performing a forward or re- verse move. Standard Normal forward and reverse ribbon calibration. Forward Only Forward only ribbon calibration. Factory Default Standard When GPIO Print & Apply is set to Enable, Ribbon Calibrate is set to Forward Only. - Page 73 Media > Top of Form > Ticket Save Mode This option determines the action of the media for Continuous (Standard), Tear-Off, Tear-Off Strip and Cut Media Handling Modes after the printer is first powered up or after the printhead has been opened and then closed. When enabled, this option eliminates wasting label(s) or ticket stock when the printer advances media to search for the next TOF position.
-
Page 74: Media > Faults
Media > Top of Form > Adjust Mode This option enables use of the Media > Top of Form > TOF Adjust distance. Disable The TOF Adjust menu value will not be used. Enable The TOF Adjust menu value will be used. Factory Default Disable Media >... -
Page 75: Media > Auto Label Map
Media > Faults > Label Missing Allows the Label Taken Sensor to first detect the presence of a label at the tear bar. The printer does not generate a fault condition if a Disable missing label is encountered. Peel-Off and Tear-Off Handling: The printer generates Full Label a fault condition if a missing label is encountered. - Page 76 This option specifies the maximum print width to be used by the application. The IGP/Auto Label Mapping® feature allows backward compatibility of pro- grams written for Printronix line-matrix printers. It allows the printer to print two-up (or other multi-up) labels. Instead of printing multiple labels across the printer, it prints the leftmost label and the rightmost label, so the printout will be twice as long but half as wide.
-
Page 77: Auto Label Map Examples
Media > Auto Label Map > Num Auto Labels The desired number of labels to be printed vertically adjacent on the form. Minimum T8x04: 40 Maximum T8x06: 21 T8x08: 17 Factory Default Auto Label Map Examples All of the examples below assume that the logical form length is set to the label length. Example 1: Simple Case Problem: A file has been constructed with two horizontally adjacent 4.0”... - Page 78 Solution #1 with Menu Settings: • Set Media > Auto Label Map > Auto Label Width to “2.0” (the width of two labels) • Set Media > Auto Label Map > Num Auto Labels to “2” • Set Media > Auto Label Map > Select to “Enable”. Printer Operation for Solution #1: The printer will print the first two labels at the same time.
-
Page 79: Example 3: Past Maximum File Width
Example 3: Past Maximum File Width Problem: A file has been constructed with three horizontally adjacent 4.0” labels. The user now desires to use this file with a printer that has an 8.0” physical width. The user should have used a solution similar to one of the solutions in the examples above, but the user erroneously enters an Media >... -
Page 80: Sensors
Sensors Intro: Sensor Types When making changes in this section, there are certain implications that need to be understood because some menus are intimately related. For example, when the menu Sensors > Control > Gap/Mark Sensor is changed, this has an effect on other menu defaults as shown in Table 2. Table 2. - Page 81 Sensors > Control > Gap/Mark Sensor Select when using media with notches or holes that interrupt a black vertical line on the underside of the Advanced media. The Top-of- Form position is the leading edge Notch of the die cut label (trailing edge of the gap, notch, or hole).
- Page 82 Sensors > Control > Sensed Distance This value represents the distance that was sensed between the TOF of one label to the TOF of the next label upon successful calibration. It is a read-only value. Gapped media: the distance equals the physical label length plus one gap, notch, or hole (trailing edge of one gap, notch, or hole to the trailing edge of the next gap, notch, or hole).
-
Page 83: Sensors > Calibrate
Sensors > Control > Paper Out Sensor Selects which type of media sensing, Transmissive or Reflective, will be used to detect a paper out condition. The printer automatically selects the type of sensing based on the Gap/Mark sensing selected as shown in Table Reflective Use reflective sensor for paper out sensing Transmissive... - Page 84 SENSORS > Calibrate > HeadClose Action Selects whether the printer performs a selected action after a print head open fault condition is cleared. No media motion after a print head open fault condi- Disable tion is cleared. Performs Auto Calibration every time the print head Auto-Cal open fault condition is cleared.
- Page 85 Sensors > Calibrate > Cal in Peel Mode This option allows you to perform a calibration in Peel-Off Media Handling mode. Calibration in Peel-Off mode does not stop and wait for you to re- move peeled labels. Therefore, be prepared to remove the labels as they are automatically peeled.
- Page 86 Sensors > Calibrate > Gap Length Gap Length is the actual length (height) of a label gap measured in .01 inch increments. Minimum 0.05 inches Maximum 1.00 inches Factory 0.12 inches You must enter the correct Gap Length. If the Gap WARNING Length is too long, the image will shift down from the leading edge (TOF) of the label.
- Page 87 Sensors > Calibrate > Use Label Length Determines whether or not Media > Image > Label Length is used during Auto Calibrate. This resolves problems where the sensor(s) may mistake high noise levels or preprinted images within the label as the gap, notch, hole, or black mark that could result in a sensed distance value much shorter than the actual label length.
-
Page 88: Sensors > Diagnostics
Sensors > Calibrate > Threshold Range This option allows the user to select the optimal threshold range for the la- bel stock. The printer defaults to using a threshold range of 50% of the posi- tive going pulse (see Sensors > Diagnostics > Media Profile) that repre- sents each gap, notch or mark detected after doing an Auto or Manual Cali- brate. - Page 89 Sensors > Diagnostics > Manual Calibrate Manual Calibrate is another method of improving the printer’s media sens- ing and is only used when Auto Calibrate has failed or the Gap/Mark Threshold or Paper Out Threshold values derived from Auto Calibrate do not improve the media sensors’...
-
Page 90: System
System System > Control System > Control > Display Language This parameter chooses the language that will appear on the control panel: English, German, French, Italian, Spanish, Portuguese, Traditional Chinese, Simplified Chinese, and Korean. Factory Default English System > Control > LCD Brightness The brightness of the control panel backlight. - Page 91 System > Control > Alarm Determines if the printer will power-up in the ONLINE state or OFFLINE state (Home screen). An audible alarm sounds (3 beeps) when a fault oc- curs, such as a paper jam. A continuous audible alarm sounds when a fault oc- Cont.
- Page 92 System > Control > Feed Key Online This option changes the functionality of the FEED key when the printer is ONLINE. When selected, pressing the FEED key causes the Feed printer to feed a form. When selected, pressing the FEED key causes the Reprint Last printer to reprint the last printed form.
-
Page 93: System > Energy Star
System > Control > Set Lock Key Normally, to lock or unlock the printer menu, the up/down keys are pressed at the same time. The Set Lock Key executable menu lets you choose dif- ferent keys to lock or unlock the printer menu. You may choose almost any group of keys as the new lock and unlock keys. -
Page 94: System > Flash File View
System > Energy Star > Pwr Saver Active This menu allows you to enable and disable Power Saver mode. If enabled, the menu for Power Saver Time is in effect. Disable Power Saver mode is disabled and not used. Enable Power Saver mode is enabled. -
Page 95: System > Sd File View
System > Flash File Edit > Available Space Shows the user how much FLASH memory is available for new user files. This does not count memory in the Flash Reclaimable area. This is a read- only menu. System > Flash File Edit > Flash Reclaimable Shows the user how much FLASH memory is available to be reclaimed if the user performs the Optimize &... - Page 96 IMPORTANT The SD card must be installed at the time of power-up and cannot be removed until the printer is powered off. System > SD File Edit > Overwrite Files Like System > Flash File Edit > Overwrite Files, this prevents SD files from being overwritten by disabling the overwrite function.
-
Page 97: System > Printer Mgmt
System > SD File Edit > QCMC Update This menu can be used to update the configuration within the QCMC image stored on the SD card (see Appendix G Quick Change Memory Card (QCMC) page 281). System > SD File Edit > QCMC Erase This menu can be used to erase the QCMC image stored on the SD card (see Appendix G Quick Change Memory Card (QCMC) page 281). - Page 98 System > Printer Mgmt > Ret. Status Port This option selects the port for return Status Commands used by the emula- tions. For PGL, this is the ~STATUS command, and for ZGL, this is the ^HS command. Sends the data through the same port as used to re- Automatic ceive the application job.
-
Page 99: System > Gpio
Since PXML and UCP management protocols share the same Ethernet port, only one can be active at a time. This menu selects the active Man- agement Protocol Interface, either PXML or UCP. Printronix XML management protocol used to control PXML and manage the printer. See the XML Programmer Reference Guide for more information. - Page 100 GPIO software is both a printer resident GPIO event parser that executes GPIO Tables created by the GPIO Manager. The GPIO table is used to control how the GPIO hardware behaves for a given application. Refer to the GPIO User’s Guide for more information and a description of the menus in this section. IMPORTANT This subsection will only be visible when the GPIO option installed.
-
Page 101: Application
Application LP+, PGL, VGL Character Sets The Character Sets for LP+, PGL, and VGL are chosen by Character Group and also a Character Set within that group. The active Character Group will determine which collection of Character Sets will be shown on the panel and available for selection. - Page 102 Application > XXX Setup > Arabic Sets This option will show when menu Character Group is set to Arabic Sets. ASMO 449 IBM CP864 ASMO 449+ IBM CP1046 ASMO 708 Arabic Lam One ASMO 708+ Arabic Lam Two Arabic Sets MSDOS CP710 Win.
- Page 103 Application > XXX Setup > European Sets This option will show when menu Character Group is set to European Sets. Latin 2 8859-2 Polish POL1 Code Page 852 Win. CP 1250 Mazovia Win. CP 1252 Kamenicky Win. CP 1257 Roman 8 CP 858 EURO PC-437 Slavic European Sets...
- Page 104 Application > XXX Setup > Turkish Sets This option will show when menu Character Group is set to Turkish Sets. Data Gen. Turk.* NCR Turkish DEC Turkish PST Turkish IBM Turkish UNIS-1 Turkish Siemens Turkish Code Page 853 Turkish Sets PTT Turkish INFO Turkish IBC Turkish...
-
Page 105: Application > Control
This function allows you to activate any IGP emulation listed in the menu. The IGP emulation can be changed with this menu or by host command if the current Active IGP emulation supports it. Printronix Graphics Language. Emulates the QMS Code-V protocol. ZGL * Emulates the Zebra ZPL protocol. - Page 106 Application > Control > PGL Diagnostics This menu sets the error reporting capability of PGL when selected as the current Active IGP emulation. Full error checking reported. Any element that falls off the current page is reported as an error. Puts the printer in debug mode whenever a form is defined in CREATE mode.
- Page 107 Application > Control > VGL Diagnostics This menu sets the error reporting capability of VGL when selected as the current Active IGP emulation. Enable All Full error checking and report. Disable No error checking and report. Command syntax is checked and error messages Error Msgs printed when command parameters are incorrect.
- Page 108 IGP emulation. Re- fer to the LinePrinter Plus Programmer's Reference Manual for more infor- mation. P-Series Printronix P-Series language. P-Series XQ Printronix P-Series XQ language. Serial Matrix Emulates the Serial Matrix protocol. Proprinter XL Emulates the Proprinter XL protocol. Epson FX Emulates the Epson FX-1050 protocol.
- Page 109 You can enable a CST (Character Substitution Table) with this menu. The CST is loaded in the printer FLASH memory and will be executed by the PAA (Printronix Application Adapter). Refer to the PrintNet Enterprise Suite User’s Manual to learn more about how to create and use CSTs.
-
Page 110: Application > Ipds Setup
Application > IPDS Setup IMPORTANT The IPDS Setup submenu will only be present when the IPDS option is in- stalled. The option is not available with the TN or Postscript/PDF firmware Application > IPDS Setup > Default Font This item allows you to select the desired default resident font to be used when IPDS is not activating a Font Global ID. - Page 111 Application > IPDS Setup > Default CodePage This item allows you to select the desired default codepage to be used when IPDS is not activating a Code Page ID. Refer to the IPDS Program- mer’s Reference Manual for more information. English/USA/Can Greek English/US/Intl...
- Page 112 Application > IPDS Setup > CodePage Subset This item allows you to select the desired version of the following code pages - 037,273, 274, 275, 277, 278, 280, 281, 282, 284, 285, 297, 500, and 871. Version 0 Version 1 Factory Default Version 0 Application >...
- Page 113 Application > IPDS Setup > Null Suppression Controls how the IPDS emulation acts when a 0x00 character is received. When disabled, an exception is generated when the Disable IPDS data stream contains a 0x00. When enabled, this option ignores the EBCDIC value Enable 0x00 in the IPDS data stream.
- Page 114 Application > IPDS Setup > Expanded Fonts This option specifies which algorithm is used for expanding a character string in Write Graphics. A resizing and smoothing algorithm will be performed Compatible on the bitmapped font. A substitution will be done to a scalable outline font. Using Scalable will increase performance and quality, however, the substitution will only be done for Latin 1 Scalable...
-
Page 115: Application > Ps/Pdf
Application > PS/PDF IMPORTANT The PS/PDF submenu will only be present with the Postsript/PDF firmware. The Postscript/PDF data is handled by Ghostscript by Artifex, an interpreter compatible with the following: Portable Document Format (“PDF”) 1.0, 1.1, 1.2, 1.4, 1.5, and 1.6 as defined in the Portable Docu- ment Format Reference Manual, distributed by Adobe Systems Incorporated. -
Page 116: Application > Pgl Setup
Application > PS/PDF > Host Form Length This option selects whether job sent with specific page dimensions will change the settings under Media > Image > Label Length. Disable The job will not affect the media label length setting. Enable The job will change the media label length setting. - Page 117 Application > PGL Setup > Select LPI This is the number of lines to be printed per inch. For example, at 6 lpi there is 1/6 inch from the top of one print line to the top of the next print line.
- Page 118 Application > PGL Setup > Auto Wrap This parameter determines if text will wrap to the next line when the line of text exceeds the right margin. Truncates the text beyond the right margin until a CR Disable or CR + LF is received. Enable Automatically inserts a CR + LF after a full print line.
- Page 119 Application > PGL Setup > Host Form Length Determines how Media > Image > Label Length is affected upon receiving an EXECUTE command. Forms printed in EXECUTE mode do not change the physical label size. Therefore, the size of the form Disable (defined in CREATE mode) must fit within the current label dimensions, or errors may be reported.
- Page 120 Application > PGL Setup > Skip Cmd Prefix Stands for Skip Command Prefix. This parameter determines if the printer will print any data before a PGL command is received. Disable The printer will print all data before a PGL command. Enable The printer ignores all data before a PGL command.
- Page 121 Application > PGL Setup > AI 00 Spaces This option is designated for EAN/UCC-128 barcodes whose application identifier (AI) is 00. The printable data field is printed with the AI enclosed Disable in parentheses. This is the standard EAN/UCC-128 format. The printable data field is printed with the UCC fields Enable separated by spaces.
- Page 122 Application > PGL Setup > Do FF at TOF Determines whether the printer, with media already set at the TOF (Top-of- Form) position, will advance media to the next TOF position upon receipt of an FF command. The printer will not advance media from the present Disable TOF position to the next TOF position upon receipt of an FF command.
- Page 123 Application > PGL Setup > UPC Descenders This parameter allows you to print bar code descenders when human read- able data is not presented in the UPC/EAN bar codes. UPC/EAN bar codes are printed with descenders, Always even if there is no human readable data. UPC/EAN bar codes are printed without descenders if Never the PDF command is present.
- Page 124 Application > PGL Setup > User-Def Ratio This option allows you to ignore the user-defined barcode ratio and replace it with the default ratio (X1). The user-defined barcode ratio will be replaced with Disable the default ratio (X1). This option allows you to ignore the user-defined bar- Enable code ratio and replace it with the default ratio (X1).
-
Page 125: Application > Vgl Setup
Application > PGL Setup > Preparser Port Allows you to send preparser commands to the printer through any port. Disable Not using the Preparser command. The preparser command can be accepted from any Enable port. Factory Default Disable Application > PGL Setup > Storage Select Allows the user to map the parameter DISK to either EMC (SD card) or FLASH memory. - Page 126 Application > VGL Setup > Power-up ^X Determines if VGL is active at power-up or if all the data will be passed down to the LP+ emulation for processing. Disable VGL is ready to process data. VGL starts in ignore mode. The graphics mode ^PY is Enable set as the power-up default.
- Page 127 Application > VGL Setup > Btm Margin Ctl Determines the page’s bottom margin. A change in text length has no effect, and the bottom margin setting in the LP+ Emulation menu will be LP+ Menu used, although the new text length value still shows in the menu.
- Page 128 Application > VGL Setup > Host Form Length Sets the printer page size when a form length command from the host ap- plication is received. Sets the printer label size equal to the Label Length Disable set in Media > Image > Label Length. Sets the printer label size equal to Label Length from Enable the host form length command.
- Page 129 Application > VGL Setup > Ignore Dots Controls how VGL interprets position values. The VGL expects position values to be specified in Disable tenth inches and dot rows. Causes the VGL to expect position values to be spec- Enable ified in only 1/10ths of an inch. If the dot position is also given, it is treated as text.
- Page 130 Application > VGL Setup > Absorb After ^PY Determines how data after the ^PY command will be handled. The paper motion line terminator immediately follow- Absorb Motion ing the graphics ^PY command will be ignored. The system ignores all the data following ^PY until a Absorb All host generated terminator is detected and ignored.
- Page 131 Application > VGL Setup > Rot. Char Size Determines how expanded characters will be sized when rotated. Rotated (clockwise/counterclockwise), expanded Adjusted characters have a different size than an unrotated character with the same size parameters. Rotated, expanded characters will be the same size Not Adjusted as unrotated characters with the same size parame- ters.
- Page 132 Application > VGL Setup > Width Limit Controls the range of width for expanded characters based on the height. Disable There is no limit to width based on height. The length and width for expanded characters is shown in the Width Limit Table, which shows the Enable maximum width allowed for a specific height in the range of 00 through 40 (0.0 through 4.0 inches).
- Page 133 Application > VGL Setup > Absorb After ^PN Determines how paper motion line terminators are handled after the ^PN command. The paper motion line terminators that immediately Disable follow the ^PN command are sent to the printer and processed. The paper motion line terminators that immediately Enable follow the ^PN command are ignored.
- Page 134 Application > VGL Setup > C128 Mode Comp. This option is for compatibility with mode switches for Code 128 barcodes. Disable Uses the normal auto switch for optimum barcodes. Enable Matches the older firmware auto switch algorithm. Factory Default Disable Application >...
- Page 135 Application > VGL Setup > Ignore Ch#2 Specifies character 2 for the character filtering option. Valid decimal values are from 0 through 255. Minimum Maximum Factory Default Application > VGL Setup > Data Bit 8 Determines how data bit 8 is interpreted and is traditionally used for the parallel interface.
- Page 136 Application > VGL Setup > ^Dnn Dot Slew Chooses between low and high resolution mode for dot row slewing. Sets the dot slew command dot values to be inter- Low Resolution preted as 60 dpi P-Series dots. Sets the dot slew command dot values to be inter- High Resolution preted as print engine dots.
- Page 137 Application > VGL Setup > Uniform Fonts This menu determines how the typeface selected will be used across differ- ent modes. The typeface selected while in Extended Graphics Disable Mode will be cancelled when the graphics pass is complete. The typeface selected while in Extended Graphics Enable Mode will also be used in Standard Graphics Mode and Normal Mode.
- Page 138 Application > VGL Setup > Host PI This menu determines how the host PI line for the parallel interface is con- figured. Disable The host does not send PI signals. The host sends PI signals. The Data Bit 8 configura- Enable tion option must be disabled to transmit the PI line to the printer.
-
Page 139: Application > Zgl Setup
Application > ZGL SETUP Refer to the ZGL Programmer’s Reference Manual. Application > TGL SETUP Refer to the TGL Programmer’s Reference Manual. Application > IGL SETUP Refer to the IGL Programmer’s Reference Manual. Application > STGL SETUP Refer to the STGL Programmer’s Reference Manual. Application >... - Page 140 Application > LP+ Setup > Host Command This item allows you to select certain host commands to be ignored by the printer. Enable All host commands accepted by printer. Ignore All All commands are ignored. Ignore CPI All CPI commands are ignored. Ignore LPI All LPI commands are ignored.
- Page 141 Application > LP+ Setup > Bold To determine if the text printed by the LP+ uses a heavy thickness. Disable Text is printed normally. Enable Text is printed with a heavy thickness. Factory Default Disable Application > LP+ Setup > Italic Print To determine if the text printed by the LP+ uses italics.
- Page 142 Application > LP+ Setup > Text Position Specifies where the text will be positioned in the line space. Top of Line Text is positioned at the top of the line space. Text is positioned as if it were at the bottom of a line Bottom of Line space at 6 LPI.
- Page 143 Application > LP+ Setup > Form Width (xx) Specifies form width in three different units for all preferences of the user: inches, millimeters, and even characters. Minimum 0.1 inches T8x04: 4.1 inches Maximum T8x06: 6.6 inches T8x08: 8.5 inches Factory Default The maximum printing width based on model.
-
Page 144: Application > P-Series Setup
Application > LP+ Setup > Bottom Margin Defined in linespaces, starting from line zero at the bottom of the page and incrementing from the bottom up. Minimum 0 linespaces Maximum 451 linespaces Factory Default 0 linespaces Application > LP+ Setup > Print Char. Set ... - Page 145 Application > P-Series Setup > Standard Sets This option will show when menu Character Group is set to Standard Sets. Primary Subset Extended Subset ASCII (USA) * Code Page 437 * French Code Page 850 German English Danish Swedish Italian IBM PC * Spanish Japanese...
- Page 146 Application > P-Series Setup > Standard Sets This option will show when menu Character Group is set to Standard Sets. ASCII (USA) * Spanish French Japanese German French Canadian Dec Mult English Dutch Norw./Danish Finnish Swedish Swiss Italian CP 858 EURO IBM PC.
- Page 147 Application > P-Series Setup > Vertical DPI This feature enables the thermal printer to print images as close as possi- ble to the same size as those originally programmed for a line matrix or la- ser printer by selecting a horizontal resolution that matches that of the printer that the file was originally generated for.
- Page 148 Application > P-Series Setup > Define LF Code This option controls the action of the printer when it receives a Line Feed code (0A hex) from the host computer. If this feature is enabled, each time the printer receives a line feed, it inserts an additional carriage return code (0D hex) into the data stream.
- Page 149 Application > P-Series Setup > Select SFCC This P-Series feature allows you to select an ASCII code which defines the Special Function Control Code (SFCC) command code value. The factory default value is hex 01, but the P-Series options allow selection of any value ranging from hex 00 through hex 7F.
-
Page 150: Application > P-Series Xq Setup
Factory Default Even dot plot Application > P-Series Setup > PSeries Dbl High This menu option allows printing compatibility between the current and older models of Printronix printers. This is normal Double High printing for current model Normal printers. Where older printers printed two dot rows higher, this... - Page 151 Application > P-Series XQ Setup > Horizontal DPI This feature enables the thermal printer to print images as close as possi- ble to the same size as those originally programmed for a line matrix or la- ser printer by selecting a horizontal resolution that matches that of the printer that the file was originally generated for.
- Page 152 Application > P-Series XQ Setup > Auto LF This option defines the printer action when print data is received past the forms width setting. Disable Discards any data past the forms width. Performs an automatic carriage return and line feed Enable when data is received past the forms width.
- Page 153 Application > P-Series XQ Setup > Elong/Alt. Font Controls which host command sets elongated (double high) fonts and ex- tended character set. ELNG=BS Elongated set by BS (08 hex), extended character set FONT=SO set by SO (0E hex). ELNG=SO Elongated set by SO (0E hex), extended character set FONT=BS set by BS (08 hex).
-
Page 154: Application > Serial Matrix Setup
Application > P-Series XQ Setup > Slew Relative “Slewing” is rapid vertical paper movement. This parameter determines the number of lines slewed (either 1-15 lines or 1-16 lines) when an EVFU Slew Relative command is received. 1-15 lines 1-16 lines Factory Default 1-15 lines Application >... - Page 155 Application > Serial Matrix Setup > Standard Sets This option will show when menu Character Group is set to Standard Sets. Primary Subset Extended Subset ASCII (USA) * Code Page 437 * French Code Page 850 German English Danish Swedish Italian IBM PC * Spanish...
- Page 156 Application > Serial Matrix Setup > Standard Sets This option will show when menu Character Group is set to Standard Sets. ASCII (USA) * Spanish French Japanese German French Canadian Dec Mult English Dutch Norw./Danish Finnish Swedish Swiss Italian CP 858 EURO IBM PC.
- Page 157 Application > Serial Matrix Setup > Define CR code This option controls the action of the printer when it receives a Carriage Return code (0D hex) from the host computer. If this feature is enabled, each time the printer receives a carriage return, it inserts an additional Line Feed code (0A hex) into the data stream.
- Page 158 Application > Serial Matrix Setup > Control Code 06 Control Code 06 defines the function of ASCII code 06 hex (ACK). You can select an alternate line spacing of 6.0, 8.0, or 10.3 LPI. Selections 6.0, 8.0, or 10.3 LPI Factory Default 8.0 LPI Application >...
-
Page 159: Application > Proprinter Setup
Application > Serial Matrix Setup > ESC d Command This item is for backward compatibility. This option interprets the ESC d command as even Even dot plot dot plot. This option interprets the ESC d command as double Double high high. - Page 160 Application > Proprinter Setup > Horizontal DPI This feature enables the thermal printer to print images as close as possi- ble to the same size as those originally programmed for a line matrix or la- ser printer by selecting a horizontal resolution that matches that of the printer that the file was originally generated for.
- Page 161 Application > Proprinter Setup > Auto LF This option defines the printer action when print data is received past the forms width setting. Disable Discards any data past the forms width. Performs an automatic carriage return and line feed Enable when data is received past the forms width.
-
Page 162: Application > Epson Fx Setup
Application > Proprinter Setup > FF valid at TOF The FF valid at TOF option determines whether the printer will perform a Form Feed when the host sends a Form Feed command, if the printer is at the top of form. Will not perform a form feed when the host sends a Disable Form Feed and the printer is at the top of form. - Page 163 Application > Epson FX Setup > Standard Sets This option will show when menu Character Group is set to Standard Sets. ASCII (USA) * Spanish I French Japanese German Norwegian Epson Set * English Danish II Danish I Latin Am II Swedish French Canadian Italian...
- Page 164 Application > Epson FX Setup > Vertical DPI This feature enables the thermal printer to print images as close as possi- ble to the same size as those originally programmed for a line matrix or la- ser printer by selecting a horizontal resolution that matches that of the printer that the file was originally generated for.
- Page 165 Application > Epson FX Setup > Define LF Code This option controls the action of the printer when it receives a Line Feed code (0A hex) from the host computer. If this feature is enabled, each time the printer receives a line feed, it inserts an additional carriage return code (0D hex) into the data stream.
-
Page 166: Application > Fonts
Application > Epson FX Setup > Alt. Set 80-9F Determines how data in the range 80 hex – 9F hex will be treated. Control Code Interprets as a control code. Printable Prints data in this range. Factory Default Control Code. Application >... - Page 167 Application > Fonts > OCR-A Chars Character weight adjustment of resident OCR-A characters. Minimum Maximum Factory Default Application > Fonts > OCR-B Chars Character weight adjustment of resident OCR-B characters. Minimum Maximum Factory Default Application > Fonts > Tall Characters Increases the point height of resident Intellifont characters.
-
Page 168: Host Io
Host IO Host IO > Control Host IO > Control > Interface This option allows you to send print jobs through any interface with auto- switching selected as host interface. It also allows a particular interface from the menu to be selected. Automatically switches interface when host data is Auto Switching sent to that interface (and any job in progress is com-... - Page 169 Host IO > Centronics > Buffer (Kbytes) This option configures the amount of memory allocated for the Ethernet buffer incremented in 1 Kbyte increments. Minimum Maximum 16, 32, or 64 Factory Default 16 Kbytes Host IO > Centronics > Prime Signal This option determines how the printer will operate if the host asserts a prime signal.
- Page 170 Host IO > Centronics > Data Bit 8 This option determines how data bit 8 is treated from the host. When the host PI line is enabled, data bit 8 internally indicates PI line status. To use the PI line, disable Disable data bit 8, and enable the Host PI configuration option (under the PI Ignored option).
- Page 171 Host IO > Centronics > Busy on Strobe The Response Polarity parameter must be set to match the response po- larity of your host computer. Asserts a busy signal only when the print buffers are Disable full. Enable Asserts a busy signal after each character is received. Factory Default Enable Host IO >...
- Page 172 Host IO > Centronics > Auto Trickle This feature is used to prevent a host computer from “timing out” because the parallel interface is “busy” for too long. This submenu is only available when Host IO > Control > Interface is set to Auto Switching. Disable The Auto Trickle feature is not used.
-
Page 173: Host Io > Ieee-1284
Host IO > Centronics > AutoSW Timeout This is the timeout value used for the current port to then check the other selected port types for data to print. When the printer has not received data from the host after a certain period of time, it needs to time out in order to service the other ports. -
Page 174: Host Io > Usb
Host IO > IEEE-1284 > Trickle Time Same as Host IO > Centronics > Trickle Time Host IO > IEEE-1284 > AutoSW Timeout Same as Host IO > Centronics > AutoSW Timeout Host IO > USB Host IO > USB > Buffer (Kbytes) Same as Host IO >... - Page 175 Host IO > Serial > Word Length Sets the length of the serial data word. The length of the data word can be set to 7 or 8 bits and must match the corresponding data bits setting in the host computer. 7 bit data word 8 bit data word Factory Default...
- Page 176 Host IO > Serial > Data Protocol You can select one of the following serial interface protocols to meet the host interface requirements, The printer controls the flow of communication from the host by turning the transmission on and off. In some situations, such as when the buffer is full or the timing of signals is too slow or too fast, the printer will tell the host to stop transmission by sending an XOFF...
- Page 177 Host IO > Serial > Data Protocol You can select one of the following serial interface protocols to meet the host interface requirements, The printer controls the flow of communication from the host by turning the transmission on and off using response characters sent to the host.
- Page 178 Host IO > Serial > Data Protocol You can select one of the following serial interface protocols to meet the host interface requirements, The printer controls the data flow by sending this hardware signal to the host. If there is enough room in the printer buffer, the printer will send a high signal;...
- Page 179 Host IO > Serial > Data Term Ready Stands for Data Terminal Ready. This configuration is part of hardware flow control and determines when the Data Terminal Ready (DTR) signal is generated. This signal indicates if the printer is ready to receive data. True Continuously asserts the DTR signal.
- Page 180 Host IO > Serial > Request to Send This configuration is part of hardware flow control and determines when the Request to Send (RTS) signal is generated. This signal indicates whether or not the printer is ready to receive data. True Continuously asserts the DTR signal.
- Page 181 Host IO > Serial > One Char Enquiry The One Char Enquiry mode uses the Poll Character to detect a request from the host and sends a response back to the host. This option also al- lows you to turn on and off this feature. Printer State Response (hex) ONLINE and Buffer Not Full...
- Page 182 Table 5. ENQ/STX Status Byte Printer Status Set when the printer is not ONLINE or the buffer is full. Set when the printer is OFFLINE. Clear during a paper out fault. Always set. Set during a Head Open fault. Set during a buffer overflow fault. Set during a parity or framing error fault.
- Page 183 Host IO > Serial > Offline Process Same as Host IO > Centronics > Offline Process. Host IO > Serial > Report Status Same as Host IO > Centronics > Report Status. Host IO > Serial > Trickle Time Same as Host IO > Centronics > Trickle Time Host IO >...
-
Page 184: Network
Network IMPORTANT For detailed information about using the NIC, refer to the Network Interface Card User’s Manual. Network > Control Network > Control > ASCII Data Port This option allows you to set the port number for ASCII print jobs. The data port number needs to match your host system setting. - Page 185 Network > Control > Job Control Determines how the end-of-job packet is handled (when the acknowledge- ment is sent back to the host system). The NIC waits for the entire job to be received before Standard it indicates the job is done. The NIC waits for the entire job to be printed before it Enhanced indicates the job is done.
-
Page 186: Network > Ethernet
Network > Control > AutoSW Out This menu determines when the autoswitching process will start. Allows Autoswitching when no data has been re- Data Timeout ceived for the selected Time Out period. Allows Autoswitching only when the Network Socket Session Close is closed. - Page 187 Network > Ethernet > Gateway Address This item allows you to set the Gateway Address for the TCP/IP protocol using a virtual keyboard. Make sure you enter the complete Gateway ad- dress, including the period symbol between the segments. Structure Seg1.Seg2.Seg3.Seg4 Factory Default 000.000.000.000...
- Page 188 Network > Ethernet > BootP You can enable/disable the BootP protocol using this option, but consult your administrator for the appropriate setting. Disable BootP is disabled. Enable BootP is enabled. Factory Default Disable If changed, the printer reboots when it is placed ONLINE.
-
Page 189: Configs
Configs Configs > Control Configs > Control > Save Config This option allows you to save up to eight unique configurations to meet different print job requirements. This eliminates the need to change the pa- rameter settings for each new job. The configurations are stored in memory and will not be lost if you turn off the printer. -
Page 190: Configs > Custom
Configs > Control > Delete Config You can delete one or all of your eight customized configurations. The Fac- tory default configuration cannot be deleted. All configurations will be deleted, except Factory. Specific saved configuration will be deleted. Factory Default Configs >... -
Page 191: Tools
Tools Tools > Print Tests Tools > Print Tests > Run Tests The printer tests below allow you to check for proper printer operation and print quality. Once you have selected the desired test, press the ENTER key to start printing. If the Test Count option (below) is set to Continuous, press ENTER key again to stop printing. -
Page 192: Tools > Diagnostics
Tools > Print Tests > Run Tests Prints detailed information about the most recent Nov- ram related failure. This option is useful when the Novram Err Log control panel faults with “Bad NVM” or “ILL NVM” type errors. Contact the Customer Support Center if such an error occurs. -
Page 193: Tools > Statistics
Once it occurs, the file can be easily uploaded from the printer FLASH memory using the NIC webpage or PrintNet Enterprise Suite. Once acquired, it can be sent to Printronix Cus- tomer Support. -
Page 194: Tools > About
Tools > Statistics > Total Label Count Displays the cumulative number of labels printed, regardless of size. This value is set to zero at the factory. Tools > Statistics > Head On Time Displays the time that power has been applied to the printhead since its in- stallation. - Page 195 Tools > About > Printer F/W Displays the printer firmware version and part number. Tools > About > Validator F/W Displays the validator firmware version and part number (if installed). Tools > About > Feature File Displays the feature file part number (or “None” if not present). Tools >...
-
Page 196: Validator
Validator The Validator ICON will always appear, but will be in grey when the ODV is not installed. When installed, the icon will appear in color. This section will show how the Validator section is organized, but see the Online Data Validator User’s Manual for a detailed description of how these menus work and interact. Control Grading Scanner... -
Page 197: Downloading Firmware
Downloading Firmware There is 128 MB of FLASH memory on the controller board. The printer firmware which includes printer control languages (the “emulations”), the engine control, and printer operating system software are loaded into FLASH memory at the factory, but there are occasions when you may have to load this software: ... -
Page 198: Firmware File Types (.Prg) And (.Exe)
Table 7. Firmware Download Methods User FLASH Firmware Download Method File Type(s) Files Web Page (Ethernet only). User needs the network config- FILENAME.prg Preserved ured, a browser, and know the IP address. Windows Driver (any host IO). When the Windows Driver is installed, downloading firmware can be done easily FILENAME.prg Preserved... -
Page 199: Web Page Download
Web Page Download NOTE: This download method requires firmware with the .prg extension FILENAME.prg. 1. Make sure the printer is powered up, in ONLINE mode, and that the Ethernet cable is connected. 2. Get the IP address from the front panel ONLINE screen (or under Network in Settings 3. - Page 200 Figure 6 Confirm Reboot 10. Wait until the printer is finished upgrading firmware. Figure 7 Waiting for Firmware Upgrade Completion 11. When the Web Page is redirected, the download process in complete.
-
Page 201: Windows Driver Download
1. Make sure the printer is powered up, in the ONLINE mode and that desired host IO cables are connected. 2. Install the Windows Driver from the http://printronix.com/support/drivers/ website. 3. Once the Windows Driver is installed, right-click the printer driver and select Properties. -
Page 202: Automatic Download (.Exe)
IMPORTANT For USB connections, the Windows Driver must be installed. 3. Install the Windows Driver from the http://printronix.com/support/drivers/ website. During the installation, make sure to share the printer when prompted and record the “Share name”. Figure 9 Selecting to Share the Printer IMPORTANT For USB connections, the printer must have a “Share name”... - Page 203 Figure 10 Setting Printer Properties Sharing Options 5. Start a Windows Command Prompt session. 6. Navigate to the directory with the target firmware (e.g., c:\download). 7. Execute FILENAME.exe as follows: Connection Type Enter Command Parallel FILENAME –a -pb <Enter> Serial mode COM1:9600,N,8,1 <Enter>...
-
Page 204: Manual Two-Key Download Sequence
Manual Two-Key Download Sequence NOTE: This download method can be completed with firmware in the form of FILENAME.prg or FILENAME.exe. The following steps prepare the printer for download. When the printer is in the download mode, any host IO can be used to download the firmware. 1. -
Page 205: Sending Firmware In Download Mode
NOTE: The three-key download sequence only allows download through USB or via SD card. Although the program file FILENAME.prg is used in the examples, any file with a Printronix header can be substituted in this process to download flash files. -
Page 206: Sending Firmware Via Parallel
IMPORTANT For USB connections, the printer must have a “Share name” established. 2. The “Share name” will be needed when sending the data through the USB port. This should be accomplished during installation, but can be verified at any time. Select the driver, right-click the mouse button and select “Printer Properties”. -
Page 207: Sending Firmware Via Serial
FILENAME –pb <Enter> where FILENAME.exe is the target firmware WARNING DO NOT interrupt the downloading process once it has started. Interrupting a download will leave the FLASH memory on the controller PCBA and NIC incompletely loaded, and the printer may not boot up. 2. -
Page 208: Downloading Files To The Main File System
Downloading Files to the Main File System User Files can be downloaded into the Main File System (onboard PCB Flash) in a various ways as discussed in this section. This section does not cover specific methods used by the emulations but rather general ways of downloading files as shown in Table 8_bookmark10. -
Page 209: File Properties Not Shown In Menus
File Properties Not Shown in Menus Files with one of the properties listed below (case sensitive) are considered system files and are not shown in System > Flash File View or within the System > Flash File Edit > Delete Files menu. NOTE: DO NOT download any user files with the one of the properties shown in Table 10. - Page 210 Figure 13 Downloading Files using the File Management Webpage 6. Click “Browse” to navigate the directory and find the download file, then click “Download File”. Figure 14 Navigating to Download a File A notification displays indicating that the web page will refresh upon download completion.
-
Page 211: Ptx_Setup Download
1. Start a Windows Command Prompt session. 2. Navigate to the directory with the target file (e.g., c:\download). 3. Copy cnvt2fls.exe from the https://printronix.com/support/drivers/ website to the directory with the target file. 4. Convert the file to a downloadable format using the following command at the command prompt: cnvt2fls file_name1 file_name2 file_name3 A FONT <Enter>... -
Page 212: Downloading Files To The Sd Card
7. To verify that the file is recognized and downloaded, go to the System > Flash File View submenu. One of the files displayed should include file_name3. Downloading Files to the SD Card SD files can be utilized by the printer and certain emulations such as PGL. Since the SD file format is an industry standard, downloading files and fonts to the SD card does not require special facilities within the printer. -
Page 213: Pgl Emulation
Download mode and download the font. A TrueType font can be converted to a downloadable format by appending a header to the font file using the cnvt2fls.exe utility found on the https://printronix.com/support/drivers/ website and a batch file as described in this section. Header for Main File System 1. -
Page 214: Header For Sd Card
~EXECUTE;FORM;1 Demo Facility To exercise the function of a Printronix printer in an environment where there is no host computer system available, you may need to execute a demo test file from the menu system. When executed, the demo test file will run through the emulations as if the host computer sent the file. -
Page 215: Downloading A Demo File
1. Start a Windows Command Prompt session. 2. Navigate to the directory with the target demo file (e.g., c:\download). 3. Copy (or unzip) demo2fls.exe from the https://printronix.com/support/drivers/ website to the directory with the target file. 4. Convert the file to a downloadable format with the following command at the command prompt: demo2fls file_name <Enter>... -
Page 216: Deleting A Demo File
Deleting a Demo File Delete demo files similar to any other file in the Main File System. Once deleted, the file will no longer appear as a selection in the Tools > Print Tests > Run Tests menu. -
Page 217: Reprogramming The Security Key
The security key on the controller board can be reprogrammed with a Software Program Exchange (SPX) module. The SPX is an intelligent module that plugs into the debug port on the back of the T8000. The SPX is used only once; it automatically overwrites itself after successfully reprogramming a security key. This allows the end user or a service technician to enable features such as new emulations without having to remove covers and install a new security key on the controller board. - Page 218 5. When the printer detects a valid SPX, the control panel displays: “NEW SPX DETECTED PRESS ENTER” NOTE: If an error message displays, find the message in the Message List in Chapter 6 page 219 and follow the troubleshooting instructions. 6.
-
Page 219: Diagnostics And Troubleshooting
The printer will not function properly with an incorrectly wired cable or the wrong interface cable installed. If the cable is suspect, contact Printronix or your authorized service representative. When the printer is first powered up, it will reset itself to the communication default parameters. The... -
Page 220: Hex Dump Mode
Hex Dump Mode Hex dump mode allows you to place the printer into a diagnostic mode in which the printer outputs a hexadecimal data stream on the label for examination. The purpose of hex dump mode is to see exactly what data is received by the printer, in order to debug forms. - Page 221 The speed at which media is moving under the printhead (print speed) The amount of printhead pressure. For example, low-cost direct thermal media often has very high reaction temperatures, which means that it takes a great deal of heat to make a clear image. Resin ribbons and film media may require higher print intensity for a quality image.
-
Page 222: Replacing The Printhead
3. Load an alternate roll of media. Test again for vertical streaks. 4. Load an alternate roll of ribbon. Test again for vertical streaks. If after performing all these tests you still see fixed vertical streaks, you must replace the printhead. Replacing the Printhead 1. - Page 223 Printhead Retainer Clip (2) Pivoting Deck Lower Tab (2) Printhead Assembly Printhead Controller Cable Assembly Printhead Cover Release Upper Media Sensor Cable Assembly Release Power Supply Cable Assembly Figure 20 Replacing the Printhead Assembly CAUTION To prevent electrostatic damage to electronic components, ground yourself by touching an unpainted part of the printer frame before handling and installing the printhead.
-
Page 224: Restore The Printer To Operation
Auto Dump that will capture the failure dump in a flash file that can be later uploaded from PrintNet Enterprise Suite or SD memory card and sent to Printronix Customer Support Center (see Printronix Customer Support Center page 289) for further analysis. -
Page 225: Solving Other Printer Problems
Solving other Printer Problems Table 11. Printer Problems and Solutions Symptom Solution/Explanation Communications Failures. 1. Check the interface cable. 2. Check the configuration to ensure the correct interface is enabled. 3. Verify the printer is receiving data by watching for “Re- ceiving Data”... -
Page 226: Power Failures
Table 11. Printer Problems and Solutions Symptom Solution/Explanation LCD shows ONLINE and the This message informs the user that the printer has received printer appears to be work- data, but no valid commands were found. This typically occurs ing, but nothing prints and when an incorrect Active IGP Emulation or SFCC was se- “Invalid Data”... - Page 227 Table 11. Printer Problems and Solutions Symptom Solution/Explanation Media moves, but no image 1. Make sure the J402 power supply cable has a good prints in ONLINE mode. connection to the right side of the printhead. 2. Place the printer OFFLINE and print the Checkerboard di- agnostic test pattern in Tools >...
- Page 228 Table 11. Printer Problems and Solutions Symptom Solution/Explanation Prints strange characters in- 1. If the printer serial interface is being used, check that the stead of the correct label for- printer serial baud rate setting matches the baud rate of mat.
- Page 229 Table 11. Printer Problems and Solutions Symptom Solution/Explanation Smears or voids in printed 1. Clean the printhead. 2. Make sure the printhead temperature (Print Intensity) is image. not too high. Change the Print Intensity value in the Me- dia > Image section. 3.
-
Page 230: Printer Operation
Table 11. Printer Problems and Solutions Symptom Solution/Explanation PRINTER OPERATION Advances several labels 1. Check that labels are loaded correctly. when FEED key is pressed. 2. Check that the Media > Image > Label Length (or sent by the host computer) agrees with the length of the media in- stalled. - Page 231 3. When the entire label is removed from the platen, then use an isopropyl alcohol wipe, Printronix PN 254945-901, to remove all the adhesive from the platen to help prevent any future label wraps. Tighten the printer front door thumbscrews.
- Page 232 Table 11. Printer Problems and Solutions Symptom Solution/Explanation 1. Make sure that the label is not formatted too close to the • Print quality is good, but top edge of the form. Leave white space equal to eight dot the printer skips every rows at the top of the label.
-
Page 233: Printer Alarms
Table 11. Printer Problems and Solutions Symptom Solution/Explanation Wide width ribbon does not The Ribbon Width value in the MEDIA CONTROL menu is set take up properly. The ribbon too narrow for the ribbon installed. Set the Ribbon Width value moves past the platen as- to match the width of the ribbon installed. - Page 234 3. Contact your authorized customer service representative. Table 12. LCD Message Troubleshooting Displayed Message Solution/Explanation 1284 OPTION CARD Status message indicating that the IEEE1284 option card FPGA failed to program. PROGRAM FAILED --------------------- 1. Pressing any key on the panel will cause the printer PRESS KEY TO CONTINUE to continue boot-up with the previous FPGA configu- ration.
- Page 235 Table 12. LCD Message Troubleshooting Displayed Message Solution/Explanation BAR CODE QUIET Data validation error: the blank zone(s) left or right of the bar code is not big enough to meet the minimum require- Zone too small ment. Typically, this occurs in forms where bar codes are placed too close to other elements, the bar code is too close to an edge of the media, or the media’s position is shifting.
- Page 236 Table 12. LCD Message Troubleshooting Displayed Message Solution/Explanation CHECKSUM ERROR The printer received the complete program but the check- sum did not match. The data may have been corrupted FLUSHING QUEUES during download. 1. Power off the printer for 15 seconds, then power back 2.
- Page 237 Table 12. LCD Message Troubleshooting Displayed Message Solution/Explanation DIRECT THERMAL This is the normal reminder message when you change the Media > Handling > Print Mode setting from Transfer to Di- Remove Ribbon rect. 1. Remove ribbon from the ribbon supply and ribbon take-up spindles in the printer.
- Page 238 Table 12. LCD Message Troubleshooting Displayed Message Solution/Explanation ERROR OCCURRED An interim message displays while the printer discards host FLUSHING QUEUES data it cannot use because a fault condition exists. While this message displays, the asterisk (*) rotates. Wait. When the asterisk (*) stops rotating, a different fault message will appear;...
- Page 239 Table 12. LCD Message Troubleshooting Displayed Message Solution/Explanation FILE SYS WRITE Problem writing to flash memory. Check Flash 1. Power off the printer for 15 seconds, then power back on. If the problem persists, contact your authorized customer service representative. FILE UPLOADING File is uploading to PNE.
- Page 240 Table 12. LCD Message Troubleshooting Displayed Message Solution/Explanation GPIO OPTION CARD Status message indicating that the GPIO option card FPGA failed to program. PROGRAM FAILED 1. Pressing any key on the panel will cause the printer to --------------------- continue boot-up with the previous FPGA configuration. PRESS KEY TO CONTINUE GRF CHK ERROR PRESS In the TN emulation, the printer received a non-printable...
- Page 241 Table 12. LCD Message Troubleshooting Displayed Message Solution/Explanation LABEL MISSING The Label Taken Sensor did not detect the label present over the tear bar with Tear-Off or Peel-Off Media Handling Check Paper Path mode enabled. • The label was removed before the printer stopped print- ing or before the LCD “Remove Label”...
- Page 242 4. When all the labels are removed from the platen, use an isopropyl alcohol wipe, Printronix PN 254945-901, to re- move all adhesive from the platen to help prevent any fu- ture label wraps.
- Page 243 Table 12. LCD Message Troubleshooting Displayed Message Solution/Explanation OPTION NOT INSTALLED If the printer is powered on with the cutter enabled in Media > Handling > Media Handling, but the cutter itself is open (in the down position, or the cutter upper enclosure is re- moved) the printer cannot detect the cutter.
- Page 244 Table 12. LCD Message Troubleshooting Displayed Message Solution/Explanation PAPER OUT The printer does not sense media: Load Paper • Media was not installed or has run out. • A break in media has occurred. • Media was not routed or installed correctly. •...
- Page 245 Table 12. LCD Message Troubleshooting Displayed Message Solution/Explanation POOR SCANNING Data validation failure: percent decode. The validator de- tected gross inconsistencies within the height of the bar Check media code. These types of failures are likely attributed to large blemishes within the bar code, caused by ribbon wrinkle or debris on media.
- Page 246 Table 12. LCD Message Troubleshooting Displayed Message Solution/Explanation PRINTER HOT The printer has detected higher than usual temperatures on the controller PCBA. 1. Determine that the fan is operating and that all air vents are unobstructed. 2. Power off the printer for 15 seconds, then power the printer back on.
- Page 247 Table 12. LCD Message Troubleshooting Displayed Message Solution/Explanation • Remove Label A label was detected at the front of the printer by the La- bel Taken Sensor. This is the normal reminder message when Peel-Off or Tear-Off Media Handling has been se- lected.
- Page 248 Table 12. LCD Message Troubleshooting Displayed Message Solution/Explanation Speed Exceeds Validator The Print Speed or Slew Speed value is above 6 IPS as the power-up default with the validator option installed, or Limit the user attempted to increase Print Speed or Slew Speed above 6 IPS.
-
Page 249: Specifications
Specifications Print Method Table 13. Printing Specifications T5204 T5304 T5206 T5306 T5208 T5308 Print Resolution (dpi) .005 .0033 .005 .0033 .005 .0033 Min. Dot Size (sq. in) (.127 mm) (.083 mm) (.127 mm) (.083 mm) (.127 mm) (.083 mm) ... -
Page 250: Media
Media Table 14. Media - General Information Roll-fed, die-cut continuous or fanfold labels, tags or tickets; Type: most direct thermal or thermal transfer materials. Supply Roll: 8 inch (203 mm) maximum diameter on 1.5-inch (37.5 mm) to 3- inch (76 mm) diameter cores. Internal Rewinder: Accepts up to a 5-inch diameter roll of label backing. - Page 251 Tag Specification Tag Specification III. Label Specification (Mark Sensing) (Gap Sensing) (Gap Sensing) Black Mark (on underside) Direction of Media Motion Direction of Media Motion Direction of Media Motion Figure 21 Media Dimensions Table 15. Media Specifications T8X04R T8X06 T8X08R Label Width Range 1.00 -4.5 in.
-
Page 252: Ribbon
Table 15. Media Specifications T8X04R T8X06 T8X08R Media Length Range 0.25 in. (6.35mm) – 99 in. (2515mm) Continuous/Batch Mode Tear-Off Strip Mode 0.25 in. (6.35mm) – 99 in. (2515mm) Tear-Off Mode 1 in. minimum (25.4 mm) – 99 in. (2515 mm) Peel-Off Mode 1 in. -
Page 253: Memory
Memory Table 18. Memory Specifications Flash Memory (standard) 128MB soldered onto Controller PCBA DRAM (standard) 512MB soldered onto Controller PCBA Media Cutter Option Cutters are designed to cut tags and label liner. Avoid cutting through the adhesive backed portion of any media. -
Page 254: Host Interfaces
Host Interfaces Table 20. Host Interface Characteristics 1. Serial RS-232 at 600, 1200, 2400, 4800, 9600, 19200, 38400, 57600, or 115200 baud. 2. USB 2.0 3. Ethernet 10/100 4. Wireless 802.11 a/b/g/n 5. Parallel (Centronics compatible) or IEEE 1284 bi-directional. The RS-232 host interfaces shall have the following characteristics: Word Length: Selectable 7-bit or 8-bit data format... -
Page 255: Environmental
Environmental Table 23. Environmental Information 41° F to 104° F (5° C to 40° C) Operating Temperature: -40° F to 150° F (-40° C to 60° C) Storage Temperature: Operating Humidity: 20% to 85%, non-condensing Storage Humidity: 5% to 85% non-condensing Ventilation: Free air movement Dust:... -
Page 257: Printer Options
Printer Options Options are offered with the printer to enhance its capabilities and to provide a large degree of application flexibility. A description of the option complement is given below. Field-installable options include installation instructions. Hardware Options Media Cutter The printer may be ordered with a cutter mechanism installed (for cutting tags and label liner), or the option can be installed by an authorized service representative at a later date. -
Page 258: Parallel (Centronics Or Ieee-1284)
Please refer to the Printronix Media Selection Guide for details concerning the application suitability for all media and ribbon products. To obtain a copy of this guide, or for any other questions concerning Genuine... -
Page 259: Printronix Gasoline Resistant Specialty Resin Ribbon 8770
(152.4mm), 6.70" (171mm), and 8.67" (220mm). Genuine Printronix Media Printronix provides a wide variety of sizes, colors, and shapes of labels and tags readily available to meet all of your labelling needs. The Printronix Expanded Die Library details hundreds of label sizes and... -
Page 260: Accessories
Low environmental durability. Compliance labeling. Low abrasion resistance. Longer life than direct ther- mal. Thermal Transfer Paper Label Printronix Wax Mid-range wax resin perfor- Same as economy ap- Resin Blend mance and characteristics at plications with ad- Synthetic Label economy wax prices. - Page 261 • LP+ Programmer’s Reference Manual • PGL Programmer’s Reference Manual • VGL Programmer’s Reference Manual • TGL Programmer’s Reference Manual • IGL Programmer’s Reference Manual • STGL Programmer’s Reference Manual • DGL Programmer’s Reference Manual • IEGL Programmer’s Reference Manual •...
-
Page 263: Ascii Control Codes
ASCII Control Codes Char Char Char Char & <... - Page 264 Char Char Char Char > NOTE: For the hardware handshake XON/XOFF commands: XON = Ctrl Q (DC1) XOFF = Ctrl S (DC3)
-
Page 265: Media Cutter Installation
Media Cutter Installation Prepare the Printer Peel/Tear Assembly Screw (2) Lower Support Assembly Peel/Tear Door Figure 22 Peel/Tear Assembly 1. Set the printer power switch to O (Off). 2. Open the peel/tear door by pulling it upward, then forward. 3. Using the appropriate metric hex key, remove the two screws attaching the peel/tear assembly to the lower support assembly. -
Page 266: Installing The Cutter
NOTE: Keep the two screws you have removed; you will use them to attach the cutter assembly to the lower support assembly. Installing the Cutter RJ-11 Receptacle RJ-11 Connector Screw (2) Lower Support Assembly Cutter Assembly Metal Tab (2) Mounting Bracket Magnetic Catch (2) Cutter Assembly Figure 23 Cutter Assembly... -
Page 267: Restore The Printer To Operation
Restore the Printer to Operation NOTE: The printer cannot detect the presence of the cutter unless the cutter is in the up (closed) position and the cutter top cover is installed when the printer is powered on. 1. Set the printer power switch to | (ON). 2. -
Page 269: Media Cutter Tray Installation
Media Cutter Tray Installation Assembling the Media Cutter Tray Slots Cutter Tray Flanges (4) Cutter Tray Base Figure 24 Attaching the Cutter Tray Bin to the Cutter Tray Base 1. Align the flanges of the cutter tray bin with the slots in the cutter tray base. 2. -
Page 270: Installing The Media Cutter Tray
Installing the Media Cutter Tray Base Pan Cutter Tray Figure 25 Placing the Media Tray Cutter in Position 1. Position the output area of the printer adjacent to the edge of the supporting table or stand. 2. Open the media cover and slide the lip of the media cutter tray over the lip of the printer base pan. - Page 271 Cutter Tray Figure 26 Installing the Media Cutter Tray 3. Rotate the media cutter tray into position with the tray resting against the table. 4. Close the media cover.
- Page 272 ...
-
Page 273: Ptx_Setup Commands
PTX_SETUP Commands Overview The PTX_SETUP commands are a superset of commands which allow the printer to perform several tasks by parsing commands either stored in flash or sent to the printer by the host. Commands range from re-routing debug statements to downloading complete printer configurations. This appendix describes the PTX_SETUP commands specific to thermal printers, as well as the commands which are not platform specific. - Page 274 PTX_SETUP commands have the following format: (SFCC)PTX_SETUP Command–Sub Command;Value PTX_END For example, if the SFCC assigned to PTX_SETUP is the default value of the exclamation mark (!, hex 21), and you wanted to load configuration number 4 and capture all incoming data to a file named “BIN”, you would use the following command: !PTX_SETUP CONFIG–LOAD;4...
- Page 275 Table 26. General PTX_SETUP Commands Command Sub-Command Parameter Description CONFIG PRINT Print Configuration Cfg. Cfg can be a number 1-8, or one of four pre- defined configurations. The four non-numeric configurations are re- quested using the first character for the CURRENT, FACTORY, POWERUP, or ALL configuration(s).
- Page 276 Table 26. General PTX_SETUP Commands Command Sub-Command Parameter Description CONFIG PNE_PORT Port This command selects the port that the PNE will use to communicate to the printer. The valid ports are: • DISABLE • • ETHERNET • NOTE: If ETHERNET is selected but not enabled, the selection will revert to DISABLE.
- Page 277 Table 26. General PTX_SETUP Commands Command Sub-Command Parameter Description FILE_IO CAPTURE Filename Captures all incoming data into a (DISK_IO) file named Filename. Receipt of a FILE_IO–CAPTURE command without the Filename parameter will force the file data to be written to flash, and will end the file capture.
-
Page 278: Summary Of The Config Command
Table 26. General PTX_SETUP Commands Command Sub-Command Parameter Description FILE_IO MINSIZE For backwards compatibility. (DISK_IO) OPTIMIZE (none) Causes the printer to optimize the Flash File System. The printer au- tomatically reboots during this pro- cess. PTX_END (none) (none) Exits the PTX_SETUP. Summary of the CONFIG Command The UPLOAD and DOWNLOAD command can be used for uploading and downloading complete printer configurations. -
Page 279: Thermal Commands
NOTE: After selecting the Optimize & Reboot function, do not shut off the printer's power until after the printer returns to the power-on state. Loss of power during the optimize process may corrupt the printer's program. If this occurs, first attempt to repeat the downloading process. If that fails, contact an authorized service representative. - Page 280 Table 27. Thermal PTX_SETUP Commands Command Sub-Command Parameter Description LENGTH Sets the page length in 1/1000” Value units. MEDIA_HANDLING Value Sets the type of media handling: 0 - Continuous 1 - Tear-Off Strip 2 - Tear-Off 3 - Peel-Off 4 - Cut MIRROR Value Value of 0 turns mirroring off, non-...
-
Page 281: Quick Change Memory Card (Qcmc)
Quick Change Memory Card (QCMC) Overview The QCMC provides the ability to duplicate an entire printer’s firmware, saved configurations, and cus- tom files quickly through the printer’s control panel with a user friendly interface. No external host or files are needed to transfer this information to the QCMC. A “snapshot image” is saved of the printer’s firm- ware, configuration settings, and custom files. -
Page 282: Installing The Qcmc
Installing the QCMC CAUTION You must power off the printer before you install or remove the QCMC, or you may damage the QCMC and the printer. If you remove the QCMC after powering on the printer with the QCMC installed, the fault message “SD REMOVED Reboot Printer”... - Page 283 prompted with a message on the front panel to save the printer’s configuration to the QCMC as shown below. NOTE: This screen will appear every time at power-up until the printer’s flash is saved to the QCMC. If the RIGHT ARROW key is pressed, the printer will reboot into normal operation and not save any information to the QCMC.
-
Page 284: Copying The Qcmc "Snapshot" Image To A Second Printer
In the unlikely case there is not enough space on the SD to save the entire flash image, you will be prompted with a message “NOT ENOUGH SPACE ON SD / Delete SD File”. This is a fatal error and requires user intervention: ... - Page 285 This means that the QCMC is not compatible with the printer’s software or hardware. A software upgrade is required, or a different configured QCMC will be needed. A QCMC validation check will also be performed to ensure the data stored on the SD is not corrupted. If the test fails the following fault message will display.
-
Page 286: Updating The Qcmc Image
IMPORTANT: When the copy is completed and the printer reboots, the user should run auto- calibration to make sure the configuration changes are used in the calibration process. Updating the QCMC Image This option should only be used when a QCMC image has previously been stored from the target printer. If some configuration settings have been altered from that point, the menu System >... - Page 287 WARNING During this process, do not turn off the power. Upon successful completion of saving a flash image to the QCMC, the printer will display a message indicating the operation is complete. The printer will then reboot into normal operation.
-
Page 289: Customer Support
Customer Support Printronix Customer Support Center IMPORTANT Please have the following information available prior to calling the Printronix Customer Support Center: • Model number • Serial number (located on the back of the printer) • Installed options (i.e., interface and host type if applicable to the problem) •... -
Page 290: Corporate Offices
Changi South Street 1 Changi South Industrial Estate Singa- pore 486763 Phone: (65) 6542 0110 Fax: (65) 6546 1588 Printronix Commercial (Shanghai) Co. Ltd 22F, Eton Building East No.555, Pudong Av. Shanghai City, 200120, P R China Phone: (86) 400 886 5598... -
Page 291: Glossary
Glossary Baud (rate) Baud Rate is the number of information bits that can be transmitted between the printer and the computer in one second. For example, one baud equals one bit per sec- ond in a series of binary signals. Both the printer and the computer must be configured to the same baud rate. - Page 292 Default A value, parameter, attribute, or option that is as- signed by a program or system when another has not been specified by the user. Diagnostic Pertaining to the detection and isolation of a printer mal- function or mistake. Media Media coated with special chemicals that act as an accelerator, acceptor dye, and binder.
- Page 293 Label Liner (backing) The material labels are attached to during their manufac- turing process. Attachment is usually accomplished with an adhesive. After printing, labels can be easily removed from the liner and the liner discarded or recycled. Label Taken Sensor A sensor located at the front of the printer to detect the presence of a label extended out the front of the printer.
- Page 294 SD Card A small removable device used to store data. The SD Card is used for fonts purchased from Printronix and the QCMC (Quick Change Memory Card) option.
- Page 295 Slew Vertical paper movement. Standard-Pitch RFID Labels Labels with RFID inlays that typically have a pitch from 2.0 to 6.0 inches. These labels support encoding of the tag and provide ample space to print text, graphics, bar- codes, or logos. Stop Bits The signal which indicates the end of a character or ele- ment.
-
Page 297: Communication Notices And Warranties
Consult your Printronix representative for information on the products and services currently available in your area. Any reference to an Printronix product, program, or service is not intended to state or imply that only that Printronix product, program, or service may be used. Any functionally equivalent product, pro- gram, or service that does not infringe any Printronix intellectual property rights may be used instead. -
Page 298: Communication Statements
Properly shielded and grounded cables and connectors must be used in order to meet FCC emission lim- its. Printronix is not responsible for any radio or television interference caused by using other than recom- mended cables and connectors or by unauthorized changes or modifications to this equipment. -
Page 299: Industry Canada Compliance Statement
(www.printronix.com) for the most up to Declara- tions of Conformity. Printronix cannot accept responsibility for any failure to satisfy the protection requirements resulting from a non-recommended modification of the product, including the fitting of non-Printronix option cards. This product has been tested and found to comply with the limits for Class A Information Technology Equipment according to European standard EN 55022. -
Page 300: German Conformity Statement
In solch einem Fall ist der Abstand bzw. die Abschirmung zu der industri- ellen Störquelle zu öergrvßern. Anmerkung: Um die Einhaltung des EMVG sicherzustellen sind die Geräte, wie in den Printronix Handbüchern angeg- eben, zu installieren und zu betreiben. Korea... -
Page 301: Taiwan
CAUTION: This product is equipped with a 3-wire power cord and plug for the user’s safety. Use this power cord in conjunction with a properly grounded electrical outlet to avoid electrical shock Taiwan WARNING: This is a Class A product. In a domestic environment this product may cause radio interference in which case the user will be required to take adequate measures. -
Page 302: Software License Agreement
You agree that this Agreement provides you no more rights with regards to warranty, support, indemnity or liability terms with respect to Printronix Inc, or any contributor to the Embedded Software than that provided by any express warranty that may be made by Printronix, Inc. -
Page 303: Openssl License
ALLOW THE EXCLUSION OR LIMITATION OF INCIDENTAL OR CONSEQUENTIAL DAMAGES SO THAT EXCLUSION AND LIMITATION MAY NOT APPLY TO YOU. 6. U.S. Government Users The Embedded Software is a “commercial item,” as that term is defined in 48 C.F.R. 2.101 (Oct 1995), consisting of “commercial computer software” and “commercial computer soft- ware documentation,”... -
Page 304: Original Ssleay License
2. Redistributions in binary form must reproduce the above copyright notice, this list of conditions and the following disclaimer in the documentation and/or other materials provided with the distribution. 3. All advertising materials mentioning features or use of this software must display the following acknowledgment: "This product includes software developed by the OpenSSL Project for use in the OpenSSL Toolkit. -
Page 305: Openssl
Redistribution and use in source and binary forms, with or without modification, are permitted provided that the following conditions are met: 1. Redistributions of source code must retain the copyright notice, this list of conditions and the following disclaimer. 2. Redistributions in binary form must reproduce the above copyright notice, this list of conditions and the following disclaimer in the documentation and/or other materials provided with the distribution. -
Page 306: Artifex Portions Software Copyright Notices
The Cousine Font is a monospaced font used in the product for purposes of the front panel display only. The source is found at http://www.fontsquirrel.com/fonts/list/classification/monospaced and is licensed to Printronix under terms of the Apache License, Version 2.0 described at http://www.apache.org/licenses/LICENSE-2.0.html. Copyright [yyyy] [name of copyright owner]... -
Page 307: Limited Software Product Warranty
This License shall continue until terminated. This license may be terminated by agreement between you and Printronix, Inc. or by Printronix, Inc. If you fail to comply with the terms of this License and such failure is not corrected within thirty (30) days after notice. When this License is terminated, you shall return to... -
Page 308: U.s. Government Restricted Rights
Printronix. (In the United States and Canada, this period provides for onsite support service in the first 90 days of ownership, with return-to-factory service provided from the 91st day of ownership until the end of one year, costs of shipping to be borne by the purchaser.) -
Page 309: Ecos
eCos eCos, the Embedded Configurable Operating System Copyright © 1998, 1999, 2000, 2001, 2002, 2003 Red Hat, Inc. Copyright © 2002, 2003 John Dallaway Copyright © 2002, 2003 Nick Garnett Copyright © 2002, 2003 Jonathan Larmour Copyright © 2002, 2003 Andrew Lunn Copyright ©...
Need help?
Do you have a question about the T8000 and is the answer not in the manual?
Questions and answers