Table of Contents
Advertisement
Quick Links
USER MANUAL
Thank you for purchasing the My Weigh® iBalance® iM01™ digital scale. Please read all operating instructions
carefully before use. This electronic scale is a precision instrument. With normal care and proper treatment, it will
provide years of reliable service. For more information please visit www.myweigh.com
Never load the scale with more than the maximal capacity. Although the iBalance® iM01™ is designed to be
extremely durable with extra overload protection built into the case, overloading will permanently damage it! Avoid
any exposure to extreme heat or cold, your scale works better when operated at normal room temperature. Keep
your scale in a clean environment. Dust, dirt, moisture, vibration, air currents and/or a close proximity to other
Gently apply all items to be weighed onto tray top. Avoid shaking, dropping or otherwise shocking the scale. Scales
are delicate instruments and unlike cellular phones, scales have delicate sensors that determine how much an item
weighs. If you drop or shock your scale, these sensors "feel" the shock and are sometimes destroyed. This happens
with all digital scales. We design our scales to be as resistant to shock or drops as possible, however there is no way
for us to protect 100% against load cell or sensor damage.
Failure to follow these instructions will void your warranty.
Always allow the scale to acclimate to normal room temperature for at least one hour before use. Give your scale
stabilize.
PRECAUTIONS BEFORE USING THE BALANCE
is to use Static-Guard spray, and spray it on both sides of the weighing platform.
2. Before the initial use, please remove the protection screw. Re-install this screw before transport to help avoid
possible damage.
3. The balance must be in an exactly horizontal position in order to achieve accurate measurement results. In order
to bring the balance into a horizontal position, the adjustable feet are turned either clockwise or counter-clockwise
until the air bubble on the front panel is in the center of the marked circle.
4. Please use an independent power outlet to avoid interference from other electrical appliances.
5. Don't put any object on the platform before powering on.
6. When possible please allow the scale to warm up for several minutes before operation.
7. Items should always be placed on the center of the platform when being weighed.
8. For optimum accuracy, recalibrate before each use.
Advertisement
Table of Contents

Related Manuals for My Weigh iBALANCE iM01


Summary of Contents for My Weigh iBALANCE iM01
-
Page 1: User Manual
USER MANUAL Thank you for purchasing the My Weigh® iBalance® iM01™ digital scale. Please read all operating instructions carefully before use. This electronic scale is a precision instrument. With normal care and proper treatment, it will provide years of reliable service. For more information please visit www.myweigh.com Never load the scale with more than the maximal capacity. -
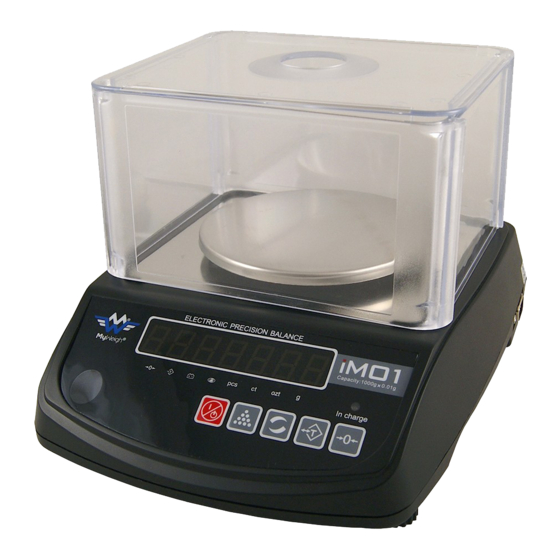
Page 2: Display Symbols
SCALE FEATURES PROTECTION SCREW on the left side of the scale OPTIONAL CLEAR WIND SCREEN ADJUSTABLE FEET on bottom of each corner of the scale DATA TRANSMISSION PORT on right side of the scale AIR BUBBLE LEVEL DISPLAY SYMBOLS KEYPAD FUNCTIONS Scale is in ZERO mode. -
Page 3: Error Messages
COUNTING FUNCTION 1. Press , the display will show “ 10Cnr” (means sample size is 10 pcs) 2. Press again and again, “10、 20、 50、 100” pcs will appear in succession. Stop at the one you want to use. 3. Put the exact quantity of samples desired on the platform and press , the set sample size will appear. - Page 4 2. The display will then show “ZEr-S” or “ZEr-L” press to select the zero display range. (ZEr-S means 0d and ZEr-L means 3.0d) Press ± 5. You can choose the communication method by pressing to rotate/revolve (Co: send in succession, st: send After that the scale will return to normal weighing mode.
Need help?
Do you have a question about the iBALANCE iM01 and is the answer not in the manual?
Questions and answers