Advertisement
Quick Links
Gasket Kit #3419
Installation Instructions
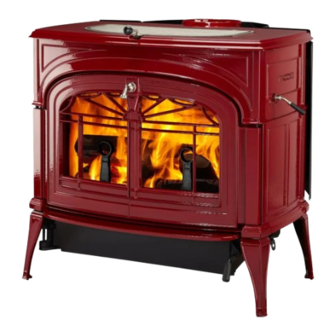
for the Encore Stove
Your stove uses gaskets to provide a tight seal between
moving parts. Eventually these gaskets will become
compressed and will no longer seal properly. Replacing
the gaskets will ensure good performance.
Materials Provided:
•
17' of 5/16" Glass Fiber Gasket for the Flue Collar,
Catalyst Access Panel, Main Doors and Damper
•
6' of 3/16" Glass Fiber Gasket (Glass)
•
4' of 5/16" Wire Reinforced Glass Fiber "Armaseal" for
the Griddle
•
3.5' of 3/8" Glass Fiber Gasket for the Ash Door
•
3 oz. Tube of Gasket Cement
Tools Needed:
Phillips screwdriver
Utility knife or scissors
Rubber mallet, or hammer and wood block
Flashlight or droplight
Procedure
For a guide to each gasketed area, refer to the follow-
ing sections and illustrations. Regardless of its location,
replacing a gasket involves these steps.
•
Remove the old gasket by scraping it out of its chan-
nel with an old screwdriver.
•
Clean the gasketing channel with a wire brush. Be
careful with adjacent surfaces, especially if they are
enamelled. Remove any stubborn deposits with a
small cold chisel. Clean both mating surfaces thor-
oughly to bare metal.
•
Cut the appropriate size gasket to length, allowing an
extra inch.
•
Knead the tube of cement before opening, to mix the
contents thoroughly.
•
Place an unbroken 1/8" bead of gasket cement in
the channel. Do not use too much cement as it may
saturate the gasket; the gasket must remain soft and
resilient. One tube of cement will produce a 1/8" bead
sufficient for all the gasket in this kit.
Small cold chisel
Wire brush
•
Starting with one end, press the gasket into the
cemented channel. If the gasket goes around and
meets itself, ensure that you have a good joint before
trimming the excess gasket. Do not overlap, or leave
ragged edges.
•
Seal the gasket by placing it firmly against its normal
mating surface. A slip of waxed paper between the
gasket and its mating surface will help keep the ce-
ment from travelling through the gasket and sticking
to the mating surface. Clean away any excess ce-
ment.
•
Allow to dry. Be sure to remove the waxed paper!
•
Be careful, with enamel stoves, to keep cement off
the enamel finish. If cement does accidentally get on
the enamel, wash it off immediately with warm water.
•
If you have questions, refer to the Encore Owner's
manual or a Vermont Castings dealer.
Flue Collar
Remove the two (2) Phillips head screws and lift off the
flue collar. Pull off the old gasketing. Thoroughly clean
the gasket channel, and the mating face of the flue
collar. Cut two (2) lengths of 5/16" replacement gasket.
Place a continuous 1/8" bead of cement in the chan-
nel for each piece, and gently press the gasketing into
place. If you are also replacing the damper gasket, go
on to the next section. Otherwise, replace the flue collar
and secure with the Phillips screws.
Flue Collar Opening
Catalyst Access
Opening
(1986-91 Units
Only)
Fig. 1 Flue collar gasket (all units) and catalyst access panel
location (1986 - 1991 units).
Damper
Remove the flue collar and open the damper. Pull off
the old gasketing and clean off the old cement. Thor-
oughly clean the damper plate and around the damper
opening in the upper fireback. Cut a piece of the 5/16"
gasket material to length, allowing 1" of excess. Place
a continuous 1/8" bead of cement in the damper gasket
channel, and press the new gasketing in place, trim-
KT466
KT466
Encore flue collar
4/04
2008843 8/08 Rev. 9
Advertisement

Summary of Contents for Vermont Castings Encore
-
Page 1: Installation Instructions
Replacing • If you have questions, refer to the Encore Owner’s the gaskets will ensure good performance. manual or a Vermont Castings dealer. Materials Provided: Flue Collar •... - Page 2 Close the damper to seat the gasket. Replace the flue collar and screws. Catalyst Access Panel (This section applies only to Encore Model 0028 and 2140, which were built before December 1991. Later stoves and the Encore 1450 Non-catalytic model do not have a separate external access panel for a catalyst.)
-
Page 3: Glass Gasket
Phillips head screw securing the door manifold Rope Gasket and glass clip to the upper right of the door. Swing the door manifold out of your way. The Encore 1450 Wireformed Gasket KT471 non-catalytic model does not have an integral door Fig. - Page 4 MHSC 149 Cleveland Drive • Paris, Kentucky 40361 www.mhsc.com...


Need help?
Do you have a question about the Encore and is the answer not in the manual?
Questions and answers
I need a diagram of defiant encore 2140 door gasket placement
The diagram for the door gasket placement on the Vermont Castings Encore 2140 shows the gasket located on the perimeter of the door, sealing the glass panes. For models built before December 1991, like the 2140, each door has two identical panes of glass separated by a wire-reinforced gasket. The gasket runs around the edge of the door to ensure a proper seal.
This answer is automatically generated