Vermont Castings Intrepid II 1990 Installation & Operating Manual
Wood burning stove
Hide thumbs
Also See for Intrepid II 1990:
- Installation and operating manual (40 pages) ,
- Homeowner's installation and operating manual (40 pages) ,
- Installation & operating manual (42 pages)
Table of Contents
Advertisement
Quick Links
Installation & Operating Manual
Installation and Appliance Setup - Care and Operation
INSTALLER: Leave this manual with party responsible for use and operation.
OWNER: Retain this manual for future reference.
Call your dealer for questions on Installation, Operation, or Service.
NOTICE: SAVE THESE INSTRUCTIONS
Intrepid
II Wood Burning Stove
®
Model 1990
For use in Europe
0966
Intrepid Cover
11/00
1
Save These Instructions For Future Reference
Vermont Castings • Intrepid II 1990 UE Installation Manual_R22 • 07/19
SAFETY NOTICE
IF THIS APPLIANCE IS NOT PROPERLY INSTALLED,
OPERATED AND MAINTAINED, A HOUSE FIRE MAY
RESULT.
TO REDUCE THE RISK OF FIRE, FOLLOW THE
INSTALLATION INSTRUCTIONS. FAILURE TO
FOLLOW INSTRUCTIONS MAY RESULT IN PROPERTY
DAMAGE, BODILY INJURY OR EVEN DEATH.
CONTACT LOCAL BUILDING OFFICIALS ABOUT
RESTRICTIONS AND INSTALLATION INSPECTION
REQUIREMENTS IN YOUR AREA.
!
Please read this entire manual before
installation and use of this wood-burning
room heater.
Failure to follow these instructions could
result in property damage, bodily injury
or even death.
• Do not store or use gasoline or other flammable vapors
and liquids in the vicinity of this or any other appliance.
• Do not overfire - If any external part starts to glow, you
are overfiring. Close air controls. Overfiring will void
your warranty.
• Comply with all minimum clearances to combustibles
as specified. Failure to comply may cause a house fire.
!
Tested and approved for use with dry, seasoned cordwood
only. Do Not Burn Wet or Green Wood. Burning any other
type of fuel will void your warranty.
WARNING
CAUTION
30003840
Advertisement
Table of Contents

Related Manuals for Vermont Castings Intrepid II 1990


Summary of Contents for Vermont Castings Intrepid II 1990
- Page 1 Close air controls. Overfiring will void your warranty. • Comply with all minimum clearances to combustibles For use in Europe as specified. Failure to comply may cause a house fire. CAUTION 0966 Intrepid Cover Tested and approved for use with dry, seasoned cordwood 11/00 only. Do Not Burn Wet or Green Wood. Burning any other type of fuel will void your warranty. Save These Instructions For Future Reference Vermont Castings • Intrepid II 1990 UE Installation Manual_R22 • 07/19 30003840...
-
Page 2: Table Of Contents
Please record the following information Service Parts List..........26 for future reference. Warranty ............31 Stove Serial No. _____________________ Dealer ____________________________ = Contains updated information __________________________________________ __________________________________________ Phone _____________________________ Date Purchased _____________________ Installer ___________________________ __________________________________________ __________________________________________ Phone _____________________________ Date Installed _______________________ Vermont Castings • Intrepid II 1990 UE Installation Manual_R22 • 07/19 30003840... -
Page 3: Specifications
610 mm 640 mm (24") (25¹⁄₄") 520 mm (20¹⁄₂") Top exit flue collar height 180 mm (7¹⁄₈") 545 mm (21¹⁄₂") 350 mm (13³⁄₄") Figure 1 - Intrepid II 1990CE dimensions. 3840 Vermont Castings • Intrepid II 1990 UE Installation Manual_R22 • 07/19 30003840 Intrepid EU... -
Page 4: Installation
European standards, need to be complied with when provide a referral to someone who can. installing this stove. The flue and chimney design must meet requirement J2, Part Outside Air J of the building regulations 2000 (Combustion Appliances and Fuel Storage Systems). In some modern, super-insulated homes, there is not enough air for combustion because of insufficient air infiltration into the building. Such air enters a home through unsealed cracks and openings. Kitchen or bath exhaust fans can compete with the stove for available air and compound the problem. Vermont Castings • Intrepid II 1990 UE Installation Manual_R22 • 07/19 30003840... - Page 5 SAFETY NOTE: ALWAYS WEAR GLOVES AND Chimney connectors are used only to make the connection PROTECTIVE EYEWEAR WHEN DRILLING, CUTTING OR from the stove to the chimney. JOINING SECTIONS OF CHIMNEY CONNECTOR. Vermont Castings • Intrepid II 1990 UE Installation Manual_R22 • 07/19 30003840...
- Page 6 Securing the Single-wall Connector to a Prefabricated Chimney For prefabricated chimneys, follow the installation instructions of the chimney maker exactly as you install the chimney. The maker of the chimney will supply the accessories to support Figure 4 - Chimney connection in a freestanding installation. the chimney, either from the roof of the house, at the ceiling of the room where the stove is installed, or from an exterior wall. ST492a Intrepid II freestanding installation 11/00 Vermont Castings • Intrepid II 1990 UE Installation Manual_R22 • 07/19 30003840...
- Page 7 • Check the clearance between the stove and the chimney with the chimney connector manufacturer for any specific connector, and any combustible trim or the mantel. Use requirements. the necessary combination of mantel, trim, and connector heat shields to achieve the required clearances. • Check the clearance between the chimney connector and the ceiling. If no heat shields are used, the clearance should be at least 660 mm (26"). To find out how much this clearance may be reduced with heat shields, see the clearance chart on Page 14. Vermont Castings • Intrepid II 1990 UE Installation Manual_R22 • 07/19 30003840...
- Page 8 12/14/99 djt for the connector. The resulting space must remain empty. front of the stove: 406 mm (16") from the front. Fireplace A flush-mounted sheet metal cover may be used on one side hearths must also offer the required protection of 152 mm only. If covers must be used on both sides, each cover must (6") on either side. be mounted on noncombustible spacers at least 25 mm (1") clear of the wall. Vermont Castings • Intrepid II 1990 UE Installation Manual_R22 • 07/19 30003840...
-
Page 9: Clearances
Clearance is the distance between either your stove (measured from the back edge of the stove’s top plate) or chimney connector, and nearby walls, floors, the ceiling, and any other fixed combustible surfaces. In addition, furnishings and other combustible materials must be kept away from the stove as well. In general, a distance of 1220 mm (48") must be maintained between the stove and moveable combustible items such as drying clothes, furniture, newspapers, firewood, etc. Keeping those clearance areas empty assures that nearby surfaces and objects will not overheat. Vermont Castings • Intrepid II 1990 UE Installation Manual_R22 • 07/19 30003840... - Page 10 1.5 x D at least 1.5 x D Air space of at least 12 mm Plan Without Shield between noncombustible shield at least and combustible material 1.5 x D Elevation Without Shield Elevation Plan With Shield With Shield Figure 12 - Connecting fluepipe clearances. ST911 fluepipe clearances 10/06 Vermont Castings • Intrepid II 1990 UE Installation Manual_R22 • 07/19 30003840...
-
Page 11: Assembly
ST513 be situated on a completely noncombustible hearth, such Remove leg bolts as unpainted concrete over earth. To install the bottom heat shield, loosen the leg bolts, and slip the bottom heat shield 11/00 C-clips onto the bolts. Attach the bottom heat shield to the C-clips with the wing nuts, and tighten the leg bolts. Align the shield as shown in Figure 14. 10-3/4” 9-3/4” Figure 14 - Attach bottom heat shield. ST512 Attach bottom heat shield 11/00 Vermont Castings • Intrepid II 1990 UE Installation Manual_R22 • 07/19 30003840... -
Page 12: Operation
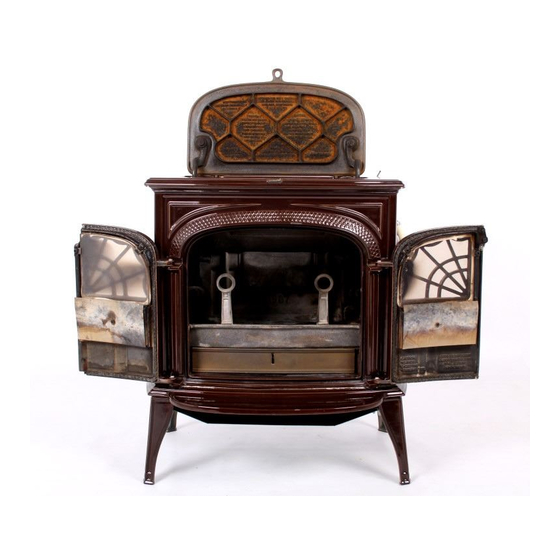
Door Handle 11/17/00 djt Figure 19 - The thermostat handle may be positioned anywhere ST517 between the two extremes for different heat levels. Intrepid II Ash Pan Door Handle Holder Thermostat Andiron (Behind Leg) positions Figure 18 - The Intrepid II controls. 11/17/00 djt ST518 Intrepid II controls 11/20/00 djt Vermont Castings • Intrepid II 1990 UE Installation Manual_R22 • 07/19 30003840... - Page 13 11/20/00 djt than the outside. In combination with pre-heated primary combustion air ‘washing’ over the inside of the glass, this helps provide clear fire-viewing at most operating levels. Figure 22 - Top loading is the best way to add fuel during regular use. Front loading is useful for kindling a fire. ST521 Intrepid loading 11/00 Vermont Castings • Intrepid II 1990 UE Installation Manual_R22 • 07/19 30003840...
- Page 14 Never burn liquid-based fuels such as kerosene, gasoline or alcohol. Burning any materials not allowed in these instructions, or over-firing the stove, may void the warranty ST523 Intrepid Vermont Castings • Intrepid II 1990 UE Installation Manual_R22 • 07/19 30003840 temp readings...
- Page 15 Do not for any reason attempt to increase the firing of doing so can produce soot or large flakes of char or fly ash your heater by altering the air control adjustment range that can coat the combustor and cause smoke to spill into outlined in these directions. the room. Coal smoke also can poison the catalyst so that it won’t operate properly. Use the following air control settings as a starting point to help determine the best settings for your installation. Each is described as a fraction of the total distance the lever may be moved from right to left. Vermont Castings • Intrepid II 1990 UE Installation Manual_R22 • 07/19 30003840...
- Page 16 “freshen up” a fire. Keep all such liquids well away from the Intrepid II while it is in use. Vermont Castings • Intrepid II 1990 UE Installation Manual_R22 • 07/19 30003840...
- Page 17 The Intrepid II will be hot while in operation. Keep children, clothing and furniture away. Contact may cause skin burns. DO NOT OVERFIRE THIS HEATER. Overfiring may cause a house fire, or can result in permanent damage to the stove and to the catalytic combustor. If any part of the Intrepid II glows, you are overfiring. Vermont Castings • Intrepid II 1990 UE Installation Manual_R22 • 07/19 30003840...
-
Page 18: Draft Management
Single Venting much better. Each ‘airtight’ stove requires its own flue. If an airtight stove Indoor/Outdoor location is vented to a flue that also serves an open fireplace, or a leakier stove, it’s easier for the chimney draft to pull air in Because the chimney must keep the smoke warm, it’s best to through those channels than it is to pull air through the airtight, locate it inside the house. This uses the house as insulation and performance suffers. Imagine a vacuum cleaner with a for the flue and allows a little heat release into the home. An hole in the hose to see the effect here. In some cases the indoor chimney won’t lose its heat to the outdoors, so it takes other appliance can even cause a negative draft through the less heat from the stove to get it warm and keep it warm. airtight, and result in a dangerous draft reversal. Vermont Castings • Intrepid II 1990 UE Installation Manual_R22 • 07/19 30003840... - Page 19 If you keep track of your burning habits and relate them to you want. If your dry wood burns out too quickly or overloads their effects on the stove’s operation, you’ll be rewarded with the catalyst you can mix in greener wood to slow the fire down. good performance and a safe system. Back-puffing Back-puffing results when the fire produces volatile gases faster than the chimney draft pulls them out of the firebox. The gases back up in the firebox till they’re dense enough and hot enough to ignite. If your stove back-puffs, you should open up the damper to let the smoke rise to the flue more quickly, let more air into the firebox, and avoid big loads of firewood. Run your stove with enough primary air so that you always see lively, dancing flames in the firebox; a lazy, smoky fire is inefficient and can contribute to creosote buildup in the chimney. Vermont Castings • Intrepid II 1990 UE Installation Manual_R22 • 07/19 30003840...
-
Page 20: Maintenance
(Figure 30) Keep window opening is clean, and free of dust. making adjustments a little at a time until the setting is right. 4. Install the glass. Lay the glass on the inner gasket with the The front doors of the stove should close securely and tightly, coated side down (toward the outside of the door). Tighten when the handle is in the closed position. When the latch is the screws snugly, but loose enough to allow for a little properly adjusted there should be a slight resistance as the movement of the glass when the stove is in operation. doors are moved to the completely closed position. Overtightening can crack the glass immediately or cause it to crack if it is unable to expand when hot. Vermont Castings • Intrepid II 1990 UE Installation Manual_R22 • 07/19 30003840... -
Page 21: Catalytic Combustor
(Figure 31) Loosen the 7/16" cleaned if necessary. This may be done during examination locking nut in the center of the damper. Use a 1/8" Allen of the combustor. wrench to turn the Allen screw a full turn clockwise. Test the damper for snugness, and continue adjusting the Allen screw The probe thermostat should be inspected annually, or more as needed. Tighten the 7/16" locking nut when the damper often if decreased catalytic combustion performance is not operates smoothly but firmly. due to a defective combustor. Vermont Castings • Intrepid II 1990 UE Installation Manual_R22 • 07/19 30003840... - Page 22 6. Gently slide the catalytic element out of the refractory Pockets chamber. Check the element and the bottom of the Clamps chamber for a buildup of fly ash. Refractory Access Panel Figure 32 - Removing the catalytic element. ST533 remove catalyst 11/00 Vermont Castings • Intrepid II 1990 UE Installation Manual_R22 • 07/19 30003840...
- Page 23 There is a flat, die-cut gasket between each glass panel and die-cut flat gasket; refer to Page 23 for information on these. its door. See page 25 for information on replacing the glass panel or its gasket. If you need to change a gasket, first obtain an appropriate replacement from your Vermont Castings, Dealer. Wait until the fire is out and the stove has cooled. Be sure to follow the standard safety procedure for working with dusty materials: Wear safety goggles and a dust mask. The procedure for replacing the gaskets is the same, regardless of the gasket location. 1. Remove the existing gasket by grasping an end and pulling firmly. 2. Use a wire brush or a screwdriver to clean the channel of any remaining cement or bits of gasket. Remove stubborn deposits of cement with a cold chisel if necessary. Vermont Castings • Intrepid II 1990 UE Installation Manual_R22 • 07/19 30003840...
- Page 24 The chimney connector should be cleaned by disconnecting • Touch up the paint on black stoves. the sections, taking them outside, and removing any deposits with a stiff wire brush. Reinstall the connector sections after cleaning, being sure to secure the individual sections with sheet metal screws. If you cannot inspect or clean the chimney yourself, contact your local Vermont Castings authorized dealer or hire a professional chimney sweep. Vermont Castings • Intrepid II 1990 UE Installation Manual_R22 • 07/19 30003840...
- Page 25 While the catalyst itself does not enter into the combustion process, it is possible for certain elements, such as lead and sulfur, to attach to the active sites on the surface of the honeycomb. Though the catalyst is still there, it is covered, or masked, by the contaminant, and cannot function. To avoid this situation, it is important not to burn anything in your Intrepid II that is a source of these contaminants. Particularly avoid painted or treated wood, coal, household trash, colored papers, metal foils, or plastics. Chemical chimney cleaners may also contain harmful elements. The safest approach is to burn only untreated, natural wood. Vermont Castings • Intrepid II 1990 UE Installation Manual_R22 • 07/19 30003840...
-
Page 26: Service Parts List
0001987T-I (Majolica Brown w/Transition Doors)(End Manufacturing Date: March 2017) 0001991-I (Bordeaux) 0001991T-I (Bordeaux w/Transition Doors) (End Manufacturing Date: March 2017 ) 0001990T-I (Classic Black w/Transition Doors) Part number list on following page. 07/19 Vermont Castings • Intrepid II 1990 UE Installation Manual_R22 • 07/19 30003840... - Page 27 1200896-10 Shim Ring 1201986 Secondary Air Flap 1601490 Refractory Chamber w/Access Panel SRV1602527 Ceramic Catalyst 30001153 Refractory Access Panel 1602516 Additional service part numbers appear on following page. Vermont Castings • Intrepid II 1990 UE Installation Manual_R22 • 07/19 30003840...
- Page 28 30006716A Majolica Brown SRV30004830 Tie Rod 1601640 Hex Bolt, Leg, 3/8”-16x1” 1201432 Right Air Manifold 1308654 Left Air Manifold 1308653 Additional service part numbers appear on following page. Vermont Castings • Intrepid II 1990 UE Installation Manual_R22 • 07/19 30003840...
- Page 29 Nut, Jam Pkg of 10 1203290-10 Ash Pan Assembly 5003522 Griddle Gasket 10 Ft 1-00-1203668 Door Gasket 15 Ft 1-00-1203588 Additional service part numbers appear on following page. Vermont Castings • Intrepid II 1990 UE Installation Manual_R22 • 07/19 30003840...
- Page 30 Bordeaux 0001380 Majolica Brown 0001373 Classic Black 1302254A Biscuit SRV30003214 Shelf Bordeaux SRV30006720 Majolica Brown SRV30004831 Classic Black 1302272A Biscuit SRV30003215 Shelf Bracket Bordeaux SRV30006721 Majolica Brown SRV30004832 Vermont Castings • Intrepid II 1990 UE Installation Manual_R22 • 07/19 30003840...
-
Page 31: Warranty
Firebox and heat exchanger, Grate and Stainless Limited 3 years Steel Burners, FlexBurn® System (engine, inner Lifetime cover,access cover and fireback) 90 Days All replacement parts beyond warranty period 4021-645J • 08-03-17 Vermont Castings • Intrepid II 1990 UE Installation Manual_R22 • 07/19 30003840... - Page 32 Consideration must be given to the appliance location and configuration, environmental conditions, insulation and air tightness of the structure. 4021-645J • 08-03-17 Vermont Castings • Intrepid II 1990 UE Installation Manual_R22 • 07/19 30003840...
- Page 33 EXCEPT TO THE EXTENT PROVIDED BY LAW, HHT MAKES NO EXPRESS WARRANTIES OTHER THAN THE WARRANTY SPECIFIED HEREIN. THE DURATION OF ANY IMPLIED WARRANTY IS LIMITED TO DURATION OF THE EXPRESSED WARRANTY SPECIFIED ABOVE. 4021-645J • 08-03-17 Vermont Castings • Intrepid II 1990 UE Installation Manual_R22 • 07/19 30003840...
- Page 34 352 Mountain House Road • Halifax, PA 17032 www.vermontcastings.com 30003840...
Need help?
Do you have a question about the Intrepid II 1990 and is the answer not in the manual?
Questions and answers