Table of Contents
Advertisement
http://www.vicsign.com
1 Satety precautions..........................................................2
1.1 Safety using ethods....................................................2
1.2 Definition of warning symbols..........................................2
2 Standard accessories.........................................................5
3 Product Structure Diagram....................................................6
4 Details frames amd installation..............................................6
a. Leg frame installation....................................................6
b. Installation and use......................................................7
c. Power connection..........................................................7
d. Serial RS232 cable and USB cable connection...............................7
e. USB cable.................................................................8
g. Media installation.......................................................13
h. knife setting and adjusting..............................................13
i. Drawing pen installation.................................................14
5 Operating instructions.......................................................14
a.Control Panel illustration...............................................14
b. Off-line/On-line........................................................15
c. media moves and car moves...............................................15
d. speed and pressure debugginge. pause function...........................16
e Pause function..........................................................16
f . Setting the origin.....................................................16
g. Media test strip debugging..............................................17
6. Flexi software installation.................................................17
a. Flexi operation..........................................................20
Table of Contents
..........................................10
(Optional).........................................22
User manual of HWQ series vinyl cutter
1 / 29
Advertisement
Table of Contents

Summary of Contents for Vicsign HWQ series
-
Page 1: Table Of Contents
User manual of HWQ series vinyl cutter Table of Contents 1 Satety precautions............2 1.1 Safety using ethods............2 1.2 Definition of warning symbols..........2 2 Standard accessories............5 3 Product Structure Diagram............6 4 Details frames amd installation..........6 a. Leg frame installation............6 b. Installation and use............7 c. -
Page 2: Satety Precautions
User manual of HWQ series vinyl cutter 1 Safety precautions To ensure the operator can correctly use the vinyl cutter, and prevent damage of vinyl cutter, please follow the instructions with the signs below. a Safety using methods Any improper operation possibly results in WARNING hazard of life or damage of equipment. - Page 3 User manual of HWQ series vinyl cutter Do not put out the plug when the power is on to avoid damage to the machine. Make sure electrical grounding when it is working. Otherwise it will electric shock and machine can’t work normally.
- Page 4 User manual of HWQ series vinyl cutter When operating the machine, do not place either of your hands on capstan to avoid injury. 4 / 29...
- Page 5 User manual of HWQ series vinyl cutter Place the machine on a stable surface, otherwise the machine may fall therefore get damaged. To unplug the power cable from replace, please hold plug instead of the cable. Strongly pulling of the cable possibly result in electric or fire.
-
Page 6: Standard Accessories
User manual of HWQ series vinyl cutter 2 Standard accessories Check following accessories after unpacking, please contact the seller or our company if you find anything missing. Note Quantit Item: Parts Picture Standard Power cable USB cable Standard Standard... -
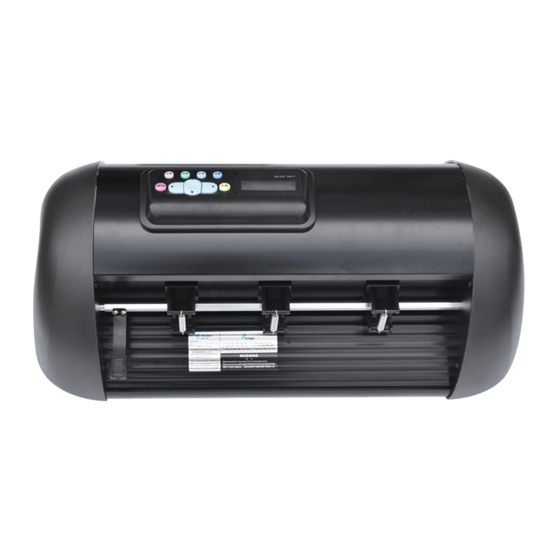
Page 7: Product Structure Diagram
User manual of HWQ series vinyl cutter Product Structure Diagram 1. Platform 2. Cover 3. Control Panel 4.Carriage 5.Blade holder 6.Pinch roller group 7. Trim strip 8.Upper cover plate 9. I/O Plug-in and Switch 10.RS232 serial port/USB port/SD port interface... -
Page 8: Installation And Use
User manual of HWQ series vinyl cutter Take out every party of the stand from the packing box, turn on the party bag, and install the stand according to the illustrational showing. Lay the cutter on the stand after install, aim at and install spiral shell, then lock with the screw. -
Page 9: Serial Rs232 Cable And Usb Cable Connection
User manual of HWQ series vinyl cutter d Serial RS232 cable and USB cable connection 1.Connection Methods RS232 Port USB Serial Port Warmly remind: RS232 serial wire and USB wire are those two isolated wire, when connection only need one of those two wires. - Page 10 User manual of HWQ series vinyl cutter Click“ I accept the terms in the license agreement”,click “Next” Choose "Complete" to install all necessary features then Click“next”; wait for a moment ,Click “finish” ,make it completely installed. 32bit driver Manual installation method:...
- Page 11 User manual of HWQ series vinyl cutter Into view, select “search for the best driver in these locations.” and ”Include this location in the search:” select the USB driver file path, click Next , as follows: Click Finish to close the wizard after installing, as follows:...
-
Page 12: Sd Card (Secure Digital Memory Card)
User manual of HWQ series vinyl cutter Open the computer's device manager, below dialog displays the USB drive, the interface in software should be same as device. f SD Card (Secure Digital Memory Card) 1 open the software and complete the drawings and save as the PLT format. Note: the document name in Arabic or English words can not exceed 12 characters. - Page 13 User manual of HWQ series vinyl cutter b.Select report mode ”save as files”, then click ”send” and promptly save as PLT format. *Note: File can report as PLT file in Artcut and CorelDraw software. 13 / 29...
- Page 14 User manual of HWQ series vinyl cutter 2 Insert SD card into the machine, press "Origin”, press the arrow keys up and down to find the appropriate file, press "Enter”, then it will start working. *When take off the SD from the machine, please do not extract directly, tap the SD card with your hands slightly and it will pop up.
-
Page 15: Media Installation
User manual of HWQ series vinyl cutter g. Media installation 1 Media storage and use precautions — After opening the package, store the media in a cool dark place to avoid sunlight and water — Do not place the print media to erect in order to avoid edge damage —... -
Page 16: Drawing Pen Installation
User manual of HWQ series vinyl cutter media,lift the handle,which controls pinch roller. h. Knife set and adjusting Don’t touch the knife top CAUTION with your finger prevent injury. a. Install the knife into the holder. Rotate the knife sheath to adjust the length of exposed part of knife tip. Blade holder exploded as shown below, the detail operation are described as followed: b. -
Page 17: Operating Instructions
User manual of HWQ series vinyl cutter 5 Operating instructions a Control Panel illustration 1. Offline pause 1.Switch On-line state to Off-line state 2, Can be suspended when cutting. 2. Origin 1. press” ”” ” to move car and “... -
Page 18: Media Moves And Car Moves
User manual of HWQ series vinyl cutter Online state Offline state c Media moves and car moves The plotter is offline, press the left arrow key " " the car moves, press the right arrow key " " the car will move to right. -
Page 19: Pause Function
User manual of HWQ series vinyl cutter e Pause function During plotter output, press the “Off line / Pause” button, the plotter will be in suspended state and displays the coordinates of the current document processing parameters. As shown:... -
Page 20: Flexi Software Installation
User manual of HWQ series vinyl cutter 6. FLEXI software installation Put FLEIXI CD into CD ROM, open files and click “Autorun.exe” install the software.In the process of installation, please don't insert dongle on computer, so to prevent dongle driver cannot be installed. - Page 21 User manual of HWQ series vinyl cutter Select the installation path, click next. insert dongle on computer, and input password, it will automatically show ID number of user,as follows: 21 / 29...
- Page 22 User manual of HWQ series vinyl cutter Select language, click “done”and software will finish installation,then it will auto fix desktop shortcut. a..Flexi operation 1,open Flexi software,make new file or open other files,click cutting/draw button” ” to send file 2, the software automatically switches "Add Setup" dialog box, select brand name and model name accordingly,...
- Page 23 User manual of HWQ series vinyl cutter 3,select connected method. *Caution:please check and make sure the Flexi interface port is the same as Device Manager shown,otherwise machine can not work. Those two port should the same 4. Please choose the port the same as cut output port, the other parameter is the same as handshare agreement (above picture)show, baud rate: 38400 hardware handshake agreement:...
- Page 24 User manual of HWQ series vinyl cutter 5.Enter into the above cutting interface, set the overcut to 0, and then click properties. 6. Set the 0.036mm at knife effect,and the rest are same as following shown: 24 / 29...
-
Page 25: Automatic Cruise Edge (Optional)
User manual of HWQ series vinyl cutter Automatic cruise edge (optional) 1. Open Flexi Software, import the graphic, click the blank part of image, the software will auto switch to “design center” dialog, setting the cutting material size, for example, if you need cut in A4 size material, set the size to “A4”... - Page 26 User manual of HWQ series vinyl cutter 4. Then click the “effect” in menu, click “Contour Cut Mark”, SA automatically mark after cutting accuracy is the most accurate, as the picture show: Click here 5. Print ready files, note: the print proportion of printer is 100%...
- Page 27 ), press “Origin”, after Coordinates reset, the new origin is ready, the plotter output will come from the new origin for cutting. Click “cut contour” and send 8. FLEXI software will automatically pop-up dialog, such as: machine brand name chose” Vicsign”, select the model name/number of the machine 27 / 29...
- Page 28 User manual of HWQ series vinyl cutter 9. Click” Next”, please notice: if use USB port, please open the computer “device manager” to check if the port selected in Flexi is the same as the interface of Computer driver installation configuration. If not the same, the signal can not sending.
- Page 29 User manual of HWQ series vinyl cutter 11. Click send, can cut/plotter the file. 29 / 29...
Need help?
Do you have a question about the HWQ series and is the answer not in the manual?
Questions and answers