Sony DAV-IS10 Operating Instructions Manual
Hide thumbs
Also See for DAV-IS10:
- Operating instructions manual (123 pages) ,
- Specifications (2 pages) ,
- Operating instructions manual (123 pages)

Related Manuals for Sony DAV-IS10


Summary of Contents for Sony DAV-IS10
- Page 1 3-212-590-51(1) DVD Home Theatre System Operating Instructions Manual de instrucciones ©2007 Sony Corporation Sony Corporation http://www.sony.net/ Printed in Malaysia...
-
Page 2: Welcome
Welcome! WARNING To reduce the risk of fire or electric Thank you for purchasing Sony DVD Home shock, do not expose this apparatus to Theatre System. Before operating this system, rain or moisture. please read this manual thoroughly and retain it for future reference. -
Page 3: Table Of Contents
Table of Contents Welcome! ..........2 Enjoying STB (Set Top Box) Digital About This Manual ......... 5 Sound or Digital Satellite Receiver This System Can Play the Following Sound from the System ....45 Discs ..........5 (STB SYNCHRO) Getting Started – BASIC – Various Functions for Playing Discs Step 1: Positioning the Speakers..... - Page 4 Tuner Functions Additional Information Presetting Radio Stations ...... 71 Precautions ........... 96 Listening to the Radio......72 Notes about the Discs ......97 Troubleshooting........97 Other Operations Self-diagnosis Function ...... 101 Controlling the TV with the Supplied (When letters/numbers appear in Remote..........
-
Page 5: About This Manual
About This Manual This System Can Play the Following Discs • The instructions in this manual describe the controls on the remote. You can also use the controls on the control unit if they have the Format of Disc logo same or similar names as those on the remote. - Page 6 • An adapter to convert an 8 cm disc to standard Note about CDs/DVDs size. Adapter The system can play CD-ROMs/CD-Rs/CD- RWs recorded in the following formats: – audio CD format – video CD format – MP3 audio tracks, JPEG image files, and DivX video files of format conforming to ISO 9660 Level 1/Level 2, or its extended format, •...
- Page 7 Note on DualDiscs Note on playback operations A DualDisc is a two sided disc product which of DVDs and VIDEO CDs mates DVD recorded material on one side with digital audio material on the other side. Some playback operations of DVDs and VIDEO However, since the audio material side does not CDs may be intentionally set by software conform to the Compact Disc (CD) standard,...
-
Page 8: Getting Started - Basic
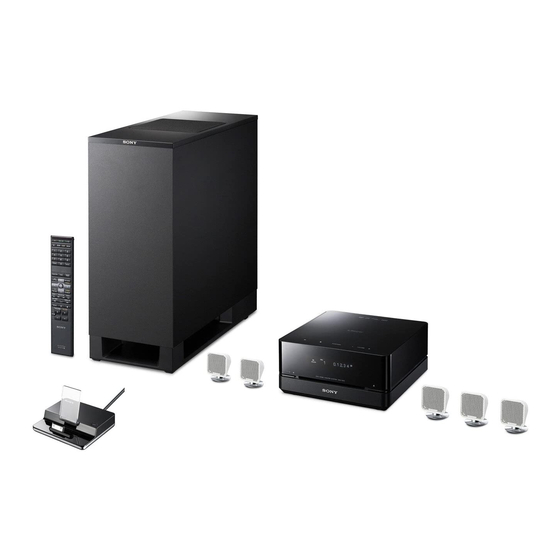
Getting Started – BASIC – Unpacking • Control unit (1) • Speakers (5) • Subwoofer (1) • AM loop antenna (aerial) (1) • FM wire antenna (aerial) (1) • Video Cord (1) • Remote Commander (remote) (1) • R6 (size AA) batteries (2) •... -
Page 9: Step 1: Positioning The Speakers
Using the subwoofer Step 1: Positioning the efficiently Speakers To reinforce the bass sound, place the subwoofer possible close to a wall. For the best possible surround sound, all the speakers other than the subwoofer should be Close to a wall placed at the same distance from the listening position (1). - Page 10 • Do not place objects on the top of the subwoofer • Do not place the subwoofer back of the obstruction, where the speaker unit is installed. such as TV, etc. Middle range sound will fall. TV etc. • Do not place the subwoofer under a desk or in a cabinet, etc.
- Page 11 Note on handling the subwoofer • Do not place your hand into the slit of the subwoofer when lifting it. The speaker driver may be damaged. When lifting, hold the bottom of the subwoofer. Subwoofer Slits • Do not push the top of the subwoofer where the speaker unit is installed.
-
Page 12: Step 2: Connecting The System
Step 2: Connecting the System The following is the basic connection of the system. Refer to the connection diagram below, and read the additional information from 1 to 4 on the following pages. 2 Center speaker 2 Front 2 Front speaker (L) speaker (R) 3 AM loop antenna (aerial) - Page 13 1 Connecting the Control unit Connect the system connector of the control unit to the SYSTEM CONTROL jack of the subwoofer. Insert the plug of the SYSTEM CONTROL cord, then secure the screws of the plug. Bottom of the subwoofer Rear of the control unit SYSTEM CONTROL ONLY FOR HCD-IS10...
-
Page 14: Connecting The Speakers
2 Connecting the Speakers Connect the connectors of the speaker cords to their corresponding SPEAKER jacks. The connectors of the speaker cords are the same color as the jacks to be connected. Front speaker (R) Front speaker (L) Center speaker Speaker cords Green White... - Page 15 Connect the cords to the AM antenna (aerial) terminals. The cords can be connected to either terminal. Insert the cords pushing down the terminal clamp. Insert until this part. Note • Do not place the AM loop antenna (aerial) near the system or other AV equipment, as noise may result. •...
- Page 16 4 Connecting the AC power cord (mains lead) Before connecting the AC power cord (mains lead) of the subwoofer to a wall outlet (mains), connect all the speakers to the subwoofer (page 14). Subwoofer To a wall outlet (mains) AC power cord (mains lead) Note •...
-
Page 17: Step 3: Connecting The Tv
Step 3: Connecting the TV The following is the basic connection of the control unit and TV. For other TV connections, see page 21. For other component connections, see page 24. : Video signal flow : Audio signal flow AUDIO VIDEO Rear of the control unit Required cords... -
Page 18: Step 4: Performing The Quick Setup
Press without inserting a disc. Step 4: Performing the The Setup Display for selecting the language used in the on-screen display Quick Setup appears on the TV screen. Follow the steps below to make the minimum LANGUAGE SETUP number of basic adjustments for using the OSD: ENGLISH SPANISH... - Page 19 Connect the calibration mic to the volume down. Give consideration to children and neighbor. ECM-AC2 jack on the rear of the control unit, and set it up at the ear level using • Avoid being in the measurement area and a tripod, etc.
- Page 20 To recall the Quick Setup display Press DISPLAY when the system is in stop mode. The Control Menu display appears on the TV screen. Press X/x to select [SETUP], then press The options for [SETUP] appear. 1 2 ( 2 7 ) 1 8 ( 3 4 ) DVD VIDEO 0 : 0 0 : 0 2...
-
Page 21: Getting Started - Advanced
Getting Started – ADVANCED – Connecting the TV (Advanced) Connecting the TV with the video cord/component video cord/ HDMI cable Sends the played back DVD image to the connected TV. Check the jacks of your TV, and choose connection method A, B, or C. Picture quality improves in order from A (standard) to C (HDMI). - Page 22 To connect to a TV with the VIDEO IN jack Connect the video cord. Yellow To connect to a TV with the COMPONENT VIDEO IN jacks Connect a component video cord (not supplied). To use the VIDEO OUT (COMPONENT) jacks (Y, ) instead of the video jacks, your TV monitor must be equipped with COMPONENT VIDEO IN jacks (Y, P ).
- Page 23 Connecting the TV with the digital optical cord A TV with a digital optical out jack (TV with built-in digital satellite receiver, etc.) can be connected to the TV (DIGITAL IN OPTICAL) jack instead of the TV (AUDIO IN) jacks on the rear of the control unit.
-
Page 24: Connecting Other Components
Connecting Other Components You can enjoy other components. Connecting the system and the other component Outputs the other component through the speakers of this system. VCR, digital satellite receiver, etc. To the digital coaxial output jack COAXIAL DIGITAL To SAT/CABLE Rear of the (DIGITAL IN COAXIAL) jack control unit... - Page 25 If you connect a digital satellite receiver with a DIGITAL OUT (COAXIAL or OPTICAL) jack A digital satellite receiver can be connected to the SAT/CABLE (DIGITAL IN COAXIAL) or TV (DIGITAL IN OPTICAL) jack. To connect, use a digital coaxial cord (not supplied) for the SAT/CABLE (DIGITAL IN COAXIAL) jack or digital optical cord (not supplied) for the TV (DIGITAL IN OPTICAL) jack.
-
Page 26: Installing The Speakers On A Wall
Installing the Speakers on a Wall You can use the speakers installed on a wall. Installing the speakers on a wall Prepare screws (not supplied) that are suitable for the holes of the bracket. Secure the bracket to the wall using hole 1. •... - Page 27 Push A with the supplied wrench (1), and then remove the speaker cords (2). When the lever is down, the When the lever is up, the speaker cords are locked. speaker cords can be removed. Thread the speaker cords through hole 3. Reconnect the detached speaker cords, matching 3/# to the appropriate speaker terminals (1), and then push the lever down completely (2).
- Page 28 • Contact a screw shop or installer regarding the wall material or screws to be used. • Sony is not responsible for accident or damage caused by improper installation, insufficient wall strength or improper screw installation, natural calamity, etc.
- Page 29 • You can remove the speaker cords from the connector. With the catch facing down, press and hold the connector down against a flat surface (1) and remove the speaker cords from the connector (2). Catch To avoid short-circuiting the speakers Short-circuiting of the speakers may damage the system.
-
Page 30: Basic Operations
Basic Operations Playing Discs Depending on the DVD or VIDEO CD, some operations may be different or restricted. Refer to the operation details supplied with your disc. Soft-touch buttons "/1 FUNCTION VOLUME FUNCTION ./> "/1 Disc slot Note • Soft-touch buttons function by touching lightly. Do not press them strongly. - Page 31 Turn on your TV. Switch the input selector on the TV to this system. Press "/1. The system turns on. Unless the mode of the system is set to “DVD,” press FUNCTION on the remote or FUNCTION (soft-touch button) on the control unit to select “DVD.” “No Disc”...
-
Page 32: Additional Operations
To save the power in standby mode Press "/1 while the system turns on. To cancel standby mode, press "/1 once. Note • When the system is turned off, do not push a disc into the control unit. Additional operations Press Stop Pause... -
Page 33: Enjoying The Radio Or Other Components
Enjoying the Radio or Other Components Selecting the connected component You can use a TV, VCR, or other components connected to the TV or SAT/CABLE jacks on the rear of the control unit. Refer to the operating instructions supplied with the components for further information. -
Page 34: Changing The Input Level Of The Sound From Connected Components
Changing the input level of the sound from connected components Distortion may occur when listening to a component connected to the TV (AUDIO IN) jacks on the rear of the control unit. This is not a malfunction and will depend on the component connected. To prevent this, you can change the input level from the sound of the other components. -
Page 35: Enjoying Tv Or Vcr Sound From All Speakers
Enjoying TV or VCR Sound from All Speakers You can enjoy TV or VCR sound from all the speakers in this system. For details, see “Step 3: Connecting the TV” (page 17), “Connecting the TV (Advanced)” (page 21), and “Connecting Other Components” (page 24). FUNCTION SOUND FIELD... -
Page 36: Selecting The Movie Or Music Mode
Selecting the Movie or Music Mode You can choose a suitable sound mode for movies or music. MOVIE/ MUSIC With the cover opened. Press MOVIE/MUSIC during playback. Press MOVIE/MUSIC repeatedly until the mode you want appears in the front panel display. The default setting is underlined. -
Page 37: Sound Adjustments
Automatic outputting of the Sound Adjustments original sound Enjoying Surround Sound x AUTO FORMAT DIRECT STANDARD The auto decoding function automatically by Using Sound Field detects the type of audio signal being input (Dolby Digital, DTS, or standard 2 channel stereo) and performs the proper decoding if necessary. -
Page 38: Adjusting The Bass, Middle, And Treble Level
Enjoying the sound effect Adjusting the Bass, x PORTABLE AUDIO ENHANCER Middle, and Treble Level This mode reproduces a clear enhanced sound image from your portable audio device. This You can adjust the bass, middle, and treble level mode is ideal for MP3 and other compressed easily. -
Page 39: Using The Hdmi Control Function For 'Bravia' Theatre Sync
Control) for HDMI (high-definition multimedia interface). The HDMI CONTROL function will not operate in the following cases: • When you connect this system to a component which is not correspond with Sony's HDMI CONTROL function. • When you connect the control unit and components using other than the HDMI connection. -
Page 40: Preparing For The Hdmi Control Function
Preparing for the HDMI CONTROL function To use the HDMI CONTROL function, set up the system and the TV. Before you use the HDMI CONTROL function, be sure you have performed the following procedures. Make sure that the control unit is connected to the TV (compatible with HDMI CONTROL function) via the HDMI connection. - Page 41 Press X/x to select [SETUP], then press The options for [SETUP] appear. 1 2 ( 2 7 ) 1 8 ( 3 4 ) DVD VIDEO 0 : 0 0 : 0 2 QUICK QUICK CUSTOM RESET Press X/x to select [CUSTOM], then press The Setup Display appears.
-
Page 42: Watching Dvd By A Single Button Press
Watching DVD by a Single Button Press (One-Touch Play) Simply pressing by H (one-touch) on the remote, the system and the components with the HDMI connections turn on simultaneously, and then DVD playback starts automatically. Check the HDMI connections of the respective component and make sure [HDMI CONTROL] is set to [ON] (page 40). -
Page 43: Enjoying The Tv Sound From The Speakers In This System
Enjoying the TV Sound from the Speakers in this System (System Audio Control) You can enjoy the TV sound from the speakers of this system by a simple operation. To use System Audio Control, connect the control unit and the TV with an audio cord (not supplied) (A) and an HDMI cable (not supplied) (B). -
Page 44: Turning Off The System With The Tv
Turning off the System with the TV (System Power Off) When you turn off the TV using the power button on the TV’s remote, this system also turns off automatically. To use System Power Off, connect the control unit and the TV with an HDMI cable (not supplied). See page 43. -
Page 45: Enjoying Stb (Set Top Box) Digital Sound Or Digital Satellite Receiver Sound From The System
Enjoying STB (Set Top Box) Digital Sound or Digital Satellite Receiver Sound from the System (STB SYNCHRO) You can enjoy digital sound and images of STB or a digital satellite receiver. Sound is output from the speakers of this system. Images of STB or a digital satellite receiver are output from the TV by the HDMI connection (HDMI 1 shown below). - Page 46 Press X/x to select [STB SYNCHRO], then press Press X/x to select [ON]. The default setting is underlined. • [ON]: sets the [STB SYNCHRO] function to on. • [OFF]: sets the [STB SYNCHRO] function to off. Press [DIGITAL IN] setting is selected automatically. CUSTOM SETUP HDMI CONTROL: STB SYNCHRO:...
-
Page 47: Various Functions For Playing Discs
Playback direction ×2B t 1M t 2M t 3M Various Functions for Playing Discs Searching for a Particular 3M (DVD VIDEO/DVD-VR mode/DivX video/ VIDEO CD only) Point on a Disc ×2B (DVD VIDEO/CD only) (Scan, Slow-motion Play, Freeze Opposite direction Frame) ×2b t 1m t 2m t 3m 3m (DVD VIDEO/DVD-VR mode/DivX video/... -
Page 48: Searching For A Title/Chapter/Track/Scene, Etc
[ALBUM] Searching for a Title/ [FILE] Chapter/Track/Scene, Example: when you select [CHAPTER] etc. [** (**)] is selected (** refers to a number). The number in parentheses indicates the total number of titles, chapters, tracks, indexes, scenes, albums or files. You can search a DVD by title or chapter, and 1 2 ( 2 7 ) 1 8 ( 3 4 ) DVD VIDEO... -
Page 49: Searching By Scene
Input the time code using the number Searching by Scene buttons, then press For example, to find the scene at 2 hours, 10 (Picture Navigation) minutes, and 20 seconds after the beginning, just enter “21020.” You can divide the screen into 9 subscreens and •... -
Page 50: (Picture Navigation) Resuming Playback From The Point Where You Stopped The Disc
Press Resuming Playback from The first scene of each title, chapter, or track appears as follows. the Point Where You Stopped the Disc (Resume Play) When you stop the disc, the system remembers the point where you pressed x and “Resume” Press C/X/x/c to select a title, chapter, appears in the front panel display. -
Page 51: Creating Your Own Program
To enjoy a disc that is played Creating Your Own before by resume playback (Multi-disc Resume) Program (DVD VIDEO, VIDEO CD only) (Program Play) This system recalls the point where you stopped the disc the last time it was played and resumes playback from that point the next time you insert You can play the contents of a disc in the order the same disc. - Page 52 Press X/x to select [SET ], then Press H to start Program Play. press Program Play starts. When the program ends, you can restart the [TRACK] is displayed when you play a same program again by pressing H. VIDEO CD or CD. To return to normal play PROGRAM 0:00:00...
-
Page 53: Playing In Random Order
Press X/x to select the item to be Playing in Random Order shuffled. x When playing a VIDEO CD or CD (Shuffle Play) • [TRACK]: shuffles tracks on the disc. x When Program Play is activated • [ON]: shuffles tracks selected in Program You can have the system “shuffle”... -
Page 54: (Shuffle Play) Playing Repeatedly
Press X/x to select the item to be Playing Repeatedly repeated. The default setting is underlined. (Repeat Play) x When playing a DVD VIDEO or DVD- • [OFF]: does not play repeatedly. • [DISC]: repeats all of the titles on the disc. You can play all the titles, tracks or albums on a •... -
Page 55: Using The Dvd's Menu
Using the DVD’s Menu Changing the Sound A DVD is divided into a lot of sections, which make up a picture or music feature. These When playing a DVD VIDEO or DATA CD/ sections are called “titles.” When you play a DATA DVD (DivX video files) recorded in DVD which contains several titles, you can multiple audio formats (PCM, Dolby Digital,... - Page 56 x When playing a DVD VIDEO x When playing a Super VCD Depending on the DVD VIDEO, the choice The default setting is underlined. of language varies. • [1:STEREO]: the stereo sound of the When four digits are displayed, they audio track 1 indicate a language code.
-
Page 57: Selecting [Original] Or [Play List] On A Dvd-R/Dvd-Rw
Example: Selecting [ORIGINAL] or Dolby Digital 3 ch [PLAY LIST] on a DVD-R/ Surround (Monaural) Front (L/R) DVD-RW 2 : SPANISH DOLBY DIGITAL 2 / 1 Some DVD-Rs/DVD-RWs in VR (Video Recording) mode have two types of titles for playback: originally recorded titles Currently playing ([ORIGINAL]) and titles that can be created on program format... -
Page 58: Viewing Information About The Disc
Press X/x to select a setting. Viewing Information About The default setting is underlined. • [PLAY LIST]: plays the titles created the Disc from [ORIGINAL] for editing. • [ORIGINAL]: plays the titles originally recorded. Press DISPLAY DISPLAY Viewing the playing time and remaining time in the front panel display You can check disc information, such as the... - Page 59 4 Remaining time and number of the current Press DISPLAY during playback. chapter The following display appears on the TV 5 Disc name screen. 6 Title and chapter T 1:01:57 When playing a DATA CD (DivX video) or DATA DVD (DivX video) Time information 1 Playing time of the current file 2 Current file name...
- Page 60 Note Checking the date • Characters/marks may not be displayed for some information languages. • Depending on the type of disc being played, the (JPEG only) system can only display a limited number of You can check the date information during characters.
-
Page 61: Changing The Angles
Changing the Angles Displaying the Subtitles If various angles (multi-angles) for a scene are If subtitles are recorded on a disc, you can turn recorded on a DVD VIDEO, you can change the the subtitles on or off while playing. If viewing angle. -
Page 62: Adjusting The Delay Between The Picture And Sound
Adjusting the Delay About MP3 Audio Tracks Between the Picture and and JPEG Image Files Sound (A/V SYNC) What is MP3/JPEG? MP3 is audio compression technology that When the sound does not match the pictures on satisfies the ISO/MPEG regulations. JPEG is the TV screen, you can adjust the delay between image compression technology. - Page 63 • that have the extension “.MP3” (MP3 audio When you insert a DATA CD or DATA DVD, track) or “.JPG”/“.JPEG” (JPEG image file) the numbered tracks (or files) are played sequentially, from 1 through 7. Any sub- • that conform to the DCF* image file format albums/tracks (or files) contained within a * “Design rule for Camera File system”: Image standards for digital cameras regulated by Japan...
-
Page 64: Playing Data Cds Or Data Dvds With Mp3 Audio Tracks And Jpeg Image Files
Press X/x to select an album. Playing DATA CDs or x When selecting an album Press H to start playing the selected DATA DVDs with MP3 album. Audio Tracks and JPEG x When selecting a track Press Image Files A list of tracks contained in the album appears. - Page 65 To play the next or previous JPEG Selecting a JPEG image file or image file album Press C/c when the Control Menu display is not Load a DATA CD or DATA DVD. displayed on the TV screen. Note that you can select the next album by continuing to press c Press DVD MENU.
-
Page 66: Playing Audio Tracks And Images As A Slide Show With Sound
Press X/x to select a setting. Playing Audio Tracks and The default setting is underlined. • [AUTO]: plays both the JPEG image files Images as a Slide Show and MP3 audio tracks in the same album with Sound as a slide show. •... - Page 67 Specifying the slide show Selecting an effect for image duration files in the slide show (JPEG only) (JPEG only) When you play JPEG image files using slide When you play a JPEG image file, you can show, you can specify the duration for slides to select the effect to be used when viewing the appear on the screen.
-
Page 68: Enjoying Divx ® Videos
About playback order of data on ® Enjoying DivX Videos DATA CDs or DATA DVDs See “Playback order of MP3 audio tracks or JPEG image files” (page 63). Note that the playback order may not be applicable, depending on the software used for creating the DivX video file, or if there are more than 200 albums and 600 DivX video files in each album. - Page 69 Selecting an album To go to the next or previous page Press DVD MENU. Press C/c. A list of albums on the disc appears. Only albums that contain DivX video files are To return to the previous display listed. Press O RETURN. To stop playback 3 ( 3 ) Press x.
-
Page 70: Playing Video Cds With Pbc Functions (Ver.2.0)
Note Playing VIDEO CDs with • Depending on the VIDEO CD, [Press ENTER] in Step 3 may appear as [Press SELECT] in the PBC Functions (Ver.2.0) operating instructions supplied with the disc. In this case, press H. (PBC Playback) • To play without PBC, press ./> or the number buttons while the system is in stop mode to select a With PBC (Playback Control) functions, you track, then press H or... -
Page 71: Tuner Functions
Press X/x to select the preset number you want. Tuner Functions TUNED STEREO Presetting Radio Stations You can preset 20 FM stations, and 10 AM stations. Before tuning, make sure to turn down • You can select the preset number directly by the volume to minimum. -
Page 72: Listening To The Radio
when the system receives the radio station. To Listening to the Radio stop the automatic tuning manually, press TUNING + or –. Preset radio stations in the system’s memory To listen to radio stations when first (see “Presetting Radio Stations” (page 71)). you know the frequencies Use direct tuning in Step 2. -
Page 73: Naming Preset Stations
Naming preset stations Viewing the station name or frequency in the front panel You can enter a name for preset stations. These display names (for example, “XYZ”) appear in the front panel display when a station is selected. When the system is set to “FM” or “AM,” you Note that no more than one name can be entered can check the frequency using the front panel for each preset station. -
Page 74: Controlling The Tv With The Supplied Remote
Note 503, 517 • When you replace the batteries of the remote, the LOEWE 515, 556 code number may reset itself to the default (SONY) setting. Reset the appropriate code number. LXI (Sears) 503, 508, 510, 517, 518, 551 MAGNAVOX... - Page 75 CATV ENTER* TOOLS* Displays the operation menu for Manufacturer Code number the current display. SONY 802, 821, 822, 823, 824, 825, RETURN* Return to the previous display. AMSTRAD 845, 846 TV MENU* Display the menu of the TV. C/X/x/c*, BSKYB * Select the item on the menu.
-
Page 76: Enjoying Multiplex Broadcast Sound
Enjoying Multiplex Enjoying the Sound at Low Broadcast Sound Volume (DUAL MONO) (NIGHT MODE) You can enjoy multiplex broadcast sound when You can enjoy sound effects or dialog, as you the system receive the Dolby Digital multiplex would in a movie theater, even at low volume. It broadcast signal. -
Page 77: Using The Sleep Timer
Using the Sleep Timer Changing the Brightness of the Front Panel Display You can set the system to turn off at a preset time, so you can fall asleep listening to music. The brightness of the front panel display can be You can preset the time in 10 minutes set to either of 2 levels. -
Page 78: Changing The Display Mode
Changing the Display Changing the Display Mode Appearance of the Soft- touch Buttons (INFORMATION MODE) (ILLUMINATION MODE) You can change the displayed information in the front panel display. You can select the way of displaying the soft- touch buttons located on the top of the control unit. - Page 79 • Even if “SIMPLE” mode is set, only N on the top of the control unit lights up during playback. Note • When the soft-touch buttons turn off in “SIMPLE” mode, first touch the soft-touch button area so that the soft-touch buttons light up, then operate the system with them.
-
Page 80: Advanced Settings And Adjustments
Press DISPLAY while the system is in stop mode. Advanced Settings and Adjustments The Control Menu display appears on the TV screen. Locking Discs Press X/x to select (CUSTOM PARENTAL CONTROL, [PARENTAL CONTROL], then press PARENTAL CONTROL) The options for [PARENTAL CONTROL] appear. - Page 81 Enter or re-enter your 4-digit password Limiting playback for children using the number buttons, then press [PARENTAL CONTROL] [Custom parental control is set.] appears (DVD VIDEO only) and the TV screen returns to the Control Playback of some DVD VIDEOs can be limited Menu display.
- Page 82 Press X/x to select [LEVEL], then press x When you have already registered a password The display for entering the password The selection items for [LEVEL] are appears. displayed. PARENTAL CONTROL PARENTAL CONTROL LEVEL: Enter password, then press STANDARD: ENTER NC17 Press X/x to select the level you want, Enter or re-enter your 4-digit password...
-
Page 83: Calibrating The Appropriate Settings Automatically
Note Calibrating the • When you play discs which do not have the Parental Control function, playback cannot be limited on this Appropriate Settings system. • Depending on the disc, you may be asked to change Automatically the parental control level while playing the disc. In this case, enter your password, then change the level. - Page 84 Press X/x to select Connect the calibration mic to the [AUTO ECM-AC2 jack on the rear of the control CALIBRATION], then press unit, and set it up at the ear level using a tripod, etc. (not supplied). 1 ( 4 4 ) 3 ( 2 8 ) DVD VIDEO The front of each speaker should face the...
- Page 85 [Mic input level The calibration mic or system may overloaded.] be damaged. Measurement complete. FRONT L : 5.00m 0.0dB Contact your Sony dealer or local FRONT R : 5.00m 0.0dB authorized Sony service facility. CENTER : 5.00m + 1.0dB SUBWOOFER : 5.00m + 4.0dB...
-
Page 86: Using The Setup Display
Press X/x to select [CUSTOM], then Using the Setup Display press The Setup Display appears. By using the Setup Display, you can make LANGUAGE SETUP various adjustments to items such as picture and ENGLISH OSD: sound. SPANISH MENU: AUDIO: ORIGINAL For an overall list of Setup Display items, see SUBTITLE: AUDIO FOLLOW... -
Page 87: Setting The Display Or Sound Track Language
Select a setting using X/x, then press Setting the Display or The setting is selected and setup is Sound Track Language complete. [LANGUAGE SETUP] SCREEN SETUP TV TYPE: 4:3 LETTER BOX [LANGUAGE SETUP] allows you to set /RGB (HDMI): SCREEN SAVER: various languages for the on-screen display or BACKGROUND: JACKET PICTURE... -
Page 88: Settings For The Display
Note Settings for the Display • Depending on the DVD, [4:3 LETTER BOX] may be selected automatically instead of [4:3 PAN SCAN] or [SCREEN SETUP] vice versa. x [YC /RGB (HDMI)] Choose settings according to the TV to be Selects the type of HDMI signal output from connected. - Page 89 x [BLACK LEVEL] Selects the black level (setup level) for the video signal output from the VIDEO OUT (VIDEO) jack. 16:9 aspect ratio TV [ON] Sets the black level of the output signal to the standard level. Does your TV accept progressive [OFF] Lowers the standard black level.
- Page 90 x “INTERLACE” (NORMAL) output through the VIDEO OUT (COMPONENT) jacks. Even though you set to “PROGRE” Select this setting when: (PROGRESSIVE), images from the VIDEO OUT – your TV does not accept progressive signals, (VIDEO) jack are unaffected as they are output in the interlace format.
-
Page 91: [Screen Setup] Custom Settings
[ON] Sets the [STB SYNCHRO] Custom Settings function to on. [CUSTOM SETUP] Note • When this function is set to [ON], [DIGITAL IN] Use this to set up playback related and other function setting begins. settings. x [DIGITAL IN] Assigns a digital sound input corresponding Select [CUSTOM SETUP] in the Setup Display. -
Page 92: Settings For The Speakers
selects PCM, DTS, Dolby Digital sound, and MPEG Settings for the Speakers audio tracks in this order. x [MULTI-DISC RESUME] (DVD VIDEO/ [SPEAKER SETUP] VIDEO CD only) Switches the Multi-disc Resume setting on or To obtain the best possible surround sound, set off. - Page 93 x [DISTANCE (FRONT)] The default distance setting for the speakers in relation to the listening position is shown below. When you set the distance using the Quick Setup (page 18), the settings is automatically displayed. Be sure to change the value in the Setup Display when you move the speakers.
- Page 94 x [LEVEL (SURROUND)] Press DISPLAY when the system is You can vary the level of surround speakers as in stop mode. follows. Be sure to set [TEST TONE] to [ON] The Control Menu display appears. for easy adjustment. Press X/x to select [SETUP], then press [L/R]...
-
Page 95: Returning To The Default Settings
Returning the settings on the Returning to the Default Setup Display to the default Settings Press FUNCTION repeatedly until “DVD” appears in the front panel display. Returning the sound field Press DISPLAY when the system is in settings or radio settings to stop mode. -
Page 96: Additional Information
If you have any questions or problems concerning On placement your system, please consult your nearest Sony dealer. • Place the system in a location with adequate On cleaning discs, disc/lens ventilation to prevent heat build-up in the system. -
Page 97: Notes About The Discs
Do not touch the surface. problem before requesting repairs. Should any • Do not stick paper or tape on the disc. problem persist, consult your nearest Sony dealer. Note that if service personnel changes some parts during repair, these parts may be retained. - Page 98 return the setting to interlace format (the default • If the speakers are used with a CRT-based TV or setting) (page 89). projector, install the speakers at least 0.3 m from the TV set. • Re-connect the connecting cord securely. •...
- Page 99 • Press DISPLAY so that the frequency appears in The sound loses stereo effect when you play a the front panel display. VIDEO CD, a CD, or an MP3. • Set the audio setting to [STEREO] by pressing The remote does not function. AUDIO (page 55).
- Page 100 A disc cannot be ejected and “LOCKED” of the alphabets. Other characters are displayed as appears in the front panel display. [*]. • Contact your Sony dealer or local authorized Sony A disc does not start playing from the service facility. beginning.
-
Page 101: Self-Diagnosis Function
“DEMO PLAY” appears in the front panel Self-diagnosis Function display. • Contact your Sony dealer or local authorized Sony (When letters/numbers appear in the service facility. display) The HDMI CONTROL function does not work. • When “HDMI” does not light up in the front panel When the self-diagnosis function is activated to display, check the HDMI connection (page 21). -
Page 102: (When Letters/Numbers Appear In The Display) Specifications
TV screen. Although this is not a Front L / Front R (rated): 35 W + 35 W malfunction and for Sony service use only, (at 10 ohms, 1 kHz, 1 % normal system operation will not be possible. -
Page 103: Glossary
Speaker system Full range speaker system Digital Cinema Auto Calibration was developed Speaker unit 35 mm by Sony to automatically measure and adjusts Rated impedance 10 ohms the speaker settings to your listening Dimensions (approx.) 45 × 55 × 40 mm (w/h/d) environment in a short period of time. - Page 104 x Music mode mode have the same format as a DVD VIDEO, The Music mode is for use with any stereo music while discs created in VR (Video Recording) recordings, and provides a wide and deep sound mode allow the contents to be programmed or space.
- Page 105 S-master Audio Layer-3). MPEG-2 is used for one of the S-master is an all-digital amplifier technology audio format of DVD. developed by Sony, which effectively Multi-angle function minimizes the occurrence of sound fragmentation and jitter, delivering superb Various angles of a scene, or viewpoints of the dialog clarity and faithful reproduction of the video camera are recorded on some DVDs.
-
Page 106: Language Code List
Language Code List The language spellings conform to the ISO 639: 1988 (E/F) standard. Code Language Code Language Code Language Code Language 1027 Afar 1183 Irish 1347 Maori 1507 Samoan 1028 Abkhazian 1186 Scots Gaelic 1349 Macedonian 1508 Shona 1032 Afrikaans 1194 Galician 1350 Malayalam 1509 Somali... -
Page 107: Index To Parts And Controls
Index to Parts and Controls For more information, refer to the pages indicated in parentheses. Control unit (front panel) FUNCTION VOLUME A Soft-touch buttons ( D [/1 (on/standby) (30) /FUNCTION/ VOLUME –/+) (30) E Disc slot (30) B Remote sensor (8) (eject) (30) C Front panel display (109) continued... - Page 108 Control unit (rear panel) A AM terminals (12) F SAT/CABLE (DIGITAL IN COAXIAL) jack (24) B TV (AUDIO IN) jacks (17) G VIDEO OUT (VIDEO) jack (17, 21) C HDMI OUT jack (21) H VIDEO OUT (COMPONENT) jacks (21) D ECM-AC2 jack (18, 83) I Ventilation slots E TV (DIGITAL IN OPTICAL) jack (23) J FM 75Ω...
- Page 109 Front Panel Display About the indications in the front panel display SLEEP NIGHT TUNED TITLE CHAP STEREO MONO MOVIE MUSIC REPEAT 1 DIGITAL PROGRESSIVE A Lights up when the sleep timer is set. I Current repeat mode (54) (77) J Lights up when the system outputs B Lights up when the night mode is on.
- Page 110 Subwoofer Bottom of the subwoofer SYSTEM CONTROL ONLY FOR HCD-IS10 SPEAKER ONLY FOR SS-IS10 FRONT R FRONT L SUR R SUR L CENTER A Ventilation slots B SYSTEM CONTROL jack (12) C SPEAKER jacks (12)
-
Page 111: Remote Control
Remote control (30) c/C STEP (47) N m/M (47) (47) TUNING –/+ (71) O REPEAT (54) P VOLUME +/– (30, 72, 75) Q MUTING (30) R AUDIO (55, 76) S PICTURE NAVI (49) T MOVIE/MUSIC (36) U RESOLUTION (89) V DIRECT TUNING (72) W TUNER MENU (71, 117) X [/1 (on/standby) (18, 30, 50) Y DISPLAY (58, 72) -
Page 112: Guide To The Control Menu Display
Guide to the Control Menu Display DISPLAY Use the Control Menu display to select a function and to view related information. Press DISPLAY repeatedly to turn on or change the Control Menu display as follows: Control Menu display 1 Control Menu display 2 (appears for certain discs only) Control Menu display off Control Menu display The Control Menu display 1 and 2 will show different items depending on the disc type. - Page 113 Currently playing title number Currently playing chapter number Total number of titles Playback status Total number of chapters (N Playback, X Pause, Control Menu items x Stop, etc.) 1 2 ( 2 7 ) Type of disc being 1 8 ( 3 4 ) DVD VIDEO played 1 : 3 2 : 5 5...
- Page 114 [AUTO CALIBRATION] (page 83) Adjust the level of each speaker automatically. [PROGRAM] (page 51) Selects the track to play in the order you want. [SHUFFLE] (page 53) Plays the track in random order. [REPEAT] (page 54) Plays the entire disc (all titles/all tracks/all albums) repeatedly or one title/chapter/track/album repeatedly.
-
Page 115: Dvd Setup Display List
DVD Setup Display List You can set the following items with the DVD Setup Display. The order of the displayed items may be different from the actual display. The default settings are underlined. LANGUAGE SETUP SCREEN SETUP 16:9 OSD* TV TYPE 4:3 LETTER MENU* AUDIO*... - Page 116 CUSTOM SETUP SPEAKER SETUP HDMI CONNECTION FRONT CONTROL CENTER NONE SURROUND SYNCHRO NONE DIGITAL IN TV t OPT, SAT/CABLE t COAX SUBWOOFER TV t COAX, SAT/CABLE t OPT DISTANCE 0.0 – 7.0 m PAUSE AUTO (FRONT) 0.0 – 7.0 m MODE FRAME 0.0 –...
-
Page 117: System Menu List
System Menu List You can set the following items with SYSTEM MENU on the remote. The default settings are underlined. System menu A/V SYNC LONG SHORT ATTENUATE* ATT ON ATT OFF ILLUM MODE STANDARD SIMPLE INFO MODE STANDARD SIMPLE * “ATTENUATE” appears only when the function is set to the “TV” function. Tuner Menu List You can set the following items with TUNER MENU on the remote. -
Page 118: Index
Index Numerics Dolby Pro Logic II 103 TV sound 35 DTS 55, 104 16:9 88 DUAL MONO 76 4:3 LETTER BOX 88 DVD 104 Memory Clear 95 4:3 OUTPUT 89 DVD+RW 104 MENU 87 4:3 PAN SCAN 88 DVD’s menu 55 Mica-reinforced-cellular- 5.1 Channel Surround 56 DVD-RW 57, 104... - Page 119 Remote 8, 74, 111 Repeat Play 54 RESET 95 Resume Play 50 Scan 47 SCENE 48 Scene 105 SCREEN SAVER 88 SCREEN SETUP 88 SETUP 86 Setup Display 86, 115 Shuffle Play 53 SLEEP 77 Slide Show 66 Slow-motion Play 47 S-master 105 Soft-touch button 30 Sound Field 37...
- Page 120 Para reducir el riesgo de incendio o Gracias por adquirir el sistema DVD Home descarga eléctrica, no exponga este Theatre de Sony. Antes de utilizar este sistema, aparato a la lluvia ni a la humedad. lea este manual atentamente y consérvelo para consultarlo en el futuro.
- Page 121 Tabla de contenido Bienvenido ..........2 Cómo escuchar el sonido del televisor Acerca de este manual ......5 desde los altavoces del sistema ..44 Este sistema puede reproducir los (Control del audio del sistema) siguientes discos ....... 6 Apagado del sistema mediante el televisor ..........
- Page 122 Reproducción de DATA CD o DATA Ajustes de los altavoces...... 100 DVD con pistas de audio MP3 y [AJUSTE ALTAVOZ] archivos de imagen JPEG ....67 Recuperación de los valores Reproducción de pistas de audio e predeterminados ......103 imágenes como una presentación de Información complementaria diapositivas con sonido....
-
Page 123: Acerca De Este Manual
DivX, DivX Certified y los logotipos asociados son Acerca de este manual marcas comerciales de DivX, Inc. y se utilizan bajo licencia. • Las instrucciones de este manual describen los controles del mando a distancia. También es posible utilizar los controles de la unidad de control si presentan los mismos nombres o similares a los del mando a distancia. -
Page 124: Este Sistema Puede Reproducir Los Siguientes Discos
Nota acerca de los CD/DVD Este sistema puede Este sistema reproduce discos CD-ROM/CD-R/ reproducir los siguientes CD-RW grabados en los siguientes formatos: discos – En formato de CD de audio – En formato de CD de vídeo – Pistas de audio MP3, archivos de imagen Formato de Logotipo del disco JPEG y archivos de vídeo DivX de formato... - Page 125 Discos de música codificados • Discos que tengan fijado un accesorio disponible en el mercado como, por ejemplo, mediante tecnologías de una etiqueta o un anillo. protección de los derechos de Anillo autor Etiqueta Este producto se ha diseñado para reproducir discos que cumplen con el estándar Compact Disc (CD).
- Page 126 Acerca de CD Multi Session Nota sobre las operaciones de reproducción de discos • Este sistema puede reproducir CD Multi DVD y VIDEO CD Session cuando la primera sesión incluye una pista de audio MP3. También se podrán Es posible que ciertas operaciones de reproducir las pistas de audio MP3 grabadas en reproducción de discos DVD y VIDEO CD sesiones posteriores.
-
Page 127: Procedimientos Iniciales - Básicos
Procedimientos iniciales – BÁSICOS – Desembalaje • Unidad de control (1) • Altavoces (5) • Altavoz potenciador de graves (1) • Antena cerrada de AM (1) • Antena de cable de FM (1) • Cable de vídeo (1) • Mando a distancia (control remoto) (1) •... -
Page 128: Paso 1: Colocación De Los Altavoces
Utilización eficaz del altavoz Paso 1: Colocación de los potenciador de graves altavoces Para reforzar el sonido de graves, coloque el altavoz potenciador de graves lo más cerca Para obtener el mejor sonido envolvente posible, posible de una pared. todos los altavoces, excepto el potenciador de graves, deben estar colocados a la misma Cerca de una pared distancia de la posición de escucha (1). - Page 129 • No coloque el altavoz potenciador de graves detrás de un dispositivo que pueda obstruirlo como, por ejemplo, un televisor, ya que los tonos medios podrían no oírse. Televisor, etc. • No coloque objetos encima del altavoz potenciador de graves. Nota •...
- Page 130 Nota sobre la manipulación del altavoz potenciador de graves • No ponga la mano en la hendidura del altavoz potenciador de graves para levantarlo, ya que podría dañar el altavoz. Cuando levante el altavoz potenciador de graves, sujételo por la base. Altavoz potenciador de graves...
-
Page 131: Paso 2: Conexión Del Sistema
Paso 2: Conexión del sistema A continuación, se muestra la conexión básica del sistema. Consulte el siguiente diagrama de conexiones y lea la información adicional de los puntos 1 al 4 en las siguientes páginas. 2 Altavoz central 2 Altavoz 2 Altavoz frontal (L) frontal (R) - Page 132 1 Conexión de la unidad de control Conecte el conector del sistema de la unidad de control a la toma SYSTEM CONTROL del altavoz potenciador de graves. Inserte el conector del cable SYSTEM CONTROL y, a continuación, apriete los tornillos del conector. Parte inferior del altavoz potenciador de graves Parte posterior de la unidad de control SYSTEM CONTROL...
- Page 133 2 Conexión de los altavoces Conecte los conectores de los cables de altavoz a las tomas SPEAKER correspondientes. Los conectores de los cables de altavoz son del mismo color que las tomas a las que deben conectarse. Altavoz frontal (R) Altavoz frontal (L) Altavoz central Cables de altavoz...
- Page 134 Conecte los cables a los terminales de la antena de AM. Los cables pueden conectarse a cualquiera de los terminales. Presione el fijador del terminal hacia abajo para insertar los cables. Insértelo hasta esta parte. Nota • No coloque la antena cerrada de AM cerca del sistema ni de ningún otro equipo de AV, ya que se podría producir ruido.
- Page 135 4 Conexión del cable de alimentación de ca Antes de conectar el cable de alimentación de ca del altavoz potenciador de graves a una toma de corriente de pared, conecte todos los altavoces al altavoz potenciador de graves (página 15). Altavoz potenciador de graves A una toma de corriente de pared...
-
Page 136: Paso 3: Conexión Del Televisor
Paso 3: Conexión del televisor A continuación, se presenta la conexión básica de la unidad de control y el televisor. Para obtener información sobre otras conexiones del televisor, consulte la página 22. Para obtener información sobre otras conexiones de componentes, consulte la página 25. : flujo de la señal de vídeo Televisor : flujo de la señal de audio... -
Page 137: Paso 4: Realización Del Ajuste Rápido
Pulse sin insertar un disco. Paso 4: Realización del En la pantalla del televisor aparecerá la pantalla de ajustes para seleccionar el ajuste rápido idioma utilizado en las indicaciones en pantalla. Siga los pasos que se indican a continuación para realizar el número mínimo de ajustes AJUSTE DE IDIOMA básicos para utilizar el sistema. - Page 138 Pulse Parte posterior de la unidad de control Aparece la pantalla [CALIBRAC. AUTOM.]. CALIBRAC. AUTOM. Conecte el micrófono de calibración. ¿Desea iniciar la medición? A la toma ECM-AC2 Micrófono de calibración Conecte el micrófono de calibración a la toma ECM-AC2 de la parte posterior de la unidad de control y ajústelo a la altura del oído con un trípode, etc.
- Page 139 Para volver a la pantalla de Desenchufe el micrófono de calibración y pulse C/c para ajuste rápido seleccionar [SI]. Pulse DISPLAY cuando el sistema se encuentre en modo de parada. Medición completa. FRONTAL I : 5.00m 0.0dB Aparece la pantalla del menú de control en la FRONTAL D : 5.00m 0.0dB...
-
Page 140: Procedimientos Iniciales - Avanzados
Procedimientos iniciales – AVANZADOS – Conexión del televisor (avanzado) Conexión del televisor con el cable de vídeo, el cable de vídeo componente o el cable HDMI Envía la imagen de DVD en reproducción al televisor conectado. Compruebe las tomas del televisor y elija el método de conexión A, B o C. La calidad de la imagen mejora progresivamente de A (estándar) a C (HDMI). - Page 141 Para realizar la conexión a un televisor con la toma VIDEO IN Conecte el cable de vídeo. Amarillo Para realizar la conexión a un televisor con las tomas COMPONENT VIDEO IN Conecte un cable de vídeo componente (no suministrado). Para utilizar las tomas VIDEO OUT (COMPONENT) (Y, P ) en lugar de las tomas de vídeo, el monitor del televisor deberá...
- Page 142 Conexión del televisor con el cable digital óptico Es posible conectar un televisor con toma de salida digital óptica (televisor con receptor digital vía satélite incorporado, etc.) a la toma TV (DIGITAL IN OPTICAL) en lugar de a las tomas TV (AUDIO IN) de la parte posterior de la unidad de control.
-
Page 143: Conexión De Otros Componentes
Conexión de otros componentes Puede utilizar otros componentes. Conexión del sistema y el otro componente El sonido del otro componente se emite a través de los altavoces de este sistema. Videograbadora, receptor digital vía satélite, etc. A la toma de salida digital coaxial COAXIAL DIGITAL... - Page 144 Si conecta un receptor digital vía satélite con una toma DIGITAL OUT (COAXIAL u OPTICAL) Es posible conectar un receptor digital vía satélite a la toma SAT/CABLE (DIGITAL IN COAXIAL) o TV (DIGITAL IN OPTICAL). Para realizar la conexión, utilice un cable digital coaxial (no suministrado) para la toma SAT/CABLE (DIGITAL IN COAXIAL) o un cable digital óptico (no suministrado) para la toma TV (DIGITAL IN OPTICAL).
-
Page 145: Instalación De Los Altavoces En La Pared
Instalación de los altavoces en la pared Puede utilizar los altavoces instalados en una pared. Instalación de los altavoces en la pared Prepare tornillos (no suministrados) adecuados para los orificios del soporte. Fije el soporte a la pared mediante el orificio 1. Sugerencia •... - Page 146 Presione A con la llave suministrada (1) y, a continuación, extraiga los cables de altavoz (2). Cuando la palanca está hacia abajo, los Cuando la palanca está hacia arriba, los cables de altavoz están bloqueados. cables de altavoz se pueden extraer. Pase los cables de altavoz por el orificio 3.
- Page 147 • Consulte con una tienda especializada o con un instalador acerca del material de la pared o los tornillos que se han de utilizar. • Sony no se responsabiliza de ningún accidente o daño causado por una instalación inadecuada, una pared de poca resistencia, una instalación incorrecta de tornillos, una catástrofe natural, etc.
- Page 148 Sugerencia • Puede extraer los cables de altavoz del conector. Con el enganche mirando hacia abajo, mantenga presionado el conector contra una superficie plana (1) y retire los cables de altavoz del conector (2). Enganche Para evitar que se produzca un cortocircuito en los altavoces Si se produce un cortocircuito en los altavoces, el sistema podría dañarse.
-
Page 149: Funcionamiento Básico
Funcionamiento básico Reproducción de discos Algunas operaciones pueden ser distintas o estar limitadas en función del DVD o VIDEO CD. Consulte la información de funcionamiento suministrada con el disco. Botones de presión leve "/1 FUNCTION VOLUME FUNCTION ./> "/1 Ranura del disco Nota •... - Page 150 Encienda el televisor. Cambie el selector de entrada del televisor a este sistema. Pulse "/1. El sistema se encenderá. A menos que el modo del sistema esté ajustado en “DVD”, pulse FUNCTION en el mando a distancia o FUNCTION (botón de presión leve) en la unidad de control para seleccionar “DVD”. “No Disc”...
- Page 151 Nota • Si activa la función CONTROL HDMI, el televisor que se encuentra conectado a la unidad de control mediante el cable HDMI podrá utilizarse de forma sincronizada con el sistema. Para obtener información detallada, consulte página 40. Para ahorrar energía en el modo de espera Pulse "/1 mientras se enciende el sistema.
-
Page 152: Cómo Escuchar La Radio U Otros Componentes
Cómo escuchar la radio u otros componentes Selección del componente conectado Puede utilizar un televisor, una videograbadora u otros componentes conectados a las tomas TV o SAT/ CABLE de la parte posterior de la unidad de control. Para obtener más información, consulte el manual de instrucciones suministrado con los componentes conectados. - Page 153 Cambio del nivel de entrada del sonido procedente de los componentes conectados Es posible que se produzca distorsión cuando escuche el sonido de un componente conectado a las tomas TV (AUDIO IN) de la parte posterior de la unidad de control. No se trata de un fallo de funcionamiento, sino que dependerá...
-
Page 154: Cómo Escuchar El Sonido Del Televisor O De La Videograbadora A Través De Todos Los Altavoces
Cómo escuchar el sonido del televisor o de la videograbadora a través de todos los altavoces Puede escuchar el sonido del televisor o de la videograbadora a través de todos los altavoces de este sistema. Para obtener más información, consulte “Paso 3: Conexión del televisor” (página 18), “Conexión del televisor (avanzado)”... -
Page 155: Selección Del Modo De Película O De Música
Selección del modo de película o de música Puede elegir un modo de sonido adecuado para las películas o la música. MOVIE/ MUSIC Con la tapa abierta. Pulse MOVIE/MUSIC durante la reproducción. Pulse MOVIE/MUSIC varias veces hasta que el modo que desea ajustar aparezca en el visor del panel frontal. -
Page 156: Ajustes De Sonido
Campo acústico Visor OMNI-DIRECTIONAL OMNI-DIR Ajustes de sonido SOUND Cómo escuchar sonido Emisión automática del envolvente mediante el sonido original campo acústico x AUTO FORMAT DIRECT STANDARD La función de decodificación automática detecta el tipo de señal de audio que se recibe (Dolby Digital, DTS o estéreo estándar de 2 canales) y realiza la decodificación correspondiente, en Para disfrutar de sonido envolvente, basta con... -
Page 157: Ajuste Del Nivel De Graves, Medios Y Agudos
Nota Ajuste del nivel de graves, • Si la señal de entrada procede de una fuente multicanal, se cancelará Dolby Pro Logic II MOVIE/ medios y agudos MUSIC y se emitirá directamente la fuente multicanal. • Cuando se recibe el sonido de emisión bilingüe, El nivel de los tonos graves, medios y agudos Dolby Pro Logic II MOVIE/MUSIC no es efectivo. -
Page 158: Uso De La Función Control Hdmi Para 'Bravia' Theatre Sync
‘BRAVIA’ Theatre Sync sólo puede utilizarse con televisores Sony ‘BRAVIA’ que presenten esta función. Si conecta componentes Sony compatibles con la función CONTROL HDMI mediante el cable HDMI (no suministrado), el funcionamiento se simplificará de la forma siguiente: • Reproducción mediante una pulsación (página 43): con tan sólo pulsar H en el mando a distancia, el televisor se encenderá... - Page 159 Preparativos para utilizar la función CONTROL HDMI Para utilizar la función CONTROL HDMI, instale el sistema y el televisor. Antes de utilizar la función CONTROL HDMI, asegúrese de haber realizado los procedimientos siguientes. Asegúrese de que la unidad de control está conectada al televisor (compatible con la función CONTROL HDMI) mediante la conexión HDMI.
- Page 160 Pulse X/x para seleccionar [AJUSTE] y, a continuación, pulse Aparecerán las opciones de [AJUSTE]. 1 2 ( 2 7 ) 1 8 ( 3 4 ) DVD VIDEO 0 : 0 0 : 0 2 RÁPIDO RÁPIDO PERSONALIZADO RESTAURAR Pulse X/x para seleccionar [PERSONALIZADO] y, a continuación, pulse Aparece la pantalla de ajustes.
-
Page 161: Visualización Del Dvd Mediante La Pulsación De Una Tecla
Visualización del DVD mediante la pulsación de una tecla (Reproducción mediante una pulsación) Sólo con pulsar H (una pulsación) en el mando a distancia, el sistema y los componentes con conexiones HDMI se encenderán simultáneamente y se iniciará la reproducción del DVD de forma automática. -
Page 162: Cómo Escuchar El Sonido Del Televisor Desde Los Altavoces Del Sistema
Cómo escuchar el sonido del televisor desde los altavoces del sistema (Control del audio del sistema) Es posible escuchar el sonido del televisor a través de los altavoces del sistema mediante una operación sencilla. Para utilizar el control del audio del sistema, conecte la unidad de control y el televisor con un cable de audio (no suministrado) (A) y un cable HDMI (no suministrado) (B). -
Page 163: (Control Del Audio Del Sistema) Apagado Del Sistema Mediante El Televisor
Apagado del sistema mediante el televisor (Apagado del sistema) Si apaga el televisor con el botón de encendido del mando a distancia del televisor, el sistema se apagará automáticamente. Para utilizar la función de apagado del sistema, conecte la unidad de control y el televisor con un cable HDMI (no suministrado). -
Page 164: Para Disfrutar Del Sonido Digital De Un Stb
Para disfrutar del sonido digital de un STB (Set Top Box, decodificador) o el sonido de un receptor digital vía satélite a través del sistema (SINCRONIZACIÓN STB) Es posible disfrutar de sonido e imágenes digitales de un STB o de un receptor digital vía satélite. El sonido se emite a través de los altavoces de este sistema. - Page 165 Pulse X/x para seleccionar [AJUSTE PERSONALIZADO] y, a continuación, pulse Nota • Para ajustar la función [SINCRONIZACIÓN STB], ajuste primero [CONTROL HDMI] en [SI] (página 41). Pulse X/x para seleccionar [SINCRONIZACIÓN STB] y, a continuación, pulse Pulse X/x para seleccionar [SI]. El ajuste predeterminado aparece subrayado.
-
Page 166: Diversas Funciones De Reproducción De Discos
Localización rápida de un Diversas funciones de reproducción punto mediante la reproducción del disco hacia de discos adelante o hacia atrás Búsqueda de un punto rápidamente (Exploración) determinado de un disco (excepto JPEG) /m o M/ Pulse mientras se reproduce (Exploración, reproducción a cámara el disco. -
Page 167: Búsqueda De Un Título/Capítulo/Pista
Visualización fotograma por Búsqueda de un título/ fotograma (Reproducción a capítulo/pista/escena, cámara lenta) (sólo DVD VIDEO, DVD-R, DVD-RW, etc. vídeo DivX y VIDEO CD) /m o M/ Pulse cuando el sistema se encuentre en modo de pausa. Para volver a la velocidad de reproducción normal, pulse H. - Page 168 Pulse X/x para seleccionar el método Pulse de búsqueda. El sistema inicia la reproducción a partir del En la pantalla se visualizarán elementos número seleccionado. distintos en función del disco. Para buscar una escena [TITULO], [ESCENA], [PISTA] mediante el código de tiempo [CAPITULO], [INDICE] (sólo DVD VIDEO y DVD en modo [TIEMPO/TEXTO]...
-
Page 169: Búsqueda Por Escena
Pulse Búsqueda por escena La primera escena de cada título, capítulo o pista aparece de la siguiente forma. (Navegación por las imágenes) Puede dividir la pantalla en 9 subpantallas y encontrar la escena que desea rápidamente. Pulse C/X/x/c para seleccionar un título, capítulo o pista y pulse El sistema iniciará... -
Page 170: (Navegación Por Las Imágenes) Reanudación De La Reproducción Desde El Punto En El Que Detuvo El Disco
Para escuchar un disco Reanudación de la reproducido anteriormente mediante la reanudación de reproducción desde el reproducción (Reanudación punto en el que detuvo el multidisco) disco (sólo DVD VIDEO, VIDEO CD) El sistema recupera el punto donde detuvo el (Reanudación de reproducción) disco la última vez que lo reprodujo y reanuda la reproducción a partir de dicho punto la siguiente vez que inserta el mismo disco. -
Page 171: Creación De Un Programa Propio
• Es posible que esta función no funcione Creación de un programa correctamente con algunos discos. propio (Reproducción de programa) Puede reproducir el contenido de un disco en el orden que desee mediante el establecimiento del orden de las pistas que contiene para crear su propio programa. - Page 172 Pulse X/x para seleccionar Pulse H para iniciar la reproducción [AJUSTAR t] y, a continuación, pulse de programa. Se inicia la reproducción de programa. Cuando el programa finalice, puede pulsar [PISTA] aparecerá al reproducir un VIDEO H para reiniciarlo. CD o un CD. Para volver a la reproducción PROGRAMA 0:00:00...
-
Page 173: Reproducción En Orden Aleatorio
Pulse X/x para seleccionar el elemento Reproducción en orden que desea reproducir en orden aleatorio. aleatorio x Al reproducir un VIDEO CD o CD • [PISTA]: reproduce las pistas del disco en (Reproducción aleatoria) orden aleatorio. x Cuando la reproducción de Puede dejar que el sistema “seleccione programa está... -
Page 174: (Reproducción Aleatoria) Reproducción Repetida
Pulse X/x para seleccionar el elemento Reproducción repetida que desea repetir. El ajuste predeterminado aparece (Reproducción repetida) subrayado. x Al reproducir un DVD VIDEO o DVD- • [NO]: no se reproduce de forma repetida. Puede reproducir repetidamente todos los • [DISCO]: repite todos los títulos del títulos, pistas o álbumes de un disco o un solo disco. -
Page 175: Uso Del Menú Del Dvd
• Si [MODO (MP3, JPEG)] está ajustado en [IMAGEN Uso del menú del DVD (JPEG)] (página 69), no podrá seleccionar [PISTA]. Los discos DVD se dividen en muchas secciones, las cuales componen una imagen o pieza de música. Estas secciones se llaman “títulos”. -
Page 176: Cambio Del Sonido
x Al reproducir un DVD VIDEO Cambio del sonido La elección de idioma varía según el DVD VIDEO. Si aparecen cuatro dígitos, indicarán el código de idioma. Consulte la “Lista de códigos de idiomas” (página 116) para Si reproduce un DVD VIDEO o DATA CD/ comprobar el idioma que representa cada DATA DVD (archivos de vídeo DivX) grabado código. - Page 177 x Al reproducir un Super VCD Ejemplo: El ajuste predeterminado aparece Dolby Digital de 3 canales subrayado. Sonido envolvente • [1:ESTEREO]: sonido estéreo de la pista (monoaural) Frontales (L/R) de audio 1 • [1:1/I]: sonido del canal izquierdo de la pista de audio 1 (monoaural) 2 : ESPAÑOL DOLBY DIGITAL 2 / 1...
-
Page 178: Selección De [Original] O [Play List] En Un Dvd-R/Dvd-Rw
Pulse X/x para seleccionar Selección de [ORIGINAL] o [ORIGINAL/PLAY LIST] y, a continuación, pulse [PLAY LIST] en un DVD-R/ Aparecerán las opciones de [ORIGINAL/ PLAY LIST]. DVD-RW 1 ( 4 4 ) 3 ( 2 8 ) DVD-VR 1 : 3 0 : 5 0 Algunos DVD-R/DVD-RW en modo VR PLAY LIST (grabación de vídeo) tienen dos tipos de títulos... -
Page 179: Visualización De Información Sobre El Disco
Al reproducir un DVD VIDEO o Visualización de DVD-R/DVD-RW información sobre el disco 1 Tiempo de reproducción y número del título actual 2 Tiempo restante y número del título actual 3 Tiempo de reproducción y número del capítulo actual 4 Tiempo restante y número del capítulo actual 5 Nombre del disco 6 Título y capítulo DISPLAY... - Page 180 x Al reproducir un VIDEO CD (sin Comprobación del tiempo de funciones PBC) o CD reproducción y del tiempo • T **:** restante en la pantalla del Tiempo de reproducción de la pista actual televisor • T–**:** Puede comprobar el tiempo de reproducción y el Tiempo restante de la pista actual tiempo restante del título, capítulo o pista actual, •...
- Page 181 Para comprobar el texto de un * “Exchangeable Image File Format” (formato de archivos de imagen intercambiable) es un formato DATA CD/DATA DVD (audio MP3/ de imagen para cámaras digitales definido por la vídeo DivX) Japan Electronics and Information Technology Al pulsar DISPLAY mientras se reproducen las Industries Association (JEITA).
-
Page 182: Cambio De Los Ángulos
Cambio de los ángulos Visualización de subtítulos Si el DVD VIDEO contiene varios ángulos para una escena, puede cambiar el ángulo de Con discos que contengan subtítulos grabados, visualización. es posible activar o desactivar dichos subtítulos durante la reproducción. Si existen subtítulos en varios idiomas grabados en el disco, podrá... -
Page 183: Ajuste Del Retardo Entre La Imagen Y El Sonido
Ajuste del retardo entre la Acerca de las pistas de imagen y el sonido audio MP3 y los archivos de imagen JPEG (A/V SYNC) Si el sonido no coincide con la imagen de la pantalla del televisor, puede ajustar el retardo ¿Qué... - Page 184 x Estructura del contenido del disco Pistas de audio MP3 o Árbol 1 Árbol 2 Árbol 3 Árbol 4 Árbol 5 archivos de imagen JPEG que puede reproducir el sistema ROOT El sistema puede reproducir pistas de audio MP3 o archivos de imagen JPEG: •...
-
Page 185: Archivos De Imagen Jpeg
Nota Reproducción de DATA • Es posible que el orden de reproducción sea distinto del de la ilustración en función del software utilizado CD o DATA DVD con para crear el DATA CD o DATA DVD, o si hay más de 200 álbumes y 300 pistas (o archivos) en cada pistas de audio MP3 y álbum. - Page 186 Pulse X/x para seleccionar un álbum. Selección de un archivo de x Al seleccionar un álbum imagen o álbum JPEG Pulse H para iniciar la reproducción del álbum seleccionado. Cargue un DATA CD o DATA DVD. x Al seleccionar una pista Pulse DVD MENU.
-
Page 187: Reproducción De Pistas De Audio E Imágenes Como Una Presentación De Diapositivas Con Sonido
Para reproducir el archivo de Reproducción de pistas de imagen JPEG anterior o siguiente audio e imágenes como Pulse C/c cuando no aparezca la pantalla del menú de control en la pantalla del televisor. una presentación de Tenga en cuenta que puede seleccionar el álbum siguiente si continúa pulsando c tras la última diapositivas con sonido imagen del álbum actual, pero no podrá... - Page 188 • Si reproduce datos de imágenes JPEG y pistas MP3 1 2 ( 2 7 ) de gran tamaño a la vez, es posible que se omita el 1 8 ( 3 4 ) DATA CD sonido. Se recomienda ajustar la velocidad de bits de 2 : 5 5 MP3 en 128 kbps o inferior cuando cree el archivo.
-
Page 189: Visualización De Vídeos Divx
Nota Visualización de vídeos • Es posible que algunos archivos JPEG tarden más tiempo en mostrarse que otros, lo que puede hacer ® DivX que la duración parezca que se prolonga durante más tiempo que la opción seleccionada. Esto ocurre en especial con los archivos JPEG progresivos o archivos JPEG de 3.000.000 píxeles o más. - Page 190 Sin embargo, este sistema sólo reproduce • El sistema no puede reproducir algunos archivos de vídeo DivX con una duración superior a 3 horas. DATA CD cuyo formato lógico corresponda a la • En algunos archivos de vídeo DivX, es posible que la norma ISO 9660 de nivel 1 ó...
- Page 191 Sugerencia Selección de un archivo de • Si el número de visualizaciones está memorizado, vídeo DivX puede reproducir los archivos de vídeo DivX tantas veces como indique este número. Se tendrán en Después del paso 2 de “Selección de cuenta las siguientes incidencias: un álbum”, pulse –...
-
Page 192: Reproducción De Video Cd Con Funciones Pbc (Versión 2.0)
Para volver al menú Reproducción de VIDEO CD Pulse O RETURN. con funciones PBC Nota • En función del VIDEO CD, [Pulse ENTER] en el (versión 2.0) paso 3 puede aparecer como [Pulse SELECT] en el manual de instrucciones suministrado con el disco. (Reproducción PBC) En este caso, pulse H. -
Page 193: Funciones Del Sintonizador
Pulse El visor del panel frontal muestra un Funciones del sintonizador número de memorización. Memorización de TUNED STEREO emisoras de radio Es posible memorizar 20 emisoras de FM y Pulse X/x para seleccionar el número 10 de AM. Antes de realizar la sintonización, de memorización que desee. -
Page 194: Cómo Escuchar La Radio
Pulse Cómo escuchar la radio “Complete!" aparecerá en el visor del panel frontal. El intervalo de sintonización de AM ha cambiado. En primer lugar, memorice emisoras de radio en la memoria del sistema (consulte Pulse TUNER MENU. “Memorización de emisoras de radio” (página 75)). - Page 195 Para la sintonización manual, pulse Asignación de un nombre a TUNING + o – varias veces. emisoras memorizadas Para la sintonización automática, mantenga pulsado TUNING + o –. La sintonización Puede introducir un nombre para las emisoras automática se detiene de forma automática memorizadas.
- Page 196 Pulse “Complete!” aparecerá en el visor del panel frontal y se guardará el nombre de la emisora. Pulse TUNER MENU. Sugerencia • Para comprobar la frecuencia en el visor del panel frontal, pulse DISPLAY varias veces (página 78). Visualización del nombre de la emisora o de la frecuencia en el visor del panel frontal Si se ajusta el sistema en “FM”...
-
Page 197: Otras Operaciones
• Al sustituir las pilas del mando a distancia, es posible J.C.PENNY 503, 510, 566 que el código se reajuste en el valor de fábrica (SONY). Vuelva a ajustar el código apropiado. 516, 552 503, 517 Control de televisores con el... - Page 198 Mostrar el menú del televisor. C/X/x/c*, * Seleccionar el elemento del menú. Fabricante Código SONY 802, 821, 822, 823, 824, 825, * Para utilizar estos botones mientras se encuentra en el modo de televisor (el indicador del modo TV se AMSTRAD 845, 846 ilumina), pulse el botón TV.
-
Page 199: Cómo Escuchar El Sonido De Emisión Multiplex
Cómo escuchar el sonido Cómo escuchar el sonido a de emisión multiplex un volumen bajo (DUAL MONO) (NIGHT MODE) Puede disfrutar del sonido de emisión multiplex Puede escuchar efectos de sonido o diálogo, si el sistema recibe la señal de emisión multiplex incluso a un volumen bajo, de la misma forma Dolby Digital. -
Page 200: Uso Del Temporizador De Apagado
Para cancelar la función de Uso del temporizador de temporizador de apagado apagado Pulse SLEEP varias veces hasta que aparezca “SLEEP OFF” en el visor del panel frontal. Puede definir que el sistema se apague cuando transcurra un tiempo preajustado; de esta forma podrá... -
Page 201: Cambio Del Brillo Del Visor Del Panel Frontal
Cambio del brillo del visor Cambio del modo de del panel frontal visualización (INFORMATION MODE) El brillo del visor del panel frontal puede ajustarse en 2 niveles. Puede modificar la información que aparece en el visor del panel frontal. X/x/c, DIMMER SYSTEM Con la tapa abierta. -
Page 202: Cambio Del Aspecto De Visualización De Los Botones De Presión Leve
Pulse SYSTEM MENU. Cambio del aspecto de El menú del sistema se desactivará. visualización de los Sugerencia • Aunque esté ajustado el modo “SIMPLE”, sólo el botones de presión leve botón N de la parte superior de la unidad de control se iluminará... -
Page 203: Ajustes Avanzados
Inserte el disco que desee bloquear. Si el disco está reproduciéndose, pulse Ajustes avanzados x para detener la reproducción. Bloqueo de discos Pulse DISPLAY cuando el sistema se encuentre en modo de parada. (BLOQUEO DE SEGURIDAD, Aparece la pantalla del menú de control en REPRODUCCIÓN PROHIBIDA) la pantalla del televisor. - Page 204 x Si ya ha registrado una contraseña Introduzca la contraseña de 4 dígitos con los botones numéricos y, a continuación, Aparecerá la pantalla de introducción de la pulse contraseña. El sistema está preparado para la reproducción. REPRODUCCIÓN PROHIBIDA Sugerencia • Si olvida la contraseña, introduzca el número de 6 Introduzca contraseña y pulse ENTER dígitos “199703”...
- Page 205 x Si no ha introducido ninguna contraseña Aparecerá la pantalla de registro de REPRODUCCIÓN PROHIBIDA contraseñas nuevas. NIVEL: EE.UU. ESTANDAR: EE.UU. OTROS REPRODUCCIÓN PROHIBIDA Introduzca una contraseña nueva de 4 dígitos y pulse ENTER Pulse X/x para seleccionar un área geográfica como nivel de limitación de la reproducción y, a continuación, pulse...
- Page 206 Para desactivar la función de Pulse X/x para seleccionar [CONTRASEÑA t] y, a continuación, reproducción prohibida pulse Ajuste [NIVEL] en [NO] en el paso 8. Aparecerá la pantalla de introducción de la Para reproducir un disco que contraseña. tenga activada la función de Introduzca la contraseña de 4 dígitos reproducción prohibida con los botones numéricos y, a...
-
Page 207: Calibración De Los Ajustes Adecuados De Forma Automática
Conecte el micrófono de calibración a Calibración de los ajustes la toma ECM-AC2 de la parte posterior de la unidad de control y ajústelo a la adecuados de forma altura del oído con un trípode, etc. (no suministrado). automática La parte frontal de los altavoces debe mirar hacia el micrófono de calibración y no debe (CALIBRAC. - Page 208 Pulse X/x para seleccionar • Si aparece un mensaje de error en la pantalla del televisor, siga sus instrucciones y, a [CALIBRAC. AUTOM.] y, a continuación, seleccione [SI]. continuación, pulse Aparecerá un mensaje de error cuando: – el micrófono de calibración no esté 1 ( 4 4 ) conectado.
-
Page 209: Uso De La Pantalla De Ajustes
Póngase en contacto con su distribuidor Sony o con un centro de Nota servicio técnico Sony local • Los ajustes de reproducción almacenados en el disco autorizado. tendrán prioridad sobre los ajustes de la pantalla de [Compruebe la Los altavoces frontales no están... - Page 210 Pulse X/x para seleccionar Seleccione un elemento con X/x y, a [AJUSTE] y, a continuación, pulse continuación, pulse Aparecerán las opciones de [AJUSTE]. Aparecerán las opciones correspondientes al elemento seleccionado. 1 2 ( 2 7 ) Ejemplo: [TIPO TV] 1 8 ( 3 4 ) DVD VIDEO 0 : 0 0 : 0 2 AJUSTE PANTALLA...
-
Page 211: Ajuste Del Idioma De Las Indicaciones O De La Pista De Sonido
Nota Ajuste del idioma de las • Si selecciona un idioma en [MENU], [AUDIO] o [SUBTITULO] que no esté grabado en el DVD indicaciones o de la pista VIDEO, se seleccionará automáticamente uno de los idiomas grabados (según el disco, es posible que el de sonido idioma no se seleccione de forma automática). -
Page 212: Ajustes De La Pantalla
[16:9] Ajustes de la pantalla [AJUSTE PANTALLA] Elija los valores según el televisor que vaya a [4:3 TIPO BUZÓN] conectar. Seleccione [AJUSTE PANTALLA] en la pantalla de ajustes. Para obtener información [4:3 EXPLO PAN] detallada, consulte “Uso de la pantalla de ajustes”... - Page 213 x [FONDO] x [SALIDA 4:3] Selecciona la imagen o el color de fondo de la Esta opción sólo es eficaz si ajusta [TIPO TV] de [AJUSTE PANTALLA] en [16:9] pantalla del televisor en el modo de parada o (página 94). Ajústela para ver señales mientras se reproduce un CD, DATA CD (audio progresivas de formato 4:3.
- Page 214 ¿Acepta el televisor señales x “PROGRE” (PROGRESSIVE) Seleccione este ajuste cuando: progresivas? – su televisor acepte señales progresivas y El método progresivo de visualización de – esté conectado a las tomas VIDEO OUT imágenes de televisión reduce el parpadeo y (COMPONENT).
- Page 215 Al realizar la conexión a un Nota televisor con pantalla • Si reproduce software basado en vídeo en formato de señal progresiva, es posible que las secciones de 4:3 estándar algunos tipos de imágenes aparezcan poco naturales En función del disco, es posible que la imagen al emitirse a través de las tomas VIDEO OUT no quepa en la pantalla del televisor.
-
Page 216: [Ajuste Pantalla] Ajustes Personalizados
x [SINCRONIZACIÓN STB] Ajustes personalizados Activa o desactiva la función SINCRONIZACIÓN STB. Esta función se [AJUSTE PERSONALIZADO] encuentra disponible al conectar el sistema y el televisor mediante el cable HDMI y ajustar Utilice este menú para configurar ajustes [CONTROL HDMI] en [SI]. Para obtener relacionados con la reproducción, así... - Page 217 x [SELECCION PISTA] (sólo DVD VIDEO) x [AUDIO (HDMI)] Da prioridad a la pista de sonido que contiene el Selecciona el estado de la salida de audio a número más alto de canales al reproducir un través de la toma HDMI OUT. DVD VIDEO en el que haya grabados varios formatos de audio (formatos PCM, DTS, audio [NO]...
-
Page 218: Ajustes De Los Altavoces
[SUBWOOFER] [SI] Ajustes de los altavoces x [DISTANCIA (FRONTAL)] [AJUSTE ALTAVOZ] A continuación se muestra el valor predeterminado de distancia de los altavoces en Para obtener el mejor sonido envolvente posible, relación con la posición de escucha. ajuste la conexión de los altavoces y la distancia Si ajusta la distancia mediante el ajuste rápido desde su posición de escucha. - Page 219 x [DISTANCIA (SURROUND)] x [NIVEL (FRONTAL)] A continuación se muestra el valor Puede modificar el nivel de los altavoces predeterminado de distancia de los altavoces en frontales de la siguiente forma. Asegúrese de relación con la posición de escucha. ajustar [TONO PRUEBA] en [SI] para facilitar Si ajusta la distancia mediante el ajuste rápido el ajuste.
- Page 220 Pulse cuando haya terminado de Ajuste del nivel de los realizar los ajustes. altavoces mediante el tono de Pulse X/x varias veces para prueba seleccionar [TONO PRUEBA] y, a continuación, pulse Pulse X/x varias veces para seleccionar [NO] y, a continuación, pulse Nota •...
-
Page 221: [Ajuste Altavoz] Recuperación De Los Valores Predeterminados
Recuperación de los valores Recuperación de los predeterminados en la valores predeterminados pantalla de ajustes Pulse FUNCTION varias veces hasta que Recuperación de los valores “DVD” aparezca en el visor del panel frontal. predeterminados en los Pulse DISPLAY cuando el sistema se ajustes del campo acústico o encuentre en modo de parada. -
Page 222: Información Complementaria
Sony más próximo. ventilación. • No coloque la unidad de control sobre superficies Limpieza de los discos, (alfombras, mantas, etc.) ni cerca de materiales... -
Page 223: Notas Sobre Los Discos
La placa de características está situada en la parte Notas sobre los discos inferior exterior de la unidad de control. Transporte del sistema Manejo de discos Cuando transporte el sistema, utilice el siguiente • Para mantener limpio el disco, tómelo por los procedimiento para proteger el mecanismo interno. -
Page 224: Solución De Problemas
RESOLUTION para comprobar las opciones anteriores, póngase en cambiar el tipo de señal de vídeo que se emite a contacto con el distribuidor Sony más próximo. través de la toma HDMI OUT a [720 × 480p] (página 97). - Page 225 conectarla a la entrada de vídeo del televisor • Intente lo siguiente: 1 Apague el sistema y (excepto a la toma HDMI) (página 22). vuelva a encenderlo. 2 Apague el equipo conectado y vuelva a encenderlo. 3 Desconecte y Aunque ajusta el formato en [TIPO TV] de vuelva a conectar el cable HDMI.
- Page 226 • Se ha condensado humedad en el interior de la No se oye el sonido o se oye con un nivel muy unidad de control que podría dañar las lentes. bajo a través de los altavoces de sonido Extraiga el disco y deje la unidad de control envolvente.
- Page 227 El disco no se puede expulsar y “LOCKED” aparece en el visor del panel frontal. de reproducir un disco. • Póngase en contacto con su distribuidor Sony o • Ha seleccionado la función de reanudación de la reproducción. con un centro de servicio técnico Sony local Durante el modo de parada, pulse x en la unidad autorizado.
-
Page 228: Función De Autodiagnóstico
“DEMO PLAY” aparece en el visor del panel Función de frontal. • Póngase en contacto con su distribuidor Sony o autodiagnóstico con un centro de servicio técnico Sony local autorizado. (Cuando aparecen letras o números en La función CONTROL HDMI no funciona. -
Page 229: (Cuando Aparecen Letras O Números En La Pantalla) Especificaciones
Aunque no se trata de un fallo de 35 W + 35 W funcionamiento y está destinado únicamente al (10 ohmios, a 1 kHz, 1% personal de servicio de Sony, no es posible THD) utilizar el sistema con normalidad. Para utilizar Potencia de salida RMS (referencia) el sistema, apáguelo y vuelva a encenderlo. - Page 230 Sección del sintonizador de AM Unidad de control (HCD-IS10) Rango de sintonización 530 - 1.710 kHz (con el Dimensiones (aprox.) 215 × 105 × 207 mm intervalo ajustado en (an/al/prf) 10 kHz) Peso (aprox.) 3,0 kg 531 - 1.710 kHz (con el intervalo ajustado en El diseño y las especificaciones están sujetos a 9 kHz)
-
Page 231: Glosario
CD de datos que contiene pistas de audio MP3 o archivos JPEG. Digital Cinema Auto Calibration Sony desarrolló Digital Cinema Auto Archivo Calibration para medir y ajustar Una imagen JPEG o un vídeo DivX grabados en automáticamente las opciones de los altavoces a un DATA CD/DATA DVD. - Page 232 x Modo de película DVD+RW El modo de película puede utilizarse con Un DVD+RW (más RW) es un disco regrabable emisiones de televisión en estéreo y con y reescribible. Los DVD+RW utilizan un cualquier programa codificado con Dolby formato de grabación comparable al de los DVD Surround.
- Page 233 Este sistema admite ambas versiones. S-master S-master es una tecnología de amplificador totalmente digital desarrollada por Sony, que minimiza de forma eficaz la aparición de fragmentación e inestabilidad del sonido, lo que aporta una excelente nitidez a los diálogos y una fiel reproducción del sonido original.
-
Page 234: Lista De Códigos De Idiomas
Lista de códigos de idiomas La ortografía de los idiomas cumple con la norma ISO 639: 1988 (E/F). Código Idioma Código Idioma Código Idioma Código Idioma 1027 Afar 1183 Irish 1347 Maori 1507 Samoan 1028 Abkhazian 1186 Scots Gaelic 1349 Macedonian 1508 Shona 1032 Afrikaans 1194 Galician... -
Page 235: Índice De Componentes Y Controles
Índice de componentes y controles Para obtener más información, consulte las páginas indicadas entre paréntesis. Unidad de control (panel frontal) FUNCTION VOLUME A Botones de presión leve ( D [/1 (encendido/en espera) (31) FUNCTION/VOLUME –/+) (31) E Ranura de discos (31) B Sensor de control remoto (9) (expulsar) (31) C Visor del panel frontal (119) - Page 236 Unidad de control (panel posterior) A Terminales de AM (13) F Toma SAT/CABLE (DIGITAL IN COAXIAL) (25) B Tomas TV (AUDIO IN) (18) G Toma VIDEO OUT (VIDEO) (18, 22) C Toma HDMI OUT (22) H Tomas VIDEO OUT (COMPONENT) (22) D Toma ECM-AC2 (19, 89) I Ranuras de ventilación E Toma TV (DIGITAL IN OPTICAL) (24)
- Page 237 Visor del panel frontal Acerca de las indicaciones del visor del panel frontal SLEEP NIGHT TUNED TITLE CHAP STEREO MONO MOVIE MUSIC REPEAT 1 DIGITAL PROGRESSIVE A Se ilumina cuando el temporizador de I Modo de repetición actual (56) apagado está ajustado. (82) J Se ilumina cuando el sistema emite B Se ilumina cuando se activa el modo señales progresivas (sólo en la función...
- Page 238 Altavoz potenciador de graves Parte inferior del altavoz potenciador de graves SYSTEM CONTROL ONLY FOR HCD-IS10 SPEAKER ONLY FOR SS-IS10 FRONT R FRONT L SUR R SUR L CENTER A Ranuras de ventilación B Toma SYSTEM CONTROL (13) C Tomas SPEAKER (13)
-
Page 239: Mando A Distancia
Mando a distancia (31) c/C STEP (49) N m/M (48) (48) TUNING –/+ (75) O REPEAT (56) P VOLUME +/– (31, 76, 80) Q MUTING (31) R AUDIO (58, 81) S PICTURE NAVI (51) T MOVIE/MUSIC (37) U RESOLUTION (96) V DIRECT TUNING (76) W TUNER MENU (75, 127) X [/1 (encendido/en espera) (19, 31, 52) -
Page 240: Guía De La Pantalla Del Menú De Control
Guía de la pantalla del menú de control DISPLAY Utilice la pantalla del menú de control para seleccionar una función y ver la información relacionada. Pulse DISPLAY varias veces para encender o cambiar la pantalla del menú de control de la siguiente forma: Pantalla del menú... - Page 241 Número del título actualmente en reproducción Número del capítulo actualmente en reproducción Número total de títulos Estado de reproducción Número total de capítulos (N Reproducción, X Pausa, Elementos del x Parada, etc.) menú de control 1 2 ( 2 7 ) Tipo de disco en 1 8 ( 3 4 ) DVD VIDEO...
- Page 242 [TIEMPO/TEXTO] (página 49) Comprueba el tiempo transcurrido y el restante de reproducción. Introduzca el código de tiempo para la búsqueda de imágenes y de música. Muestra el texto de DVD/CD o el nombre de la pista MP3. [CALIBRAC. AUTOM.] (página 89) Ajusta el nivel de cada altavoz de forma automática.
-
Page 243: Lista De Pantallas De Ajustes De Dvd
Lista de pantallas de ajustes de DVD Es posible ajustar los siguientes elementos con la pantalla de ajustes de DVD. El orden de los elementos mostrados puede variar respecto de la indicación real. Los valores predeterminados aparecerán subrayados. AJUSTE DE IDIOMA AJUSTE PANTALLA 16:9 MENU PANTALLA*... - Page 244 AJUSTE PERSONALIZADO AJUSTE ALTAVOZ CONTROL CONEXIÓN FRONTAL HDMI CENTRAL NINGUNO SINCRONIZA- SURROUND CIÓN STB NINGUNO DIGITAL IN TV t OPT, SAT/CABLE t COAX SUBWOOFER TV t COAX, SAT/CABLE t OPT DISTANCIA 0,0 – 7,0 m MODO AUTO (FRONTAL) 0,0 – 7,0 m PAUSA FOTOGRAMA 0,0 –...
-
Page 245: Lista Del Menú Del Sistema
Lista del menú del sistema Es posible ajustar los siguientes elementos con el botón SYSTEM MENU del mando a distancia. Los valores predeterminados aparecerán subrayados. Menú del sistema A/V SYNC LONG SHORT ATTENUATE* ATT ON ATT OFF ILLUM MODE STANDARD SIMPLE INFO MODE STANDARD... -
Page 246: Índice Alfabético
Índice alfabético Numéricos Control de reproducción (PBC) 16:9 94 HDMI Control del televisor 79 4:3 EXPLO PAN 94 /RGB (HDMI) 94 CONTROL HDMI 40, 98 4:3 TIPO BUZÓN 94 HDMI (high-definition multimedia interface) 23, 115 D. C. A. C. 89, 113 A/V SYNC 65 DATA CD 67, 71 AJUSTE 92... - Page 247 Pantalla de ajustes 91, 125 TIEMPO/TEXTO 50 Pantalla del menú de control TIPO TV 94 TITULO 50 PCM (Pulse Code Modulation, Título 115 modulación codificada de TONO PRUEBA 101 pulsos) 115 TREBLE 39 PERSONALIZADO 92 PICTURE NAVI 51, 68 Pilas 9 Unidad de control 117 PISTA 50 Pista 115...
Need help?
Do you have a question about the DAV-IS10 and is the answer not in the manual?
Questions and answers