Sony dav-is10 Operating Instructions Manual
Hide thumbs
Also See for dav-is10:
- Operating instructions manual (247 pages) ,
- Specifications (2 pages) ,
- Operating instructions manual (123 pages)

Related Manuals for Sony dav-is10


Summary of Contents for Sony dav-is10
- Page 1 3-212-589-31(1) DVD Home Theatre System Operating Instructions ©2007 Sony Corporation Downloaded From TheatreSystem-Manual.com Manuals Sony Corporation http://www.sony.net/ Printed in Malaysia...
-
Page 2: Welcome
Don’t throw away the battery with The manufacturer of this product is Sony Corporation, general house waste, dispose of it 1-7-1 Konan Minato-ku Tokyo, 108-0075 Japan. The correctly as chemical waste. -
Page 3: Table Of Contents
Table of Contents Welcome!..........2 Enjoying STB (Set Top Box) Digital About This Manual ......... 5 Sound or Digital Satellite Receiver This System Can Play the Following Sound from the System ....45 Discs ..........5 (STB SYNCHRO) Getting Started – BASIC – Various Functions for Playing Discs Step 1: Positioning the Speakers.....9... - Page 4 Tuner Functions Additional Information Presetting Radio Stations ...... 71 Precautions ........... 98 Listening to the Radio ......72 Notes about the Discs ......99 Using the Radio Data System (RDS)..74 Troubleshooting........99 Self-diagnosis Function ...... 103 Other Operations (When letters/numbers appear in Controlling the TV with the Supplied the display) Remote..........
-
Page 5: About This Manual
About This Manual This System Can Play the Following Discs • The instructions in this manual describe the controls on the remote. You can also use the controls on the control unit if they have the Format of Disc logo same or similar names as those on the remote. - Page 6 • An adapter to convert an 8 cm disc to standard Note about CDs/DVDs size. Adapter The system can play CD-ROMs/CD-Rs/CD- RWs recorded in the following formats: – audio CD format – video CD format – MP3 audio tracks, JPEG image files, and DivX video files of format conforming to ISO 9660 Level 1/Level 2, or its extended format, •...
- Page 7 Note on DualDiscs operating instructions supplied with the DVDs or VIDEO CDs. A DualDisc is a two sided disc product which mates DVD recorded material on one side with digital audio material on the other side. Copyrights However, since the audio material side does not This product incorporates copyright protection conform to the Compact Disc (CD) standard, technology that is protected by U.S.
-
Page 8: Getting Started - Basic
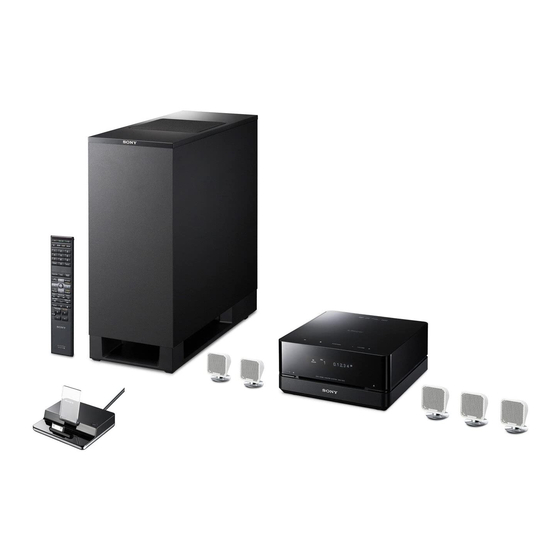
Getting Started – BASIC – Unpacking • Control unit (1) • Speakers (5) • Subwoofer (1) • AM loop antenna (aerial) (1) • FM wire antenna (aerial) (1) • Video Cord (1) • Remote Commander (remote) (1) • R6 (size AA) batteries (2) •... -
Page 9: Step 1: Positioning The Speakers
Using the subwoofer Step 1: Positioning the efficiently Speakers To reinforce the bass sound, place the subwoofer possible close to a wall. For the best possible surround sound, all the speakers other than the subwoofer should be Close to a wall placed at the same distance from the listening position (1). - Page 10 • Do not place objects on the top of the subwoofer • Do not place the subwoofer back of the obstruction, where the speaker unit is installed. such as TV, etc. Middle range sound will fall. TV etc. • Do not place the subwoofer under a desk or in a cabinet, etc.
-
Page 11: Subwoofer
Note on handling the subwoofer • Do not place your hand into the slit of the subwoofer when lifting it. The speaker driver may be damaged. When lifting, hold the bottom of the subwoofer. Subwoofer Slits • Do not push the top of the subwoofer where the speaker unit is installed. -
Page 12: Step 2: Connecting The System
Step 2: Connecting the System The following is the basic connection of the system. Refer to the connection diagram below, and read the additional information from 1 to 4 on the following pages. 2 Center speaker 2 Front 2 Front speaker (L) speaker (R) 3 AM loop antenna (aerial) - Page 13 1 Connecting the Control unit Connect the system connector of the control unit to the SYSTEM CONTROL jack of the subwoofer. Insert the plug of the SYSTEM CONTROL cord, then secure the screws of the plug. Bottom of the subwoofer Rear of the control unit SYSTEM CONTROL ONLY FOR HCD-IS10...
-
Page 14: Connecting The Speakers
2 Connecting the Speakers Connect the connectors of the speaker cords to their corresponding SPEAKER jacks. The connectors of the speaker cords are the same color as the jacks to be connected. Front speaker (R) Front speaker (L) Center speaker Speaker cords Green White... - Page 15 Connect the cords to the AM antenna (aerial) terminals. The cords can be connected to either terminal. Insert the cords pushing down the terminal clamp. DMPORT Insert until this part. Note • Do not place the AM loop antenna (aerial) near the system or other AV equipment, as noise may result. •...
- Page 16 4 Connecting the AC power cord (mains lead) Before connecting the AC power cord (mains lead) of the subwoofer to a wall outlet (mains), connect all the speakers to the subwoofer (page 14). Subwoofer To a wall outlet (mains) AC power cord (mains lead) Note •...
-
Page 17: Step 3: Connecting The Tv
Step 3: Connecting the TV The following is the basic connection of the control unit and TV. For other TV connections, see page 21. For other component connections, see page 24. : Video signal flow : Audio signal flow AUDIO VIDEO DMPORT Rear of the control unit... -
Page 18: Step 4: Performing The Quick Setup
Press without inserting a disc. Step 4: Performing the The Setup Display for selecting the language used in the on-screen display Quick Setup appears on the TV screen. Follow the steps below to make the minimum LANGUAGE SETUP number of basic adjustments for using the OSD: ENGLISH MENU:... -
Page 19: Calibration Mic
Connect the calibration mic to the volume down. Give consideration to children ECM-AC2 jack on the rear of the control and neighbor. unit, and set it up at the ear level using • Avoid being in the measurement area and making noise during the measurement (which a tripod, etc. - Page 20 To recall the Quick Setup display Press DISPLAY when the system is in stop mode. The Control Menu display appears on the TV screen. Press X/x to select [SETUP], then press The options for [SETUP] appear. 1 2 ( 2 7 ) 1 8 ( 3 4 ) DVD VIDEO 0 : 0 0 : 0 2...
-
Page 21: Getting Started - Advanced
Getting Started – ADVANCED – Connecting the TV (Advanced) Connecting the TV with the video cord/component video cord/ HDMI cable Sends the played back DVD image to the connected TV. Check the jacks of your TV, and choose connection method A, B, or C. Picture quality improves in order from A (standard) to C (HDMI). - Page 22 To connect to a TV with the VIDEO IN jack Connect the video cord. Yellow To connect to a TV with the COMPONENT VIDEO IN jacks Connect a component video cord (not supplied). To use the VIDEO OUT (COMPONENT) jacks (Y, ) instead of the video jacks, your TV monitor must be equipped with COMPONENT VIDEO IN jacks (Y, P ).
- Page 23 Connecting the TV with the digital optical cord A TV with a digital optical out jack (TV with built-in digital satellite receiver, etc.) can be connected to the TV (DIGITAL IN OPTICAL) jack instead of the TV (AUDIO IN) jacks on the rear of the control unit.
-
Page 24: Connecting Other Components
Connecting Other Components You can enjoy other components. Connecting the system and the other component Outputs the other component through the speakers of this system. VCR, digital satellite receiver, etc. To the digital coaxial output jack COAXIAL DIGITAL To SAT/CABLE (DIGITAL IN COAXIAL) jack Rear of the control unit... - Page 25 To connect the DIGITAL MEDIA PORT adapter Connect a DIGITAL MEDIA PORT adapter (not supplied) to the DMPORT jack. For details of the DIGITAL MEDIA PORT adapter, see “Using the DIGITAL MEDIA PORT Adapter” (page 80). If you connect a digital satellite receiver with a DIGITAL OUT (COAXIAL or OPTICAL) jack A digital satellite receiver can be connected to the SAT/CABLE (DIGITAL IN COAXIAL) or TV (DIGITAL IN OPTICAL) jack.
-
Page 26: Installing The Speakers On A Wall
Installing the Speakers on a Wall You can use the speakers installed on a wall. Installing the speakers on a wall Prepare screws (not supplied) that are suitable for the holes of the bracket. Secure the bracket to the wall using hole 1. •... - Page 27 Push A with the supplied wrench (1), and then remove the speaker cords (2). When the lever is down, the When the lever is up, the speaker cords are locked. speaker cords can be removed. Thread the speaker cords through hole 3. Reconnect the detached speaker cords, matching 3/# to the appropriate speaker terminals (1), and then push the lever down completely (2).
- Page 28 • Contact a screw shop or installer regarding the wall material or screws to be used. • Sony is not responsible for accident or damage caused by improper installation, insufficient wall strength or improper screw installation, natural calamity, etc.
- Page 29 • You can remove the speaker cords from the connector. With the catch facing down, press and hold the connector down against a flat surface (1) and remove the speaker cords from the connector (2). Catch To avoid short-circuiting the speakers Short-circuiting of the speakers may damage the system.
-
Page 30: Basic Operations
Basic Operations Playing Discs Depending on the DVD or VIDEO CD, some operations may be different or restricted. Refer to the operation details supplied with your disc. Soft-touch buttons "/1 FUNCTION VOLUME FUNCTION ./> "/1 Disc slot Note • Soft-touch buttons function by touching lightly. Do not press them strongly. - Page 31 Turn on your TV. Switch the input selector on the TV to this system. Press "/1. The system turns on. Unless the mode of the system is set to “DVD,” press FUNCTION on the remote or FUNCTION (soft-touch button) on the control unit to select “DVD.” “No Disc”...
-
Page 32: Additional Operations
To save the power in standby mode Press "/1 while the system turns on. To cancel standby mode, press "/1 once. Note • When the system is turned off, do not push a disc into the control unit. Additional operations Press Stop Pause... -
Page 33: Enjoying The Radio Or Other Components
Enjoying the Radio or Other Components Selecting the connected component You can use a TV, VCR, or other components connected to the TV or SAT/CABLE jacks on the rear of the control unit. Refer to the operating instructions supplied with the components for further information. -
Page 34: Changing The Input Level Of The Sound From Connected Components
Changing the input level of the sound from connected components Distortion may occur when listening to a component connected to the TV (AUDIO IN) jacks on the rear of the control unit. This is not a malfunction and will depend on the component connected. To prevent this, you can change the input level from the sound of the other components. -
Page 35: Enjoying Tv Or Vcr Sound From All Speakers
Enjoying TV or VCR Sound from All Speakers You can enjoy TV or VCR sound from all the speakers in this system. For details, see “Step 3: Connecting the TV” (page 17), “Connecting the TV (Advanced)” (page 21), and “Connecting Other Components” (page 24). FUNCTION SOUND FIELD... -
Page 36: Selecting The Movie Or Music Mode
Selecting the Movie or Music Mode You can choose a suitable sound mode for movies or music. MOVIE/ MUSIC With the cover opened. Press MOVIE/MUSIC during playback. Press MOVIE/MUSIC repeatedly until the mode you want appears in the front panel display. The default setting is underlined. -
Page 37: Sound Adjustments
Automatic outputting of the Sound Adjustments original sound Enjoying Surround Sound x AUTO FORMAT DIRECT STANDARD The auto decoding function automatically by Using Sound Field detects the type of audio signal being input (Dolby Digital, DTS, or standard 2 channel stereo) and performs the proper decoding if necessary. -
Page 38: Adjusting The Bass, Middle, And Treble Level
Enjoying the sound effect Adjusting the Bass, x PORTABLE AUDIO ENHANCER Middle, and Treble Level This mode reproduces a clear enhanced sound image from your portable audio device. This You can adjust the bass, middle, and treble level mode is ideal for MP3 and other compressed easily. -
Page 39: Using The Hdmi Control Function For 'Bravia' Theatre Sync
Control) for HDMI (high-definition multimedia interface). The HDMI CONTROL function will not operate in the following cases: • When you connect this system to a component which is not correspond with Sony's HDMI CONTROL function. • When you connect the control unit and components using other than the HDMI connection. -
Page 40: Preparing For The Hdmi Control Function
Preparing for the HDMI CONTROL function To use the HDMI CONTROL function, set up the system and the TV. Before you use the HDMI CONTROL function, be sure you have performed the following procedures. Make sure that the control unit is connected to the TV (compatible with HDMI CONTROL function) via the HDMI connection. - Page 41 Press X/x to select [SETUP], then press The options for [SETUP] appear. 1 2 ( 2 7 ) 1 8 ( 3 4 ) DVD VIDEO 0 : 0 0 : 0 2 QUICK QUICK CUSTOM RESET Press X/x to select [CUSTOM], then press The Setup Display appears.
-
Page 42: Watching Dvd By A Single Button Press
Watching DVD by a Single Button Press (One-Touch Play) Simply pressing by H (one-touch) on the remote, the system and the components with the HDMI connections turn on simultaneously, and then DVD playback starts automatically. Check the HDMI connections of the respective component and make sure [HDMI CONTROL] is set to [ON] (page 40). -
Page 43: Enjoying The Tv Sound From The Speakers In This System
Enjoying the TV Sound from the Speakers in this System (System Audio Control) You can enjoy the TV sound from the speakers of this system by a simple operation. To use System Audio Control, connect the control unit and the TV with an audio cord (not supplied) (A) and an HDMI cable (not supplied) (B). -
Page 44: Turning Off The System With The Tv
Turning off the System with the TV (System Power Off) When you turn off the TV using the power button on the TV’s remote, this system also turns off automatically. To use System Power Off, connect the control unit and the TV with an HDMI cable (not supplied) and an audio cord (not supplied). -
Page 45: Enjoying Stb (Set Top Box) Digital Sound Or Digital Satellite Receiver Sound From The System
Enjoying STB (Set Top Box) Digital Sound or Digital Satellite Receiver Sound from the System (STB SYNCHRO) You can enjoy digital sound and images of STB or a digital satellite receiver. Sound is output from the speakers of this system. Images of STB or a digital satellite receiver are output from the TV by the HDMI connection (HDMI 1 shown below). - Page 46 Press X/x to select [STB SYNCHRO], then press Press X/x to select [ON]. The default setting is underlined. • [ON]: sets the [STB SYNCHRO] function to on. • [OFF]: sets the [STB SYNCHRO] function to off. Press [DIGITAL IN] setting is selected automatically. CUSTOM SETUP HDMI CONTROL: STB SYNCHRO:...
-
Page 47: Various Functions For Playing Discs
Playback direction × 2B t 1M t 2M t 3M Various Functions for Playing Discs Searching for a Particular 3M (DVD VIDEO/DVD-VR mode/DivX video/ VIDEO CD only) Point on a Disc × 2B (DVD VIDEO/CD only) (Scan, Slow-motion Play, Freeze Opposite direction Frame) ×... -
Page 48: Searching For A Title/Chapter/Track/Scene, Etc
[ALBUM] Searching for a Title/ [FILE] Chapter/Track/Scene, Example: when you select [CHAPTER] etc. [** (**)] is selected (** refers to a number). The number in parentheses indicates the total number of titles, chapters, tracks, indexes, scenes, albums or files. You can search a DVD by title or chapter, and 1 2 ( 2 7 ) 1 8 ( 3 4 ) DVD VIDEO... -
Page 49: Searching By Scene
Input the time code using the number Searching by Scene buttons, then press For example, to find the scene at 2 hours, 10 (Picture Navigation) minutes, and 20 seconds after the beginning, just enter “21020.” You can divide the screen into 9 subscreens and •... -
Page 50: (Picture Navigation) Resuming Playback From The Point Where You Stopped The Disc
Press Resuming Playback from The first scene of each title, chapter, or track appears as follows. the Point Where You Stopped the Disc (Resume Play) When you stop the disc, the system remembers the point where you pressed x and “Resume” Press C/X/x/c to select a title, chapter, appears in the front panel display. -
Page 51: Creating Your Own Program
To enjoy a disc that is played Creating Your Own before by resume playback (Multi-disc Resume) Program (DVD VIDEO, VIDEO CD only) (Program Play) This system recalls the point where you stopped the disc the last time it was played and resumes playback from that point the next time you insert You can play the contents of a disc in the order the same disc. - Page 52 Press X/x to select [SET ], then Press H to start Program Play. press Program Play starts. When the program ends, you can restart the [TRACK] is displayed when you play a same program again by pressing H. VIDEO CD or CD. To return to normal play PROGRAM 0:00:00...
-
Page 53: Playing In Random Order
Press X/x to select the item to be Playing in Random Order shuffled. x When playing a VIDEO CD or CD (Shuffle Play) • [TRACK]: shuffles tracks on the disc. x When Program Play is activated • [ON]: shuffles tracks selected in Program You can have the system “shuffle”... -
Page 54: (Shuffle Play) Playing Repeatedly
Press X/x to select the item to be Playing Repeatedly repeated. The default setting is underlined. (Repeat Play) x When playing a DVD VIDEO or DVD- • [OFF]: does not play repeatedly. • [DISC]: repeats all of the titles on the disc. You can play all the titles, tracks or albums on a •... -
Page 55: Using The Dvd's Menu
Using the DVD’s Menu Changing the Sound A DVD is divided into a lot of sections, which make up a picture or music feature. These When playing a DVD VIDEO or DATA CD/ sections are called “titles.” When you play a DATA DVD (DivX video files) recorded in DVD which contains several titles, you can multiple audio formats (PCM, Dolby Digital,... - Page 56 x When playing a DVD VIDEO x When playing a Super VCD Depending on the DVD VIDEO, the choice The default setting is underlined. of language varies. • [1:STEREO]: the stereo sound of the When four digits are displayed, they audio track 1 indicate a language code.
-
Page 57: Selecting [Original] Or [Play List] On A Dvd-R/Dvd-Rw
Example: Selecting [ORIGINAL] or Dolby Digital 3 ch [PLAY LIST] on a DVD-R/ Surround Front (L/R) (Monaural) DVD-RW 2 : SPANISH DOLBY DIGITAL 2 / 1 Some DVD-Rs/DVD-RWs in VR (Video Recording) mode have two types of titles for playback: originally recorded titles Currently playing ([ORIGINAL]) and titles that can be created on program format... -
Page 58: Viewing Information About The Disc
Press X/x to select a setting. Viewing Information About The default setting is underlined. • [PLAY LIST]: plays the titles created the Disc from [ORIGINAL] for editing. • [ORIGINAL]: plays the titles originally recorded. Press DISPLAY DISPLAY Viewing the playing time and remaining time in the front panel display You can check disc information, such as the... - Page 59 4 Remaining time and number of the current Press DISPLAY during playback. chapter The following display appears on the TV 5 Disc name screen. 6 Title and chapter T 1:01:57 When playing a DATA CD (DivX video) or DATA DVD (DivX video) Time information 1 Playing time of the current file 2 Current file name...
- Page 60 Note Checking the date • Characters/marks may not be displayed for some information languages. • Depending on the type of disc being played, the (JPEG only) system can only display a limited number of You can check the date information during characters.
-
Page 61: Changing The Angles
Changing the Angles Displaying the Subtitles If various angles (multi-angles) for a scene are If subtitles are recorded on a disc, you can turn recorded on a DVD VIDEO, you can change the the subtitles on or off while playing. If viewing angle. -
Page 62: Adjusting The Delay Between The Picture And Sound
Adjusting the Delay About MP3 Audio Tracks Between the Picture and and JPEG Image Files Sound (A/V SYNC) What is MP3/JPEG? MP3 is audio compression technology that When the sound does not match the pictures on satisfies the ISO/MPEG regulations. JPEG is the TV screen, you can adjust the delay between image compression technology. - Page 63 • that have the extension “.MP3” (MP3 audio When you insert a DATA CD or DATA DVD, track) or “.JPG”/“.JPEG” (JPEG image file) the numbered tracks (or files) are played sequentially, from 1 through 7. Any sub- • that conform to the DCF* image file format albums/tracks (or files) contained within a * “Design rule for Camera File system”: Image standards for digital cameras regulated by Japan...
-
Page 64: Playing Data Cds Or Data Dvds With Mp3 Audio Tracks And Jpeg Image Files
Press X/x to select an album. Playing DATA CDs or x When selecting an album Press H to start playing the selected DATA DVDs with MP3 album. Audio Tracks and JPEG x When selecting a track Press Image Files A list of tracks contained in the album appears. - Page 65 To play the next or previous JPEG Selecting a JPEG image file or image file album Press C/c when the Control Menu display is not Load a DATA CD or DATA DVD. displayed on the TV screen. Note that you can select the next album by continuing to press c Press DVD MENU.
-
Page 66: Playing Audio Tracks And Images As A Slide Show With Sound
Press X/x to select a setting. Playing Audio Tracks and The default setting is underlined. • [AUTO]: plays both the JPEG image files Images as a Slide Show and MP3 audio tracks in the same album with Sound as a slide show. •... - Page 67 Specifying the slide show Selecting an effect for image duration files in the slide show (JPEG only) (JPEG only) When you play JPEG image files using slide When you play a JPEG image file, you can show, you can specify the duration for slides to select the effect to be used when viewing the appear on the screen.
-
Page 68: Enjoying Divx ® Videos
About playback order of data on ® Enjoying DivX Videos DATA CDs or DATA DVDs See “Playback order of MP3 audio tracks or JPEG image files” (page 63). Note that the playback order may not be applicable, depending on the software used for creating the DivX video file, or if there are more than 200 albums and 600 DivX video files in each album. - Page 69 Selecting an album To go to the next or previous page Press DVD MENU. Press C/c. A list of albums on the disc appears. Only albums that contain DivX video files are To return to the previous display listed. Press O RETURN. To stop playback 3 ( 3 ) Press x.
-
Page 70: Playing Video Cds With Pbc Functions (Ver.2.0)
Note Playing VIDEO CDs with • Depending on the VIDEO CD, [Press ENTER] in Step 3 may appear as [Press SELECT] in the PBC Functions (Ver.2.0) operating instructions supplied with the disc. In this case, press H. (PBC Playback) • To play without PBC, press ./> or the number buttons while the system is in stop mode to select a With PBC (Playback Control) functions, you track, then press H or... -
Page 71: Tuner Functions
Press X/x to select the preset number you want. Tuner Functions TUNED STEREO Presetting Radio Stations You can preset 20 FM stations, and 10 AM stations. Before tuning, make sure to turn down • You can select the preset number directly by the volume to minimum. -
Page 72: Listening To The Radio
when the system receives the radio station. To Listening to the Radio stop the automatic tuning manually, press TUNING + or –. Preset radio stations in the system’s memory To listen to radio stations when first (see “Presetting Radio Stations” (page 71)). you know the frequencies Use direct tuning in Step 2. -
Page 73: Naming Preset Stations
Naming preset stations Viewing the station name or frequency in the front panel You can enter a name for preset stations. These display names (for example, “XYZ”) appear in the front panel display when a station is selected. When the system is set to “FM” or “AM,” you Note that no more than one name can be entered can check the frequency using the front panel for each preset station. -
Page 74: Using The Radio Data System (Rds)
Using the Radio Data System (RDS) What is the Radio Data System? The Radio Data System (RDS) is a broadcasting service that allows radio stations to send additional information along with the regular program signal. This tuner offers convenient RDS features, such as station name display. RDS is available only for FM stations.* Note •... -
Page 75: Other Operations
Note 503, 517 • When you replace the batteries of the remote, the LOEWE 515, 556 code number may reset itself to the default (SONY) setting. Reset the appropriate code number. LXI (Sears) 503, 508, 510, 517, 518, 551 MAGNAVOX... - Page 76 CATV ENTER* TOOLS* Displays the operation menu for Manufacturer Code number the current display. SONY 802, 821, 822, 823, 824, 825, RETURN* Return to the previous display. AMSTRAD 845, 846 TV MENU* Display the menu of the TV. C/X/x/c*, BSKYB * Select the item on the menu.
-
Page 77: Enjoying Multiplex Broadcast Sound
Enjoying Multiplex Enjoying the Sound at Low Broadcast Sound Volume (DUAL MONO) (NIGHT MODE) You can enjoy multiplex broadcast sound when You can enjoy sound effects or dialog, as you the system receive the Dolby Digital multiplex would in a movie theater, even at low volume. It broadcast signal. -
Page 78: Using The Sleep Timer
Using the Sleep Timer Changing the Brightness of the Front Panel Display You can set the system to turn off at a preset time, so you can fall asleep listening to music. The brightness of the front panel display can be You can preset the time in 10 minutes set to either of 2 levels. -
Page 79: Changing The Display Mode
Changing the Display Changing the Display Mode Appearance of the Soft- touch Buttons (INFORMATION MODE) (ILLUMINATION MODE) You can change the displayed information in the front panel display. You can select the way of displaying the soft- touch buttons located on the top of the control unit. -
Page 80: (Illumination Mode) Using The Digital Media Port Adapter
Using the DIGITAL MEDIA • Even if “SIMPLE” mode is set, only N on the top of the control unit lights up during playback. PORT Adapter Note • When the soft-touch buttons turn off in “SIMPLE” The DIGITAL MEDIA PORT (DMPORT) mode, first touch the soft-touch button area so that the adapter is for enjoying sound from a portable soft-touch buttons light up, then operate the system... - Page 81 Start playback of the connected component. The sound and images from the connected component are played on the system or connected TV. For operation details, see the operating instructions of the DIGITAL MEDIA PORT adapter (not supplied). • When listening to MP3 or other compressed music using a portable audio source, you can enhance the sound.
-
Page 82: Advanced Settings And Adjustments
Press DISPLAY while the system is in stop mode. Advanced Settings and Adjustments The Control Menu display appears on the TV screen. Locking Discs Press X/x to select (CUSTOM PARENTAL CONTROL, [PARENTAL CONTROL], then press PARENTAL CONTROL) The options for [PARENTAL CONTROL] appear. - Page 83 Enter or re-enter your 4-digit password Limiting playback for children using the number buttons, then press [PARENTAL CONTROL] [Custom parental control is set.] appears (DVD VIDEO only) and the TV screen returns to the Control Playback of some DVD VIDEOs can be limited Menu display.
-
Page 84: Custom Parental
x When you have already registered a Press X/x to select [LEVEL], then press password The display for entering the password The selection items for [LEVEL] are appears. displayed. PARENTAL CONTROL PARENTAL CONTROL LEVEL: Enter password, then press STANDARD: ENTER NC17 Press X/x to select the level you want, Enter or re-enter your 4-digit password... -
Page 85: Calibrating The Appropriate Settings Automatically
Note Calibrating the • When you play discs which do not have the Parental Control function, playback cannot be limited on this Appropriate Settings system. • Depending on the disc, you may be asked to change Automatically the parental control level while playing the disc. In this case, enter your password, then change the level. - Page 86 Connect the calibration mic to the Press X/x to select [AUTO ECM-AC2 jack on the rear of the control CALIBRATION], then press unit, and set it up at the ear level using a tripod, etc. (not supplied). 1 ( 4 4 ) 3 ( 2 8 ) DVD VIDEO The front of each speaker should face the...
- Page 87 [Mic input level The calibration mic or system may overloaded.] be damaged. Measurement complete. FRONT L : 5.00m 0.0dB Contact your Sony dealer or local FRONT R : 5.00m 0.0dB authorized Sony service facility. CENTER : 5.00m + 1.0dB SUBWOOFER : 5.00m + 4.0dB...
-
Page 88: Using The Setup Display
Press X/x to select [CUSTOM], then Using the Setup Display press The Setup Display appears. By using the Setup Display, you can make LANGUAGE SETUP various adjustments to items such as picture and ENGLISH OSD: sound. ENGLISH MENU: AUDIO: ORIGINAL For an overall list of Setup Display items, see SUBTITLE: AUDIO FOLLOW... -
Page 89: Setting The Display Or Sound Track Language
Select a setting using X/x, then press Setting the Display or The setting is selected and setup is Sound Track Language complete. [LANGUAGE SETUP] SCREEN SETUP TV TYPE: 4:3 LETTER BOX [LANGUAGE SETUP] allows you to set /RGB (HDMI): SCREEN SAVER: various languages for the on-screen display or BACKGROUND: JACKET PICTURE... -
Page 90: Settings For The Display
Note Settings for the Display • Depending on the DVD, [4:3 LETTER BOX] may be selected automatically instead of [4:3 PAN SCAN] or [SCREEN SETUP] vice versa. x [YC /RGB (HDMI)] Choose settings according to the TV to be Selects the type of HDMI signal output from connected. -
Page 91: Screen Setup
Does your TV accept progressive x [4:3 OUTPUT] This setting is effective only when you set [TV signals? TYPE] in [SCREEN SETUP] to [16:9] Progressive is a TV image display method (page 90). Adjust to watch 4:3 aspect ratio which reduces flickering, and sharpens the progressive signals. - Page 92 x “INTERLACE” (NORMAL) output through the VIDEO OUT (COMPONENT) jacks. Even though you set to “PROGRE” Select this setting when: (PROGRESSIVE), images from the VIDEO OUT – your TV does not accept progressive signals, (VIDEO) jack are unaffected as they are output in the interlace format.
-
Page 93: [Screen Setup] Custom Settings
[ON] Sets the [STB SYNCHRO] Custom Settings function to on. [CUSTOM SETUP] Note • When this function is set to [ON], [DIGITAL IN] Use this to set up playback related and other function setting begins. settings. x [DIGITAL IN] Assigns a digital sound input corresponding Select [CUSTOM SETUP] in the Setup Display. -
Page 94: Settings For The Speakers
selects PCM, DTS, Dolby Digital sound, and MPEG Settings for the Speakers audio tracks in this order. x [MULTI-DISC RESUME] (DVD VIDEO/ [SPEAKER SETUP] VIDEO CD only) Switches the Multi-disc Resume setting on or To obtain the best possible surround sound, set off. - Page 95 x [DISTANCE (FRONT)] The default distance setting for the speakers in relation to the listening position is shown below. When you set the distance using the Quick Setup (page 18), the settings is automatically displayed. Be sure to change the value in the Setup Display when you move the speakers.
- Page 96 x [LEVEL (SURROUND)] Press DISPLAY when the system is in stop mode. You can vary the level of surround speakers as follows. Be sure to set [TEST TONE] to [ON] The Control Menu display appears. for easy adjustment. Press X/x to select [SETUP], then press [L/R]...
-
Page 97: Returning To The Default Settings
Returning the settings on the Returning to the Default Setup Display to the default Settings Press FUNCTION repeatedly until “DVD” appears in the front panel display. Returning the sound field Press DISPLAY when the system is in settings or radio settings to stop mode. -
Page 98: Additional Information
If you have any questions or problems concerning On placement your system, please consult your nearest Sony dealer. • Place the system in a location with adequate On cleaning discs, disc/lens ventilation to prevent heat build-up in the system. -
Page 99: Notes About The Discs
Do not touch the surface. problem before requesting repairs. Should any • Do not stick paper or tape on the disc. problem persist, consult your nearest Sony dealer. Note that if service personnel changes some parts during repair, these parts may be retained. - Page 100 case, return the setting to interlace format (the • If the speakers are used with a CRT-based TV or default setting) (page 91). projector, install the speakers at least 0.3 m from the TV set. • Re-connect the connecting cord securely. •...
- Page 101 • Press DISPLAY so that the frequency appears in The sound loses stereo effect when you play a the front panel display. VIDEO CD, a CD, or an MP3. The remote does not function. • Set the audio setting to [STEREO] by pressing AUDIO (page 55).
- Page 102 A disc cannot be ejected and “LOCKED” of the alphabets. Other characters are displayed as appears in the front panel display. [*]. • Contact your Sony dealer or local authorized Sony A disc does not start playing from the service facility. beginning.
-
Page 103: Self-Diagnosis Function
“DEMO PLAY” appears in the front panel Self-diagnosis Function display. • Contact your Sony dealer or local authorized Sony (When letters/numbers appear in the service facility. display) The HDMI CONTROL function does not work. • When “HDMI” does not light up in the front panel When the self-diagnosis function is activated to display, check the HDMI connection (page 21). -
Page 104: (When Letters/Numbers Appear In The Display) Specifications
TV screen. Although this is not a Front L / Front R (rated): 35 W + 35 W malfunction and for Sony service use only, (at 10 ohms, 1 kHz, 1 % normal system operation will not be possible. -
Page 105: Glossary
Speaker unit 35 mm Digital Cinema Auto Calibration was developed Rated impedance 10 ohms by Sony to automatically measure and adjusts Dimensions (approx.) 45 × 55 × 40 mm (w/h/d) Mass (approx.) 0.07 kg the speaker settings to your listening Speaker cords 4.5 m ×... - Page 106 x Music mode mode have the same format as a DVD VIDEO, The Music mode is for use with any stereo music while discs created in VR (Video Recording) recordings, and provides a wide and deep sound mode allow the contents to be programmed or space.
- Page 107 DVD, the region limit may still apply. S-master S-master is an all-digital amplifier technology developed by Sony, which effectively minimizes the occurrence of sound fragmentation and jitter, delivering superb dialog clarity and faithful reproduction of the...
-
Page 108: Language Code List
Language Code List The language spellings conform to the ISO 639: 1988 (E/F) standard. Code Language Code Language Code Language Code Language 1027 Afar 1183 Irish 1347 Maori 1507 Samoan 1028 Abkhazian 1186 Scots Gaelic 1349 Macedonian 1508 Shona 1032 Afrikaans 1194 Galician 1350 Malayalam 1509 Somali... -
Page 109: Index To Parts And Controls
Index to Parts and Controls For more information, refer to the pages indicated in parentheses. Control unit (front panel) FUNCTION VOLUME A Soft-touch buttons ( D [/1 (on/standby) (30) /FUNCTION/ VOLUME –/+) (30) E Disc slot (30) B Remote sensor (8) (eject) (30) C Front panel display (111) continued... - Page 110 Control unit (rear panel) DMPORT A AM terminals (12) F SAT/CABLE (DIGITAL IN COAXIAL) jack (24) B TV (AUDIO IN) jacks (17) G VIDEO OUT (VIDEO) jack (17, 21) C HDMI OUT jack (21) H VIDEO OUT (COMPONENT) jacks (21) D ECM-AC2 jack (18, 85) I Ventilation slots E TV (DIGITAL IN OPTICAL) jack (23)
- Page 111 Front Panel Display About the indications in the front panel display SLEEP NIGHT TUNED TITLE CHAP STEREO MONO MOVIE MUSIC NTSC REPEAT 1 DIGITAL PROGRESSIVE A Lights up when the sleep timer is set. I Lights up when the HDMI OUT jack is (78) correctly connected to HDCP (high- bandwidth digital content protection)
- Page 112 Subwoofer Bottom of the subwoofer SYSTEM CONTROL ONLY FOR HCD-IS10 SPEAKER ONLY FOR SS-IS10 FRONT R FRONT L SUR R SUR L CENTER A Ventilation slots B SYSTEM CONTROL jack (12) C SPEAKER jacks (12) Downloaded From TheatreSystem-Manual.com Manuals...
-
Page 113: Remote Control
Remote control (30) c/C STEP (47) N m/M (47) (47) TUNING –/+ (71) O REPEAT (54) P VOLUME +/– (30, 72, 76) Q MUTING (30) R AUDIO (55, 77) S PICTURE NAVI (49) T MOVIE/MUSIC (36) U RESOLUTION (91) V DIRECT TUNING (72) W TUNER MENU (71, 119) X [/1 (on/standby) (18, 30, 50) Y DISPLAY (58, 72) -
Page 114: Guide To The Control Menu Display
Guide to the Control Menu Display DISPLAY Use the Control Menu display to select a function and to view related information. Press DISPLAY repeatedly to turn on or change the Control Menu display as follows: Control Menu display 1 Control Menu display 2 (appears for certain discs only) Control Menu display off Control Menu display The Control Menu display 1 and 2 will show different items depending on the disc type. - Page 115 Currently playing title number Currently playing chapter number Total number of titles Playback status Total number of chapters (N Playback, X Pause, Control Menu items x Stop, etc.) 1 2 ( 2 7 ) Type of disc being 1 8 ( 3 4 ) DVD VIDEO played 1 : 3 2 : 5 5...
- Page 116 [AUTO CALIBRATION] (page 85) Adjust the level of each speaker automatically. [PROGRAM] (page 51) Selects the track to play in the order you want. [SHUFFLE] (page 53) Plays the track in random order. [REPEAT] (page 54) Plays the entire disc (all titles/all tracks/all albums) repeatedly or one title/chapter/track/album repeatedly.
-
Page 117: Dvd Setup Display List
DVD Setup Display List You can set the following items with the DVD Setup Display. The order of the displayed items may be different from the actual display. The default settings are underlined. LANGUAGE SETUP SCREEN SETUP 16:9 OSD* TV TYPE 4:3 LETTER MENU* AUDIO*... - Page 118 CUSTOM SETUP SPEAKER SETUP HDMI CONNECTION FRONT CONTROL CENTER NONE SURROUND SYNCHRO NONE DIGITAL IN TV t OPT, SAT/CABLE t COAX SUBWOOFER TV t COAX, SAT/CABLE t OPT DISTANCE 0.0 – 7.0 m PAUSE AUTO (FRONT) 0.0 – 7.0 m MODE FRAME 0.0 –...
-
Page 119: System Menu List
System Menu List You can set the following items with SYSTEM MENU on the remote. The default settings are underlined. System menu A/V SYNC LONG SHORT ATTENUATE* ATT ON ATT OFF ILLUM MODE STANDARD SIMPLE INFO MODE STANDARD SIMPLE * “ATTENUATE” appears only when the function is set to the “TV” function. Tuner Menu List You can set the following items with TUNER MENU on the remote. -
Page 120: Index
Index Numerics DVD 106 MENU 89 DVD+RW 106 Mica-reinforced-cellular- 16:9 90 DVD’s menu 55 diaphragm 106 4:3 LETTER BOX 90 DVD-RW 57, 106 MIDDLE 38 4:3 OUTPUT 91 DVI 22 MODE (MP3, JPEG) 66 4:3 PAN SCAN 90 MOVIE/MUSIC 36 5.1 Channel Surround 56 MP3 62, 64 MPEG audio 106... - Page 121 Scan 47 SCENE 48 Scene 107 SCREEN SAVER 90 SCREEN SETUP 90 SETUP 88 Setup Display 88, 117 Shuffle Play 53 SLEEP 78 Slide Show 66 Slow-motion Play 47 S-master 107 Soft-touch button 30 Sound Field 37 SPEAKER SETUP 94 CONNECTION 94 DISTANCE 95 LEVEL 95, 96...
- Page 122 Downloaded From TheatreSystem-Manual.com Manuals...
- Page 123 Downloaded From TheatreSystem-Manual.com Manuals...
Need help?
Do you have a question about the dav-is10 and is the answer not in the manual?
Questions and answers