Table of Contents
Advertisement
Quick Links
Advertisement
Table of Contents

Related Manuals for roundhouse Beddgelert 0-6-4


Summary of Contents for roundhouse Beddgelert 0-6-4
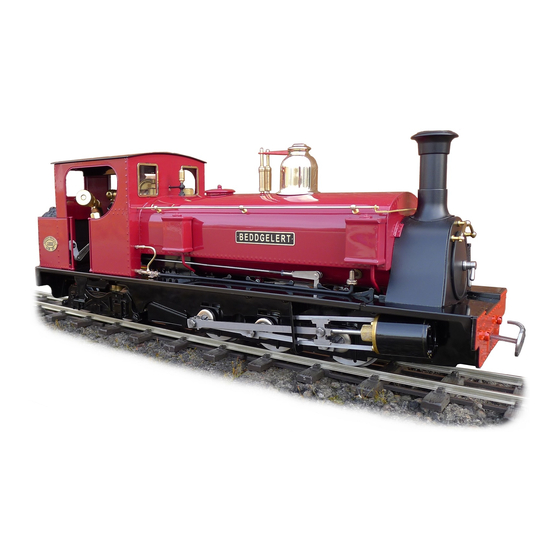
- Page 1 Beddgelert Owners Handbook For the Beddgelert 0-6-4 Locomotive...
-
Page 2: Operating Instructions
Operating Instructions IMPORTANT: Read these instructions carefully before operating the locomotive The following items are required for running this engine and are not included with the model. Fuel Butane gas. See ’Gas System’ section. Water See 'Filling the boiler' section. General Lubricating oil See 'Lubrication' section. -
Page 3: Table Of Contents
Beddgelert Instruction Manual CONTENTS Tool kit Page 4 Running in Page 4 Access to controls Page 4 Identification of parts of the locomotive Page 5 Preparing for operation Page 6 1. Filling the Gas Tank Page 6 2. Filling the Boiler Page 7 3. -
Page 4: Tool Kit
TOOL KIT The following items are included with your locomotive. One 60ml bottle of special steam oil for use in the lubricator. One 60ml syringe with plastic tube for filling the boiler with water. One water top up pump bottle. One set of spare washers and ‘O’... -
Page 5: Identification Of Parts Of The Locomotive
IDENTIFICATION OF LOCOMOTIVE MAIN CONTROLS Displacement Left Side Lubricator Filler Cap Pressure Water Gauge Gauge Displacement Lubricator Drain Screw Battery Holder for ‘AAA’ Batteries Right Side Steam Water Regulator top up valve Filler Valve Regulator Gas Jet Holder Union... -
Page 6: Preparing For Operation
ROUNDHOUSE. Mixed gasses are also available and may be used if ordinary butane or iso-butane are not available, but see the ‘Gas System’ section for more information on this subject. Before attempting to fill the gas tank, make sure that the gas control valve is closed by turning it clockwise and that there are no other operating locomotives or naked flames nearby. -
Page 7: Filling The Boiler
accessed through a hole in the dummy coal load. Ensure that the gas canister is fitted with a correct adapter, then invert it and place its nozzle over the gas filler valve. Support the locomotive from underneath in the area of the tank, and press the canister down. The gas will be heard hissing as it enters the tank and a small amount will escape around the valve. - Page 8 Safety Valve located under Dome. Remove Dome to access Safety Valve raised so, insert the end of the plastic pipe into the boiler and withdraw 30 ml of water with the syringe. Replace the filler plug finger tight, and then place the dome back over it. Note that there is a rubber ‘O’...
-
Page 9: Lubrication
3) LUBRICATION Regular lubrication of all working parts is important and should be carried out before each operating session. There are two types of lubrication required: The external moving linkages and bearings are lubricated with a medium oil such as motor engine oil, and the internal steam mechanisms such as cylinders, pistons and valves are lubricated with a special steam oil that is mixed with the steam. -
Page 10: Lighting The Burner
Internal lubrication is achieved by steam oil that is mixed with the steam in the displacement lubricator, housed in the front, left-hand side of the cab. Unscrew and remove the knurled cap from the top of the lubricator. Locate the knurled lubricator drain screw located under the cab floor. -
Page 11: Running The Locomotive
happen, the burner will sound quite different to normal and the blue flame will be visible in the smoke box if viewed down the chimney from a safe height. Should this happen, turn off the gas immediately or damage may result and then re-light it. If the problem persists and it is not possible to ignite the burner correctly, then a dirty jet should be suspected and cleaned as detailed in the Troubleshooting section. -
Page 12: Driving The Locomotive Manually
this will vary depending on the gas valve setting. The boiler should not be allowed to run dry, and the gas tank capacity is such that the gas should run out before the water but it is good practice to keep an eye on the water gauge as a check. -
Page 13: Batteries
Using the reversing lever, select the desired direction of travel and open the regulator a little. Initially, there will be a certain amount of water in the pipes and cylinders, which will exhaust through the chimney and, after a few moments, the engine will move jerkily, until this clears. -
Page 14: Water Top-Up System
described in the manual control section. For more information on using the radio control equipment, see the manufacturer’s instruction booklet supplied with the Radio Control Set. The art of fine control will soon be learnt with a little practice NOTE: Ensure that the valve gear is fully in gear for the required direction when the engine is moving. - Page 15 Once the locomotive is in operation as detailed in the previous sections, water can be added to the boiler at any time during the run as follows. Fill the water pump bottle from your usual water supply. Bring the locomotive to a halt in a convenient place and remove the cab roof.
-
Page 16: Troubleshooting & Maintenance
Aim to keep the water level between ½ and ¾ up the gauge and re- fill the gas tank as detailed earlier whenever it is empty. In this way, you can keep the loco in steam and at working pressure as long as you like. -
Page 17: Steam Leaks
year. STEAM LEAKS The cylinders are fitted with 'O' rings in the glands sealing both piston and valve rods. These can be adjusted if steam leaks develop. They should only be tightened just enough to stop the leak, as over tightening will affect the running of the model. Cylinder covers are fitted with gaskets and valve chests with ’O’... -
Page 18: Radio Control
RADIO CONTROL If the radio control gives problems, always check the batteries first and replace if in doubt. For more information on using the radio control equipment, see the manufacturer’s instruction booklet supplied with the Radio Control Set. GAS SYSTEM Internally fired locomotives are fitted with our 'FG' type gas burner, which is set up and fully tested at the factory. -
Page 19: Gas Jet Removal
GAS JET REMOVAL To remove the gas jet, first remove the roof. Unscrew and remove the plastic battery holder. . Using a 2BA spanner, unscrew the Gas Jet Holder Union Nut. This connects the gas pipe to the gas regulator - see the photograph on Page 5. Loosen the gas jet holder retaining screw which will allow the gas jet holder to be pulled backwards and out. - Page 20 Unscrew the hexagon retaining nut then screw the spindle out of the body. The ‘O’ ring can now be lubricated. Replace the spindle followed by the retaining nut. Slide the backlash spring over the spindle and replace the knob. Note that the grub screw that holds the knob in place tightens into a groove near the end of the spindle.
-
Page 21: Boiler And Gas Tank Certificate, Pages 21
ROUNDH OUSE ENGINE ERING Model: BEDDGELERT Serial No.: Model: Type 22 boiler Serial No.: Test date: Ves- Serial No.: sel for Test date: Group 1 gas- ses and associ- ated pipe work and Dated ………………..R. Loxley (director) - Page 22 Please refer to the ‘owners handbook’ for your particular model of locomotive, for details on correct use of these pressure vessels. Pressure vessel care and maintenance Gas tank The gas tank is used for the storage of LPG (liquefied petroleum gas) in the form of butane, iso-butane or as set out in the ‘owners handbook’.
- Page 23 Gas Burner 1). Superheater Pipe. 2). Lubricator Pipe. 3). Gas Jet Holder retaining screw. 4). Gas Jet. 5). Gas Jet Holder. 6). Gas Pipe. 7). Gas Burner fixing screw. 8). Air Inlet Holes.
- Page 24 Your dealer is; ROUNDHOUSE If your dealer is unable to help, please contact the Factory directly: ROUNDHOUSE ENGINEERING CO. LTD. Units 6-10 Churchill Business Park. Churchill Road. Wheatley. Doncaster. DN1 2TF. England Telephone: 01302 328035 Fax: 01302 761312 Email: mail@roundhouse-eng.com...
Need help?
Do you have a question about the Beddgelert 0-6-4 and is the answer not in the manual?
Questions and answers