Minolta Di151 Operator's Manual
Hide thumbs
Also See for Di151:
- Operator's manual (257 pages) ,
- Manual (132 pages) ,
- Service manual (105 pages)
Table of Contents
Advertisement
Quick Links
Advertisement
Table of Contents

Related Manuals for Minolta Di151


Summary of Contents for Minolta Di151
- Page 1 4007-7704-01 Di151 Operator’s Manual...
- Page 3 Using the Machine Properly To ensure the optimum performance of the machine, follow the precautions listed below. Never place a heavy object on the machine. Never subject the machine to shocks. Never open any doors or turn the machine off while the machine is making copies. Never bring any magnetized object near the machine.
- Page 4 Always ensure that the power cord or communications cable of other electrical equipment does not become wedged into the machine mechanism, as malfunctioning equipment or a fire could result. Always use the correct power voltage, as improper voltage can cause a fire or electrical shock. Never use a multiple outlet adapter, as a fire or electrical shock can result.
- Page 5 Recycled Paper (USA market only) Your Minolta Machine has been designed to use the following Recycled Paper Minolta Recycled Bond Item NO. 8925 701...
- Page 7 Thank you for choosing Minolta quality. For over 30 years Minolta has been a leader on the forefront of office equipment technology and service. Our desire has always been to bring you highly reliable products. We pledge to continue to provide you, our customer, with our state of the art equipment, as well as full customer service for all our products.
-
Page 8: Table Of Contents
Contents Chapter 1 Safety Notes ................1-1 1. Installation ..................1-2 The Installation Site..............1-2 Power Source................1-2 Space Requirements ..............1-2 2. Precautions ..................1-3 Operating Environment .............1-3 Proper Use of the Machine ............1-3 Moving the Machine..............1-3 Storing and Handling Supplies..........1-3 Legal Restrictions on Copying ..........1-4 Chapter 2 Getting to Know Your Machine .......... - Page 9 Contents Chapter 5 When an Indicator Light Up ............ 5-1 1. Display Messages ................5-2 2. The Toner Empty Indicator ...............5-4 Chapter 1 How to replace the imaging cartridge ........5-4 3. Paper Empty Indicator ...............5-6 Safety Notes How to replenish the paper supply ..........5-6 4.
- Page 10 Terms and Symbols for Original Types and Copy Paper A few special terms and symbols are used in this manual to designate types of originals and copy paper. This page explains about these terms and symbols. Feeding Direction (copy paper path) Paper that has been loaded into the machine will be fed from the right side.
-
Page 11: Safety Information
Safety Information Laser Safety This is a digital machine which operates by means of a laser. There is no possibility of danger from the laser, provided the machine is operated according to the instructions in this manual. Since radiation emitted by the laser is completely confined within protective housing, the laser beam cannot escape from the machine during any phase of user operation. - Page 12 Safety Information For European Users CAUTION: Use of controls, adjustments or performance of procedures other than those specified in this manual may result in hazardous radiation exposure. This is a semiconductor laser. The maximum power of the laser diode is 5 mW and the wavelength is 770–810 nm.
-
Page 13: Laser Safety Label
CLA 1 LAE POUCT LAE LAE 1 POUT 1166O252BA C4007O155CB Manufacturer’s Name Plate Laser safety label For United States MINOLTA CO., LTD 2 Hiashiaatsuhi aataho Tooaashi Aihien 44255 apan ANUACTUE THI POUCT COPLIE ITH 21 C CHAPTE I UBCHAPTE 0946710114... - Page 14 viii Safety Information...
-
Page 15: Chapter 1 Safety Notes
Chapter 1 Safety Notes... -
Page 16: Installation
1. Installation The Installation Site To ensure utmost safety and prevent possible malfunctions of the unit, install it in an environment that meets the following requirements. N An area away from curtains or any flammable object. N An area where the unit will not come into contact with water or liquids. N An area free from direct sunlight. -
Page 17: Precautions
2. Precautions Operating Environment The operating environmental requirements of the unit are as follows. Temperature: 10–30 °C (50–86 °F) with a fluctuation of up to 10 °C (18 °F) per hour. Humidity: 15–85% with a fluctuation of up to 20% per hour. Proper Use of the Machine To ensure the optimum performance of the machine, follow the precautions listed below. -
Page 18: Legal Restrictions On Copying
2. Precautions Legal Restrictions on Copying Certain types of documents must never be copied by the machine for the purpose or with the intent to pass copies of such documents off as the original. The following is not a complete list but is meant to be used as a guide to responsible copying. -
Page 19: Chapter 2 Getting To Know Your Machine
Chapter 2 Getting to Know Your Machine... -
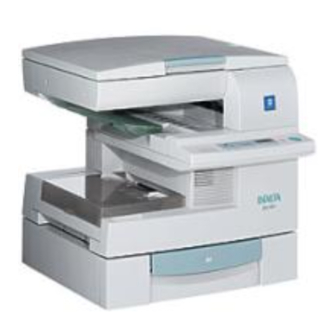
Page 20: The Various Parts Of The Machine
Secures the original to be copied. C4007O091CA C4007O092CA Memory for Copier (16MB/32MB) <Option> Expands the memory capacity of the machine. Fax Unit for Di151 <Option> Allows the machine to support facsimile functions. Printer Controller Pi1501 <Option> Allows the machine to support printer functions. - Page 21 1. The Various Parts of the Machine Options C4007O095CA Automatic Document Feeder <Option> Document Guide Plates: Adjusted to the size of the original document. Document Feed Tray: Loaded with the document facing upward. Document Feed Tray Pulled out to support large documents. Extender: Document Exit Tray: Receives the document after it is read by the machine.
- Page 22 1. The Various Parts of the Machine Parts of the machine and what they do C4007O089CA C4007O097CA Copy Tray: Copies are output into this tray. Paper Tray: Holds up to 250 sheets of paper. Use to feed paper into the machine manually. p. 5-6 Manual Bypass Tray: Use to control copy and other functions of the unit.
-
Page 23: Inside The Machine
1. The Various Parts of the Machine Inside the Machine C4007O098CA C4007O099CA Lock Release Lever: Pulled when replacing the imaging cartridge or removing paper mis- feeds. Original Pad: Secures the original for copying. Original Glass: Original is placed on top of this surface for copying. Upper Half of Machine: Opened under the following circumstances: •... -
Page 24: The Functions Of The Control Panel
2. The Functions of the Control Panel Control Panel Start Key Zoom Key • Press to start a copy cycle. • Press to change the zoom ratio. • Use to select the standard zoom ratio. Clear/Stop Key p. 3-12 •... -
Page 25: Display Panel
2. The Functions of the Control Panel C4007O002CA Display Panel Add Toner Indicator Indicates that the toner supply is running low. Replace the imaging cartridge. p. 5-4 Add Paper Indicator Indicates that the selected drawer is out of paper. Replenish the paper supply. p. -
Page 26: Turning The Machine On And Off And Enabling The Initial Mode
3. Turning the Machine ON and OFF and Enabling the Initial Mode Turning ON and OFF • Turning the Machine ON Press the Power Switch to the (ON) position. • Turning the Machine OFF Press the Power Switch to the (OFF) position. -
Page 27: Auxiliary Functions
4. Auxiliary Functions Auto Panel Reset Function The unit automatically returns to the Initial Mode without pressing the Clear/Stop Key one minute after a copy operation has completed or one minute after the last operation key was pressed. Useful Tip The period of time until the Auto Panel Reset Function is released can be changed through the User’s Choice Mode. - Page 28 2-10...
-
Page 29: Chapter 3 Making Copies
Chapter 3 Making Copies... -
Page 30: How To Copy Documents
1. How to Copy Documents • Generally, full size copies are reproduced at a zoom ratio of 100%. To make a Full-size copy on paper of the same size as the original, set the document (step 1), specify the number of copies to be generated (step 6), and press the Start Key (step 7). (* The default paper tray, zoom ratio and auto exposure settings are automatically selected in the Initial Mode.) •... - Page 31 1. How to Copy Documents To change the 4. Selecting the Copy Density exposure level Mode. • Press the Exposure Control • Press the Auto Exposure Mode Keys to specify the desired Key to switch between Auto level of density. p. 3-14 Exposure Mode and Photo Mode.
-
Page 32: Setting The Original Document
2. Setting the Original Document When using the Automatic Document Feeder With the Automatic Document Feeder, originals placed into the Document Feed Tray are fed in one sheet at a time, copied, then fed out. Please follow the instructions provided when using this device. Failure to follow these instructions may cause a misfeed damage to the original or other complications. -
Page 33: Setting The Original Onto The Glass
2. Setting the Original Document Setting the original onto the glass General Documents Transparent Documents <When setting documents of plain or thick paper <When setting OHP transparencies or tracing types> paper> Open the Original Cover. Follow the same procedure as described for Set the document onto the glass with the side general documents. -
Page 34: Selecting Paper Trays
3. Selecting Paper Trays How to select a paper tray Paper trays are selected using the Paper Select Key. You can select from the Paper Drawer, the Paper Feed Unit and the Manual Bypass Tray depending on the configuration of your copy application. C4007O056CA The paper tray options can be selected as follows by pressing the Paper Select Key. -
Page 35: Using The Manual Bypass Tray
3. Selecting Paper Trays Using the Manual Bypass Tray Use this tray to copy documents onto paper that is not otherwise loaded into the machine or to copy onto OHP transparencies or specialty paper types. Paper and media supported by the Manual Bypass Tray N Types of Paper Regular paper (16–24 lbs.) Thick paper (24–41-3/4 lbs.) - Page 36 3. Selecting Paper Trays Loading the paper (standard sizes) Select the proper paper size and type using Set the original document. Keys. (Example) Regular paper (Letter size) Insert the paper as far as possible into the Manual Bypass Tray. Be sure to adjust the Document Guide Plates to fit the paper.
- Page 37 3. Selecting Paper Trays Loading the paper (non-standard sizes/free sizes) Set the original document. Press the Key or the Key to display “U8”. Insert the paper as far as possible into the Manual Bypass Tray. Be sure to adjust the Document Guide Plates to fit the paper.
- Page 38 3-10 3. Selecting Paper Trays Press the Key or the Key to Select the Manual Bypass Tray by pressing display the paper length code. Refer to the Paper Select Key. “Manual Feed Input Size” for details. p. 4-6 (Example) Paper width: 7-3/4" C4007O046CA Press the Key or the...
-
Page 39: Specifying The Number Of Copies
3-11 4. Specifying the Number of Copies How to specify the number of copies to be generated The number of copies to be generated can be specified by using the Key and Key. Each press of the Key increases the number value by one. Each press of the Key increases the number value by 10. -
Page 40: Specifying The Zoom Ratio
3-12 5. Specifying the Zoom Ratio How to specify the zoom ratio The zoom ratio can be specified by pressing the Zoom Key. There are two modes to choose from: Standard Copy Zoom and Manual Zoom Select. C4007O058CA Standard Copy Zoom Mode With this mode, the most often used preset zoom settings can be selected. - Page 41 3-13 5. Specifying the Zoom Ratio Manual Copy Zoom Settings The zoom ratio can be adjusted in single increments with each press of the Keys. (Range: 50–199 %) Press and hold a Key to rapidly change the zoom ratio. Press the Zoom Key to enter the Copy Zoom Setting Mode.
-
Page 42: Selecting The Copy Image Density Mode
3-14 6. Selecting the Copy Image Density Mode How to select the copy image density The copy image density can be selected by pressing the Auto Exposure Mode Key and the Image Density Key. There are three modes to choose from: Auto Exposure, Manual Exposure and the Photo. C4007O057CA Auto Exposure Mode Manual Exposure Mode... -
Page 43: Photo Mode
3-15 6. Selecting the Copy Image Density Mode Photo Mode The Photo Mode is optimal for copying Useful Tips documents containing halftones such as photos. • Both the Manual Exposure Mode and the This mode allows you to select from nine levels of Photo Mode allow you to select from nine exposure. -
Page 44: Selecting The Function Mode
3-16 7. Selecting the Function Mode How to select the Function Mode The Function Mode can be selected by pressing the Copies/Function Key. There are four modes to choose from: Non-Sort Mode, 2in1 Non-Sort Mode, Sort Mode and 2in1 Sort Mode. - Page 45 3-17 7. Selecting the Function Mode F2: 2in1 Non-Sort (Requires installation of the Automatic Document Feeder and expansion memory) Copies two original documents onto one sheet of Copies paper and outputs the results in the same order as they were loaded into the machine. Originals * Use of this function is also made possible only by installing the expansion memory and when...
-
Page 46: Notes For Using The Function Mode
3-18 7. Selecting the Function Mode Notes for using the Function Mode The Function Mode Indicator • The Function Mode indicator will become lit when settings other than the Initial Mode are selected. • The Zoom indicator will become lit and the zoom ratio will automatically be decreased when F2 (2in1 Non-Sort) or F4 (2in1 Sort) are selected. - Page 47 Chapter 4 Using the User’s Choice Mode...
-
Page 48: The Total Check Function
1. The Total Check Function How to read the Total Check Function displays This machine can keep a count of the number of copies that it has generated since it was first set up. N Total Count Shows the total number of copies since the machine was installed. N PM Count Shows the number of copies taken since the last replacement of PM parts (image transfer unit or fusing unit). - Page 49 1. The Total Check Function How to select a Total Check Function Press and hold the Clear/Stop Key for three seconds. The Total Count will be displayed. C4007O075CA Press and hold the Clear/Stop Key again, for three seconds, to display the PM Count. C4007O076CA Press the Clear/Stop Key to return to the previous status mode.
-
Page 50: User's Choice Mode
2. User’s Choice Mode This mode allows you to determine the default settings for functions that are activated when the main power switch is turned on or the panel is reset with the Auto Panel Reset Function. The User’s Choice Mode is used to program the most commonly used settings of the machine into the Initial Mode. - Page 51 2. User’s Choice Mode U3: Disable Sleep Function Completely disables the Sleep Function Mode. Code Setting Default Turns OFF the Disable Sleep Function Mode. Enables the Disable Sleep Function Mode. U4: Exposure Mode Priority Allows you to select the optimal exposure mode or the Photo Mode from the Initial Mode. Code Setting Default...
- Page 52 2. User’s Choice Mode U7: Paper Size Select Allows you to assign a particular paper size to the paper tray. Code Setting Default Letter L Legal L Half Letter (Invoice) L U8: Manual Feed Input Size Allows you to specify a paper size when loading non-standard size paper into the Manual Bypass Tray. <Paper Width>...
- Page 53 2. User’s Choice Mode <Paper Length> Code Setting Default 182–184 mm (7-1/4") 185–194 mm (7-1/4"–7-3/4") 195–204 mm (7-3/4"–8") 205–214 mm (8"–8-1/2") 215–224 mm (8-1/2"–8-3/4") 225–234 mm (8-3/4"–9-1/4") 235–244 mm (9-1/4"–9-1/2") 245–254 mm (9-3/4"–10") 255–264 mm (10"–10-1/2") 265–274 mm (10-1/2"–10-3/4") 275–284 mm (10-3/4"–11-1/4") 285–294 mm (11-1/4"–11-1/2") 295–304 mm (11-1/2"–12") 305–314 mm (12"–12-1/4")
- Page 54 2. User’s Choice Mode U9: Density (Automatic Document Feeder) Allows you to specify the density level when an original document is set into the Automatic Document Feeder. Code Setting Default Recommended for general copying purposes (text documents). Recommended when copying lighter or faded original documents.
- Page 55 2. User’s Choice Mode UC: Tray Priority (for Printer Mode) Allows you to set the prioritized tray for feeding paper into the machine when outputting documents from a personal computer. Code Setting Default Auto Select Paper Tray Paper Feed Unit * This function is displayed only when the Printer Controller is installed.
- Page 56 4-10 2. User’s Choice Mode How to select User’s Choice Settings Press the Start Key. The currently selected Press and hold the Exposure Control Key User’s Choice Code will be displayed. (Lighter) for three seconds to enter the User’s Choice Mode. “U1” will be displayed. C4007O077CA C4007O072CA Display the desired User’s Choice Code...
- Page 57 4-11 2. User’s Choice Mode Press the Clear/Stop Key to return to the previous status mode. C4007O073CA * The User’s Choice Mode will be cancelled and the previous status mode will be enabled.
- Page 58 4-12...
-
Page 59: Chapter 5 When An Indicator Light Up
Chapter 5 When an Indicator Lights Up... -
Page 60: Display Messages
1. Display Messages Error Indicator Cause Response Toner Empty The toner supply inside of the Replace the imaging cartridge imaging cartridge has been using the procedure provided. depleted. p. 5-4 C4007O039CA Paper Empty The paper supply has been Replenish the paper supply using depleted. -
Page 61: Error Indicator
1. Display Messages Error Indicator Cause Response An internal error has occurred. Reset the machine using the procedure provided. p. 5-12 C4007O026CA Cover Open The Upper Half of the Machine is Make sure that the Upper Half of open. the Machine is securely closed. C4007O027CA The Automatic Document Feeder Make sure that the Automatic... -
Page 62: The Toner Empty Indicator
2. The Toner Empty Indicator The error indicator displayed here will appear when the toner supply inside of the imaging cartridge has been depleted. The machine will not be operable under these circumstances. Follow the procedure provided below to replace the imaging cartridge when this indicator is displayed. - Page 63 2. The Toner Empty Indicator Useful Tip The imaging cartridge can easily be installed by aligning the front of the cartridge with the marker provided within the machine. C4007O113CA Gently swing down and lock the Upper Half of Machine. Then, close the Front Door. C4007O114CA NOTE Only use replacement imaging cartridges that...
-
Page 64: Paper Empty Indicator
3. Paper Empty Indicator The error indicator displayed here will appear when the paper supply inside of the machine has been depleted. The machine will not be operable under these circumstances. Follow the procedure provided below to replenish the paper supply when this indicator is displayed. C4007O037CA How to replenish the paper supply Paper Tray... -
Page 65: Paper Feed Unit
3. Paper Empty Indicator Paper Feed Unit Gently slide the Paper Drawer back in. Slide out the Paper Drawer and press down the Paper Lifting Plate. C4007O121CA C4007O141CA NOTE Load the paper stack into the Paper Drawer The following indicator will appear in the so that its front side faces down. -
Page 66: Paper Misfeed Indicators
4. Paper Misfeed Indicators If a paper misfeed occurs, the machine will stop PC Indicator operating, the letter “J” will flash alternately with a number or the “PC” indicator will flash. C4007O015CA J Indicator Example: The J2 indicator (Flashing alternately) C4007O013CA C4007O014CA Clearing paper misfeeds... - Page 67 4. Paper Misfeed Indicators J2/J3 <Paper Feed Unit> NOTE Be careful not to touch the areas marked Press in the tray stoppers, and then remove with bare hands. CAUTION: HOT the Paper Drawer. Pull the Lock Release Lever and fold open the Upper Half of Machine.
- Page 68 5-10 4. Paper Misfeed Indicators Remove the misfed sheet of paper. Close the Upper Half of Machine. C4007O123CA Remove a misfed sheet of paper jammed in C4007O114CA the Transport Section by pulling it from the NOTE bottom of the Fusing Unit. The following indicator will appear in the display after clearing the paper misfeed: C4007O017CA...
- Page 69 5-11 4. Paper Misfeed Indicators Place the original document that was Remove the original document from the removed in step 1 into the Automatic Document Feed Tray. Document Feeder again. C4007O125CA Open the Paper Misfeed Guide and gently C4007O127CA remove the paper misfeed. NOTE The following indicator will appear in the display after clearing the paper misfeed:...
-
Page 70: Trouble Indicator
5-12 5. Trouble Indicator If an error occurs within the machine, a “CXXXX” trouble code appears in the display. How to reset the machine Press the Power Switch to turn the machine off, then on again. * Should a “CXXXX” trouble code continue to appear in the display after resetting the machine, please contact your technical representative. -
Page 71: Chapter 6 Troubleshooting
Chapter 6 Troubleshooting... -
Page 72: Improving Image Quality
1. Improving Image Quality Symptom Possible Cause Action The image is too light. A “lighter” exposure level for the Adjust the Auto Exposure Level Auto Exposure Mode has been Priority of the User’s Choice specified. Mode. p. 4-5 Or, disable the Auto Exposure Mode and adjust settings manually through the Manual Exposure Mode. - Page 73 1. Improving Image Quality Symptom Possible Cause Action Unintended markings appear The Original Pad is dirty. Wipe the Original Pad clean with a soft cloth. p. 7-4 along the edges of the copy. The selected paper size is larger Specify a paper size that is appropriate to the original than the original document (zoom...
-
Page 74: Correcting Functional Problems
2. Correcting Functional Problems Symptom Check for: Actions Nothing is displayed on the Does the green light in the Start The Sleep Function has been Control Panel. Key turn on? enabled. Press the Start Key to disable this mode. Nothing happens when the Start Has an Error or Trouble Indicator Follow the procedures provided. -
Page 75: Chapter 7 Miscellaneous
Chapter 7 Miscellaneous... -
Page 76: Specifications
1. Specifications Machine Model name Di151 Type Desktop Platen Type Stationary Photoconductor Copying System Electrostatic Dry Powdered Image Transfer Developing System Fine Micro-Toning System Fusing System Lamp-Heater Roller Document Reader CCD Line Sensor 600 × 600dpi Resolution Memory 8MB (Standard) -
Page 77: Automatic Document Feeder
1. Specifications Automatic Document Feeder Original Documents Plain Paper (13–29 lbs.) Original Sizes Legal L–Half Letter (Invoice) L Original Weight Up to 50 sheets × × Dimensions Width 21-3/4" Depth 15-1/2" Height 6-1/4" Weight 8-3/4 lbs. Paper Feed Unit Paper Type Plain Paper (16–24 lbs.) Paper Size Letter L... -
Page 78: Care And Maintenance
2. Care and Maintenance Cleaning Outer Cover Original Pad Wipe the exterior surface of the machine clean Open the Original Cover. with a soft cloth. Wipe the surface of the Original Pad clean with a soft cloth dampened with a mild home detergent. -
Page 79: Paper Size And Zoom Ratio Table
3. Paper Size and Zoom Ratio Table Paper Size Name Size (Metric) Size (Inch) 210 mm × 297 mm 8-1/4 × 11-3/4 148 mm × 210 mm 5-3/4 × 8-1/4 105 mm × 148 mm 4-1/4 × 5-3/4 182 mm × 257 mm 7-1/4 ×... - Page 80 3. Paper Size and Zoom Ratio Table...
-
Page 81: Appendix Index
Appendix Index... - Page 82 Index Numerics 2 in 1 Copying pp. 3-17, 3-18 OHP pp. 3-5, 3-7 Options p. 2-3 Add toner pp. 5-4, 5-5 Adding paper p. 5-7 Paper sizes pp. 3-4, 3-7 Auto Exposure Level Priority pp. 4-4, 4-5 Photo Mode p. 3-15 Auto Exposure Mode Key pp.
- Page 83 Copyright 2000 MINOLTA CO., LTD. Printed in Japan The information contained in this manual is subject to change without notice to incorporate improvements made on the product or products the manual covers. MINOLTA CO., LTD. Image Information Products Marketing Headquarters 2000.
Need help?
Do you have a question about the Di151 and is the answer not in the manual?
Questions and answers