Table of Contents
Advertisement
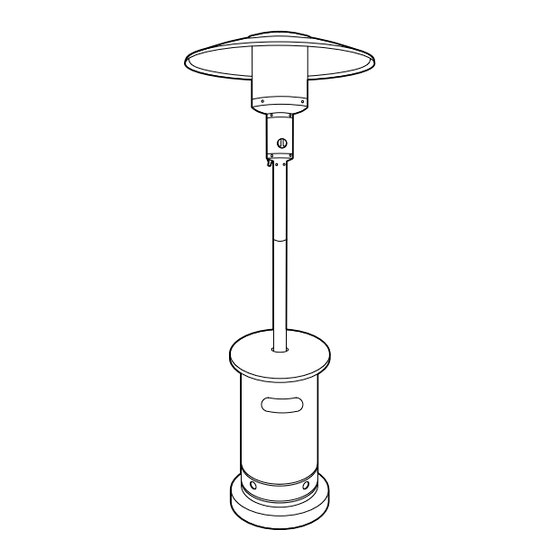
Item #1001 362 427
Model #68164
USE AND CARE GUIDE
PATIO HEATER
Questions, problems, missing parts? Before returning to the store,
call Hampton Bay Customer Service
8 a.m. - 7 p.m., EST, Monday – Friday, 9 a.m. – 6 p.m., EST, Saturday
1-855-HD-HAMPTON
C
US
HAMPTONBAY.COM
THANK YOU
We appreciate the trust and confidence you have placed in Hampton Bay through the purchase of this patio heater. We strive to continually
create quality products designed to enhance your home. Visit us online to see our full line of products available for your home improvement
needs. Thank you for choosing Hampton Bay!
Advertisement
Table of Contents

Related Manuals for HAMPTON BAY 68164


Summary of Contents for HAMPTON BAY 68164
- Page 1 THANK YOU We appreciate the trust and confidence you have placed in Hampton Bay through the purchase of this patio heater. We strive to continually create quality products designed to enhance your home. Visit us online to see our full line of products available for your home improvement...
-
Page 2: Table Of Contents
Table of Contents Table of Contents . . . . . . . . . . . . . . . . . . . . . . . . . . . . . . . . . . . 2 Operation . - Page 3 Safety Information (continued) PROPANE GAS PRECAUTIONS WARNING: California Proposition 65 Combustion by products produced when using this product DANGER: EXPLOSION – FIRE HAZARD contain chemicals known to the state of California to cause □ Never store propane near high heat, open flames, pilot cancer, birth defects, and other reproductive harm.
-
Page 4: Warranty
Safety Information (continued) □ If the hands or wrists have been burned, remove jewelry if □ Do not pop any blisters. Cover the burn with a light gauze possible without causing further injury. This prevents the dressing. necessity of having to cut off jewelry since swelling usually □... -
Page 5: Pre-Assembly
Pre-Assembly PLANNING ASSEMBLY Carefully lay all parts out on a soft surface and compare all parts to the Package Contents list. If any part appears missing or damaged, do not use this product and call customer service immediately. TOOLS REQUIRED Phillips Wrench screwdriver... - Page 6 Pre-Assembly (continued) PACKAGE CONTENTS Part Description Quantity Reflector Head assembly Post Tank housing Post support Support legs Regulator Base Wheel assembly...
-
Page 7: Assembly
Assembly Attaching the wheel assembly to the (Optional) Attaching the ground base fixture to the base If your model did not come with a wheel assembly, proceed to If your model does not come with the anchoring arms and nuts or step 2. - Page 8 Assembly (continued) Attaching the reflector studs to the Placing the tank housing head assembly □ Place the tank housing (D) on top of the assembly. □ Insert three reflector studs (FF) into the top of the head assembly (B). Tighten the studs securely. Attaching the head assembly □...
-
Page 9: Connecting The Propane Tank
Assembly (continued) Assembling the reflector WARNING: Remove the protective cover before assembly. NOTE: Leave all screws and nuts loose until the entire reflector is put together in order to ensure proper alignment of all sections. □ Slide two pieces of the reflector (A) together. Insert one small screw (LL). -
Page 10: Performing A Leak Test
Connecting the Propane Tank (continued) CONNECTING THE TANK 1. Attach a regulator to the cylinder. 2. Install the cylinder to the heater assembly using the webbing (MM). Performing a Leak Test WARNING: Perform all leak tests outdoors. Extinguish all open flames. NEVER perform this test while smoking. DO not use the heater until all connections have been tested and confirmed not to be leaking. -
Page 11: Operation
Operation DANGER: For outdoor use only. Never use inside a house, or other unventilated or enclosed area. This heater consumes air (oxygen). Do not use in an unventilated or enclosed area as this will endanger your life. DANGER: EXPLOSION – FIRE HAZARD □... - Page 12 Operation (continued) BEFORE YOU TURN THE GAS SUPPLY ON □ Your heater was designed and approved for outdoor use only. Do not use it inside a building, garage, or any other enclosed area. □ Make sure the surrounding areas are free of combustible materials, gasoline, and other flammable vapors or liquid. □...
-
Page 13: Replacing The Gas Cylinder
Replacing the Gas Cylinder WARNING: Changing of the cylinder must be undertaken in a flame-free atmosphere. Ensure that all taps on the consuming appliance are in the closed position. 1. Close the valve of the gas cylinder. 2. Disconnect the regulator from the cylinder following the instructions that came with your regulator. 3. -
Page 14: Care And Cleaning
Care and Cleaning WARNING: Do not perform maintenance after the heater has been turned off until the temperature has cooled down. Do not expose the pilot, controllers and parts underneath the burner to water. Do not use the heater if any of these parts are exposed to water until the appliance is inspected or repaired by a qualified service person. - Page 15 Troubleshooting (continued) There is thick black smoke. There is blockage in the burner. Turn off the heater and let it cool. Remove the blockage and clean the inside and outside of the burner. The heater produces a whistling noise Air passageways are blocked. Check the minimum installation clearances and when the burner is lit.
- Page 16 Questions, problems, missing parts? Before returning to the store, call Hampton Bay Customer Service 8 a.m.-7 p.m., EST, Monday-Friday, 9 a.m. - 6 p.m., EST, Saturday 1-855-HD-HAMPTON HAMPTONBAY.COM Retain this manual for future use.
Need help?
Do you have a question about the 68164 and is the answer not in the manual?
Questions and answers