Table of Contents
Advertisement
Advertisement
Table of Contents

Related Manuals for D-Link DCH-S160


Summary of Contents for D-Link DCH-S160
-
Page 1: User Manual
Version 1.01 | July 7, 2015 User Manual mydlink™ Wi-Fi Water Sensor DCH-S160... -
Page 2: Preface
Preface D-Link reserves the right to revise this publication and to make changes in the content hereof without obligation to notify any person or organization of such revisions or changes. Manual Revisions Revision Date Description 1.00 March 30, 2015 • First version 1.01... -
Page 3: Table Of Contents
Registration ..............32 Front/Bottom ................. 4 Side .................... 5 Wireless Installation Tips ............6 Hardware Installation ..............7 Setting Up Your Device ............... 8 mydlink™ Home ...............10 My Devices ..................10 Information ...................11 My Actions ..................12 My Places ..................15 D-Link DCH-S160 User Manual... -
Page 4: Product Overview
Section 1 - Product Overview Product Overview Package Contents DCH-S160 mydlink™ Wi-Fi Water Sensor RJ-11 Extension Cable (1 meter) Water Sensor Cable (0.5 meter) Quick Install Card Quick Install Card General Public License (GPL) Statement Wall/Floor Cable Clip (3 pcs.) If any of the above items are missing from your package, please contact your reseller. -
Page 5: System Requirements
Mobile Requirements • iPhone, iPad, or Android smartphone or tablet • For mydlink and mydlink app requirements mydlink Requirements refer to: http://www.mydlink.com Please refer to the mobile app’s store page to check whether your device is compatible. D-Link DCH-S160 User Manual... -
Page 6: Introduction
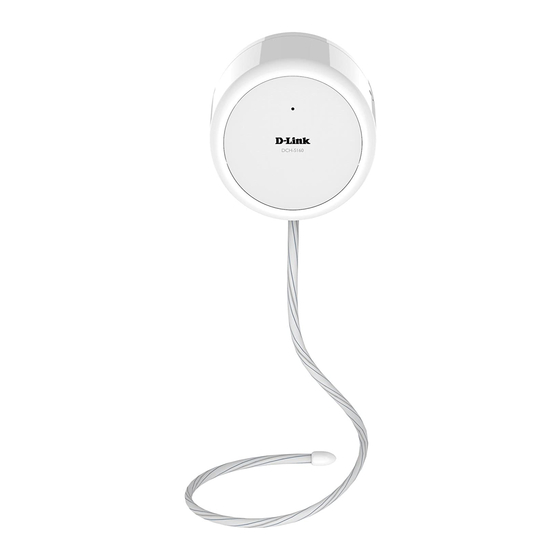
Introduction The DCH-S160 mydlink™ Wi-Fi Water Sensor is a wireless sensor that helps keep your home safe. You can install the probe anywhere and it will help you detect water leaks before serious flooding occurs. If the water sensor is triggered, an alarm will sound and an LED will blink to give you audio and visual warnings. -
Page 7: Hardware Overview
Connect an RJ-11 cable to this port to detect water Electrical Plug Plugs into an electrical wall outlet Important: Make sure the connection between the water sensor cable and the RJ-11 cable are located away from possible water contact. D-Link DCH-S160 User Manual... -
Page 8: Side
Press the WPS button for 1 second to connect the water sensor to your wireless router using Wi-Fi Protected Setup. Reset Button Press the reset button for 5 seconds to reset the DCH-S160 back to the factory default settings. D-Link DCH-S160 User Manual... -
Page 9: Wireless Installation Tips
2.4 GHz phone base is as far away from your wireless devices as possible. The base transmits a signal even if the phone in not in use. 6. If you are using X-10 wireless products, such as ceiling fans, lights, and home security systems, your wireless connection may degrade dramatically. D-Link DCH-S160 User Manual... -
Page 10: Hardware Installation
Hardware Installation 1. Connect the supplied RJ-11 water sensor cable to the RJ-11 port on the bottom of the DCH-S160. If you want to install the sensor in a location that is out of range, first connect the included RJ-11 extension cable to the device, then attach the water sensor cable. -
Page 11: Setting Up Your Device
Setting Up Your Device To install your DCH-S160, first download and install the mydlink™ Home app on your mobile device. This app will walk you through installing and configuring your DCH-S160. If you have the mydlink™ Home app previously installed on your device, please ensure you have the latest version of the app by checking for updates and updating it if necessary. - Page 12 In order for notifications to work, you must set up a rule first using the mydlink Home app’s My Actions page. Please refer to page 12 for details on how to set up a rule. Congratulations, your DCH-S160 is now ready to use! D-Link DCH-S160 User Manual...
-
Page 13: Mydlink™ Home
Section 3 - Usage mydlink™ Home My Devices Launch the mydlink Home app. Under the My Devices page, tap the DCH-S160. Last Detection: Displays the last time the sensor detected water. Information: This page will show detailed information about the product and your network. -
Page 14: Information
Displays the MAC address of the device. IP Address: Displays the IP address of the device. mydlink Displays the mydlink number of the device. Number: Remove Tap Remove to remove the device from your Device: network. D-Link DCH-S160 User Manual... -
Page 15: My Actions
Section 3 - Usage My Actions This page lets you add and enable/disable rules which execute actions such as notifications (response) when your DCH-S160 detects water (condition) and will trigger your Wi-Fi Siren if you have one connected to your network. Tap to switch between pages. - Page 16 7. You will be taken back to the My Actions page and you can now enable and disable your rule from this page. To enable the rule, slide the slider to the right. To disable, slide the slider to the left. D-Link DCH-S160 User Manual...
- Page 17 8. To delete a rule on iOS, swipe the rule you want to delete to the left. Tap the red Delete button to remove the rule. To delete a rule on Android, swipe the rule you want to delete to the right. Tap the trash can icon to remove the rule. D-Link DCH-S160 User Manual...
-
Page 18: My Places
2. On the New Group page, tap the icon to choose an icon or photo for the group. Tap next to it to enter a name for the group. Then tap the + icon to add devices. 3. Select the devices to be included in this group and tap Done. D-Link DCH-S160 User Manual... -
Page 19: D-Link Dch-S160 User Manual
Section 3 - Usage 4. Your group will be created and will show up in My Places. Tap a device to take you to its settings. D-Link DCH-S160 User Manual... -
Page 20: Troubleshooting
How do I reset the DCH-S160? When you reset your DCH-S160, it will change your settings back to the factory default settings. To reset the device, locate the Reset button on the side of the device. With the device plugged in, press and hold the Reset button for about five seconds until the Status LED turns red. -
Page 21: Technical Specifications
• US plug: 100 grams (3.53 ounces) Diagnostic LEDs • Status Operating Temperature • 0 to 40 ˚C (32 to 104 ˚F) Storage Temperature • -20 to 65 ˚C (-4 to 149 ˚F) Frequency range varies depending on local regulations D-Link DCH-S160 User Manual... -
Page 22: Safety Instructions
D-Link may result in the loss of product warranty. Unless expressly approved by an authorized representative of D-Link in writing, you may not and may not permit others to: • Disassemble or reverse engineer the device or attempt to derive source code (underlying ideas, algorithms, or structure) from the device or from any other information provided by D-Link, except to the extent that this restriction is expressly prohibited by local law. - Page 23 • Install the power supply before connecting the power cable to the power supply. • Unplug the power cable before removing the power supply. • If the system has multiple sources of power, disconnect power from the device by unplugging all power cables from the power supplies. D-Link DCH-S160 User Manual...
- Page 24 • Always unplug the power before cleaning this device. • Do not use liquid or aerosol cleaners of any kind. Use only compressed air that is recommended for electronic devices. • Use a dry cloth for cleaning. D-Link DCH-S160 User Manual...
- Page 25 • When transporting a sensitive component, first place it in an antistatic container or packaging. • Handle all sensitive components in a static-safe area. If possible, use antistatic floor pads, workbench pads, and an antistatic grounding strap. D-Link DCH-S160 User Manual...
- Page 26 D-Link recommends that you always switch off or unplug your D-Link products when they are not in use. By doing so you will help to save energy and reduce CO2 emissions.
-
Page 27: Contacting Technical Support
• Hardware Revision (located on the label on the device (e.g., rev A1)) • Serial Number (s/n number located on the label on the device). You can find software updates and user documentation on the D-Link website as well as frequently asked questions and answers to technical issues. -
Page 28: Warranty
Any repair or replacement will be rendered by D-Link at an Authorized D-Link Service Office. The replacement hardware need not be new or have an identical make, model or part. D-Link may, at its option, replace the defective Hardware or any part thereof with any reconditioned product that D-Link reasonably determines is substantially equivalent (or superior) in all material respects to the defective Hardware. -
Page 29: Limited Software Warranty
Software or to refund the portion of the actual purchase price paid that is attributable to the Software. Except as otherwise agreed by D-Link in writing, the replacement Software is provided only to the original licensee, and is subject to the terms and conditions of the license granted by D-Link for the Software. - Page 30 • The customer must submit with the product as part of the claim a written description of the Hardware defect or Software nonconformance in sufficient detail to allow D-Link to confirm the same, along with proof of purchase of the product (such as a copy of the dated purchase invoice for the product) if the product is not registered.
- Page 31 Purolator Canada or any common carrier selected by D-Link. Return shipping charges shall be prepaid by D-Link if you use an address in Canada, otherwise we will ship the product to you freight collect. Expedited shipping is available upon request and provided shipping charges are prepaid by the customer.
-
Page 32: Limitation Of Liability
FOR WARRANTY SERVICE) RESULTING FROM THE USE OF THE PRODUCT, RELATING TO WARRANTY SERVICE, OR ARISING OUT OF ANY BREACH OF THIS LIMITED WARRANTY, EVEN IF D-LINK HAS BEEN ADVISED OF THE POSSIBILITY OF SUCH DAMAGES. THE SOLE REMEDY FOR A BREACH OF THE FOREGOING LIMITED WARRANTY IS REPAIR, REPLACEMENT OR REFUND OF THE DEFECTIVE OR NONCONFORMING PRODUCT. - Page 33 The availability of some specific channels and/or operational frequency bands are country dependent and are firmware programmed at the factory to match the intended destination. The firmware setting is not accessible by the end user. D-Link DCH-S160 User Manual...
- Page 34 Les conditions de fonctionnement sont sujettes à deux conditions: (1) Ce périphérique ne doit pas causer d’interférence et. (2) Ce périphérique doit accepter toute interférence, y compris les interférences pouvant perturber le bon fonctionnement de ce périphérique. D-Link DCH-S160 User Manual...
-
Page 35: Registration
Appendix E - Registration Registration Product registration is entirely voluntary and failure to complete or return this form will not diminish your warranty rights. Version 1.01 July 7, 2015 D-Link DCH-S160 User Manual...
Need help?
Do you have a question about the DCH-S160 and is the answer not in the manual?
Questions and answers