
Subscribe to Our Youtube Channel
Related Manuals for Welby MD 1010


Summary of Contents for Welby MD 1010
- Page 1 LIF ES T YLE premium wrist blood pressure monitor instruction manual Model: MD 1010 WBPM10 Series / MD 13400...
-
Page 2: Table Of Contents
Contents Introduction ............5 Safety Information ..........6 General ...................6 Safe handling of batteries ..........7 Service & Repairs ..............8 About this device ............ 9 Proper use................9 Frequently Asked Questions ....... 10 What is blood pressure? ..........10 What are systolic and diastolic values? ....10 What is High Blood Pressure and how is it con- trolled? ................. - Page 3 Setting the date & time ........22 Putting on the wrist cuff ........24 Correct position for measurement ...... 25 Automatic measurement ..........28 Arrhythmia detection ........... 28 User settings ............29 Selecting user ..............29 Retrieving stored measurement results ....30 Deleting memory values ..........
-
Page 4: Introduction
Introduction Thank you for purchasing the Welby® Wrist Blood Pressure Monitor. This fully automatic device measures blood pressure and pulse rate and checks detects irregular heart beat fast and easily and then displays the results on the LCD screen. It works using the oscillometric method of blood pressure measurement. -
Page 5: Safety Information
Safety Information General • This device is intended for home use only. • Do not use this device for self-diagnosis or self-treatment. Contact your physician or other licensed health care provider for specific information about your blood pressure. • Keep plastic packaging out of the reach of children. -
Page 6: Safe Handling Of Batteries
Safe handling of batteries Batteries may contain combustible materials. If not handled correctly, batteries can leak, become very hot, ignite or even explode, which could damage your device and/or your health. It is very important that you follow the instructions below: •... -
Page 7: Service & Repairs
inserted to avoid short circuits. • Remove discharged batteries from the device immediately. • Remove the batteries from the device if you do not intend to use it for an extended period. • Replace all of the old batteries in device with new batteries of the same type. -
Page 8: About This Device
About this device The device is used to measure blood pressure at the wrist and can save 60 measurement values in each of two memory spaces. Proper use This device is intended for use in dry, indoor areas only. The device is only intended for private use and not for clinical or commercial use. -
Page 9: Frequently Asked Questions
Frequently Asked Questions What is blood pressure? Blood pressure is the force exerted by blood against the walls of the aterties as blood is pumped through the circulatory system and is measured in millimeters of mercury (mmHg). The higher the pressure, the harder the heart has to work to supply blood to the vital organs in the body. -
Page 10: What Is High Blood Pressure And How Is It Controlled
What is High Blood Pressure and how is it controlled? High Blood Pressure, also called by its medical term Hypertension, is an abnormally high arterial blood pressure. If left unattended, it can cause many health problems including stroke and heart attack. Blood pressure can be higher than usual if parts of the circulatory system are restricted, diseased or abnormal in other ways High Blood Pressure can be... -
Page 11: How Does The Blood Pressure Monitor Work
How does the blood pressure monitor work? Your blood pressure monitor contains high quality components for measuring and to display the results on the display using the oscillometric method of blood pressure measurement. It also measures and displays your pulse. The device measures blood pressure indirectly using a cuff around the wrist. -
Page 12: Measuring Range
Measuring range The blood pressure monitor shows your blood pressure (SYS. = systolic and DIA. = diastolic value), pulse and the time and date on the display. Blood pressure is measured in mmHg (millimetres of mercury). This devices classifi es blood pressure measurements based on the defi nition and standards set by the World Health Organisation (WHO). - Page 13 Blood pressure classifi cation according to WHO in mmHg 1 Normal range 2 Borderline high 3 High blood pressure range...
- Page 14 Range Systolic Diastolic mmHg mmHg Indicator Low blood Under 90 Under 50 Green pressure Normal blood 91–129 51–84 Green pressure Borderline high blood 130–139 85–89 Green pressure Mild high blood 140–159 90–99 Yellow pressure Moderate high blood 160–179 100–109 Orange pressure Severe high blood...
-
Page 15: About Your Measurement Results
About your measurement results If the measurements obtained give you cause to be concerned about your health, consult with your physician or licensed health care professional. Do not change your current treatments and/or dosages of medication(s) as a result of your measurements unless you have discussed this fi rst with your doctor! By using your device regularly and recording your results, you can get a clear overview of your blood... -
Page 16: Before Taking Your Blood Pressure Measurement
Before taking your blood pressure measurement Note the following points so that the measurement results give a realistic representation of your blood pressure: • Always measure your blood pressure at the same time of the day. • Measure your blood pressure when you are relaxed. - Page 17 • Please ensure that you always measure your blood pressure under the same conditions! Also note the information about maintaining the correct posture during measurement on page 25. Different measurement conditions can lead to markedly different results. If you have a result that diff ers greatly from your normal blood pressure measurement, you should take measurement again after a short period of time in order to exclude the factors listed above that can lead...
-
Page 18: Initial Operation
Initial operation Device overview 1 User button 2 Clock button 3 ON/OFF button 4 Battery compartment 5 Cuff 6 Save button 7 WHO color indicator 8 Display... -
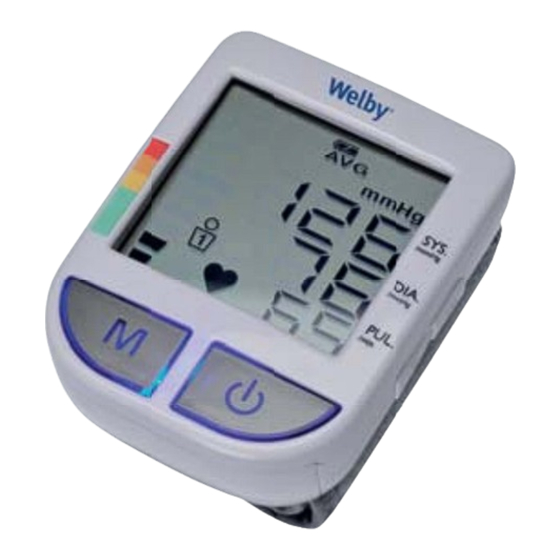
Page 19: Display
Display 1 AVG: Average blood pressure 2 Battery indicator 3 M: Display of stored measurement results 4 Systolic blood pressure 5 Diastolic blood pressure 6 Pulse measurement 7 Pulse display with arrhythmia detection indicator 8 User selection 9 Blood pressure range indicator 10 Cuff infl ation symbol 11 Date and time... -
Page 20: Inserting Batteries
Inserting batteries Remove the cover of the battery compartment at the notch in the direction of the arrow. Insert two 1.5 V R03/LR03/ AAA alkaline batteries. Replace the cover of the battery compartment. It is time to replace the batteries: •... -
Page 21: Setting The Date & Time
Always change both batteries! Never use new and old batteries together or diff erent types of batteries. Do not use rechargeable batteries for operating this device. Setting the date & time After you have inserted the batteries, the device will change into settings mode. - Page 22 Confi rm your selection by pressing the clock button and the display will change to the hour setting. Press the button until the current time is displayed. Confi rm your selection by pressing the clock button and the display will change to the minute setting.
-
Page 23: Putting On The Wrist Cuff
Putting on the wrist cuff Remove clothing from left arm or roll up sleeve making sure it is not too tight on your arm. Attach the wrist cuff in such a way that it is approx. 1/2” away from the palm of your hand. ... -
Page 24: Correct Position For Measurement
Correct position for measurement To measure your blood pressure, sit comfortably on a chair, take 5 or 6 deep breaths and relax. Place your left elbow on a table or other supporting surface so that the the wrist cuff is at heart height. You can also hold your left arm at heart height in front of your chest and support it using your right arm. - Page 25 It is important to measure your blood pressure at home and at the same time each day so that the blood pressure, which can change over the course of a day, is recorded properly. Record your measurements in the chart at the end of this instruction manual and discuss with your physician so that you can receive medical advice based on an evaluation of these measurements.
- Page 26 The battery symbol, the blinking cuff infl ation symbol and the selected user are shown on the display. Do not move the cuff , your arm or hand muscles during measurement. After a few seconds, the cuff will infl ate. When the cuff pressure is stable, the device will start measuring automatically.
-
Page 27: Automatic Measurement
Automatic measurement If the cuff pressure is too low, the device stops measuring and infl ates the cuff again. Measurement starts when the correct cuff pressure has been reached. The device also measures your pulse. The value displayed will fall during measurement. When the measurement is complete, the cuff will defl ate by itself and the systolic and diastolic blood pressure as well as the pulse and the pulse symbol... -
Page 28: User Settings
User settings The blood pressure monitor has two memory banks, which allow two diff erent users to save up to 60 measurements each. The device calculates the average value from the last three measurements. Selecting user Press the clock button or user button to switch the device on. -
Page 29: Retrieving Stored Measurement Results
Retrieving stored measurement results Press the user button to switch on the device. Press the user button again to select the desired user. Press the button, the average measurement will be shown on the display. This is indicated on the display with AVG. -
Page 30: Deleting Memory Values
Deleting memory values You can delete individually saved measurements or all of the measurements for each user. Press the ON/OFF button to switch on the device. Press the user button again to select the desired user. Press the button, the average measurement will be shown on the display. - Page 31 Press the user button , CL and 00 will be shown on the display. The value has now been deleted. In order to delete all of the saved measurements for the selected user, repeat the fi rst three steps until the average measurement is shown on the display.
- Page 32 Press the user button , CL and 00 will be shown on the display. All of the saved measurements for the selected user have now been deleted.
-
Page 33: Caring For Your Blood Pressure Monitor
Caring for your blood pressure monitor Cleaning/storage Only use a dry, soft cloth to clean the device. Do not use chemical solutions or cleaning products because these may damage the device’s surface or markings. Store the device in the supplied case when not in use. -
Page 34: Waste Disposal
Waste disposal Packaging Your device has been packaged to protect it from damage in transit. The packaging is made of environmentally friendly material which can be recycled. Device At the end of its service life, the device should not be disposed of with the household trash. -
Page 35: Troubleshooting
Troubleshooting If there are error messages or incorrect measurements displayed, remove the batteries and insert them again after about one minute. Error Possible causes Solutions Display The batteries are Replace both is blank dead. batteries with new 1.5 V R03/LR03/AAA batteries. - Page 36 Error Possible causes solutions The cuff is not Fit the cuff correctly attached correctly. and take a new measurement. An error has Take a new occurred in the measurement. measurement Cuff pressure Check the fi tting of above 300 mmHg the cuff and take a new measurement.
-
Page 37: Technical Data
Technical data Measurement method: Oscillometric Measuring range Blood pressure: 30 ~ 280 mmHg Pulse: 40 ~ 180 beats/min. Power supply: 2 x 1.5 V alkaline batteries R03/LR03/AAA Display: Memory spaces: 2 x 60 measurement results Infl ation: Automatically by pump Air release: Automatically via a one-way valve... - Page 38 Temperatures Operating temperature: +50 ~ +104 °F, at humidity 30–85% Storage temperature: −4 ~ +140 °F, at humidity 10–95% Cuff size: 5.3” ~ 7.68” Specifi cations subject to change without notice.
-
Page 39: Fcc Statement
FCC Statement NOTE: POTENTIAL FOR RADIO/TELEVISION INTERFERENCE (for U.S.A. only) This product has been tested and found to comply with the limits for a Class B digital device, pursuant to Part 15 of the FCC rules. These limits are designed to provide reasonable protection against harmful interference in a residential installation. - Page 40 circuit different from that to which the receiver is connected. • Consult the dealer or an experienced radio/TV technician for help. You may also fi nd helpful the following booklet, prepared by the FCC: “How to Identify and Resolve Radio-TV Interference Problems. ” This booklet is available from the U.S.
-
Page 41: Blood Pressure Reading Log
Blood pressure reading log User 1 Date & Pulse Wt. Notes Time... - Page 42 User 2 Date & Pulse Wt. Notes Time...
-
Page 43: Limited Warranty
Limited Warranty PLEASE READ THIS LIMITED WARRANTY CAREFULLY TO UNDERSTAND YOUR RIGHTS AND OBLIGATIONS. MEDION warrants that the Welby® Premium Wrist Blood Pressure Monitor (MD 13400, Item 1990) accompanied by this limited warranty is free from manufacturing defects in material or workmanship for a period of 36 months from the date of original purchase. - Page 44 limited warranty extends to repaired products and replacement products only through the end of the original limited warranty period. In no event shall MEDION or any of its distributors or resellers be liable for incidental, indirect or consequential damages relating to the product (including any repaired product or replacement product) or its use.
- Page 45 To obtain a RMA please contact MEDION Toll Free Customer Care at: 866-633-4660 Daily 8:00 am - 12:00 am CST except holidays Email Support (Available 24 x 7, with response in 24 hours or less)
- Page 46 Toll Free Customer Support Line (866) 633-4660 Daily 8:00 am - 12:00 am CST except holidays...
Need help?
Do you have a question about the MD 1010 and is the answer not in the manual?
Questions and answers
I have a BDH 647 monitor that will not turn on. I've tried numerous batteries so it isn't that. Any suggestions?
If the Welby MD 1010 monitor will not turn on, follow these troubleshooting steps:
1. Remove the batteries.
2. Wait about one minute.
3. Insert new 1.5 V R03/LR03/AAA alkaline batteries.
4. Ensure both batteries are replaced at the same time.
5. Do not mix old and new batteries or use different types.
6. Do not use rechargeable batteries.
This answer is automatically generated