
Related Manuals for Extraflame HP 15


Summary of Contents for Extraflame HP 15
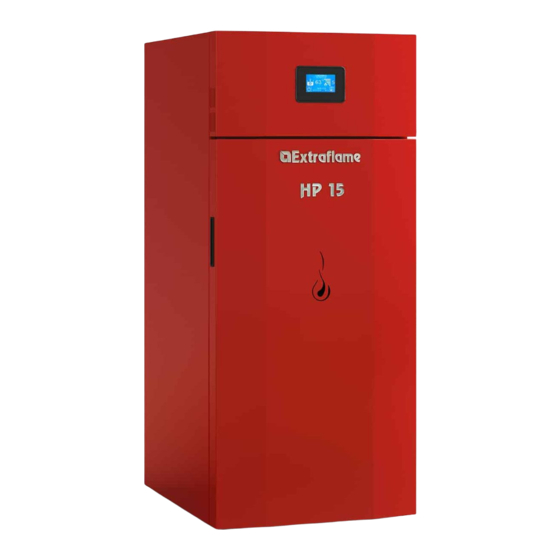
- Page 1 Pellet boilers User MANUAl hP 15 - 22 -30 eNGlish/iNGlese...
- Page 2 ENGLISH...
-
Page 3: Table Of Contents
ENGLISH ...................................... 4 SpEcIfIcatIoNS ......................................4 IdentIfIcatIon of components ........................................5 INtRoDUctIoN ....................................... 6 REcommENDED DIStaNcES foR tHE boILER compaRtmENt ........................ 7 WaRNINGS ........................................8 SafEty ..........................................8 RoUtINE maINtENaNcE ....................................8 HyDRaULIc SyStEm ......................................9 InstallatIon and safety devIces ....................................... 9 aNtI-coNDENSatIoN DEVIcE (maNDatoRy) ............................ -
Page 4: English
SPecificationS featureS HP 15 HP 22 HP 30 Weight Height 1304 1304 1408 Width Depth Exhaust tube diameter Air intake tube diameter Max global thermal power 16.9 33.9 Rated output thermal power (made with water) 15.2 22.5 Min global thermal power... -
Page 5: Identification Of Components
Display Pellet tank cover Door Power socket for electric cable Safety thermostat (manual reset) 100°C Safety thermostat (manual reset) 85°C Combustion flue pipe Air intake tube for combustion Main power switch Serial port HP30 HP 15 - 22 ENGLISH... -
Page 6: Introduction
introduction The boilers produced in our factory are built with attention to the individual components so as to protect both the user and the installer from any accidents. It is therefore recommended that after any intervention on the product, the authorised staff pay particular attention to the electric connections, especially the stripped parts of the wires. -
Page 7: Recommended Distances For The Boiler Compartment
Š Do not leave the packaging elements within reach of children or unassisted disabled persons. Š The hearth door must always be closed during normal functioning of the product. Š Avoid direct contact with parts of the appliance that tend to heat up during functioning. Š... -
Page 8: Warnings
We thank you for having chosen our company; our product is a great heating solution developed from the most advanced technology with top quality machining and modern design, aimed at making you enjoy the fantastic sensation that the heat of a flame gives, in complete safety. Warnings This instructions manual is an integral part of the product: make sure that it always accompanies the appliance, even if transferred to another owner or user, or if transferred to another place. -
Page 9: Hydraulic System
HYDRAULIC SYSTEM Certain concepts referring to the Italian Standard UNI 10412-2 (2009) are described in this chapter. As previously described, when installing, all national, regional, provincial and council Standards in force provided by the country in which the appliance has been installed must be complied with. During installation of the generator it is MANDATORY to adjust the system with a manometer in order to display the water pressure. -
Page 10: Positioning
positioning For correct product functioning, it is recommended to position it so that it is perfectly level, using a spirit level. REARMs The figures below illustrate the positions of the tank (85°C) and H2O (100°C) rearms. Contact the qualified technician if one of the rearms should be triggered, so as to verify the cause. -
Page 11: Installation
InstallatIon general The flue gas exhaust and hydraulic connections must be carried out by qualified personnel who must issue installation conformity documentation compliant with national standards. the installer must provide the owner or person acting for him, according to the legislation in force, with the declaration of conformity, supplied with: 1) the use and maintenance manual of the appliance and of the system components (such as for example, the smoke ducts, chimney, etc.);... - Page 12 In the presence of type B gas appliances with intermittent operation not intended for heating, they must have their own aeration and/or ventilation opening. The air inlets must meet the following requirements: Š they must be protected with grids, metal mesh, etc., but without reducing the net useful section; Š...
-
Page 13: Pellets And Feeding
Pellets and feeding Pellets are made by applying high pressure to sawdust, or wood waste products (not containing paint) from sawmills, carpentry and other activities related to processing and working with wood. Given that it does not use any glue to hold it together this type of fuel is completely environmentally friendly. In fact the compactness of the pellets over time is guaranteed by a natural substance found in the wood itself: wood coal. -
Page 14: Touch Screen Display
TOUCH SCREEN DISPLAY The boiler is equipped with a modern touch-screen display that allows the adjustment of the individual device functions in an easy and intuitive way to the user. All adjustments and settings depicted in the screens can be performed directly via the integrated touch-screen display. Tapping the buttons (icons) on the display surface the different actions are activated. -
Page 15: Control Panel And Icons
CONTROL PANEL AND ICONS icon meaning • Indicates the presence of an alarm. The machine will turn off. • This indicates the system pressure detected by the machine. • It indicates the pump operation: Off = pump OFF; ON = pump on Flashing ling = the safety device is active (H2O temperature >... -
Page 16: Key Functions
kEY fUNCTIONS funcTion funcTion press and hold for more than 2 seconds to Allows increases/select (+) or decrease (-) turn on or turn off the boiler. a mode (seT) press and hold for more than 2 seconds to Allows you to scroll through the menus exit the menu. -
Page 17: Commissioning Settings
COMMISSIONINg SETTINgS Once the power cable at the back of the generator has been connected, move the switch, located on the back, to position (I). The switch at the back of the generator powers the generator board. The generator stays off and the panel shows an initial screen with the word off. MAINS fREqUENCY 50/ 60Hz in the event the generator is installed in a country with 60hz frequency, the generator will display "wrong mains frequency". -
Page 18: Operation And Logics
OPERATION AND LOgICS IgNITION Once you have checked the "basic instructions" listed above, press the for more than two seconds to turn on the generator. 15 minutes are available for the ignition phase. After ignition and having reached the control temperature, the generator stops the ignition phase and passes to sTArTing. -
Page 19: Stby - Additional Room Thermostat
STBY - ADDITIONAL ROOM THERMOSTAT PLEASE NOTE : Installation must be performed by an authorised technician is it possible to thermostat a room adjacent to the room where it was placed the generator just connecting a room thermostat according to the procedure described in the next step (it is advisable to position the optional mechanical thermostat at a height of 1.50 m from the floor) . -
Page 20: Set Power
SET POWER The following menu allows to set the power. Minimum power 1, maximum power 5. SET TEMPERATURE The following menu allows the boiler temperature to be set. Possible setting are: 65 - 80°C. USER REgULATION The user reguLATion allows you to: �... -
Page 21: Enable Chrono
• ENABLE CHRONO it allows to enable/disable the chrono and the various time slots of the boiler. • PELLET REgULATION The following menu allows to adjust the percentage of pellet feed. if the generator has operating problems due to the quantity of pellets, you can adjust the pellet load directly from the control panel. -
Page 22: Chrono
• CHRONO The chrono allows to program 4 time spans within a day to use every day of the week. The switch-on and switch-off time can be set in every time slot, along with the days of use of the programmed time slot and the desired water temperature (65 - 80°C). -
Page 23: Reset
� BUzzER when set to "off" the acoustic signal is disabled. � BRIgHTNESS It allows you to adjust the backlight of the display. The possible settings range from off - 10 to 30. Activating OFF, the back light of the display will go off after a preset delay. -
Page 24: Cleaning And Maintenance
Cleaning and MaintenanCe always follow the instruCtions in MaxiMuM safety Conditions! Š Make sue the power cable is unplugged since the generator could be programmed to start. Š That the generator is cold in its entirety. Š The ashes are completely cold. Š... - Page 25 daily - sCrapers: hp15-22: The heat exchangers must only be cleaned when the generator is cold! Cleaning the heat exchangers allows to ensure constant heat output over time. This type of maintenance must be performed at least once a day. To do this, just use the relevant scrapers positioned in the upper part of the generator, making the upward movements and vice versa several times.
-
Page 26: Routine Maintenance Performed By Qualified Technicians
routine MaintenanCe perforMed by Qualified teChniCians routine maintenance must be performed at least once a year. Since the generator uses pellets as its solid fuel, it requires an annual routine maintenance operation which must be performed by a qualified technician, using original spare parts only. Failure to comply with the above can compromise the safety of the appliance and void the the guarantee conditions. - Page 27 routine MaintenanCe THE PICTURES ARE PURELY INDICATIVE. HP30 HP15-22 Fumes motor (disassembly and cleaning and flue duct and "T"), new silicone in the dedicated points Inspection of gaskets, ash drawer and door (replace and apply silicone where envisaged) Combustion chamber, door "air" slots and heat exchanger (full cleaning) including ignition-plug pipe cleaning Tank (complete emptying and cleaning) Air intake pipe check and cleaning of the flow sensor where necessary ENGLISH...
-
Page 28: Displays
Displays Display Reason Stove off sTaRT The start-up phase is in progress pelleT feeDinG Continuous pellet feeding is in progress during the ignition phase iGniTion The ignition phase is in progress sTaRT-up The start-up phase is in progress WoRk The normal work phase is in progress MoDulaTion The stove is working at minimum BuRn poT... -
Page 29: Alarms
alaRMs Display eXplanaTion soluTion On: indicates the presence of an alarm Flashing: indicates the deactivation of the depression sensor. Indicates the presence of an alarm. The alarm can be reset by pressing key 1 for 3 seconds only if the fumes motor has stopped and if 15 minutes have elapsed from when the alarm was displayed. -
Page 30: Guarantee Terms
Extraflame S.p.A. cannot be held liable for injury or damage which may - either directly or indirectly - be caused to persons, animals and property ensuing from failure to observe all the instructions provided in the relevant instruction manual and the warnings regarding installation, use and maintenance of the product, that can also be downloaded on the website. - Page 31 After the 24 months of the guarantee have elapsed any repair intervention cost will be completely borne by the consumer. In the case of disputes the only competent court is that of the Extraflame S.p.A. registered office - (Vicenza-Italy) AddITIONAL wARNINGs Š...
- Page 32 +39.0445.865911 - +39.0445.865912 - info@extraflame.it - www.lanordica-extraflame.com The Manufacturer reserves the right to vary the features and data shown in this booklet at any time and without prior notice, in order to improve its products. This manual cannot be considered as a contract for third parties.
Need help?
Do you have a question about the HP 15 and is the answer not in the manual?
Questions and answers