
Subscribe to Our Youtube Channel
Related Manuals for Winnebago TRAVATO


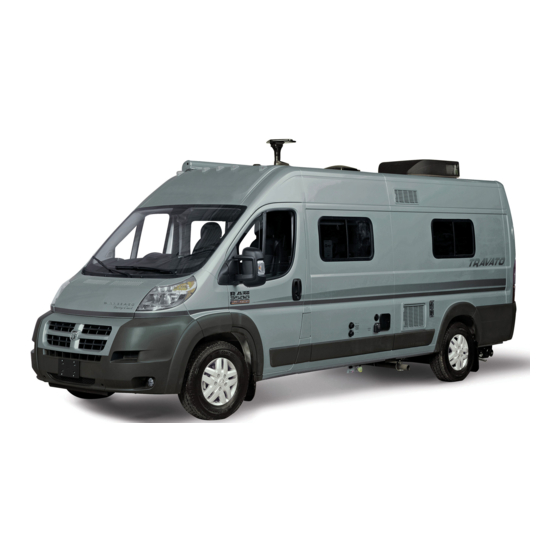
Summary of Contents for Winnebago TRAVATO
- Page 1 Rev. 1407151026 Part No. 161500-14-035 Copyright 2013 Winnebago Industries, Inc. All rights reserved.
-
Page 3: Table Of Contents
TABLE OF CONTENTS 1 – INTRODUCTION About this Manual ..........................1-1 Safety Messages Used in this Manual ....................1-1 Pre-Delivery Inspection ........................1-2 Front Axle Tire Alignment ....................... 1-2 Service and Assistance ........................1-2 Reporting Safety Defects ........................1-2 Occupant and Cargo Carrying Capacity Labels ................1-3 Vehicle Certification Label ....................... - Page 4 Table Of Contents Battery Boost Switch ........................3-5 Engine Cooling System ........................3-5 Lights ..............................3-5 Tires ..............................3-6 Suspension Alignment and Tire Balance ..................3-6 4 – APPLIANCES AND SYSTEMS Refrigerator ............................4-1 Refrigerator Service Access Compartment ..................4-2 Range Top ............................
- Page 5 Table Of Contents Shower Hose Vacuum Breaker ......................7-6 Shower .............................. 7-6 Exterior Shower/Wash Station ......................7-7 Toilet ..............................7-8 Waste Water System - Waste Pump ....................7-8 Waterline and Tank Drain Valves ....................7-10 Water Heater Bypass Valve ......................7-11 Winterizing Procedure ........................
- Page 6 Table Of Contents Chassis Service and Maintenance ....................10-9 Coach Maintenance Chart ......................10-10 11 – MISCELLANEOUS Loading the Vehicle ........................11-1 Weighing Your Loaded Vehicle ..................... 11-1 Car or Trailer Towing ........................11-3 Trailer Wiring Connector ........................ 11-4 Towing Guidelines .......................... 11-4 Windows ............................
-
Page 7: Introduction
The instructions included in this manual are intended as a guide, and in no way DANGER indicates a hazardous situation extend the responsibilities of Winnebago which, if not avoided, will result in death or Industries beyond the standard written serious personal injury. -
Page 8: Pre-Delivery Inspection
National Highway Traffic Safety Administration delivery inspection of the chassis and all (NHTSA) in addition to notifying Winnebago motorhome components. Industries, Inc. As a part of the pre-delivery inspection... -
Page 9: Occupant And Cargo Carrying Capacity Labels
SECTION 1 – INTRODUCTION or go to their website at http://www.safercar.gov or write to: Administrator, NHTSA 1200 New Jersey Avenue S.E. Washington, D.C. 20590 You can also obtain other information about motor vehicle safety from the NHTSA website at http://www.safercar.gov OCCUPANT AND CARGO CARRYING CAPACITY LABELS The following labels are affixed on the... -
Page 10: Vehicle Certification Label
These pressure levels must be maintained to assure proper handling, safety, 2. Chassis manufacture date. and fuel economy. 3. Month and year of manufacture at Winnebago ® 9. Rear Axle Wheel Configuration: Single or Industries Dual as it relates to the inflation. -
Page 11: Specifications And Capacities
24 gal. Notes: All information is based upon the most recent data available. Visit the Winnebago Industries, Inc. web page – www.winnebagoind.com – for the most current product information. The height of each model is measured to the top of the tallest standard feature and is based on the curb weight of a typically equipped unit. -
Page 12: Owner And Vehicle Information
Motorhome Serial Number ___________________________________________________________ Chassis Vehicle Identification No. (VIN) ________________________________________________ Vehicle Mileage at Delivery __________________________________________________________ Selling Dealer Name ________________________________________________________________ Address __________________________________________________________________________ __________________________________________________________________________ ® YOUR WINNEBAGO INDUSTRIES DEALER /SERVICE CENTER Name ____________________________________________________________________________ Address __________________________________________________________________________ __________________________________________________________________________ Contact ____________________________________________Phone ________________________ CHASSIS SERVICE CENTER... -
Page 13: Safety And Precautions
SECTION 2 – SAFETY AND PRECAUTIONS GENERAL WARNINGS DRIVING SAFETY • Only seats equipped with seat belts are to be occupied while the vehicle is moving. WA RNING • Make sure all passengers have seat belts fastened. Lap belts should fit low on the hips and upper thighs. -
Page 14: Fuel And Propane Gas
SECTION 2 – SAFETY AND PRECAUTIONS • Do not operate the cruise control on icy or • All pilot lights must be extinguished and extremely wet roads, winding roads, in heavy appliances turned off while refilling the fuel traffic, or in any other traffic situation where tank or propane gas tank. -
Page 15: Propane Gas Leaks
SECTION 2 – SAFETY AND PRECAUTIONS PROPANE GAS LEAK DETECTOR WA RNING Your coach is equipped with a Propane Gas Leak Detector, similar to the one shown below. Gas cooking appliances need fresh air for The leak detector sounds an alarm if an unsafe safe operation. -
Page 16: Carbon Monoxide Warning
® Winnebago Industries dealer. fuel. It will detect CO gas from any combustion source such as the furnace, gas range/oven, water... -
Page 17: Smoke Alarm
RV application. We when needed. When using the fire recommend obtaining a replacement from your extinguisher, aim the spray at the base of ® Winnebago Industries dealer. the fire. Further Information See the manufacturer’s information in your... -
Page 18: Electrical
Extinguisher, the replacement must be the same type and size as the one originally supplied in MAINTENANCE your coach. We recommend obtaining a replacement only from your Winnebago • Do not remove the radiator cap while engine ® Industries dealer or a reliable RV parts supplier. -
Page 19: Power Sofas And Beds
SECTION 2 – SAFETY AND PRECAUTIONS breath have been reported as a result of formaldehyde exposure. Reaction to formaldehyde exposure may vary among individuals. Elderly persons and young children, as well as anyone with a history of asthma, allergies, or lung problems may be at greater risk. Research is continuing on the possible long-term effects of exposure to formaldehyde. -
Page 20: Roadside Emergency
Just small amounts of dirt or dust problem occur. on the carpet can be enough to allow the mold If Winnebago Industries determines that mold process to begin. Keep the environment as clean is present due to conditions it determines is not a as possible. -
Page 21: Jump Starting
ENGINE OVERHEAT proper towing equipment to use. ® Winnebago Industries does not assume If you see or hear steam escaping from the responsibility for damage incurred while towing engine compartment or have any other reason to this vehicle. -
Page 23: Driving Your Motorhome
SECTION 3 – DRIVING YOUR MOTORHOME The information in this section refers only to features installed or adapted to the dash and driver compartment area by Winnebago Lumbar ® Industries . It also includes passenger seating in Control the living area of the coach. -
Page 24: Seat Belts
SECTION 3 – DRIVING YOUR MOTORHOME Armrest Adjustment 1- Insert tab into buckle The armrests may be swung upward out of the slot until it “clicks” and is way for easy exit or access to the front seats. A locked roller on the underside of the front of the armrest also lets you adjust the resting angle for personal comfort, whether the seat is upright or reclined. -
Page 25: Child Restraints
SECTION 3 – DRIVING YOUR MOTORHOME Lap/Shoulder Belts 3. Be certain that it is appropriate for the child's height, weight, and development. The See your chassis manual for instructions on instructions and/or the regulation label proper fastening, adjustment, and releasing of attached to the restraint typically provides this lap/shoulder belts. -
Page 26: Keys
SECTION 3 – DRIVING YOUR MOTORHOME Slide locking tab to release tension on the shoulder belt 3. Tether Shoulder Belt 5. To remove the child seat, press the “red” release button on the buckle and slide the tongue out of buckle. Further Information See the child seat manufacturer’s specific instructions for proper attachment and... -
Page 27: Hazard Warning Flashers
SECTION 3 – DRIVING YOUR MOTORHOME Further Information NOTE: The House/Coach Battery Disconnect switch near the entrance door must be Refer to the chassis manual provided in your ON and house batteries must be InfoCase for complete operating instructions on sufficiently charged for this feature to using the Remote Keyless Entry system and for work. -
Page 28: Tires
SECTION 3 – DRIVING YOUR MOTORHOME should be checked and replaced, when necessary, Have your dealer inspect your vehicle’s with a new bulb of the same size. A failure of suspension and steering components periodically more than one light, such as both taillights not for misalignment or wear. -
Page 29: Appliances And Systems
SECTION 4 – APPLIANCES AND SYSTEMS The appliances installed in your motorhome are manufactured by reputable RV appliance makers and have been tested by independent laboratories to meet all applicable standards and codes set for RV appliances. See Section 2 - Safety and Precautions of this manual for any safety and precautions you need to take regarding the operation of your appliances. -
Page 30: Refrigerator Service Access Compartment
SECTION 4 – APPLIANCES AND SYSTEMS Refrigerator Operating Controls (Located inside refrigerator door) • 1 = Power On/Energy Selector Switch Refrigerator Access Compartment • 2 = Temperature Controller (Latch Open) • 3 = Battery Igniter (Gas) • 4 = Flame Indicator (Galvanometer) Further Information Refer to the manufacturer’s user guide provided in your InfoCase for complete operating... -
Page 31: Avoiding Asphyxiation
SECTION 4 – APPLIANCES AND SYSTEMS WA RNING Gas cooking appliances need fresh air for safe operation. Before operating: Open vents or windows slightly or turn on exhaust fan prior to using cooking appliance. Gas flames consume oxygen, -Typical View which should be replaced to ensure proper combustion. -
Page 32: Microwave Oven
SECTION 4 – APPLIANCES AND SYSTEMS Further Information Refer to the appliance manufacturer’s operation manual provided in your InfoCase for complete features and operating instructions, as well as safety precautions and maintenance information. MICROWAVE OVEN -If Equipped Refer to the manufacturer’s user guide located inside the appliance for complete operating The approximate fluid levels are measured by instructions. -
Page 33: Water Heater - Electric
SECTION 4 – APPLIANCES AND SYSTEMS The propane level is registered by a sending NOTE: Some models may be equipped with a unit on the tank. The gauge mounted on the side Water Pump switch in the water service of the tank will give a more accurate indication of center on the outside of the coach or actual tank level if needed. -
Page 34: Pressure-Temperature Relief Valve
SECTION 4 – APPLIANCES AND SYSTEMS 3. Pull the handle of the P-T valve straight out PRESSURE-TEMPERATURE and allow water to flow until it stops. RELIEF VALVE On occasion, water may be seen seeping from the water heater pressure temperature relief valve. -
Page 35: Roof Air Conditioning - With Heat Strip
SECTION 4 – APPLIANCES AND SYSTEMS nuisance smoke alarm. Thermostat/Switch We do not recommend removing the • Move from OFF to desired smoke alarm battery. temperature for furnace operation To Shut Down • Move Thermostat switch to OFF position. • Turn OFF Propane Gas Tank switch if coach will be stored for a period of time. -
Page 36: Roof Air Conditioning System
SECTION 4 – APPLIANCES AND SYSTEMS entering the air conditioner rises a few degrees temperature of the air entering the air above this setting. The internal heat strip will conditioning unit drops below the selected continue to cycle on and off until the selector setting, the thermostat will turn the switch is turned to another operation mode. -
Page 37: Propane Gas
SECTION 5 – PROPANE GAS PROPANE GAS SUPPLY The propane gas system supplies fuel for the WA RNING gas range/oven, furnace, and refrigerator (while in gas mode). When used and handled properly, Do not alter or remove propane tank this system is safe and economical and provides valves or gauge. - Page 38 SECTION 5 – PROPANE GAS NOTE: The propane tank is equipped with an automatic 80% stop-fill device. WA RNING Do not fill propane container(s) to more than 80 percent of capacity. A properly filled container contains approximately 80 percent of its volume as liquid propane. Overfilling the propane container(s) can result in uncontrolled propane flow, which could lead to a fire or explosion and result...
-
Page 39: Propane Accessory Connection
SECTION 5 – PROPANE GAS Selecting Propane Fuel Types This connection is on the low pressure side of the propane gas pressure regulator. Portable We recommend using straight propane in your appliances which have an additional or built-in propane tank. Propane gas is commonly available regulator may not operate correctly. -
Page 40: Safe Use Of The Propane Gas System
SECTION 5 – PROPANE GAS • Have the entire propane gas system inspected for possible leaks and missing or damaged CAUTION parts at each tank filling. Also inspect before and after each trip, and any time trouble is suspected. Turn valve off when not in use. •... -
Page 41: Propane Gas Pressure Regulator
SECTION 5 – PROPANE GAS • Never use an open flame to test for propane gas leaks. Replace all protective covers and DANGER caps on propane system after filling. Make sure valve is closed and door latched securely. • Portable fuel-burning equipment, including IF YOU SMELL PROPANE wood and charcoal grills and stoves, shall not 1. -
Page 42: Propane Vaporization In Cold Weather
SECTION 5 – PROPANE GAS If regulator freeze-up should occur, you may attempt to thaw the regulator using a light bulb. DO NOT USE AN OPEN FLAME OR HEAT LAMP. If moisture begins to cause problems, have your propane gas dealer inject a small amount of dry methyl alcohol in your tank (approximately one ounce to 20 pounds or one pint to 100 gallons) to help guard against regulator freeze-... -
Page 43: Electrical
SECTION 6 – ELECTRICAL Your coach is equipped with an electrical the power converter automatically changes a system consisting of two separate voltages: portion of the 120-volt current to 12-volt DC current. All equipment in the motorhome that is • 12-volt DC system (battery current);... -
Page 44: Power Center
SECTION 6 – ELECTRICAL WA RNING Service inlet access must be closed when utility connections are not in use. Park Fuses or Breakers 30 Amp Receptacle Most campgrounds are equipped with a fuse or circuit breaker at the receptacle (which we recommend shutting off before engaging or WA RNING disengaging the power cord.) This protects the... -
Page 45: Circuit Breakers - House 120-Volt Ac
SECTION 6 – ELECTRICAL condition of the battery. If it is below “full 12-Volt 120-Volt charge”, the Charging Section will start charging House Fuses Circuit Breakers the batteries. If the house batteries have been extremely discharged, they will accept charge at a relatively high amperage rate. -
Page 46: Electrical Outlets - House 120-Volt Ac
SECTION 6 – ELECTRICAL “Off” and back to “On”. If the breaker is If the GFCI keeps tripping, have the electrical continually tripped and no overload is evident, system checked and repaired, if necessary, before have the system checked for a short in the wiring using again. -
Page 47: Electrical System - House 12-Volt Dc
SECTION 6 – ELECTRICAL Automatic Power Transfer Switch Operation Warnings and Cautions Whenever the generator is needed, an automatic power transfer system automatically WA RNING switches the household electrical system to the generator 10 seconds after the generator is started. The 10-second delay allows the generator The exhaust of all internal combustion to start easily without the burden of electrical engines contains carbon monoxide (CO). -
Page 48: House/Coach Battery Disconnect Switch
SECTION 6 – ELECTRICAL Converter Always leave this switch ON while using the coach. See “Power Center.” NOTE: Some electronic displays and memory Chassis Battery functions may need to be reset after The chassis battery is used to operate the power has been reconnected. -
Page 49: Battery Care
SECTION 6 – ELECTRICAL reservoir, not an electrical source. As soon as energy is removed from the battery, it should be replaced by the engine alternator or the coach converter system. If a battery sits unused for 30 days or more, especially during warm weather, it can develop a deposit of sulfate crystals on the metal plates inside the battery. - Page 50 SECTION 6 – ELECTRICAL WA RNING WA RNING California Proposition 65 Warning: Before removing any battery cables or Battery posts, terminals, and related battery, make sure all 12-volt equipment accessories contain lead and lead in the motorhome is off and the power compounds, chemicals known to the cord has been disconnected.
-
Page 51: Circuit Breakers And Fuses - House 12-Volt Dc
SECTION 6 – ELECTRICAL Chassis Battery If your coach is going to be unoccupied for ® two weeks or more, Winnebago Industries recommends disconnecting the chassis battery in your coach to avoid battery discharge. CIRCUIT BREAKERS AND Functional Non-Functional FUSES – HOUSE 12-VOLT DC... -
Page 53: Plumbing
SECTION 7 – PLUMBING FRESH WATER SYSTEM The Fresh Water System provides water to the galley sink, shower, bathroom lavatory, toilet, and water heater. Water may be supplied by either of two sources: • A fresh water tank and water pump located within the motorhome, or •... -
Page 54: Water Pump
SECTION 7 – PLUMBING Using City Water Always fill the fresh water tank at an approved potable water filling facility or a known purified drinking water source. The gravity tank fill is located beneath the sliding cushion on the right dinette seat. City Fill Inlet (Located on the left sidewall) When connected to an outside source of water,... -
Page 55: Water Pump Switch
SECTION 7 – PLUMBING The pump is self-priming and will run briefly NOTE: You must also empty the strainer when to build up line pressure when the Water Pump winterizing your coach to avoid water switch is first turned on. See “Initial Waterline freezing and cracking the filter bowl. -
Page 56: Cold Water Filter
SECTION 7 – PLUMBING Replacing the Cold Water Filter Cartridge You should replace the filter cartridge every season and when water flow from the faucet is too slow for convenience. The cartridge must be replaced at least every 12 months. •... -
Page 57: Disinfecting Your Fresh Water System
SECTION 7 – PLUMBING of tank capacity. This procedure will result in a residual chlorine concentration of 50 ppm in the water system. If a 100 ppm concentration is desired as discussed in Step 4, use 1/2 cup of household bleach with 1 gallon of water to prepare the chlorine solution. -
Page 58: Shower Hose Vacuum Breaker
SECTION 7 – PLUMBING Shower Drain Strainer SHOWER HOSE VACUUM The drain sump area in the shower has a BREAKER strainer to keep large debris from entering the After using the shower, you may notice water lines and damaging the pump. The strainer dripping from the shower faucet assembly. -
Page 59: Exterior Shower/Wash Station
SECTION 7 – PLUMBING Shower Valve Pressure Bleed-Off After using the shower, you may notice water dripping from either the shower head or the faucet assembly. The dripping results when vacuum in the shower hose (after closing the shower valve) slowly dissipates and allows water remaining in the hose to drain down. -
Page 60: Toilet
SECTION 7 – PLUMBING appropriate waste water disposal site. This means TOILET you can use the toilet, sinks, and shower even in areas where utility hookups are not available. -If Equipped The black water holding tank contains the The toilet in your motorhome is very similar sewage from the toilet and may include bathroom to the household type, except that it is designed to lavatory on some models. -
Page 61: Dumping Holding Tanks
SECTION 7 – PLUMBING Dumping Holding Tanks • 1st - Pull Black Waste Tank Drain 1. Remove sewage drain hose from storage valve to drain black water (sewage tank, then close) compartment (located on left sidewall). Sewage Drain Hose • 2nd - Pull Gray Waste Tank Drain valve to (Located on left sidewall) drain gray water (sink/shower, then close) -Typical View... -
Page 62: Waterline And Tank Drain Valves
SECTION 7 – PLUMBING miles to dislodge the solids. A few starts and stops will aid in the process. Then reconnect the hose and drain in the normal manner. NOTE: Always keep sewage drain outlet capped while sewage connection is not in use. Holding Tank Level Indicators See “Systems Monitor Panel”... -
Page 63: Water Heater Bypass Valve
SECTION 7 – PLUMBING Waterline Drain Valves -Typical installation shown (See the “Water System Drain Valve Locations” chart at the end of this section for locations on your model) Normal By-Pass Flow Mode CAUTION Leave bypass valve handle in NORMAL FLOW position if draining water and blowing out waterlines. - Page 64 SECTION 7 – PLUMBING Method 1 – Blow Out Procedure • Install the diverter plug into the filter socket. Insert plug up into the filter socket as far as (Drain and purge waterlines using possible and twist clockwise (to the right) compressed air) one-quarter turn until it stops.
- Page 65 A “blow-out” plug can be purchased at any closed. ® Do not add automotive antifreeze or Winnebago Industries dealer. caustic chemicals such as bleach or laundry detergents into the toilet bowl or holding tanks. Although these products...
- Page 66 SECTION 7 – PLUMBING Remove Water Filters (if equipped) Your drainage and fresh water systems are now winterized. 1. Remove and discard the filter cartridge from See instructions for removal from storage in the cold water filter assembly below the galley Section 11 - Maintenance and Storage.
- Page 67 SECTION 7 – PLUMBING Winterization Valve 2 (Located near the sliding entrance door) Water Heater Bypass Valve -Typical installation shown NOTE: Ensure that all drain valves are (See “Water System Drain Valve Locations” chart CLOSED before pumping RV antifreeze at the end of this section for location on your model) into the water system.
- Page 68 SECTION 7 – PLUMBING Drain Water Heater Fill Drainage System P-Traps 11. Turn OFF the Water Heater power switch 15. Pour about one cup of RV antifreeze down before draining the water heater tank to avoid each drain for the galley sink, lavatory sink, damage to the heating element.
-
Page 69: Water System Drain Valve Locations
SECTION 7 – PLUMBING WATER SYSTEM DRAIN VALVE LOCATIONS Model System Drain Valve Locations Waterline Drain • Two (2) drain valves on left side of coach mounted on frame. Valves • Open exterior shower faucet and lay shower head on ground. Place the tip of your finger inside the city water connection and gently press the backflow valve (small “button”... -
Page 71: Entertainment
SECTION 8 – ENTERTAINMENT To Swivel TV TV – 12V LED Grasp the inboard side of TV and disengage -If Equipped from the wall mounting bracket. Extend the TV The LED flat panel TV is powered by 12-volt and angle to desired position. DC current. -
Page 72: Dvd Player With Deluxe Sound
SECTION 8 – ENTERTAINMENT • The DVD may load directly to the DVD PLAYER WITH DELUXE main title/menu screen or it may begin SOUND to play previews. You may be able to skip previews if desired by pressing the NEXT button on the DVD player remote until you see the main menu screen. -
Page 73: Exterior Speakers
SECTION 8 – ENTERTAINMENT EXTERIOR SPEAKERS TV ANTENNA - DIGITAL ® -If Equipped (Jack Digital HDTV Over-the-Air Antenna) Your coach may be equipped with two Your coach is featured with a digital antenna, exterior speakers for outdoor listening pleasure which provides crystal clear digital HD reception (located below the patio awning) to provide of over-the-air channels in addition to superior outdoor usage of the interior stereo radio. -
Page 74: Tv Signal Amplifier
SECTION 8 – ENTERTAINMENT TV SIGNAL AMPLIFIER • Signal Meter • Attenuator Dial Power Switch The TV Signal Amplifier is built into the antenna and can be turned on or off with a power switch located on a switchplate near the entertainment center cabinet. -
Page 75: Exterior Cable Tv - 12V Connection
SECTION 8 – ENTERTAINMENT EXTERIOR CABLE TV - 12V CONNECTION –If Equipped The exterior cable TV/12-volt connection receptacle on your coach provides connection for use of a TV and/or 12-volt device for your outdoor entertainment. Exterior Cable TV / 12-Volt Connection (Located on passenger sidewall) -Typical View AUDIO/VIDEO SYSTEM... -
Page 77: Furniture And Softgoods
SECTION 9 – FURNITURE AND SOFTGOODS SLEEPING FACILITIES WA RNING Sleeping facilities are not intended for use while vehicle is in motion. For safety, passengers must use safety belted seating positions while vehicle is in motion. DINETTE/BED CONVERSION Reverse steps to store table. (Typical View –... - Page 78 SECTION 9 – FURNITURE AND SOFTGOODS Table Leg Release Button 4. Remove dinette table from the wall support by 7. Pull to extend side facing dinette seat cushion. lifting and pivoting the end of the table. 8. Cover bed area with side facing back cushion. 5.
-
Page 79: Roller Shades
No matter which species you choose for your new Winnebago Industries motorhome cabinetry, please keep in mind that no two pieces of wood are exactly the same. -
Page 81: Maintenance And Storage
• Have the sealant replaced if you notice any of vehicle can cause damaging rust or corrosion on the above. Your local Winnebago Industries steel or aluminum parts and can add needless dealer has the correct and necessary parts and weight to the vehicle. -
Page 82: Exterior Finish
SECTION 10 – MAINTENANCE AND STORAGE undercarriage regularly with water, especially • Commercial vehicle wash facilities should be horizontal surfaces, cavities, and other areas avoided. Revolving brushes, “soaking” where mud and other deposits may collect. solutions, and high-pressure water spray may damage sealants, decals, and appliques. -
Page 83: Exterior Graphic Care
SECTION 10 – MAINTENANCE AND STORAGE NOTE: If you use a polish or a cleaning compound that does not contain a wax NOTICE preservative, we recommend reapplying a coat of hard wax after cleaning or polishing the finish. Do not use citrus-based cleaners on polycarbonate finishes. -
Page 84: Exterior Lights
EXTERIOR LIGHTS motorhome is parked for an extended ® period of time. Most Winnebago Industries vehicles have polycarbonate lenses on exterior lamps, which are very sensitive to a variety of chemical WA RNING solvents and cleaners. -
Page 85: Cabinetry - Cleaning
SECTION 10 – MAINTENANCE AND STORAGE Vinyl simulated wood panels may be cleaned with a mild, water-based cleaner and a soft cloth. UltraLeather Cleaning Chart Do not use solvents on vinyl wood panels. Detergent/ Cleaner/ Type of Stain Water Degreaser NOTE: Many cabinetry and furniture items ... -
Page 86: Range And Refrigerator
SECTION 10 – MAINTENANCE AND STORAGE Maintenance Tips • A high iron content in the water (hard water) may result in a brown or rust-colored stained • Install protection (such as pads or casters) on appearance. If noticed, dry towel sink after furniture with legs or sharp edges. -
Page 87: Bathroom
SECTION 10 – MAINTENANCE AND STORAGE Varnish, oil paint, and solvents: VEHICLE STORAGE – • Blot up as soon as possible. Do not rub, as this PREPARATION will only spread material further across the surface. Carefully treat with a mild cleanser. Properly preparing your vehicle for storage When dry, carefully peel the stain off. -
Page 88: Vehicle Storage - Removal
SECTION 10 – MAINTENANCE AND STORAGE 9. Inspect all seams and seals around doors, 9. After flushing fresh waterlines, install a new windows, vents, and any other joints. Replace water filter cartridge on the galley sink water or repair any that are damaged. Sealing filter and/or full-coach water filteration materials and compounds can be purchased system (if equipped). -
Page 89: Chassis Service And Maintenance
SECTION 10 – MAINTENANCE AND STORAGE CHASSIS SERVICE AND MAINTENANCE Consult the appropriate sections in your chassis manual for specific information regarding operating safety, service recommendations, and maintenance schedules for the chassis section of your vehicle. 10-9... -
Page 90: Coach Maintenance Chart
SECTION 10 – MAINTENANCE AND STORAGE COACH MAINTENANCE CHART These recommendations apply for normal recreational use. Heavy duty or full-time use may require more frequent maintenance intervals. Always use specified sections or manufacturer’s guide for further information and instructions. Propane Gas System ... - Page 91 SECTION 10 – MAINTENANCE AND STORAGE COACH MAINTENANCE CHART These recommendations apply for normal recreational use. Heavy duty or full-time use may require more frequent maintenance intervals. Always use specified sections or manufacturer’s guide for further information and instructions. Safety Equipment Check operation of the following items: ...
- Page 92 SECTION 10 – MAINTENANCE AND STORAGE COACH MAINTENANCE CHART These recommendations apply for normal recreational use. Heavy duty or full-time use may require more frequent maintenance intervals. Always use specified sections or manufacturer’s guide for further information and instructions. Sealants ...
-
Page 93: Miscellaneous
SECTION 11 – MISCELLANEOUS NOTE: We recommend that you dump all LOADING THE VEHICLE holding tanks before traveling to avoid carrying unnecessary weight. NOTE: Your motorhome’s load capacity is designated by weight, not by volume, so you cannot necessarily use all available space when loading your motorhome. -
Page 94: Corner Weighing
SECTION 11 – MISCELLANEOUS Corner Weighing (Side-to-Side) You will first drive only your front wheels onto the scale pad, then drive ahead so that the The most accurate method of weighing a whole vehicle is on the scale, then finally pull off motorhome is to weigh each “corner”... -
Page 95: Car Or Trailer Towing
SECTION 11 – MISCELLANEOUS axle is 12,000 lbs., then the load on each rear dual Because of individual vehicle use and loading set (left rear duals or right rear duals) should not habits, we recommend weighing the vehicle exceed 6,000 lbs. while fully loaded to avoid exceeding any of the listed Gross Weight Ratings. -
Page 96: Trailer Wiring Connector
SECTION 11 – MISCELLANEOUS Check state regulations on trailer weight and TRAILER WIRING trailer brake requirements to be sure you select CONNECTOR the right equipment before towing. Before descending a steep or long grade when Your coach is pre-wired for trailer or car towing a trailer, reduce speed and shift into a towing lights with a 4-pin socket. -
Page 97: Windows
NOTE: Some Winnebago Industries models equipped with a Class 3 hitch may have a label limiting vertical tongue load to 350 lbs. All Winnebago Industries models equipped with a Class IV hitch have a label limiting vertical tongue load to 500 11-5... - Page 98 SECTION 11 – MISCELLANEOUS Further Information Fan Speed Manual Dome See the power ventilator manufacturer’s Fuse Selector Crank Knob operating instructions supplied in your InfoCase for further instructions, care, and cleaning information. POWER ROOF VENTILATOR (Bath) Fan Power Switch Power Roof Ventilator To Operate Ceiling Ventilator 1.
-
Page 99: Entry Step - Electric
SECTION 11 – MISCELLANEOUS Automatic Retraction Feature ENTRY STEP – ELECTRIC The step is equipped with an automatic –If Equipped retraction feature that stores the step automatically if the Ignition Switch key is turned to the On or Run positions. This feature is intended to prevent injury or damage by an extended step while the vehicle is moving. -
Page 100: Effects Of Prolonged Occupancy
SECTION 11 – MISCELLANEOUS A Second Power Awning switch is located Note: The ground support legs do offer near the right side of the passenger seat. increased stability but do not compensate for harsh weather conditions such as wind and/or heavy rain. During inclement weather, retract and secure the awning in the travel position. - Page 101 SECTION 11 – MISCELLANEOUS Ventilate with outside air Partially open one or more windows and a roof vent to circulate outside air through the coach. In cold weather, this ventilation may increase use of the furnace, but it will greatly reduce the condensation inside the coach.
- Page 103 INDEX About this Manual ..........................1-1 Air Conditioner Filter ..........................4-8 Air Conditioner/Heater – Automotive (Dash) ..................3-5 Audio/Video System Connection ......................8-5 Audio-Video System Basic Operation ....................8-1 Awning – Power ........................... 11-7 Bathroom .............................. 10-7 Battery Access ............................6-6 Battery Boost Switch ..........................
- Page 104 Index Exterior Speakers ............................ 8-3 Fire Extinguisher ............................. 2-5 Formaldehyde Information ........................2-7 Fresh Water System ..........................7-1 Front Axle Tire Alignment ........................1-2 Fuel and Propane Gas ..........................2-2 Galley Sink ............................10-5 General Warnings ........................... 2-1 Ground Fault Circuit Interrupter ......................6-4 Hazard Warning Flashers ........................
- Page 105 Index Roadside Emergency ..........................2-8 Roller Shades ............................9-3 Roof ..............................10-1 Roof Air Conditioning - with Heat Strip ....................4-7 Roof Air Conditioning System ....................... 4-8 Safe Use of the Propane Gas System ...................... 5-4 Safety Messages Used in this Manual ....................1-1 Sealants –...
Need help?
Do you have a question about the TRAVATO and is the answer not in the manual?
Questions and answers