Table of Contents
Advertisement
Available languages
Available languages
The following are trademarks registered by W.C. Bradley Co. in the U.S. Patent and Trademark Office: Caldera®; Charcoal2Go®; Char-Broil®; America's Legendary
Barbeque Company®; American Gourmet®; Bandera®; Brush Hawg®; CB 940®; Char-Diamonds®; Char-Broil Charcoal/Gas®; Everybody Grills®; Everybody
Outside®; FastStart®; Grill 2 Go®; Grill 2 Go® Express®; Grill Lovers®; Infrared Grilling That's All About U®; Keepers of the Flame®; New Braunfels Smoker
Company®; Patio Bistro®; Patio Caddie®; Patio Kitchen®; Pro-Sear®; RED®; Quantum®; Santa Fe®; Sear and Grill®; Sierra®; Signature Series®; Sure2Burn®;
The Big Easy®; Trentino®; U®; Wild West Tradition®; and the following marks:
The following are trademarks of W.C. Bradley Co.: Advantage Series™; Auto-Clean™;Chef Tested™; Commercial Series™; Designer Series™;; Diamond Flame™;
Double Chef™; Fireball™; Firenzy™; FlavorMaster™;Front Avenue™; Grill 2 Go® Advantage™; Hog and Yard Bird™; H20 Smoker™; Infrared. Grilling's Juicy Little
Secret™; Incredible Taste. Infallible Results™; Infrared Inside™; Insure™; Let's Grill Something Together™; Lev-Alert™; Longhorn™; Magneto™; Precision
Flame™; Quick2Burn™; QuickSet™; Ready When You Are™; Season, Set, And Savor™; Sizzle On The Grill™; Signature Series™; SureFire™; The Minute
Grill™;Torchfork™; Universal Grill Parts™; You Bring the Party™
Protected under one or more of the following U.S. Patents: 5,421,319; 5,458,309; 5,579,755; 5,996,573; 6,135,104; 6,279,566; 6,331,108; 6,484,900; 6,526,876; 6,595,197; 6,640,799; 6,640,803; 6,729,873; 6,739,473; 6,749,424; 6,792,935; 6,951,213; 7,047,590;
7,516,693; D364,535; D372,637; D373,701; D377,735; D383,035; D397,910; D405,643; D406,005; D406,009 ; D413,043; D413,229; D414,982; D415,388; D416,164; D416,441; D417,587; D417,588; D422,516; D423,274; D423,876; D428,303; D430,772; D435,396;
D436,004; D438,059; D438,060; D438,427; D439,110; D442,505; D443,179; D443,354; D443,464; D447,384; D447,385; D447,909; D448,610; D448,614; D448,615; D448,616; D448,975; D449,492; D450,544; D451,759; D454,028; D454,031; D455,205; D455,206;
D456,202; D456,222; D456,223; D457,789; D458,520; D458,760; D458,802; D459,088; D459,148 D459,149; D459,161; D459,163; D459,586; D459,943; D460,312; D460,313; D460,318; D461,359; D465,123; D465,693; D466,307; D466,439; D466,752; D473,414;
D474,371; D477,498; D477,501; D477,504; D477,506; D477,746; D478,471; D478,472; D480,914; D491,410; D494,009; D494,413; D498,523; D500,359; D504,048; D530,098; D535,000; Canada:D97,504;D99,355; D102,037; D104,200;D108,377; 2,315,567;
France:D010,231;D010,422;D010,590;D010,849; 1,089,646; South Korea: 384,565; United Kingdom: 2,099,402. Other Patents Pending. © 2009 W.C. Bradley Company
© 2009 Char-Broil, LLC Columbus, GA 31902
IMPORTANT: Fill out the product record information below.
Serial Number
Date Purchased
®
®
TEC™ is a trademark of Tec Infrared Grills.
Printed in China
PRODUCT GUIDE
MODEL 463250210
See rating label on grill for serial number.
For support and to register your
grill, please visit us at
www.charbroil.com
If you have questions or need
assistance during assembly,
Please call 1-888-430-7870.
Estimated assembly time: 30-40 minutes
Assembly instructions © 2009
07/28/09 • G352-001-010801
Advertisement
Chapters
Table of Contents

Subscribe to Our Youtube Channel
Related Manuals for Char-Broil RED 463250210


Summary of Contents for Char-Broil RED 463250210
- Page 1 Estimated assembly time: 30-40 minutes The following are trademarks registered by W.C. Bradley Co. in the U.S. Patent and Trademark Office: Caldera®; Charcoal2Go®; Char-Broil®; America's Legendary Barbeque Company®; American Gourmet®; Bandera®; Brush Hawg®; CB 940®; Char-Diamonds®; Char-Broil Charcoal/Gas®; Everybody Grills®; Everybody Outside®;...
-
Page 2: Table Of Contents
TABLE OF CONTENTS DANGER For Your Safety ........2-3 If you smell gas: Use and Care . - Page 3 WARNING CAUTION CALIFORNIA PROPOSITION 65 Using pots larger than 6 quarts in capacity could exceed weight limit of the 1. Combustion by-products produced when using this product contain chemicals known to the State of side burner shelf California to cause cancer, birth defects, and other or side shelf, reproductive harm.
- Page 4 LP Cylinder USE AND CARE •The LP cylinder used with your grill must meet the following requirements: DANGER •Use LP cylinders only with these required measurements: 12" (30.5cm) (diameter) x 18" (45.7 cm) (tall) with 20 lb. (9 kg.) capacity maximum. •...
-
Page 5: For Your Safety
LP Cylinder Exchange Connecting Regulator to the LP Cylinder •Many retailers that sell grills offer you the option of replacing 1.LP cylinder must be properly secured onto grill. (Refer to your empty LP cylinder through an exchange service. Use only assembly section.) those reputable exchange companies that inspect, precision fill, 2.Turn all control knobs to the OFF position. - Page 6 Leak Testing Valves, Hose and Regulator 1.Turn all grill control knobs to OFF. 2.Be sure regulator is tightly connected to LP cylinder. 3.Completely open LP cylinder valve by turning hand wheel counterclockwise. If you hear a rushing sound, turn gas off immediately.
- Page 7 Safety Tips WARNING Before opening LP cylinder valve, check the coupling nut for tightness. When grill is not in use, turn off all control knobs and LP For Safe Use of Your Grill and to Avoid Serious cylinder valve. ...
- Page 8 Burner Flame Check WARNING •Remove cooking grates and troughs. Light burners, rotate knobs from . You should see a smaller flame in position than seen on . Perform burner flame check Turn controls and gas source or tank OFF when not on sideburner, also.
-
Page 9: Spider Alert
Cleaning the Burner Assembly CAUTION Follow these instructions to clean and/or replace parts of burner assembly or if you have trouble igniting grill. 1. Turn gas OFF at control knobs and LP cylinder. SPIDER ALERT! 2. Remove cooking grates and flame tamers. 3. -
Page 10: Limited Warranty
LIMITED WARRANTY This warranty only applies to units purchased from an authorized retailer. Manufacturer warrants to the original consumer-purchaser only that this product shall be free from defects in workmanship and materials after correct assembly and under normal and reasonable home use for the periods indicated below beginning on the date of purchase*. -
Page 11: Parts List
PARTS LIST Key Qty Description Key Qty Description TOP LID, OUTER CASTER, LOCKING INNER INSERT F/ TOP LID CASTER, FIXED BEZEL, F/ LID HANDLE HARDWARE F/ TOP LID ASSEMBLY HANDLE F/ TOP LID RUBBER BUMPER, LID LOGO PLATE, TEMP GAUGE TROUGH, FIREBOX RUBBER BUMPER, RECTANGLE, F/ TOP LID... -
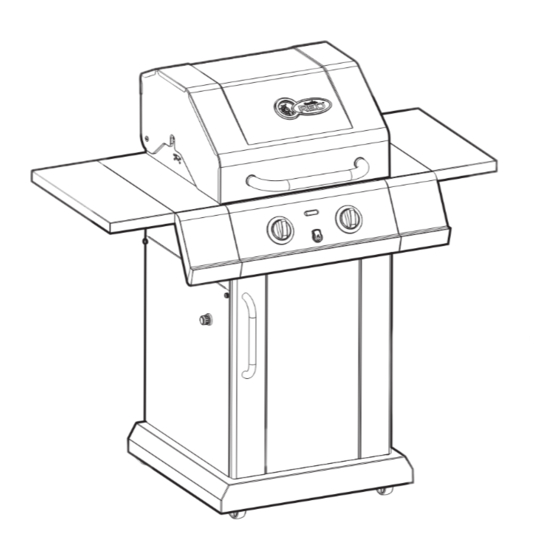
Page 12: Parts Diagram
PARTS DIAGRAM... -
Page 13: Assembly
ASSEMBLY Attach the two locking casters at the rear of the bottom shelf and the two fixed casters at the front. Use the provided caster wrench to fully tighten casters. Non-lock caster Locking caster Bottom shelf Attach side panels to bottom shelf using three 1/4-20x1/2”... - Page 14 This step requires two people to lift and position grill head Carefully lower the grill onto cart. head onto the cart, aligning slots at bottom of grill head with posts on cart side panels. Make sure the regulator hose is hanging inside the cart.
- Page 15 Insert front brace under control panel and between cart side panels. Secure using two 1/4-20x1½” screws, 7mm lock washers on each side. 7mm Flat Washer 7mm Lock 1/4-20x1½” Washer Screw Attach right side fascia to right side shelf using two 1/4-20x1½” screws, 7mm lock washers and 7mm flat washers. Only right side shelf shown for assembly, install left side shelf with fascia in the same way.
- Page 16 Attach foldable side shelf brackets to the tracks under right side shelf using one shoulder screw, 7mm flat washer, 7mm lock washer and 1/4” nut each side, shown A/B. Pull foldable side shelf outward and press it down, shown C. Push foldable side shelf toward right side shelf untill they gather up, shown D.
- Page 17 Insert flange on right side shelf into side shelf brackets on side of firebox, shown A. Attach front of right side shelf using four 1/4”-20x3/4” screws, 7mm flat washers, 7mm lock washers, shown B. Attach rear of shelf using one 1/4-20x1½” screw, 7mm lock washer, and 7mm flat washer in lower hole, using one 1/4”-20x3/4”...
- Page 18 Release the cap and nut from electronic ignition module. Attach electronic ignition module to the cart left side panel with the nut and cap. Electronic ignition module Connect each of the wires from main burner electrodes into the back of the Electronic Ignition Module. Total (2) connections. Connect the two wires [(a) and (b)] from the switch wiring harness into the back of the Electronic Ignition Module.
- Page 19 Attach FireBox lower heat shield to the tank heat shield using two #8x3/8” self-tapping screws, shown A. Inside of cart, insert rear tank heat shield tabs(w/o holes) into slots on the bottom of upper back panel. Attach front tank heat shield tabs(w/ holes) under front brace using two #8x3/8” self-tapping screws, shown B. side view Tank heat shield (concave faces up)
- Page 20 Place trough onto fire box. Align the trough pins with the holes on fire box. Make sure trough is put in the right direction. Trough pin Place cooking grates onto the firebox as shown. Insert the three wire ends at rear of warming rack into holes in back of firebox.
- Page 21 Unscrew the cap of electronic ignition module on cart left side panel. Insert AA battery into module , negative (—) end first. Replace the cap. AA Battery LP TANK IS SOLD SEPARATELY. Fill and leak check the tank before attaching to grill and regulator (see Use & Care section). Once tank has been filled and leak checked, place cylinder into cut-out in bottom shelf.
-
Page 22: Troubleshooting
EMERGENCIES: If a gas leak cannot be stopped, or a fire occurs due to gas leakage, call the fire department. EMERGENCIES: If a gas leak cannot be stopped, or a fire occurs due to gas leakage, call the fire department. Emergencies Possible Cause Prevention/Solution... - Page 23 Troubleshooting (continued) Problem Possible Cause Prevention/Solution Burner(s) will not light •Faulty electronic ignition circuit. •See Troubleshooting Integrated Electronic Ignition section. using ignitor. •Sparking somewhere other than •Inspect wire insulation and proper connections. Replace wires if between burner and electrode. insulation is broken. Burner(s) will not •See “GAS ISSUES:”...
- Page 24 Troubleshooting - Integrated Electronic Ignition Problem (Ignition) Possible Cause Check Procedure Prevention/Solution SECTION I •Battery not installed •Check battery orientation. •Install battery (make sure that “+” and “–” No sparks appear at properly. connectors are oriented correctly, with “+” end up any electrodes when burner control knobs and “–”...
- Page 25 NOTES...
- Page 26 NOTES...
- Page 27 Warranty Registration Department P.O. Box 1240 Columbus, GA 31902-1240...
- Page 29 Tiempo estimado de montaje: 30-40 minutos Las siguientes son marcas comerciales registradas de W.C. Bradley Co en la U. S. Oficina de Patentes y Marcas: Caldera®; Charcoal2Go®; Char-Broil®; America's Legendary Barbeque Company®; American Gourmet®; Bandera®; Brush Hawg®; CB 940®; Char-Diamonds®; Char-Broil Charcoal/Gas®; Everybody Grills®;...
- Page 30 TABLE OF CONTENTS INDICE DE MATERIAS PELIGRO Por su propia seguridad ......Si siente olor a gas: Uso y mantenimiento.
- Page 31 ADVERTENCIA ADVERTENCIA PROPOSICION 65 DEL ESTADO DE CALIFORNIA El uso de macetas 1. En el estado de California se sabe que los de más de 6 subproductos de la combustión, que se producen al cuartos de la usar este producto, contienen substancias químicas capacidad podría que causan cáncer, defectos congénitos u otras superar límite de...
-
Page 32: Uso Y Mantenimiento
Tanque de gas propano USO Y MANTENIMIENTO • El tanque de gas que use con su parrilla debe cumplir los siguientes requisitos: • Use únicamente tanques de gas que tengan las siguientes PELIGRO medidas obligatorias: 12 PULGADAS (30.5 cm) (diámetro) x 18 PULGADAS (45.7 cm) (altura), con una capacidad máxima de 20 lb. - Page 33 Cambio del tanque de gas Como conectar el regulador al tanque de gas propano •Muchos comerciantes minoristas que venden parrillas, le ofrecen la opción de cambiar su tanque de gas vacío mediante 1.El tanque de gas debe quedar bien fijado a la parrilla. (Lea la un servicio de recambio.
- Page 34 Prueba para detectar fugas de las válvulas, las mangueras y el regulador 1.Cierre todas las perillas de control de la parrilla. 2.Cerciórese de que el regulador esté bien conectado al tanque de gas. 3.Abra por completo la válvula del tanque, girando la manilla en sentido contrario a las agujas del reloj.
- Page 35 Consejos de seguridad Verifique que la tuerca de unión esté bien apretada antes de abrir la ADVERTENCIA válvula del tanque de gas. Cuando no use la parrilla, cierre todas las perillas de control y la válvula del tanque de gas. Para usar su parrilla en forma segura y para evitar ...
- Page 36 Control de la llama del quemador ADVERTENCIA • Retire las rejillas de cocción y las bandejas. Encienda los quemadores y gire las perillas, de la graduación a la graduación . Deberá ver una llama más reducida en la graduación CIERRE los controles y el tanque o la fuente de que en la graduación .
- Page 37 Cómo limpiar la unidad del quemador •Superficies pintadas: Lávelas con un detergente suave o un Siga estas instrucciones para limpiar o para cambiar piezas de la limpiador no abrasivo y agua tibia jabonosa. Séquelas con un unidad del quemador, o si tiene problemas para encender la parrilla. paño suave, no abrasivo.
-
Page 38: Garantía Limitada
GARANTÍA LIMITADA Esta garantía es válida únicamente para las unidades adquiridas de los distribuidores autorizados. El fabricante le garantiza únicamente al consumidor- comprador original, que este producto no presentará defectos de mano de obra ni de materiales por el período indicado a continuación, contado desde la fecha de compra*, si se arma correctamente y se usa en el hogar, en condiciones normales y razonables. -
Page 39: Lista De Piezas
LISTA DE PIEZAS Clave Cant.: Descripción Clave Cant.: Descripción TAPA SUPERIOR, PARTE EXTERIOR PANEL LATERAL IZQUIERDO DEL CARRITO ACCESORIO INTERIOR DE INSERCIÓN, TAPA PANEL LATERAL DERECHO DEL CARRITO SUPERIOR REPISA INFERIOR TORNILLO PARA EL TANQUE, REPISA INFERIOR MARCO, ASA DE LA TAPA RUEDITA CON SEGURO ASA DE TAPA SUPERIOR RUEDITA FIJA... -
Page 40: Vista Esquemática De Las Piezas
VISTA ESQUEMÁTICA DE PIEZAS... -
Page 41: Armado
ARMAD Instale las dos rueditas con seguro en la parte posterior de la repisa inferior y las dos rueditas sin seguro en la parte delantera. Ruedita sin seguro Ruedita con seguro Repisa inferior Instale los paneles laterales en la repisa inferior con tres tornillos de 1/4-20 x 1/2”, arandelas de presión de 7 mm y Tornillo de 1/4-20 x 1/2”... - Page 42 Para este paso se necesita que dos personas levanten la parte superior de la parrilla y la coloquen sobre el carrito. Baje con cuidado la parte superior de la parrilla sobre el carrito, alineando las ranuras ubicadas al fondo de ésta con los postes ubicados en los paneles laterales.
- Page 43 Introduzca el estribo delantero debajo del tablero de control y entre los paneles laterales del carrito. Verifique que los pasadores de articulación de las puertas queden en la parte superior y orientados hacia el frente. Fíjelo con dos tornillos de 1/4-20 x 1½”, arandelas de presión de 7 mm y arandelas planas de 7 mm en cada lado.
- Page 44 Instale los soportes de las repisas laterales plegables en los carriles ubicados debajo de la repisa del lado derecho, con un tornillo con pivote, arandela plana de 7 mm, arandela de presión de 7 mm y tuerca de 1/4" en cada lado, como se ilustra en A y B. Tire de la repisa plegable hacia fuera y empújela hacia abajo, como se ilustra en C.
- Page 45 Introduzca el reborde de la repisa del lado derecho en los soportes para la repisa, ubicados en el lado de la cámara de combustión, como se ilustra en A. Instale la repisa delantera del lado derecho con cuatro tornillos de 1/4”-20 x 3/4”, arandelas planas de 7 mm y arandelas de presión de 7 mm, como se ilustra en B.
- Page 46 Desenrosque la tapa y la tuerca del módulo de encendido electrónico. Instale el módulo de encendido electrónico en el panel del lado izquierdo del carrito con la tuerca y la tapa. Tuerca Módulo de encendido electrónico Tapa Conecte cada uno de los cables de los electrodos del quemador principal en la parte posterior del módulo de encendido electrónico. Total (2) conexiones.
- Page 47 Añada el protector contra el calor inferior para la cámara de combustión al protector contra el calor para el tanque, fijándolos con dos Tornillo autorroscante No. 8 de 3/8", como se ilustra en A. Dentro del carrito, introduzca las lengüetas (sin orificios) de la parte posterior del protector contra el calor para el tanque en las ranuras de la parte inferior del panel superior trasero Instale las lengüetas delanteras (con orificios) del protector contra el calor para el tanque, debajo del estribo delantero con dos tornillos autorroscantes No.
- Page 48 Coloque la cuba dentro de la cámara de combustión. Alinee las clavijas de la cuba con los orificios de la cámara de combustión. Verifique que la cuba quede orientada correctamente. Clavija de la cuba Coloque las parrillas de cocción en la cámara de combustión, como se ilustra. Inserte los extremos de los tres alambres de la parte posterior de la rejilla para calentar alimentos, en los orificios ubicados en la parte posterior de la cámara de combustión.
- Page 49 Desenrosque el botón del encendedor electrónico, ubicado en el panel del lado derecho del carrito. Coloque una pila AA en el módulo del encendedor, con el polo negativo (—) por delante. Vuelva a colocar el botón. Pila AA Tapa EL TANQUE DE GAS SE VENDE POR SEPARADO. Llene el tanque y haga una prueba para detectar fugas, antes de conectarlo a la parrilla y al regulador (lea la sección de Uso y mantenimiento).
-
Page 50: Resolución De Problemas
CASOS DE EMERGENCIA: Si no se puede detener una fuga de gas, o si ocurre un incendio debido a una fuga de gas, llame a los bomberos. Emergencias Causas probables Medidas de prevención / solución Fugas de gas de • Manguera dañada. •... - Page 51 Resolución de problemas CASOS DE EMERGENCIA: Si no se puede detener una fuga de gas, o si ocurre un incendio debido a una fuga de gas, llame a los bomberos. Emergencias Causas probables Medidas de prevención / solución Fugas de gas de •...
- Page 52 Resolución de problemas Encendido electrónico incorporado Problema (encendido) Causas probables Procedimiento de revisión Medidas de prevención / solución SECCIÓN I No aparecen chispas en • La pila no está instalada • Revise la orientación de la pila. • Instale la pila (verifique que los conectores “+” y “” estén ningún electrodo cuando se adecuadamente.
- Page 53 NOTAS...
- Page 54 NOTAS...
- Page 55 Warranty Registration Department P.O. Box 1240 Columbus, GA 31902-1240...
Need help?
Do you have a question about the RED 463250210 and is the answer not in the manual?
Questions and answers