Table of Contents
Advertisement
The following are trademarks registered by W.C. Bradley Co. in the U.S. Patent and Trademark Office: Caldera®; Charcoal2Go®; Char-Broil®; America's Legendary
Barbeque Company®; American Gourmet®; Bandera®; Brush Hawg®; CB 940®; Char-Diamonds®; Char-Broil Charcoal/Gas®; Everybody Grills®; Everybody
Outside®; FastStart®; Grill 2 Go®; Grill 2 Go® Express®; Grill Lovers®; Infrared Grilling That's All About U®; Keepers of the Flame®; New Braunfels Smoker
Company®; Patio Bistro®; Patio Caddie®; Patio Kitchen®; Pro-Sear®; RED®; Quantum®; Santa Fe®; Sear and Grill®; Sierra®; Signature Series®; Sure2Burn®;
The Big Easy®; Trentino®; U®; Wild West Tradition®; and the following marks:
The following are trademarks of W.C. Bradley Co.: Advantage Series™; Auto-Clean™;Chef Tested™; Commercial Series™; Designer Series™;; Diamond Flame™;
Double Chef™; Fireball™; Firenzy™; FlavorMaster™;Front Avenue™; Grill 2 Go® Advantage™; Hog and Yard Bird™; H20 Smoker™; Infrared. Grilling's Juicy Little
Secret™; Incredible Taste. Infallible Results™; Infrared Inside™; Insure™; Let's Grill Something Together™; Lev-Alert™; Longhorn™; Magneto™; Precision
Flame™; Quick2Burn™; QuickSet™; Ready When You Are™; Season, Set, And Savor™; Sizzle On The Grill™; Signature Series™; SureFire™; The Minute
Grill™;Torchfork™; Universal Grill Parts™; You Bring the Party™
Protected under one or more of the following U.S. Patents: 5,421,319; 5,458,309; 5,579,755; 5,996,573; 6,135,104; 6,279,566; 6,331,108; 6,484,900; 6,526,876; 6,595,197; 6,640,799; 6,640,803; 6,729,873; 6,739,473; 6,749,424; 6,792,935; 6,951,213; 7,047,590;
7,516,693; D364,535; D372,637; D373,701; D377,735; D383,035; D397,910; D405,643; D406,005; D406,009 ; D413,043; D413,229; D414,982; D415,388; D416,164; D416,441; D417,587; D417,588; D422,516; D423,274; D423,876; D428,303; D430,772; D435,396;
D436,004; D438,059; D438,060; D438,427; D439,110; D442,505; D443,179; D443,354; D443,464; D447,384; D447,385; D447,909; D448,610; D448,614; D448,615; D448,616; D448,975; D449,492; D450,544; D451,759; D454,028; D454,031; D455,205; D455,206;
D456,202; D456,222; D456,223; D457,789; D458,520; D458,760; D458,802; D459,088; D459,148 D459,149; D459,161; D459,163; D459,586; D459,943; D460,312; D460,313; D460,318; D461,359; D465,123; D465,693; D466,307; D466,439; D466,752; D473,414;
D474,371; D477,498; D477,501; D477,504; D477,506; D477,746; D478,471; D478,472; D480,914; D491,410; D494,009; D494,413; D498,523; D500,359; D504,048; D530,098; D535,000; Canada:D97,504;D99,355; D102,037; D104,200;D108,377; 2,315,567;
France:D010,231;D010,422;D010,590;D010,849; 1,089,646; South Korea: 384,565; United Kingdom: 2,099,402. Other Patents Pending. © 2009 W.C. Bradley Company
© 2009 Char-Broil, LLC Columbus, GA 31902
IMPORTANT: Fill out the product record information below.
Serial Number
Date Purchased
®
®
TEC™ is a trademark of Tec Infrared Grills.
Printed in China
PRODUCT GUIDE
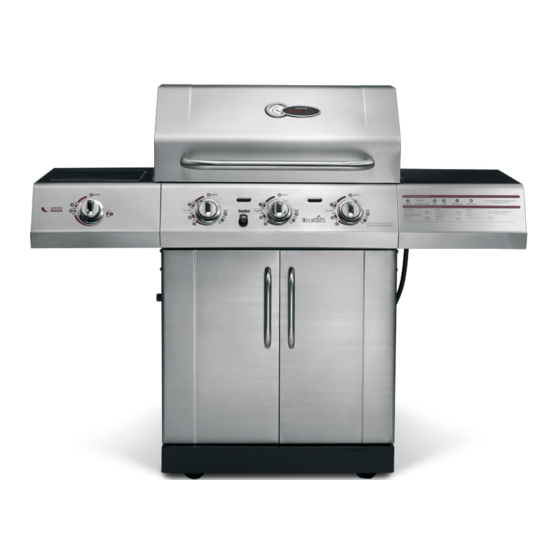
MODEL 463250510
See rating label on grill for serial number.
For support and to register your
grill, please visit us at
www.charbroil.com
If you have questions or need
assistance during assembly,
please call 1-888-430-7870.
Estimated assembly time: 30 minutes
Assembly instructions © 2009
08/07/09 • G517-001-010801
Advertisement
Table of Contents

Related Manuals for Char-Broil 463250510


Summary of Contents for Char-Broil 463250510
- Page 1 The following are trademarks registered by W.C. Bradley Co. in the U.S. Patent and Trademark Office: Caldera®; Charcoal2Go®; Char-Broil®; America's Legendary Barbeque Company®; American Gourmet®; Bandera®; Brush Hawg®; CB 940®; Char-Diamonds®; Char-Broil Charcoal/Gas®; Everybody Grills®; Everybody Outside®; FastStart®; Grill 2 Go®; Grill 2 Go® Express®; Grill Lovers®; Infrared Grilling That’s All About U®; Keepers of the Flame®; New Braunfels Smoker Company®;...
-
Page 2: Table Of Contents
TABLE OF CONTENTS For Your Safety ........2-3 Use and Care . - Page 3 WARNING CALIFORNIA PROPOSITION 65 1. Combustion by-products produced when using this product contain chemicals known to the State of California to cause cancer, birth defects, and other reproductive harm. 2. This product contains chemicals, including lead and lead compounds, known to the State of California to cause cancer, birth defects or other reproductive harm.
-
Page 4: Use And Care
USE AND CARE DANGER • NEVER store a spare LP cylinder under or near the appliance or in an enclosed area. • Never fill a cylinder beyond 80% full. • An over filled or improperly stored cylinder is a hazard due to possible gas release from the safety relief valve. -
Page 5: Connecting Regulator To Lp Cylinder
LP Cylinder Exchange •Many retailers that sell grills offer you the option of replacing your empty LP cylinder through an exchange service. Use only those reputable exchange companies that inspect, precision fill, test and certify their cylinders. Exchange your cylinder only for an OPD safety feature-equipped cylinder as described in the "LP Cylinder"... - Page 6 Hold coupling nut and regulator as shown for proper connection to LP cylinder valve. 6.Turn the coupling nut clockwise and tighten to a full stop. The regulator will seal on the back-check feature in the LP cylinder valve, resulting in some resistance. An additional one-half to three-quarters turn is required to complete the connection.
- Page 7 WARNING For Safe Use of Your Grill and to Avoid Serious Injury: • Do not let children operate or play near grill. • Keep grill area clear and free from materials that burn. • Do not block holes in sides or back of grill. •...
-
Page 8: Ignitor Check
WARNING Turn controls and gas source or tank OFF when not in use. CAUTION If ignition does NOT occur in 5 seconds, turn the burner controls OFF, wait 5 minutes and repeat the lighting procedure. If the burner does not ignite with the valve open, gas will continue to flow out of the burner and could accidently ignite with risk of injury. -
Page 9: Spider Alert
CAUTION SPIDER ALERT! SPIDER AND WEBS INSIDE BURNER TUBE If you notice that your grill is getting hard to light or that the flame isn’t as strong as it should be, take the time to check and clean the venturi’s. CONTROL PANEL VALVE In some areas of the country, spiders or small insects have been... -
Page 10: Limited Warranty
LIMITED WARRANTY This warranty only applies to units purchased from an authorized retailer. Manufacturer warrants to the original consumer-purchaser only that this product shall be free from defects in workmanship and materials after correct assembly and under normal and reasonable home use for the periods indicated below beginning on the date of purchase*. -
Page 11: Parts List
PARTS LIST Qty Description OUTER TOP LID INNER LINER, F/ LID HANDLE, F/ TOP LID END CAPS, F/ HANDLE LOGO PLATE, W/ TEMP GAUGE HARDWARE F/ TOP LID RUBBER BUMPER, RECTANGLE RUBBER BUMPER, ROUND FIREBOX HEAT SHIELD, F/ FIREBOX, FRONT LEFT SIDE OUTER PANEL, F/ FIREBOX RIGHT SIDE OUTER PANEL, F/ FIREBOX MATCH HOLDER AND CHAIN... -
Page 12: Parts Diagram
PARTS DIAGRAM... -
Page 13: Assembly
ASSEMBLY Attach the two locking casters at the rear of the bottom shelf and the two fixed casters at the front. Use the provided caster wrench to fully tighten casters. Locking caster Bottom shelf Attach side panels to bottom shelf using three 1/4-20x1/2”... - Page 14 Place lower back panel between side panels at rear of bottom shelf. Secure lower back panel to side panels using two 1/4-20x1/2” screws, 7mm lock washers, and 7mm flat washers on each side. Lower back panel 1/4-20x1/2” screw 7mm lock washer 7mm flat washer This step requires two people to lift and position grill head...
- Page 15 Insert front brace under control panel and between cart side panels. Make sure door hinge pins are on the top side and facing the front. Secure using two 1/4-20x1½” screws, 7mm lock washers, and 7mm flat washers on each side. NOTE: MAKE SURE THAT THE FRONT BRACE IS MOUNTED IN THE MOST DOWNWARD POSITION WHEN ASSEMBLED TO CART.
- Page 16 Attach right side fascia to right side shelf using four #10-24x3/8” screws, 5mm lock washers and 5mm flat washers, shown A. Insert flange on right side shelf into side shelf brackets on right side of firebox, shown B. Attach one 1/4-20x1-1/2” screw, one 1/4-20x1/2” screw ,two 7mm lock washers and two 7mm flat washers at the rear shelf, shown C.
- Page 17 Attach left side fascia to left side shelf using four #10-24x3/8” screws, 5mm lock washers and 5mm flat washers, shown A. Insert flange on left side shelf into side shelf brackets on side of firebox, shown B. Attach one 1/4-20x1-1/2” screw,one 1/4-20x1/2” screw,two 7mm lock washers and two 7mm flat washers at the rear shelf, shown C.
- Page 18 First, remove the two screws and lock washers factory attached to the sideburner valve bracket. Position sideburner valve bracket beneath sideburner shelf fascia so that valve stem comes through larger center hole in fascia. Align the holes on valve bracket with left and right holes on fascia. Secure using screws and lock washers that were removed from bracket, shown A.
- Page 19 Insert sideburner into left shelf. The stud on bottom of burner fits into rear small hole in sideburner drip pan, shown A. Secure burner to sideburner drip pan with Wing nut, shown B. Under sideburner shelf, attach sideburner ignitor wire to electrode. Make sure burner tube engages sideburner valve, shown B. Place sideburner cooking grate onto sideburner shelf, aligning grate legs with holes in shelf, shown C.
- Page 20 Release the cap and nut from electronic ignition module. Attach electronic ignition module and heat shield to the cart left side panel with the nut, shown A. Insert AA battery into ignition module, negative ( Connect each of the wires from the main burner electrodes, and sideburner electrode into the back of the Electronic Ignition Module.
- Page 21 Insert the pin on bottom of doors into hole in bottom shelf. Press upper hinge pin in front brace, align hinge hole on top of door, and release hinge pin into door. Place trough onto fire box. Left door Align the trough pins with the holes on fire box. Make sure trough is put in the right direction. PRESS Top of door...
- Page 22 Place cooking grates onto the firebox as shown. Place the Warming Rack onto the the firebox. Make sure insert the Warming Rack ends into the holes properly as shown. LP TANK IS SOLD SEPARATELY. Fill and leak check the tank before attaching to grill and regulator (see Use & Care section). Once tank has been filled and leak checked, place cylinder into cut-out in bottom shelf.
-
Page 23: Troubleshooting
EMERGENCIES: If a gas leak cannot be stopped, or a fire occurs due to gas leakage, call the fire department. EMERGENCIES: If a gas leak cannot be stopped, or a fire occurs due to gas leakage, call the fire department. Emergencies Possible Cause Gas leaking from... - Page 24 Troubleshooting (continued) Problem Possible Cause Burner(s) will not light •Faulty electronic ignition circuit. using ignitor. •Sparking somewhere other than between burner and electrode. Burner(s) will not •See “GAS ISSUES:” on previous page. match light. •Improper method of match-lighting. Sudden drop in gas •Out of gas.
- Page 25 Troubleshooting - Integrated Electronic Ignition Problem (Ignition) Possible Cause SECTION I •Battery not installed No sparks appear at properly. any electrodes when burner control knobs are turned to ; no noise can be heard •Dead battery. from spark module. •Battery cap not installed properly.
- Page 26 NOTES...
-
Page 27: Registration Card
Warranty Registration Department P.O. Box 1240 Columbus, GA 31902-1240...
Need help?
Do you have a question about the 463250510 and is the answer not in the manual?
Questions and answers