Table of Contents
Advertisement
Quick Links
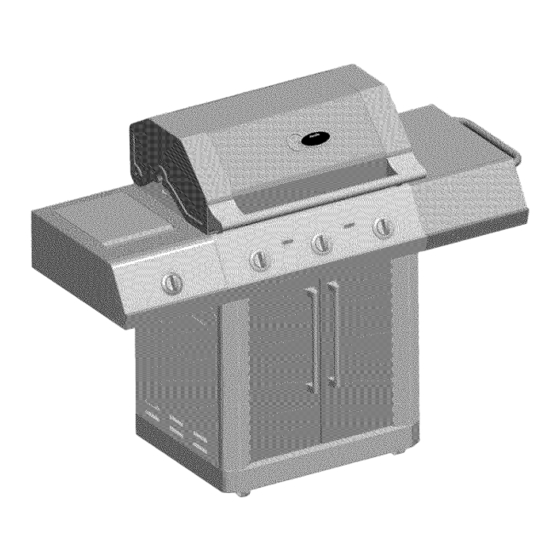
MODEL, 463250108
• PRODUCT
GUIDE
/_ CAUTION:
Read and follow all safety statements, assembly
instructions, and use and care directions before
attempting to assemble and cook.
IN STALLE R/ASS_ M B LE R',
Leave this manual with consumer.
CONSUMER:
Keep this manual for future reference.
/_ WARNING:
Failure to follow all manufacturer's instructions could
result in serious personal injury and/or property
damage.
/_ CAUTION:
Some parts may contain sharp edges - especially as
noted in the manual! Wear protective gloves if
necessary.
463250108• 80015551. 02-03-08
Advertisement
Table of Contents

Related Manuals for Char-Broil 463250108


Summary of Contents for Char-Broil 463250108
- Page 1 MODEL, 463250108 • PRODUCT GUIDE /_ WARNING: /_ CAUTION: Failure to follow all manufacturer's instructions could Read and follow all safety statements, assembly instructions, and use and care directions before result in serious personal injury and/or property attempting to assemble and cook. damage.
-
Page 2: California Proposition
CALIFORNIA PROPOSITION 65 if you smell gas: 1. Combustion by-products producedwhen using this product contain chemicals known to the State of California to cause cancer, birth defects, and other 1. Shut off gas to the appliance. reproductive harm. 2. Extinguish any open flame. 2. - Page 3 For Your Safety ........Grill Service Center ........Product Record Information ......Installation Safety Precautions ......Safety Symbols ........Use and Care ........4-11 Parts List .......... Parts Diagram ........Stainless Steel Use and Care Assembly ........14-22 Stainless steel grills can provide many years of reliable service and an attractive appearance in normal outdoor Troubleshooting ........
-
Page 4: For Your Safety
LP Cylinder • The LP cylinder used with your grill must meet the following requirements: • Use LP cylinders only with these required measurements: 12" (30.50m) (diameter) x 18" (45.7 cm) (tall) with 20 lb. (9 kg.) capacity maximum. • NEVER store a spare LP cylinder under or near , LP cylinders must be constructed and marked in accordance the appliance or in an enclosed area. - Page 5 LP Cylinder Exchange Connecting Regulator to the LP Cylinder , Many retailers that sell grills offer you the option of replacing 1. LP cylinder must be properly secured onto grill. (Refer to your empty LP cylinder through an exchange service. Use only assembly section.) those reputable exchange companies that inspect, precision fill, 2.
- Page 6 Leak Testing Valves, Hose and Regulator 1. Turnall grill control knobs to OFF. 2. Be sure regulator is tightly connected to LP cylinder. 3. Completely open LP cylinder valve by turning hand wheel counterclockwise. If you hear a rushing sound, turn gas off immediately.
- Page 7 Safety Tips A Before opening LP cylinder valve, check the coupling nut for tightness. A When grill is not in use, turn off all control knobs and LP For Safe Use of Your Grill and to Avoid Serious cylinder valve. A Never move grill while in operation or still hot.
- Page 8 Burner Flame Check , Remove cooking grates and troughs. Light burners, rotate knobs from _ toO. You should see a smaller flame in O position than seen on [_. Perform burner flame check Turn controls and gas source or tank OFF when not in use.
-
Page 9: Spider Alert
Cleaning the Burner Assembly CAUTION Follow these instructions to clean and/or replace parts of burner assembly or if you have trouble ignitinggrill. Turn gas off at control knobs and LP cylinder. SPIDER ALERT! Remove cooking grates and Troughs. Remove screws to get burner out. Carefully lift each burner up and away from valve openings. - Page 10 Safety Food CAUTION Food safety is a very important part of enjoying the outdoor cooking experience. To keep food safe from Using pots larger than 6 quarts in capacity could harmful bacteria, follow these four basic steps: exceed weight limit of the Clean: Wash hands, utensils, and surfaces with hot side burner shelf, soapy water before and after handling raw meat and...
- Page 11 The methods below are suggestions for cleaning stainless steel surfaces. Choose a cleaning method appropriate for your needs. It is recommended that you use a Char-Broil® grill cover to help prolong the life and prevent discoloration of your grill.
- Page 12 80016151 Certified Grill PartsAnd Accessories@ Char-Broil and Design@,Char-Broil (Gas GBI]Briquettes)@,Char-Diamonds@ Cooking Zone and Design@,Diamond Flame@,Executive Cheer Faststart_, Flare Fightel!b,FiavorMaster_ Gas GBI] Siouette and Design@ H20 Smoker_ Lava Flame@,MasterFiame@ MasterF}amePrecisionCooking System@ PowerSpark@ Quantum@,VIP@ PrecisionF ame and Design@ Sierra@,and TruFlame@ate registered Trademarks of the WC...
- Page 13 pp/X \ JJ,J _25G108 * 1Z...
-
Page 14: Assembly
Right and LeftShelfAssembly Attachtwo 1/4-20x3/4"screws,1/4" flat washersand 1/4" lockwashersthroughside shelf holes(rightshelf ONLY)into towelbar shownA. Insertsideshelf overscrewsandwashersthroughbracket shownB. Attachone 1/4-20x1-1/2"screw,one 1/4-20x1/2"screw,two 1/4" flat washersand two 1/4" lockwashersat the rear shelf flangeshownC. Attachthree 1/4-20x1/2"screws,1/4" flat washersand 1/4" lock washersto frontshelf flangeshownD. Only right shelf shown for assembly, repeat above steps B-Dfor left sideburner shelf. - Page 15 Sideburner Assembly Insertthe sideburnervalve intothesideburnerandsectureit to the bracketusingtwo #5-40x1/5"screwsshownA. #10 Lock Washer 5ram siliconwasher #10-24x3/8"Screw #5-40xl/5" Screw Makesureburnertubealignscorrectlyontosideburnervalve underneath left shelf shownB. Insertthe sideburnerinto thecut-outshownC, placetheside burneron supportbracket,alignand insert thesestud into installation holesof bracket. [] Secureburnerto pan usingtwo #10-24x3/8"screwsand 5ram siliconwasherand #10 lock washersshownD.
- Page 16 Sideburner Control Knob Assembly Positionsideburnervalve bracketbeneathsideburnershelf fasciaso that valvestemcomesthroughlargercenterhole in fasciashownA. #8-32x3/8"screw #8 Lock Washer Attachsideburnerbezeltofascia usingtwo #8-32x3/8" screwsshownA. PresssideburnercontrolknobontovalvestemshownA. Note: Make sure set the Bezel with longer slot at the top. #8-32x3/8"screw #8 Lock Valve Stem Sideburner Shelf ControlKnob Fasia 16.463250108...
- Page 17 Sideburner Wind Diverter, SideburnerCap and Clip, SideburnerGrate [] Placesideburnerwind diverteroversideburneraligningcut- out in diverterto fit aroundelectrodeshownA. [] Placeburnercapontosideburnerandattachsideburnercap clip shownB. [] Placesideburnercookinggrateonto sideburnershelf,aligning gratelegswith holesin shelfshownA. Sideburner Cookinc Burner Cap Diverter - 463250108,17...
- Page 18 TroughInstall First,placeTroughMiddleonto FireboxshownA Second,PlaceTroughA and TroughB onto Firebox Makesure this is put in the right direction as show in B, Trough B Trough Middle 1£. 46325010£...
- Page 19 Cooking Grateand Warming Rack Placecookinggratesonto thefireboxas shown. PlacetheWarming Rackonto thethe firebox.Make sure insertthe Warming Rackendsinto the holesproperlyshown as below. Warming Rack Cooking Grate 463250108.19...
- Page 20 Condiment Basket Assembly Open the door and place the Condiment Basket on the left door inside, make sure the insert the pivots of the Condiment Backet into the bracket which riveted together the door inside shown as below. 20 • 463250108...
- Page 21 Electronic Ignition Unscrew electronic ignition button left side panel of cart. Insert AA battery into ignitor, negative (--) end first. Replace button. 463250108 . 21...
-
Page 22: Use And Care
LP Tank LP TANK IS SOLDSEPARATELY.Filland leakcheckthe tank beforeattachingto grill and regulator(seeUse & Caresection). Oncetank hasbeen filledand leakchecked,placecylinderintocut-outin bottomshelf. Makesure tank valve is facing front of grill, Securetank with tank screwunderbottomshelf. Insertregulatorthroughlargehole in left side panel.See Use & Care section of this manualto perform the "Burner FlameCheck" and for important safety instructions before using. -
Page 23: Gas Issues
EMERGENCIES," if a gas leak cannot be stopped, or a fire occurs due to gas leakage, call the fire department. Gasleakingfrom , Damagedhose. , Turnoff gasat LP cylinderor at sourceon naturalgassystems.If cracked/cut/burned anythingbut burned,replacevalve/hose/regulator. If burned, hose. discontinueuseof productuntila plumberhas investigated cause and corrections are made. -
Page 24: Electronic Ignition
Troubleshooting (continued) ELECTRONIC IGNITION: Burner(s)will not light usingignitor. , No spark,no ignitionnoise. , See SectionI of ElectronicIgnitionSystem. (See ElectronicIgnition Troubleshooting also) , No spark,some ignitionnoise. , See SectionII of ElectronicIgnitionSystem. , Sparks,but notat electrodeor at full , See SectionIII of ElectronicIgnitionSystem. strength. - Page 25 Troubleshooting - Electronic ignition SECTION I Nosparksappearat , Battery not installed , Checkbatteryorientation. , Installbattery(makesurethat "+"and "-" anyelectrodeswhen properly. connectorsare orientedcorrectly, w ith "+" end up controlknobturned and "-" end down.) to @ ; no noise can be heardfrom spark module.
-
Page 26: Disclaimer Of Impliedwarranties;Limitation Of Remedies
I n addition,in the stateof Californiaonly,youmay take the productto the retailestablishment sellingthis productin orderto obtainperformanceunderthis limitedwarranty. If you wish to obtain performance of any obligation under this limited warranty, you should write to: Char-Broil Consumer Relations P.O. Box 1240 Columbus, GA 31902-1240 Consumerreturnswill notbe acceptedunlessa valid Return Authorizationis first acquiredbycalling1-800-241-7548 and then clearlymarked on the outsideof the packageand the packageis shippedfreight/postage pre-paidto the addressabove. -
Page 27: Registration Card
Please register your productonlineat: (if you register online, you do not need to send in this registration card.) PLEASE FILL OUT THISCARD AND RETURNIT WITHIN 10DAYS OF PURCHASE,FAILURETORETURN MAYAFFECTYOUR WARRANTYCOVERAGE,FORWARRANTY SERVICE PROOFOF PURCHASEWILL BE REQUIRED,PLEASE KEEPYOUR SALES RECEIPT,THISWARRANTY IS NON-TRANSFERABLE, LLENE ESTA TARJETA Y DEVUELVALADENTRODE LOS 10 DIASDE LA COMPRA, SINO LA DEVUELVE,PUEDE VERSEAFECTADASU COBERTURADE GARANTIA, PARA EL SERVlCIO DEGARANTIA ES NECESARIOQUE PRESENTESUCOMPROBANTEDECOMPRA,CONSERVELA FACTURA,ESTA GARANTIA ESINTRANSFERIBLE, VEUILLEZCOMPLETERCETTECARTEET LA RETOURNERDANSLES 10JOURS SUtVANTL'ACHAT, LA COUVERTUREDE VOTRE GARANTIEPOURRAIT EN ETRE... -
Page 28: Grill Service Center
Check tubes for spider webs, Ensure valves are correctly installed in burner tubes. Always ensure control knobs are in OFF position and regulator is attached to tank BEFORE opening tank valve to avoid low flames, Perform leak test regularly, Thank You for Your Purchase! Char-Broil,LLC, Columbus,GA31902, Printedin China...
Need help?
Do you have a question about the 463250108 and is the answer not in the manual?
Questions and answers