Advertisement
Table of Contents
- 1 Installation
- 2 Box Contents
- 3 Required Equipment
- 4 Prepare for Installation
- 5 Install the Camera
- 6 Adjust the Camera
- 7 Menu Operation
- 8 Main Menu Items
- 9 Video out
- 10 Setup Menu Items
- 11 Smart Focus
- 12 White Balance
- 13 Day & Night
- 14 Year Limited Warranty
- Download this manual
See also:
Installation Manual
Advertisement
Table of Contents

Related Manuals for Luma 700 Series

Summary of Contents for Luma 700 Series
- Page 1 700 Series Bullet 500 Series Bullet HD Analog Surveillance Camera Installation & Operation Manual...
-
Page 2: Installation
Luma 500/700 Series Bullet Camera Installation Before you start, ensure that the device is in good condition and all the assembly parts are included. We recommend installing with RG-59 or RG-6 cabling with two-wire power (either regular or siamese). This provides better performance over distance than using traditional category cable with baluns. -
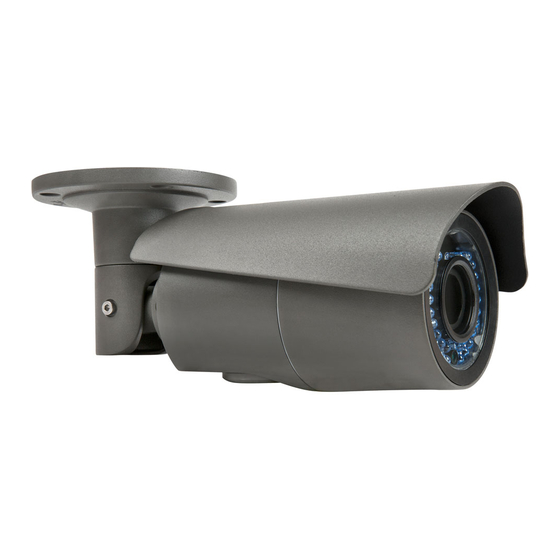
Page 3: Required Equipment
Luma 500/700 Series Bullet Camera Overview Before installing, familiarize yourself with the parts of your camera. Sunshade Adjustment Screw (not visible) Focus Dial Zoom Dial Access Panel Sunshade Level Elbow Base Screw Screw Screw Required Equipment Aside from the contents of this box, you will need to provide... -
Page 4: Prepare For Installation
Luma 500/700 Series Bullet Camera Prepare for Installation 1. Drill a cable hole and pilot holes for your screws in the ceiling, using the supplied template. 2. If you are installing this camera in an older system that does not support HD-TVI, unscrew the access panel cap and flip the camera’s resolution toggle, shown below, to the CVBS position. -
Page 5: Install The Camera
Luma 500/700 Series Bullet Camera Install the Camera 3. Attach the base of the camera to the ceiling and secure it with screws. 4. Route the cables through the cable hole. 5. This camera has an elbow joint flanked by two rotational joints for perfect pan and tilt control. Loosen the three hex screws in the camera. -
Page 6: Adjust The Camera
Luma 500/700 Series Bullet Camera Adjust the Camera 1. Adjust or remove the sunshade. You can slide the shade back and forth by loosening the screw slightly; tighten when finished. You can remove the shade by removing the screw, then removing the shade; then replacing the screw when finished. -
Page 7: Menu Operation
Luma 500/700 Series Bullet Camera Menu Operation The in-camera menu is structured as follows: MENU Setup Video Out Language White Smart Day & Exposure Backlight Scene Lens Special Adjust Reset Exit Balance Focus Night Camera Sharp- Indoor Shutter 2DNR Factory... -
Page 8: Main Menu Items
Luma 500/700 Series Bullet Camera Main Menu Items The DVR’s control interface can handle camera functions, or you can access the camera’s internal menu directly. To access the camera menu through the DVR’s local interface, click the PTZ ( ) icon on the live page, then click the menu ( ) button in the configuration bar of the control panel. -
Page 9: Setup Menu Items
Luma 500/700 Series Bullet Camera Setup Menu Items Smart Focus Press Iris+ to have the camera test the view and make a recommended focus setting for varifocal lenses. It does not adjust the camera’s focus to that number; you must do it manually. Note: This camera has a varifocal lens; its focus can only be adjusted manually. - Page 10 Extreme values can result in loss of detail in dark or brightly lit areas. True WDR (Enhanced Algorithms in the 700 Series) Use the arrows to enable or disable true wide dynamic range. This sets the difference between dark and light areas to maintain a higher quality image across all lighting conditions.
- Page 11 Use the arrows to have your camera employ WDR, BLC, HSBLC, or none of the above (off). Press Iris+ to configure that setting’s parameters, below. WDR (Enhanced Algorithms in the 700 Series) Wide Dynamic Range adjusts bright and dark areas. The more uniform lighting gives a better overall effect.
- Page 12 Luma 500/700 Series Bullet Camera Backlight compensation adjusts for areas where the backlight is strong. Its chief advantage is that you can apply it primarily to a select portion of the camera’s view (although, to preserve a natural look, it influences the appearance of the whole screen).
-
Page 13: White Balance
Luma 500/700 Series Bullet Camera Level: Set the HSBLC level from 0 to 100; this determines how bright something must be for the camera to apply HSBLC to it. Lower levels mean more of the camera screen is affected; higher levels mean that only the brightest areas are affected. - Page 14 Luma 500/700 Series Bullet Camera NR (Enhanced Algorithms in the 700 Series) To edit noise reduction settings, press Iris+. 2DNR This uses image data alone to reduce noise. Use the arrow keys to turn this on or off. 3DNR This uses image data as evaluated over time to reduce noise. Use the arrow keys to turn this on or off. If this is on, press Iris+ to customize its settings.
- Page 15 Luma 500/700 Series Bullet Camera legend is displayed at the bottom of the keyboard; the flashing underscore shows where the next letter will go (overwriting any letter currently there). The arrow icons shift the flashing underscore left and right. CLR erases all text. POS lets you position the text on the screen using the arrow keys.
- Page 16 Luma 500/700 Series Bullet Camera Display: This item turns the selected area on or off. If the area is on, you can press Iris+ to adjust the location of the camera using the arrow keys (the area’s size is defined by its zoom). Press Iris+ to exit.
- Page 17 Luma 500/700 Series Bullet Camera Motion View: When this setting is on, the camera view uses translucent red boxes to highlight areas where it detects motion. Default: Press Iris+ to restore the default settings for the size and location of the motion detection areas. This does not reset the sensitivity settings.
- Page 18 Luma 500/700 Series Bullet Camera Default: Press Iris+ to restore the default settings for all areas. Return: Press Iris+ to go back to the previous menu. Defect This menu option corrects for digital defects (hot or stuck photosites, hotspots, amp noise, etc.).
- Page 19 Luma 500/700 Series Bullet Camera Adjust Sharpness Adjust the sharpness of the camera image from 0 (unchanged) to 15 (highly sharpened). Monitor Select whether the monitor that is viewing the camera data is a CRT or LCD. Gamma (LCD only) / Black Level (CRT only): This adjusts the lightness or darkness of the image.
-
Page 20: Year Limited Warranty
5-Year Limited Warranty This Luma Surveillance™ product has a 5-Year Limited Warranty. This warranty includes parts and labor repairs on all components found to be defective in material or workmanship under normal conditions of use. This warranty shall not apply to products that have been abused, modified or disassembled.
Need help?
Do you have a question about the 700 Series and is the answer not in the manual?
Questions and answers