Planet EPL-2000 User Manual
2-port gepon managed olt
Hide thumbs
Also See for EPL-2000:
- Quick installation manual (16 pages) ,
- Quick installation manual (20 pages)
Table of Contents
Advertisement
Quick Links
Advertisement
Table of Contents

Related Manuals for Planet EPL-2000


Summary of Contents for Planet EPL-2000
- Page 1 User’s Manual of EPL-2000...
- Page 2 PLANET is a registered trademark of PLANET Technology Corp. All other trademarks belong to their respective owners. Disclaimer PLANET Technology does not warrant that the hardware will work properly in all environments and applications, and makes no warranty and representation, either implied or expressed, with respect to the quality, performance, merchantability, or fitness for a particular purpose.
-
Page 3: Table Of Contents
3.2 Management Access Overview .........................18 3.3 EMS Utility Management..........................18 3.3.1 MySQL Server Installation ...........................19 3.3.2 EMS Utility Installation ............................28 3.3.3 Starting PLANET EMS Management ........................30 3.4 SNMP-based Network Management ......................31 4. EMS Management System ....................32 4.1 EMS Toolbar..............................33 4.1.1 System:................................33 4.1.2 Alarm: ..................................36... - Page 4 4.4.5 ONU Port Management ............................71 4.4.6 Port Multicast...............................72 4.4.7 ONU VLAN ................................73 4.4.8 Port Policying...............................74 4.4.9 Port Egress................................75 4.5 How to upgrade EPL-2000 firmware......................76 5. EPL-2000 OPERATION ....................... 80 5.1 Address Table .............................80 5.2 Learning ..............................80 5.3 Forwarding & Filtering ..........................80 5.4 Auto-Negotiation ............................80...
-
Page 5: Introduction
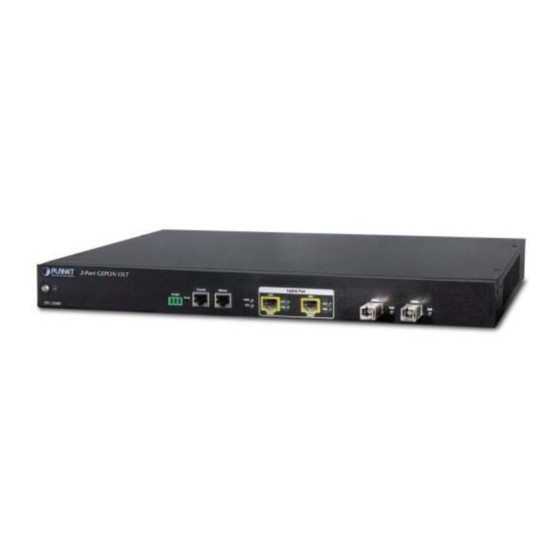
User’s Manual of EPL-2000 1. INTRODUCTION PLANET GEPON OLT – EPL-2000 – is GEPON Optical Line Terminal (OLT), consisting of two GEPON ports, two Gigabit SFP Interfaces and one management port. The term “GEPON OLT” refers to the OLT in this user’s manual. -
Page 6: Product Description
Perfectly Designed for FTTx Applications PLANET EPL-2000 is a GEPON Optical Line Terminal (OLT), consisting of two GEPON ports, two Gigabit SFP Interfaces and one management port. It is easy to install and maintain the GEPON deployment. Working with PLANET GEPON Optical Network Units (ONU) EPN series, PLANET EPL-2000 can provide highly-effective GEPON solutions and convenient management for broadband network. -
Page 7: How To Use This Manual
Robust Layer 2 Features With a high-split ratio of 1:64 and supporting the usage of PLANET ONUs, the EPL-2000 can minimize the investment cost for carriers. By using the advanced technology in the telecommunication industry, the EPL-2000 provides strong functionalities for Ethernet features such as VLAN, Multicast, DBA (Dynamic Bandwidth Allocation), and Access Control List. - Page 8 User’s Manual of EPL-2000 Layer 2 Features Dynamic bandwidth allocation (DBA) support Supports VLAN IEEE 802.1Q tagged VLAN Up to 255 VLAN groups, out of 4094 VLAN ID Supports up to 8K MAC Address Table ...
-
Page 9: Product Specifications
User’s Manual of EPL-2000 1.5 Product Specifications Product EPL-2000 Hardware Specifications Downstream: 1.25 Gbps Transmission Speed Upstream: 1.25 Gbps Optical Split Ratio Up to 1:64 Uplink Port 2 x 1000BASE-X SFP slot Port PON Port 2 x PON Port MGMT Port... -
Page 10: Hardware Installation
The unit front panel provides a simple interface monitoring the OLT. Figure 2-1 shows the front panel of the GEPON OLT. EPL-2000 Front Panel Figure 2-1 EPL-2000 Front Panel ■ RS-485 and RJ45 Console Connector This is just for Manufacturer Technical Use ■ Reset Button The reset button is designed for rebooting the GEPON OLT without turning off and on the power. -
Page 11: Led Indications
The front panel LEDs indicate instant status of port links, data activity and system power and help to monitor and troubleshoot when needed. Figure 2-2 shows the LED indications of these GEPON OLTs. EPL-2000 LED Indication Figure 2-2 EPL-2000 LED Panel ■ System Color Function Green Lights: To indicate that the Switch is powered on. -
Page 12: Olt Rear Panel
GEPON OLT. EPL-2000 Rear Panel Figure 2-3 Rear Panel of EPL-2000 ■ AC Power Receptacle For compatibility with electric service in most areas of the world, the GEPON OLT’s power supply automatically adjusts to line power in the range of 100-250V AC and 50/60 Hz. - Page 13 User’s Manual of EPL-2000 Figure 2-4 Attaching Brackets to the GEPON OLT. You must use the screws supplied with the mounting brackets. Damage caused to the parts by using incorrect screws would invalidate the warranty. Step 3: Secure the brackets tightly.
-
Page 14: Installing The Sfp Transceiver
Figure 2-6 Plugging in the SFP Transceiver Approved PLANET SFP Transceivers PLANET GEPON OLT supports both Single mode and Multi-mode SFP transceivers. The following list of approved PLANET SFP transceivers is correct at the time of publication: 1000BASE-X SFP modules:... - Page 15 1550nm 1310nm GEPON OLT EPL-2000 SFP ports of GE1 and GE2 are configured in 1000Mbps Forced Mode. If want to make the connection successfully, the switch’s SFP ports should also be in 1000Mbps Forced Mode. Otherwise, the connection might fail.
- Page 16 User’s Manual of EPL-2000 mode to “1000 Force” if needed. Removing the transceiver module Make sure there is no network activity by consulting or checking with the network administrator. Or through the management interface of the switch/converter (if available), disable the port in advance.
-
Page 17: Management Software Installation
User’s Manual of EPL-2000 3. MANAGEMENT SOFTWARE INSTALLATION This chapter explains the methods that you can use to configure management access to the GEPON OLT. It describes the types of management applications and the communication and management protocols that deliver data between your management device (workstation or personal computer) and the system. -
Page 18: Management Access Overview
3.2 Management Access Overview The GEPON OLT EPL-2000 supports 10/100Mbps Management interface and two 1000BASE-X net interfaces for TCP/IP-based GUI Management. The GEPON OLT gives you the flexibility to access and manage it by using any or all of the following methods: ... -
Page 19: Mysql Server Installation
User’s Manual of EPL-2000 3.3.1 MySQL Server Installation Please visit MySQL official website http://dev.mysql.com/ and download MySQL-Essential-5.1.73-win32.msi or MySQL-Essential-5.1.73-win64.msi for the Windows system. Once the Setup program starts running, please click “Next” button for starting installation. Figure 3-2 MySQL Installation Screen When the Setup Type window appears, choose the default “Typical”... - Page 20 User’s Manual of EPL-2000 When the Ready to Install the Program window appears, please click “Install” button. Figure 3-4 Begin Installation Wizard Screen When the installation is done, the MySQL Enterprise window appears. Please click “Next” button. Figure 3-5 MySQL Enterprise Screen...
- Page 21 User’s Manual of EPL-2000 The “Wizard Completed” window appears, and it will ask for Configure the MySQL server and Register the MySQL Server now. Please click “Finish” button. Figure 3-6 Wizard Completed Screen The MySQL Server Instance Configuration Wizard window appears; please click “Next” button.
- Page 22 User’s Manual of EPL-2000 The MySQL Server Instance Configuration window appears; keep the default setting of “Detailed Configuration” and click “Next” button. Figure 3-8 MySQL Server Instance Configuration (1) Screen Please select a Server type. Keep the default setting of “Developer Machine” and click “Next” button.
- Page 23 User’s Manual of EPL-2000 Please select the database usage. Keep the default setting of “Multifunctional Database” and click “Next” button. Figure 3-10 MySQL Server Instance Configuration (3) Screen Choose where you want to place the InnoDB Datafile. Here is the remaining default setting. Please click “Next” button.
- Page 24 User’s Manual of EPL-2000 Please set the approximate number of concurrent connections. Keep the default setting of “Decision Support (DSS)/OLAP“ and click “Next” button. Figure 3-12 MySQL Server Instance Configuration (5) Screen Please set the Network options and Server SQL mode. Keep the default setting and click “Next” button.
- Page 25 User’s Manual of EPL-2000 Please select the default character set. Keep the default setting of “Standard Character Set” and click “Next” button. Figure 3-14 MySQL Server Instance Configuration (7) Screen Please set the Windows options. Keep default setting and click “Next” button.
- Page 26 User’s Manual of EPL-2000 Please set the security options. Type the password “1234” for current root and new root. Click “Next” button. Figure 3-16 MySQL Server Instance Configuration (9) Screen Please click “Execute” button for starting the configuration. Figure 3-17 MySQL Server Instance Configuration (10) Screen...
- Page 27 User’s Manual of EPL-2000 Please give a check to “Configuration file created”, “Windows service MySQL installed”, “Service started successfully” and “Security applied”, and then click “Finish” button. Figure 3-18 MySQL Server Finish Screen...
-
Page 28: Ems Utility Installation
User’s Manual of EPL-2000 3.3.2 EMS Utility Installation Insert the bundled CD disk into the CD-ROM drive to launch the autorun program. Once completed, a welcome menu screen will appear. Click the “PL-EMS” hyperlink, the InstallShield Wizard dialog box will appear below. - Page 29 User’s Manual of EPL-2000 Click “Install” for starting installation. Figure 3-21 PL-EMS Installation Screen Click “Finish” button for completing the EMS Setup. Figure 3-22 PL-EMS Installation Completing Screen...
-
Page 30: Starting Planet Ems Management
User’s Manual of EPL-2000 When the PL-EMS is done, two icons -- PL Server and PL Client – will appear on the desktop. 3.3.3 Starting PLANET EMS Management The following shows how to start-up the PL-EMS Management on the management PC. -
Page 31: Snmp-Based Network Management
After entering the user name and password, the PL-EMS main screen will appear as in Figure 3-25. Figure 3-25 Main Screen of EPL-2000 GEPON OLT 3.4 SNMP-based Network Management You can use an external SNMP-based application to configure and manage the GEPON OLT, such as SNMPc Network Manager, HP Openview Network Node Management (NNM) or What’s Up Gold. -
Page 32: Ems Management System
User’s Manual of EPL-2000 4. EMS Management System PLANET GEPON solutions include the OLT EPL-2000 and ONUs -- EPN-102 and EPN-103. The following information introduces the software configuration. This document explains how to use the EMS Utility for the purpose of evaluating the functionality and usability of Host Interface Protocol. -
Page 33: Ems Toolbar
4.1 EMS Toolbar The toolbar includes System, Alarm, Config, Performance and Help features which allows users to do advanced setting. Figure 4-1 EPL-2000 GEPON OLT Toolbar 4.1.1 System: It includes System Config, Mib Browser, Database Mainteance, User Manage and Exit. - Page 34 User’s Manual of EPL-2000 Figure 4-3 System Config Screen The popup window includes the following fields: Object Description Language: Allows user to select the language: English and Simplified Chinese. Enter the IP address which allows user to remote control from other PC with same IP subnet address.
- Page 35 4.1.1.4 User Manage It is allowed to configure the GEPON OLT to authenticate users logging into the system for management access using local authentication methods. The EPL-2000 provides totally three different security levels for local user management. Figure 4-6 User Manager Screen...
-
Page 36: Alarm
User’s Manual of EPL-2000 The popup window includes the following fields: Object Description Add New Account Delete Account Save Account Login Name: Enter the Name for login User name: Enter the Name for user Password: Enter the Password Password Confirm:... - Page 37 User’s Manual of EPL-2000 4.1.2.1 Alarm Query The OLT alarms manager works in concert with the ONUs to provide enhanced management capabilities and complementary set of OLT specific alarms. Figure 4-8 Alarm Query screen The popup window includes the following fields:...
- Page 38 User’s Manual of EPL-2000 4.1.2.2 Config Trap Rule Figure 4-9 Config Trap Rule screen The popup window includes the following fields: Object Description Refresh: Refresh the Configuration. Apply: Apply the configuration. Close the Alarm Filter. Close:...
- Page 39 Allows user to edit the number of logs for each page. Search: Start searching the logs. Save: Save the Logs. 4.1.2.4 Trap Window This function displays the EPL-2000 trap; it includes Severity, Handler, Trap Object and more. Figure 4-11 Trap Window Screen...
-
Page 40: Config
User’s Manual of EPL-2000 4.1.3 Config This feature allows user to configure the Top Tree, EPL-2000, PON Card and ONU property. Figure 4-12 Toolbar of Config Screen The popup window includes the following fields: Object Description Add: Allows user to add Location and Device Modify: Allows user to modify the property of Devices like: EPL-2000 and PON Card. -
Page 41: Performance
User’s Manual of EPL-2000 4.1.4 Performance This performance function helps user to verify the OLT connection. This window allows user to issue ICMP PING packets to troubleshoot IP connectivity issues. Once you select the target OLT in the Top Tree and click Performance\Ping from the Toolbar, ICMP packets are transmitted. The report windows pop up automatically until responses to all packets are received, or until a timeout occurs. - Page 42 User’s Manual of EPL-2000 Figure 4-15 Language Screen Figure 4-16 About Screen The popup window includes the following fields: Object Description Skin: Allows user to change the color of window Lauange: Allows user to choose two kinds of languages: English and Simplified Chinese.
-
Page 43: Olt Management
User’s Manual of EPL-2000 4.2 OLT Management To manage EPL-2000, EMS manager needs to add EPL-2000 device. They can add and manage the EPL-2000 from the two types of interfaces: Management Port – the 10/100BASE-TX RJ45 interface Uplink ports – the two 1000BASE-X SFP interfaces The EPL-2000 is shipped with default IP addresses as follows: Management Port: IP Address: 192.168.1.10... - Page 44 Please enter the EPL-2000 default IP address “192.168.1.10”, Read Community “public” and Write Community “private” of the management port. Double-click the EPL-2000 device node unit in the topology tree, and click Chassis Management in the interface as the window appears below:...
-
Page 45: System Basic Information
User’s Manual of EPL-2000 Figure 4-20 EPL-2000 OLT Management Screen 4.2.1 System Basic Information The Basic System Information page provides information for the current device information. Basic System Information page helps an OLT administrator to identify the System Model, System Description, System Location and System Contact. -
Page 46: Basic Information
/ hardware version, System Config and Switch Mode Configure. Figure 4-22 Basic Information Screen The window includes the following fields: Object Description Card Type: The OLT device type, EPL-2000 is epon-olt type. Serial NO.: The manufacture number. Hardware Version: The version of Current Hardware. Firmware Version: The version of Current Firmware. -
Page 47: Net Interface Management
Allows user to change the Default Gateway. Inband Gateway: The default IP address of Net interface is 192.168.10.1 Allows user to change the VLAN ID. VLAN[1~4094]: Default VLAN ID: 1 Inband Manage enable: Allows user to manage EPL-2000 through GE1 and GE2 port. -
Page 48: User Manage
User’s Manual of EPL-2000 4.2.4 User Manage This Page provides an overview of the current users. Currently the only way to login as another user on the web server is to close and reopen the browser. Please press “Add” button for adding new login user account, after setup is completed, press “OK”... -
Page 49: Igmpsetting
User’s Manual of EPL-2000 Figure 4-25 User Manage Screen The window includes the following fields: Object Description User Name: The name identifying the user. The password of the user. The allowed string length is 1 to 32. User Password: Premission: The level of the user. -
Page 50: Trunk Management
Trunk multiplies the bandwidth between the devices, increases port flexibility, and provides link redundancy. As GEPON OLT EPL-2000 SFP Ports of GE1 and GE2 is configured in 1000Mbps Forced Mode, the switch’s SFP Ports should also change to the same mode if the connection is to be established... -
Page 51: Vlan Management
User’s Manual of EPL-2000 Figure 4-27 Trunk Management Screen The window includes the following fields: Object Description Enable: Trunk function Enable. Up Trunk: Disable: Trunk function Disable. 4.2.7 VLAN Management 4.2.7.1 VLAN Overview A Virtual Local Area Network (VLAN) is a network topology configured according to a logical scheme rather than the physical layout. - Page 52 User’s Manual of EPL-2000 in packet headers. The tagging feature allows VLAN to span multiple 802.1Q-compliant switches through a single physical connection and allows Spanning Tree to be enabled on all ports and work normally. Some relevant terms: Tagging - The act of putting 802.1Q VLAN information into the header of a packet.
- Page 53 User’s Manual of EPL-2000 ■ Port VLAN ID Packets that are tagged (are carrying the 802.1Q VID information) can be transmitted from one 802.1Q compliant network device to another with the VLAN information intact. This allows 802.1Q VLAN to span network devices (and indeed, the entire network –...
- Page 54 User’s Manual of EPL-2000 Tagged: Ports with tagging enabled will put the VID number, priority and other VLAN information into the header of all packets that flow into those ports. If a packet has previously been tagged, the port will not alter the packet, thus keeping the VLAN information intact.
- Page 55 User’s Manual of EPL-2000 Figure 4-28 VLAN Management Screen The window includes the following fields: Object Description VLAN ID: Indicates the ID of this particular VLAN. Description: Allows user to fill in the words for VLAN description Egress Ports: Selects specific port for VLAN group.
- Page 56 User’s Manual of EPL-2000 OLT Management \ Port \ Port Property Figure 4-29 Port Property Screen The window includes the following fields: Object Description Port ID: This is the logical port name for this row. Allows to assign PVID for selected port. The range for the PVID is 1-4094.
-
Page 57: Iptv Profile
User’s Manual of EPL-2000 tagged By default, the field is set to allType. 4.2.8 IPTV Profile This page allows user to create IPTV profile. Figure 4-30 IPTV Profile Screen The window includes the following fields: Object Description Index: The number identifying the user. -
Page 58: Iptv Channel
User’s Manual of EPL-2000 4.2.9 IPTV Channel This page allows for selecting the specific IPTV profile and creates their own IPTV channels. Figure 4-31 IPTV Channel Screen The window includes the following fields: Object Description The user can select specific IPTV Profile; the IPTV profile is creating by IPTV IPTV Profile: profile page. -
Page 59: Port Property
Object Description Port ID: This is the logical port name for this row. Select any available link mode for the given EPL-2000 fiber port. Draw the menu bar to select the mode. Mode Config: Auto - Setup Auto negotiation for copper interface. - Page 60 Set up the Rate of Ingress Rate. [0~1000000] As GEPON OLT EPL-2000 SFP Ports of GE1 and GE2 are configured in 1000Mbps Forced Mode, the switch’s SFP Ports should also be changed to 1000Mbps Forced Mode if the connection is to be established successfully,. Otherwise, the connection might fail.
-
Page 61: Port Status
User’s Manual of EPL-2000 4.2.11 Port Status This page displays current port configurations and operating status – it is a ports’ configurations summary table. Via the summary table, you can know status of each port clearly at a glance, like Port Link Up/Link Down status, Link Speed and Duplex mode. -
Page 62: Pon Card Management
User’s Manual of EPL-2000 4.3 PON Card Management Double-click the PON Card device node unit in the topology tree or right-click PON Card Management in the interface as the window shows below: Figure 4-34 PON Card Interface Screen 4.3.1 Interface Information This page displays the current PON Card Information –... - Page 63 User’s Manual of EPL-2000 Object Description PON MAC: Shows the PON1 interface MAC address. ONU AUTH: Selects the Auth mode. PON Port Enabled: Enabled or Disable the PON1 port. Max LLID Number[0~239]: Allows for setting value of LLID Registered LLID Number: Allows for setting number of Registered LLID.
-
Page 64: Olt Global Setting
User’s Manual of EPL-2000 4.3.2 OLT Global Setting Figure 4-36 OLT Global Setting Screen The popup window includes the following fields: Object Description ONU P2P: Enabled/Disable the ONU P2P function. Selects the link encryption mode, there are three modes. Link Encryption:... -
Page 65: Onu Auth
User’s Manual of EPL-2000 4.3.3 ONU Auth Figure 4-37 Onu Auth Screen The popup window includes the following fields: Object Description Allows for selecting which PON port for modifying. PON Port: Index: The number identifying the user. The MAC address of the entry. -
Page 66: Onu Management
User’s Manual of EPL-2000 4.4 ONU Management Double-click the EPL-2000 device node unit in the topology tree or right-click Chassis Management in the interface as the windows show below: Figure 4-38 ONU Interface Screen Figure 4-39 ONU Management Screen... -
Page 67: Basic Configuration
User’s Manual of EPL-2000 4.4.1 Basic Configuration The Basic System page provides information on the current device status. Basic System page helps an OLT administrator to identify the ONU device’s firmware / hardware version, ONU MAC Address, ONU Line Status and others. -
Page 68: Global Parameter
Figure 4-41 Global Parameter Screen The window includes the following fields: Object Description Enable: Open the ONU IGMP Fastleave function. IGMP Fastleave: Disable: Close the ONU IGMP Fastleave function. IPTV Profile: Fill the IPTV Profile name which has created from EPL-2000 IPTV Profile page. -
Page 69: Onu Multicast Group
User’s Manual of EPL-2000 Displays the ONU Fiber Laser RX power. onuLaserRXPower(dbm): onuLaserTXPower(dbm): Displays the ONU Fiber Laser TX power. 4.4.3 ONU Multicast Group This page displays all of your multicast connection information. Figure 4-42 Global Parameter Screen 4.4.4 DBA Configuration (Only for EPN-103) - Page 70 User’s Manual of EPL-2000 Figure 4-43 DBA Configuration Screen The window includes the following fields: Object Description Enter the minimum upload rate which is allowed for the ONU Gigabit port and Updbaminrate[0~1000000] Fast Ethernet port. The allowed range is 0 bytes to 1000000 bytes.
-
Page 71: Onu Port Management
User’s Manual of EPL-2000 4.4.5 ONU Port Management In ONU Port Management, you can configure the settings of ONU ports to control the connection parameters like Port Speed, Duplex mode, Flow Control and Port Auto-Negotiation. Figure 4-44 ONU Port Management Screen... -
Page 72: Port Multicast
User’s Manual of EPL-2000 4.4.6 Port Multicast Figure 4-45 ONU Bridging Mode Screen The window includes the following fields: Object Description ONU Port1: 10/100/1000Mbps Port. Port ID: ONU Port2: 10/100Mbps Port. Max Groups: Allows user to configure how many groups. -
Page 73: Onu Vlan
User’s Manual of EPL-2000 4.4.7 ONU VLAN This page allows the user to modify per port VLAN mode. Figure 4-46 MAC Address Management Screen The window includes the following fields: Object Description ONU Port1: 10/100/1000Mbps Port. Port ID : ONU Port2: 10/100Mbps Port. -
Page 74: Port Policying
User’s Manual of EPL-2000 4.4.8 Port Policying This page allows user to modify the Port Policy configuration. Figure 4-47 Port Policying Screen The window includes the following fields: Object Description ONU Port1: 10/100/1000Mbps Port. Port: ONU Port2: 10/100Mbps Port. Policy Enable : Allows user Disable or Enable the Policy mode. -
Page 75: Port Egress
User’s Manual of EPL-2000 4.4.9 Port Egress This page allows user to modify the Port Egress configuration. Figure 4-48 Port Egress Screen The window includes the following fields: Object Description ONU Port1: 10/100/1000Mbps Port. Port: ONU Port2: 10/100Mbps Port. Egress Enable : Allows user Disable or Enable the Egress mode. -
Page 76: How To Upgrade Epl-2000 Firmware
User’s Manual of EPL-2000 4.5 How to upgrade EPL-2000 firmware For upgrading the EPL-2000 firmware, you need to have FTP server software. Here we are using Home FTP Server software for an example: 1. The following main screen of Home FTP Server appears: Figure 4-49 Home FTP Server Main Screen 2. - Page 77 4. Copy the EPL-2000 firmware to the Home Ftp server directory. For example: C:\Program Files\Home Series\Home Ftp Server 5. Operate EMS utility click EPL-2000 once excute “Device Upgrade” on the EMS toolbar of Config. Figure 4-51 EPL-2000 Interface Screen Figure 4-52 Device Upgrade Item Screen...
- Page 78 6. After executing the Device Upgrade, the following window will appear. Please fill in the user name and password as “user”. Figure 4-53 Device Upgrade Procedure (1) Screen 7. Press “Find File” button to get EPL-2000 firmware. Following Step 3, the file should be at “C:\Program Files\Home Series\Home Ftp Server”.
- Page 79 9. Press “Upgrade” button for upgrading the firmware. During the period, the Progress Status will show “Upgrading”. After finishing the upgrading, the Progress Status will show “Upgrade OK”. Figure 4-55 Device Upgrade Procedure (3) Screen Figure 4-56 Device Upgrade Procedure (4) Screen 10. After finishingh the firmware upgrade, please reboot the EPL-2000.
-
Page 80: Epl-2000 Operation
User’s Manual of EPL-2000 5. EPL-2000 OPERATION 5.1 Address Table The OLT switch is implemented with an address table. This address table os composed of many entries. Each entry is used to store the address information on some nodes on the network, including MAC address, port number, etc. -
Page 81: Switch's Rj45 Pin Assignments
User’s Manual of EPL-2000 APPENDIX A A.1 Switch's RJ45 Pin Assignments 1000Mbps, 1000BASE-T Contact MDI-X BI_DA+ BI_DB+ BI_DA- BI_DB- BI_DB+ BI_DA+ BI_DC+ BI_DD+ BI_DC- BI_DD- BI_DB- BI_DA- BI_DD+ BI_DC+ BI_DD- BI_DC- Implicit implementation of the crossover function within a twisted-pair cable, or at a wiring panel, while not expressly forbidden, is beyond the scope of this standard. - Page 82 User’s Manual of EPL-2000 The standard cable, RJ45 pin assignment The standard RJ45 receptacle/connector There are 8 wires on a standard UTP/STP cable and each wire is color-coded. The following shows the pin allocation, color of straight cable and crossover cable connection:...
Need help?
Do you have a question about the EPL-2000 and is the answer not in the manual?
Questions and answers
HOW CAN I OPEN FIRMWARE FOR CONFIGURATION