Table of Contents
Advertisement
Quick Links
Advertisement
Table of Contents

Subscribe to Our Youtube Channel
Related Manuals for Planet NVR-400


Summary of Contents for Planet NVR-400
- Page 1 4-CH Network Video Recorder NVR-400 User’s Manual Version: 1.1 Date: April, 2009...
- Page 2 PLANET. PLANET assumes no responsibility for any inaccuracies that may be contained in this User’s Manual. PLANET makes no commitment to update or keep current the information in this User’s Manual, and reserves the right to make improvements to this User’s Manual and/or to the products described in this User’s Manual, at any time without notice.
-
Page 3: Preface
REFACE Thank you for purchasing the Network Video Recorder, an IP based device that installed on your network, which can be managed remotely via the Internet or your LAN. Together with the Internet camera, the Network Video Recorder allows you to remote access and simultaneous record live video streams. -
Page 4: Table Of Contents
NVR ................................31 4.2.7 Schedule Download............................ 34 4.2.8 Logout ................................ 35 4.2.9 Help................................36 AP P EN D IX ..................................37 ................................37 PECIFICATIONS USB C ..............................37 OMPATIBLE .......................... 38 OTION ETECTION ONFIGURATION NVR-400 User Guide - 3 -... -
Page 5: Chapter 1 Introduction T O Your Device
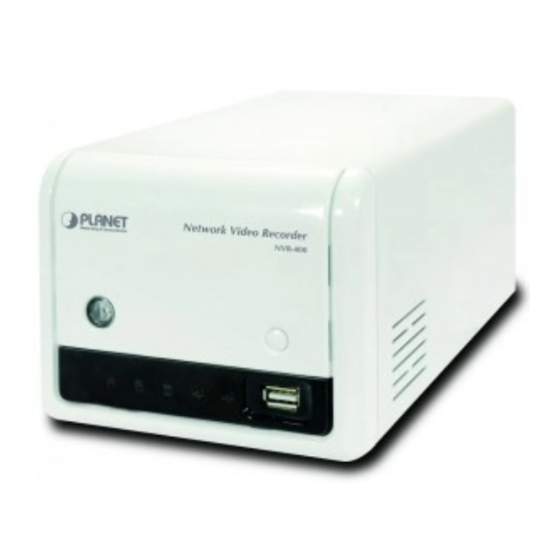
HAPTER NTRODUCTION EVICE Checking the Package Contents Check the items contained in the package carefully. You should have the following: 1 x NVR-400 1 x Power Cord 1 x Power Adapter 1 x RJ-45 Cable 4 x Rubber Pad 4 x Screw 1 x User’s Manual CD-ROM... -
Page 6: Getting To Know Your Device
The LED off indicates no USB devices is connected to the device. When you connect the USB device to the device, the LED becomes a steady Green light. When it blinks, the device is receiving/ transmitting data from/to the USB device. 1 / 2 - 5 - NVR-400 User Guide... - Page 7 Rear Panel Fan and Ventilator Reset DC 12V USB Port 2 Ethernet Item Description DC 12V Plug the provided AC Power Adapter. USB Port 2 Connect the USB printer (non-GDI interface). Ethernet Plug the provided Ethernet Cable to connect to your LAN. Press to reset the device.
-
Page 8: Chapter 2 Hardware Installation
In the illustration below, the Network Video Recorder and four Internet cameras are connected to a router/ switch, which minimize the impact of the network traffic for the users within the network. Network Video Recorder in your networking environment - 7 - NVR-400 User Guide... -
Page 9: Installing The Hard Disk Drive
2.2 Installing the Hard Disk Drive 1. Disconnect the power cable of the device. 2. Remove two screws on the rear panel, and then remove the rear panel. 3. Pull the disk tray out until it jammed in the rack. 4. -
Page 10: Connecting The Network
Connecting the LAN cable 2.4 Connecting the Power Adapter Plug the AC power adapter to the power connector located on the device’s rear panel, and then connect it to your local power supply. Connecting the power cable NVR-400 User Guide - 9 -... -
Page 11: Chapter 3 Accessing The Device
1. On your PC, click Start > My Network Places. 2. Find the device with its device named (such as NVR-400) in My Network Place. 3. Double-click the device icon. When the login window appears, enter the User name (the default is admin) and password (the default is admin), and then click OK to access the Network Video Recorder. -
Page 12: Using Ipfinder
Click Search to find the IP address of the connected device(s). Click Exit to close the utility. 3. Once you get the IP address of the device, launch the Web browser to access your device. NVR-400 User Guide - 11 -... -
Page 13: Chapter 4 Configuring The Device
HAPTER ONFIGURING EVICE You can easily access and manage the Network Video Recorder via the Web browser of your PC. This chapter describes the Web Configuration Utility, and guides you through the configuration of the device. Since the default configuration of the device is DHCP mode enabled, you are recommended to use IPFinder to search the IP address that is assigned to the device by the DHCP server, and then click Link to access the camera via the Web browser. -
Page 14: Using The Setup Wizard
Select DHCP when your network uses the DHCP server; or select Static IP to assign the IP address for the device directly. For more information of TCP/IP settings, refer to the Lan section in Web Configuration Utility. NVR-400 User Guide - 13 -... - Page 15 Step 3. Set up Space Type Select Single Disk or RAID for storing the files. For more information of space type, refer to the section 4.2.3 Storage Setup in Web Configuration Utility. Step 4. Setup Summary Display the configuration of the device. When you complete the Setup Wizard, click Apply to reboot the device.
-
Page 16: Using The Web Configuration Utility
Logout, and Help. Each option provides several related settings in the sub-menu area. Click the desired option from the menu bar and then select the related setting to set up. Sub-menu area Menu bar NVR-400 User Guide - 15 -... -
Page 17: System Information
4.2.1 System Information The System Information menu displays the current configuration and events log of the device. Summary This sub-menu displays the hostname and IP address of the device, the date and time, and the network service that you have set up. Status This sub-menu displays the firmware version of the device, the networking information, the time zone, and the disk information. - Page 18 This sub-menu displays the events log recorded by the system. NVR-400 User Guide - 17 -...
-
Page 19: System
4.2.2 System The System menu contains the basic system settings for the device, such as the networking settings, time and date setup, etc. - 18 -... - Page 20 DNS 1/2 DNS (Domain Name System) translates domain names into IP addresses. Enter the Primary DNS and Secondary DNS that are provided by ISP. Link Status Display the connection status of the device. Time NVR-400 User Guide - 19 -...
- Page 21 Time Zone Select the proper time zone for the region from the pull-down menu. NTP Setup Select this option and the time will be synchronized with the NTP Server. When you select this option, you have to enter the IP address of the NTP server. Manual Setup Select this option to set the date and time manually.
- Page 22 Otherwise, the device might be damaged because of failure of upgrading firmware. Firmware file Click Browse to find the firmware file and click Update. NVR-400 User Guide - 21 -...
-
Page 23: Storage Setup
4.2.3 Storage Setup The Storage Setup menu provides the information and controls of the installed hard disk drives, including the USB device. NOTE You are not recommended to use the USB device as your major storage device. Space Click Add to configure the storage space on the installed hard disk drives: selecting Single Disk or RAID. - Page 24 When completed, the related information of the disks is displayed on the screen. Click Add to add a storage space, or click Delete to remove the current storage space. NOTE Please remember to reboot your device when you clicked Apply button. NVR-400 User Guide - 23 -...
- Page 25 USB Disk If you connect an external USB disk, this sub-menu displays the information of the USB disk. To safely remove the connected USB device, click unmount from this sub-menu. (The other way is pressing the Unmount button on the front panel of the device for disconnecting the USB Port 1.) To reload the information of the connected USB devices, click refresh.
- Page 26 To remove, select it and then click Delete. NOTE Please remember to reboot your device when you clicked Apply button. File Management This sub-menu displays the log of file system that you have made in the device. NVR-400 User Guide - 25 -...
-
Page 27: Authorization Setup
4.2.4 Authorization Setup The Authorization Setup menu allows you to manage the users and groups of the device. User Click Add and then assign the user name in the Select User box, and give a brief instruction in the User Description box. If you have set up groups for organization, you can assign the user to a group from the Group list. - Page 28 When completed, click Apply to add the group. To organize the users for the group, click Edit Member. To remove the group, select it from the list and then click Delete. Authorization This sub-menu displays the assigned access rules and quotas of the users and groups. NVR-400 User Guide - 27 -...
-
Page 29: Network Service
4.2.5 Network Service The Network Service menu allows you to set up the network services for the device, such as FTP server, UPnP media server, etc. Windows OS Windows Network Setup - Workgroup: Enter the workgroup name where the device is installed within your network. - Page 30 The device supports UPnP (Universal Plug and Play) and port auto mapping function so that you can access the device if it is behind an NAT router or firewall. Select this option to enable the UPnP media server and then assign the Path from the list. NVR-400 User Guide - 29 -...
- Page 31 iTunes Server The device features an iTunes Server. It provides the ability to share files to the computer on the local network running iTunes. If the function is enabled, the device will be automatically detected in the iTunes program and the files contained in the specified directory will be available to stream over the network.
-
Page 32: Nvr
The NVR menu allows you to add Internet cameras and view the live video. IP Camera Backup Click Auto Add to add the camera automatically, or click Add and to add the camera manually through the following setup window: NVR-400 User Guide - 31 -... - Page 33 Enter the IP address of the camera. HTTP Port Assign the HTTP Port for the camera (the default is 80). RTSP Port Configure the transmission of streaming data within the network. The default RTSP (Real Time Streaming Protocol) port is 554. User ID/Password Enter the user name and password for accessing the camera.
- Page 34 Quad View In the Quad View screen, you can view the live video from the connected camera. You can view up to four cameras simultaneously. NVR-400 User Guide - 33 -...
-
Page 35: Schedule Download
4.2.7 Schedule Download The Schedule Download menu allows you to set up download schedule. Click Add and the following setup window will appear: Please input the file name. Login Select Anonymous or Account from the list according to the settings of the target server. -
Page 36: Logout
From this sub-menu, click Apply to exit the Web Configuration Utility and go back to the Login window. Shutdown From this sub-menu, you can do one of the following: Select Shutdown Now and click Apply to turn off the device. Select Reboot and click Apply to reboot the device. NVR-400 User Guide - 35 -... -
Page 37: Help
4.2.9 Help The Help menu displays the information for each setting option of the device. Click the topic (marked as blue color) to link to the corresponding page and view the related information in detail. - 36 -... -
Page 38: Appendix
Transcend JetFlash 2.0 / Astone USB Drive Imation Corp. 6155 Phone Parent Silicon Integrated Systems Corp. Super Flash 1GB / GXT 64MB Flash Drive USB Printer Vendor Model LJ-1020 Canon IP1880 Fuji Xerox Doc Print 203A. - 37 - NVR-400 User Guide... -
Page 39: Motion Detection Configuration
Motion Detection Configuration Example for ICA-530 1. At NVR page, please click “yes” in Motion Enable item. 2. At Network Service page, Please Enable the FTP Service. - 38 -... - Page 40 3. Login ICA-530 and set up an object detection area. 4. At Event Server page, please add NVR as the FTP Server. Notice that the FTP Path must be the corresponding camera folder. NVR-400 User Guide - 39 -...
- Page 41 5. At Event Schedule page, first you have to enable the motion detection. Second, select the item of Sending FTP. 6. Go back to NVR page and click start job. Notice that if you want to stop motion detection, please stop it in ICA-530 first. Then click the stop job button in NVR page.
- Page 42 Example to ICA-M220 1. The same as ICA-530. 2. The same as ICA-530. 3. The same as ICA-530. 4. Login ICA-M220 and set up an object detection area. 5. Please add NVR as the FTP Server. NVR-400 User Guide - 41 -...
- Page 43 6. Enable motion detection and select the item of Send snapshot file to FTP. 7. Go back to NVR page and click start job. - 42 -...
Need help?
Do you have a question about the NVR-400 and is the answer not in the manual?
Questions and answers