Table of Contents
Advertisement
Available languages
Available languages
Owner's Manual
Bedienungsanleitung
Mode d'emploi
Manuale d'uso
Manual del usuario
Before using this unit, carefully read the sections entitled:
"USING THE UNIT SAFELY" (P. 3, 4) and "IMPORTANT
NOTES" (P. 5). These sections provide important information
concerning the proper operation of the unit. Additionally, in
order to feel assured that you have gained a good grasp of
every feature provided by your new unit, this manual should
be read in its entirety. The manual should be saved and kept
on hand as a convenient reference.
Copyright © 2001 ROLAND CORPORATION
All rights reserved. No part of this publication may be
reproduced in any form without the written permission of
ROLAND CORPORATION.
Advertisement
Table of Contents

Related Manuals for Edirol UA-1A


Summary of Contents for Edirol UA-1A
- Page 1 Owner’s Manual Bedienungsanleitung Mode d’emploi Manuale d’uso Manual del usuario Before using this unit, carefully read the sections entitled: “USING THE UNIT SAFELY” (P. 3, 4) and “IMPORTANT NOTES” (P. 5). These sections provide important information concerning the proper operation of the unit. Additionally, in order to feel assured that you have gained a good grasp of every feature provided by your new unit, this manual should be read in its entirety.
- Page 2 DECLARATION OF CONFORMITY Compliance Information Statement Model Name : UA-1A Type of Equipment : USB Audio Interface Responsible Party : Edirol Corporation North America Address : 425 Sequoia Drive, Suite 114, Bellingham, WA 98226 Telephone : (360) 594-4276 For Canada NOTICE This Class B digital apparatus meets all requirements of the Canadian Interference-Causing Equipment Regulations.
-
Page 3: Using The Unit Safely
Refer all • Dusty; or are servicing to your retailer, the nearest • Subject to high levels of vibration. Roland / EDIROL Service Center, or ....................an authorized Roland / EDIROL distributor, as listed on the "Information"... - Page 4 Roland / EDIROL Service Center, or an authorized Roland / EDIROL distributor, as listed on the "Information" page when: • Objects have fallen into, or liquid has been spilled onto the unit; or •...
-
Page 5: Important Notes
IMPORTANT NOTES 291a In addition to the items listed under “USING THE UNIT SAFELY” on page 3, please read and observe the following: Power Supply • Before connecting this unit to other devices, turn off the power to all units. This will help prevent malfunctions and/or damage to speakers or other devices. - Page 6 IMPORTANT NOTES • Use a cable from Roland to make the connection. If using some other make of connection cable, please note the following precautions. • Some connection cables contain resistors. Do not use cables that incorporate resistors for connecting to this unit. The use of such cables can cause the sound level to be extremely low, or impossible to hear.
-
Page 7: Table Of Contents
Table of Contents USING THE UNIT SAFELY ..............3 IMPORTANT NOTES................5 English Introduction..................... 8 Connections and driver installation (Windows) ........9 Connections and driver installation (Macintosh) ......19 Troubleshooting ................... 23 Deutsch Einführung .................... 31 Anschlüsse und Treiberinstallation (Windows) ........ 32 Anschlüsse und Treiberinstallation (Macintosh) ...... -
Page 8: Introduction
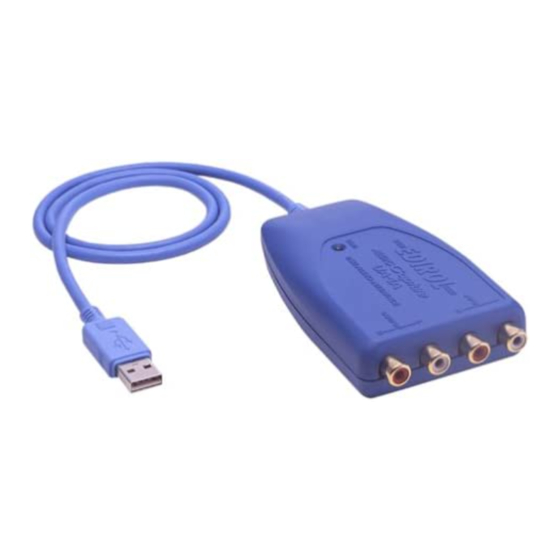
Introduction Contents of the Package The UA-1A package contains the following items. As soon as you open the package, please verify that all items are present. If any items are missing, please contact the dealer where you purchased the package. -
Page 9: Connections And Driver Installation (Windows)
Connections and driver installation (Windows) * If you are a Macintosh user, refer to p. 19. In order to use the UA-1A, you must first install the USB Composite Device driver, the USB Human Interface driver, and the USB Audio Device driver consecutively. These drivers are included with Windows. -
Page 10: Windows Me Users
* If you are using a Windows 2000 machine, refer to p. 11, if Windows 98, refer to p. 11. Turn on the power of your computer and start up Windows, and use a USB cable to connect the UA-1A to your computer. fig.02-03.e... -
Page 11: Windows 98 Users
98, refer to p. 11. Turn on the power of your computer and start up Windows. Use a USB cable to connect the UA-1A to your computer. The UA-1A is recognized to the computer and the driver is installed all automatically. - Page 12 Connections and driver installation (Windows) A USB Composite Device will be detected automatically, and the Add New Hardware Wizard dialog box will appear. Click [Next]. If this dialog box does not appear, refer to fig.02-06.e Problems related to the USB driver (p. 23). When the display asks “What do you want Windows to do?”, select...
- Page 13 Connections and driver installation (Windows) If the Microsoft Windows CD-ROM is not inserted in the CD-ROM drive, the following dialog box may appear. If this occurs, insert the Microsoft Windows CD-ROM into the CD-ROM drive, and click [OK]. fig.02-09.e fig.02-10.e When installation of the USB Composite Device driver is finished, the...
- Page 14 Connections and driver installation (Windows) Specifying the audio input/output device Click the Windows [Start] button, and select [Settings] - [Control Panel]. Win 98 / Win 98SE: In Control Panel, double-click the [Multimedia] icon to open the Multimedia Properties dialog box. Win 2000 / Me: In Control Panel, double-click the [Sounds and Multimedia] icon to open the Sounds and Multimedia...
- Page 15 Connections and driver installation (Windows) Click [OK] to complete the settings. Volume Control settings The output volume of the UA-1A can be controlled by the If Volume Control is not Windows Volume Control. installed on your computer, use Add/ Remove Applications in...
- Page 16 Connections and driver installation (Windows) When using your computer’s CD-ROM drive to play an audio CD, or when playing background music for games with the UA-1A. If using Windows Me: Select [Start] - [Settings] - [Control Panel]. In the [Control Panel], double-click the [System] icon to access the System Properties dialog box.
- Page 17 Use the following procedure to delete the driver that is folder names may be already installed. different. Use a USB cable to connect the UA-1A to your computer. Click the Windows [Start] button, and select [Settings] - [Control Panel]. In [Control Panel], double-click [System] to open the System Properties dialog.
- Page 18 Connections and driver installation (Windows) Follow the steps 1. – 4. again, and double-click [Universal Serial Bus controllers] to display the list of devices. is displayed for the USB-compatible device icon: Select the [USB Composite Device] icon, and click [Remove]. In the Confirm Device Removal dialog box, click [OK].
-
Page 19: Connections And Driver Installation (Macintosh)
Connections and driver installation (Macintosh) * If you are a Windows user, refer to p. 9. In order to use the UA-1A, you must first install a driver. UA- What is a driver? 1A uses a driver included with Mac OS. - Page 20 USB section, as shown below: fig.03-04.e If the indication is correct, the installation of the UA-1A driver is successful. Select [Quit] from the [File] menu to close the Apple System Profiler dialog, then make the sound settings explained below.
- Page 21 [Control Panels] - [Sound] to open the Sound dialog. Click the [Speakers] tab. fig.03-06.e Turn down the volume on the UA-1A, and on your audio equipment, then click [Start Test]. fig.03-07.e Test sounds are output from left to right, along with what appears on the screen;...
- Page 22 If you don’t see USB Audio, you should close Sound dialog. Then, in the Sound dialog. Then, Choose a source for disconnect the UA-1A, and sound input:, choose USB wait about ten seconds. Then, try doing the Audio. procedure over again, starting at number 2.
-
Page 23: Troubleshooting
OS. If the UA-1A does not operate as you expect, check the following points. Problems related to the USB driver “Add New Hardware Wizard” does not start up automatically “Add New Hardware Wizard”... - Page 24 The UA-1A cannot be connected if insufficient power is supplied to it. Check whether one of the following cases apply. If you are using the UA-1A with a notebook computer that is running on its battery, operation may be unreliable with some models of computer. If this is the case, connect the AC adaptor to your notebook computer.
- Page 25 If your computer or USB hub has two or more USB connectors, connecting the UA-1A to a USB connector to which the UA-1A has never before been connected may cause the Add New Hardware Wizard dialog box will appear even though the drivers have already been installed.
- Page 26 • Have you specified the audio data output destination for OS? The audio data output destination for a computer must be set to UA-1A. For details on this setting, refer to Specifying the audio input/output device (Windows p.
- Page 27 Then restart your computer. • Noise is heard in the line input If a MIDI sound module and the UA-1A are connected via USB to the same computer, and the output of the MIDI sound module is connected to the line input jacks of the UA-1A, noise from the computer may enter via the MIDI sound module and be heard from the UA-1A.
-
Page 28: Sound Is Interrupted During Audio Playback
Troubleshooting Sound is interrupted during audio playback • Try increasing the memory You can increase the processing power of your computer by adding more memory. For details on adding memory, refer to the owner’s manual for your computer. • Does your computer fulfill the USB specifications? The audio may be interrupted if you are using a computer that does not electrically meet the USB specifications. - Page 29 In the "Memory" Control Panel, set Virtual Memory to "Off." • Depending on the way in which you connect to the Internet, use the UA-1A with the following settings. •If you connect to the Internet via a LAN cable Use while the LAN cable is connected.
- Page 30 From the Apple menu, select [Apple System Profiler]. Click the [Devices and Volumes] tab. In the USB section, the screen will indicate “Audio (UA-1A USB Audio Device).” Click the arrow at the left of this text. The number displayed to the right of “Driver version” is the version of the USB audio driver.
-
Page 31: Einführung
Die UA-1A-Packung enthält folgende Artikel. Prüfen Sie sofort nach dem Öffnen der Packung, ob alle Artikel vorhanden sind. Wenn einer der aufgeführten Artikel fehlt, nehmen Sie bitte mit dem Händler Kontakt auf, von dem Sie das UA-1A bezogen haben. UA-1A USB Audio Interface fig.UA1A... -
Page 32: Anschlüsse Und Treiberinstallation (Windows)
Anschlüsse und Treiberinstallation (Windows) * Wenn Sie ein Macintosh-Anwender sind, lesen Sie bitte S. 44. Bevor Sie das UA-1A benutzen können, müssen Sie die Treiber USB Composite Device (USB-Gerät), USB Human Interface sowie USB Audio Device (USB-Audiogerät) installieren. Diese Treiber sind in Windows enthalten. Wenn... - Page 33 Anschlüsse und Treiberinstallation (Windows) Vor der Installation des Treibers Das UA-1A kann unter Windows 95 oder Windows NT nicht verwendet werden. Wenn noch andere Windows-Programme ausgeführt werden, sollten Sie diese beenden, bevor Sie Ihre Arbeit fortsetzen. Wenn Sie mehrere Roland USB-Geräte gleichzeitig an Ihren Computer anschließen (z.B.
- Page 34 Windows 98 verwenden, lesen Sie bitte S. 35. Schalten Sie Ihren Computer ein und starten Sie Windows. Schließen Sie das UA-1A an Ihren Computer mit einem USB-Kabel an. Das UA-1A wird vom Computer erkannt und der Treiber wird automatisch installiert.
- Page 35 Microsoft Windows CD-ROM in Ihr CD-ROM-Laufwerk ein und verwenden Sie ein USB-Kabel, um das UA-1A an Ihren Computer anzuschließen. Da einige Computer beim Kauf bereits den Inhalt der Microsoft Windows CD-ROM auf der Festplatte speichern, befand sich die Microsoft Windows CD-ROM eventuell nicht im Lieferumfang Ihres PCs.
- Page 36 Anschlüsse und Treiberinstallation (Windows) fig.2-06.e Wenn in der Anzeige die Frage gestellt wird, "Wie möchten Sie vorgehen?, wählen Sie "Nach dem besten Treiber für das Gerät suchen. "(Empfohlen)" Klicken Sie anschließend auf [Weiter]. fig.02-07.e Folgendes Dialogfeld wird angezeigt: Wählen Sie CD-ROM-Gerät, und klicken Sie anschließend auf [Weiter] .
- Page 37 Anschlüsse und Treiberinstallation (Windows) Wenn sich die Microsoft Windows CD-ROM nicht im CD-ROM-Laufwerk befindet, wird eventuell folgendes Dialogfeld angezeigt. In diesem Fall legen Sie dieMicrosoft Windows CD-ROM in das CD-ROM-Laufwerk ein und klicken auf [OK]. fig.02-09.e fig.02-10.e Sobald die Installation des Treibers USB Composite Device (USB-Verbundgerät)
- Page 38 Anschlüsse und Treiberinstallation (Windows) fig.02-14.e Sobald die Installation des Treibers USB Audio Device (USB-Audiogerät) beendet ist, wird folgendes Dialogfeld angezeigt. Klicken Sie auf [Beenden]. Damit ist die Installation der Treiber USB Composite Device (USB-Verbundgerät) und USB Audio Device (USB-Audiogerät) abgeschlossen. Starten Sie Windows neu.
- Page 39 Anschlüsse und Treiberinstallation (Windows) Klicken Sie auf die Registerkarte [Audio]. Klicken Sie bei Wiedergabe unterBevorzugtes Gerät . Klicken Sie in der angezeigten Liste auf [USB Audio Device (USB-Audiogerät) ], um dieses Gerät Abhängig von Ihrem auszuwählen. System wird USB Audio Device (USB-Audiogerät) eine Klicken Sie bei Wiedergabe unter Bevorzugtes zusätzliche Ziffer...
- Page 40 Anschlüsse und Treiberinstallation (Windows) Einstellung der Lautstärkeregelung Die Ausgabelautstärke des UA-1A kann mit der Lautstärkeregelung von Windows gesteuert werden. Wenn die Lautstärkeregelung auf Ihrem Computer nicht installiert ist, verwenden Klicken Sie auf die Windows-Schaltfläche[Start] und Sie Anwendungen wählen Sie [Programme] - [Zubehör] - hinzufügen/entfernen in...
- Page 41 Wenn Sie das CD-ROM-Gerät Ihres Computers für das Abspielen einer Audio-CD verwenden oder wenn Sie Hintergrundmusik für Spiele mit dem UA-1A abspielen Bei Verwendung von Windows Me: Wählen Sie [Start] - [Einstellungen] - [Systemsteuerung]. Doppelklicken Sie in der Systemsteuerung auf das Symbol [System], um das DialogfeldSystemeigenschaften zu öffnen.
- Page 42 Ihrem Computer kann es bereits installiert ist. vorkommen, dass einige der Ordnernamen anders lauten. Schließen Sie das UA-1A an Ihren Computer mit einem USB-Kabel an. Klicken Sie auf die Windows-Schaltfläche [Start] und wählen Sie[Einstellungen] - [Systemsteuerung]. Doppelklicken Sie in der [Systemsteuerung] auf das Symbol [System], um das DialogfeldSystemeigenschaften zu öffnen.
- Page 43 Anschlüsse und Treiberinstallation (Windows) Stellen Sie sicher, dass USB Audio Device (USB-Audiogerät) sich nicht in der Liste Audio, Video und Gamecontroller befindet, und klicken Sie Wenn an diesem Punkt auf [Beenden] , um den Dialog ein Dialogfeld Systemeigenschaften zu schließen. angezeigt wird, in dem vorgeschlagen wird, Windows neu zu...
-
Page 44: Anschlüsse Und Treiberinstallation (Macintosh)
Anschlüsse und Treiberinstallation (Macintosh) * Wenn Sie ein Windows-Anwender sind, lesen Sie bitte S. 32. Bevor Sie das UA-1A verwenden können, müssen Sie einen Was ist ein Treiber? Treiber installieren. UA-1A benutzt einen Treiber, der im Mac OS enthalten ist. - Page 45 [Apple System Profiler]. angeschlossenen Audiogeräte zurück. fig.03-02.e Klicken Sie auf das Register [Devices and Volumes]. Schließen Sie das UA-1A an Ihren Computer mit Achten Sie darauf, alle einem USB-Kabel an. aktuell ausgeführten Anwendungen zu schließen, bevor Sie den Anschluss herstellen.
- Page 46 Anschlüsse und Treiberinstallation (Macintosh) Wenn die Anzeige nicht korrekt ist, sollten Sie versuchen, das UA-1A vom USB-Anschluss zu trennen und ca. zehn Minuten zu warten. Anschließend wiederholen Sie das Verfahren, beginnend mit Schritt 4. Soundeinstellungen vornehmen fig.03-05.e Wählen Sie im Menü...
- Page 47 Sie den Dialog Sound. Dialog Sound schließen. Anschließend wählen Sie Anschließend stecken Sie in Choose a source for das UA-1A aus und warten ca. zehn Sekunden. sound input:die Option Versuchen Sie danach, die USB Audio. Schritte erneut auszuführen, beginnend mit Schritt 2.
-
Page 48: Fehlerbehebung
Wenn Sie zum ersten Mal mit einem Computer arbeiten oder die Erklärung einer Vorgehensweise nicht verstehen, lesen Sie bitte im Benutzerhandbuch Ihres Computers oder Ihres Betriebssystems nach. Wenn das UA-1A nicht wie erwartet funktioniert, sollten Sie zuerst folgende Punkte prüfen. Probleme in Verbindung mit dem USB-Treiber "Hardware-Assistent"... - Page 49 USB-Anschluss versorgt wird. Prüfen Sie die Einstellungen Ihres Computers. In einigen Fällen kann das UA-1A nicht mit einem bus-betriebenen Hub (einem Hub ohne eigene Stromversorgung) verwendet werden. Bitte verwenden Sie einen Hub mit selbstständiger Stromversorgung (einen Hub mit eigener Stromversorgung).
- Page 50 Treiber installiert haben. Wenn Ihr Computer oder USB-Hub über zwei oder mehrere USB-Anschlüsse verfügt, kann der erste Anschluss des UA-1A an einen USB-Anschluss dazu führen, dass das Dialogfeld Hardware-Assistent angezeigt wird, obwohl die Treiber bereits installiert wurden. Installieren Sie die Treiber erneut. Gehen Sie dabei vor wie in Anschlüsse und Treiberinstallation (Windows) (S.
- Page 51 Wenn Sie einen Computer bei bereits angeschlossenem UA-1A hochfahren, wird der Computer möglicherweise instabil. In diesem Fall fahren Sie den Computer bitte hoch, während das UA-1A nicht mit dem Computer verbunden ist, und schließen Sie das UA-1A erst nach dem Hochfahren an.
- Page 52 Einzelheiten zu dieser Einstellung finden Sie im Benutzerhandbuch der Software. • Wurden die Treiber richtig installiert? Bevor Sie mit dem UA-1A Audiodaten wiedergeben können, muss der USB Audio Device (USB-Audio-Gerät)-Treiber installiert werden. Einzelheiten zur Installation und zu den Einstellungen erhalten Sie unter Anschlüsse und Treiberinstallation (Windows S.
- Page 53 Dialogfeld zu schließen. Starten Sie Ihren Computer anschließend neu. • Im Line-Eingang ertönt Rauschen Wenn ein MIDI-Soundmodul und das UA-1A via USB an den gleichen Computer angeschlossen sind und die Ausgabe des MIDI-Soundmoduls mit den Line-Eingangsbuchsen des UA-1A verbunden ist, kann Rauschen vom Computer via MIDI-Soundmodul übertragen und vom UA-1A ausgegeben...
- Page 54 Fehlerbehebung Der Sound wird während der Audiowiedergabe unterbrochen. • Versuchen Sie, den Speicher zu erhöhen Sie können die Verarbeitungsleistung Ihres Computers verbessern, indem Sie zusätzlichen Speicher einbauen. Detaillierte Informationen zum Hinzufügen von Speicher finden Sie im Benutzerhandbuch Ihres Computers. • Erfüllt Ihr Computer die USB-Anforderungen? Der Sound kann unterbrochen werden, wenn Sie einen Computer verwenden, der in Bezug auf Elektrik nicht die USB-Anforderungen erfüllt.
- Page 55 Fehlerbehebung Audiowiedergabe stoppt • Auf einigen Computern können die Energieverwaltungseinstellungen in der Systemsteuerung dazu führen, dass die Wiedergabe stoppt. Die Energieverwaltungseinstellungen, die angezeigt werden, wenn Sie auf Energieverwaltung klicken, sind je nach PC-System unterschiedlich. Ein Beispiel für die Einstellungen erhalten Sie untenstehend, aber Sie sollten zusätzlich im Handbuch Ihres Computers nachschlagen.
- Page 56 Setzen Sie im Kontrollfeld "Memory" Virtual Memory auf "Off." • Abhängig von der Art und Weise, mit der Sie eine Verbindung mit dem Internet herstellen, verwenden Sie das UA-1A mit den folgenden Einstellungen. •Wenn die Verbindung mit dem Internet via LAN-Kabel hergestellt wird Verwenden Sie das UA-1A bei angeschlossenem LAN-Kabel.
- Page 57 Wählen Sie im Menü Apple die Option [Apple System Profiler]. Klicken Sie auf die Registerkarte [Devices and Volumes]. Der Bildschirm zeigt im Abschnitt USB "Audio (UA-1A USB Audio Device)" an. Klicken Sie auf den Pfeil links von diesem Text. Die Nummer, die rechts von"Driver version" angezeigt wird, ist die Version des USB Audio-Treibers.
-
Page 58: Introduction
Introduction Contenu du paquet Le paquet UA-1A comprend les éléments suivants. A l'ouverture du paquet, vérifiez que tous les éléments sont inclus. S’il en manque, veuillez contacter le revendeur qui vous a vendu le paquet. Interface Audio UA-1A USB fig.UA1A... -
Page 59: Connexions Et Installation Des Pilotes (Windows)
Un pilote est un logiciel qui permet à un programme s'exécutant sur votre ordinateur de transférer des données de et vers un matériel (comme l'UA-1A) lorsque celui-ci est connecté à votre ordinateur à l'aide d'un câble USB. Le pilote transmet les données de l'application à l'UA-1A et vice-versa. - Page 60 Connexions et installation des pilotes (Windows) Avant d'installer le pilote L'UA-1A ne peut être utilisé avec Windows 95 ou Windows NT. Si d'autres programmes s'exécutent dans Windows, fermez-les tous avant de continuer. Si vous prévoyez de connecter en même temps plusieurs périphériques USB Roland (par exemple...
- Page 61 * Si vous utilisez une machine Windows Me, voir p. 60, pour Windows 98, voir p. 62. Allumez votre ordinateur et démarrez Windows. Utilisez un câble USB pour connecter l'UA-1A à votre ordinateur. L'UA-1A est reconnu par l'ordinateur et le pilote est installé de façon totalement automatique.
- Page 62 Windows dans votre lecteur de CD-ROM et utilisez un câble USB pour connecter l'UA-1A à votre ordinateur. Certains ordinateurs étant vendus avec le contenu du CD-ROM de Microsoft Windows déjà sur le disque dur, ils peuvent ne pas inclure ce Si cette boîte de...
- Page 63 Connexions et installation des pilotes (Windows) fig.02-07.e La boîte de dialogue suivante s'affiche alors. Vérifiez le lecteur de CD-ROM et cliquez sur [Suivant]. fig.02-08.e La boîte de dialogue suivante s'affiche alors. A l'étape 4, l'écran Cliquez sur [Suivant]. indique : "Windows recherche les fichiers du pilote pour ce périphérique :...
- Page 64 Connexions et installation des pilotes (Windows) fig.02-13.e Ensuite, le Périphérique Audio USB est détecté automatiquement et la boîte de dialogue Assistant ajout de nouveau matériel apparaît. Cliquez sur [Suivant] et continuez l'installation en suivant exactement les procédures décrites aux étapes 2 - 5 (p.
- Page 65 Connexions et installation des pilotes (Windows) Win 2000 / Me : Dans le Panneau de configuration, cliquez deux fois sur l'icône [Sons et Multimédia] pour ouvrir la boîte de dialogue Propriétés de Sons et multimédia. * Si vous ne trouvez pas l'icône [Sons et Multimédia], cliquez alors sur [Afficher toutes les options du Panneau de configuration] dans le Panneau de configuration.
- Page 66 Connexions et installation des pilotes (Windows) Cliquez sur [OK] pour terminer les réglages. Réglages de Contrôle du volume Le volume de sortie de l'UA-1A peut être contrôlé par le Contrôle du volume de Windows. Si le Contrôle du volume n'est pas installé sur votre...
- Page 67 Connexions et installation des pilotes (Windows) Lorsque vous utilisez le lecteur de CD-ROM de votre ordinateur pour lire un CD audio ou pour lire la musique de fond des jeux avec l'UA-1A : Avec Windows Me : Sélectionnez [Démarrer] - [Paramètres] - [Panneau de configuration].
- Page 68 Audio USB s'est interrompue avant la fin. de certains dossiers peuvent être différents. Procédez comme suit pour supprimer le pilote déjà installé. Utilisez un câble USB pour connecter l'UA-1A à votre ordinateur. Cliquez sur le bouton [Démarrer] de Windows, puis dans [Paramètres], choisissez [Panneau de configuration].
- Page 69 Connexions et installation des pilotes (Windows) Assurez-vous que le Périphérique Audio USB n'est Si une boîte de dialogue pas dans la liste Contrôleurs son, vidéo et jeux et vous proposant de cliquez sur [Fermer] pour quitter la boîte de dialogue redémarrer Windows Propriétés système.
-
Page 70: Connexions Et Installation Des Pilotes (Macintosh)
* Si vous possédez un PC sous Windows, reportez-vous p. 59. Pour pouvoir utiliser l'UA-1A, vous devez d'abord installer Qu'est-ce qu'un pilote ? un pilote. L'UA-1A utilise un pilote inclus dans le système Mac OS. -> p. 59 Problèmes connus : UA-1A •... - Page 71 [Commands]. Les trois périphériques audio suivants doivent s'afficher dans la section USB, comme suit : fig.03-04.e Si c'est le cas, l'installation du pilote UA-1A est réussie. Sélectionnez [Quit] dans le menu [File] pour fermer la boîte de dialogue Apple System Profiler, puis procédez au réglage du son (voir ci-dessous).
- Page 72 Panels] - [Sound] pour ouvrir la boîte de dialogue Sound. Cliquez sur l'onglet [Speakers]. fig.03-06.e Baissez le volume sur l'UA-1A et sur votre appareil audio, puis cliquez sur [Start Test]. fig.03-07.e Les sons de test passent de gauche à droite, en suivant l'affichage à...
- Page 73 Sound. Sound. Pour Choose a Déconnectez ensuite source for sound input:, l'UA-1A et attendez environ dix secondes. choisissez USB Audio. Recommencez l'opération, en commençant par l'étape 2. Ne cochez pas [Play sound through output device].
-
Page 74: Dépannage
Dépannage Si un problème inattendu se produit avec l'UA-1A, veuillez lire ce chapitre. Il offre de nombreux conseils pour vous aider à résoudre les problèmes. Les problèmes décrits à la section Dépannage sont organisés selon le système d'exploitation sur lequel le problème peut être rencontré. Utilisez les icônes à... - Page 75 • Votre ordinateur ou votre concentrateur USB est-il suffisamment alimenté ? L'UA-1A ne peut être connecté s'il est insuffisamment alimenté. Vérifiez si l'un de ces cas s'applique. Si vous utilisez l'UA-1A avec un ordinateur portable fonctionnant sur ses batteries, l'opération peut ne pas être fiable avec certains modèles d'ordinateurs.
- Page 76 Si votre ordinateur ou concentrateur USB dispose de plusieurs connecteurs USB, lorsque vous connectez l'UA-1A à un connecteur USB sur lequel il n'a jamais été connecté, la boîte de dialogue « Assistant ajout de nouveau matériel » peut s'afficher même si les pilotes ont déjà été installés. Installez à...
- Page 77 ? Pour certains logiciels, vous devez régler la destination des données audio en sortie sur UA-1A. Pour plus de détails sur ce réglage, reportez-vous au manuel d'utilisation du logiciel. • Les pilotes sont-ils correctement installés ? Pour lire les données audio avec l'UA-1A, le pilote Périphérique Audio USB...
- Page 78 • Le niveau du volume de l'instrument connecté à LINE IN est-il trop élevé ? Utilisez le curseur de réglage de l'entrée ligne de l'UA-1A pour réduire le niveau d'entrée. Le niveau du volume de l'instrument connecté à LINE IN est trop bas.
- Page 79 Si un module sonore MIDI et l'UA-1A sont connectés via USB au même ordinateur et que la sortie du module MIDI est connectée aux prises jack d'entrée ligne de l'UA-1A, du bruit peut entrer par le module MIDI et être entendu par l'UA-1A. Dans ce cas, utilisez un concentrateur auto-alimenté...
- Page 80 Dépannage • Essayez de modifier les paramètres des lecteurs de disque Les paramètres suivants peuvent ne pas être inclus sur votre ordinateur. Dans le Panneau de configuration de Windows, cliquez deux fois sur [Système] pour ouvrir la boîte de dialogue [Propriétés Système], puis cliquez sur l'onglet [Gestionnaire de périphériques].
- Page 81 "Off." • Selon la manière par laquelle vous vous connectez à Internet, utilisez l'UA-1A avec les paramètres suivants. •Si vous vous connectez à Internet à l'aide d'un câble LAN Utilisez l'appareil tant que le câble LAN est connecté.
- Page 82 Si un CD audio est utilisé pour la musique de fond du jeu, voir Lorsque vous utilisez le lecteur de CD-ROM de votre ordinateur pour lire un CD audio ou pour lire la musique de fond des jeux avec l'UA-1A : (p. 67).
-
Page 83: Introduzione
Introduzione Contenuto della confezione La confezione UA-1A contiene i seguenti elementi. Dopo aver aperto la scatola, controllare che tutti gli elementi siano presenti. Se ne mancano alcuni, contattare il rivenditore presso il quale è stata acquistata la confezione. Interfaccia audio UA-1A USB fig. -
Page 84: Collegamenti E Installazione Del Driver (Windows)
Collegamenti e installazione del driver (Windows) * Per gli utenti Macintosh, fare riferimento a pag. 96. Per poter utilizzare l’UA-1A, è necessario installare prima il driver USB Composite Device [Periferica composita USB] e successivamente nell’ordine il driver USB Human Interface [Interfaccia utente USB] e il driver USB Audio Device [Periferica audio USB]. - Page 85 Collegamenti e installazione del driver (Windows) Prima di installare il driver Non è possibile utilizzare l’UA-1A con Windows 95 o Windows NT. Se altri programmi Windows sono in esecuzione, chiuderli prima di continuare la procedura. Se si devono collegare contemporaneamente più...
- Page 86 * Se si lavora in ambiente Windows Me, fare riferimento a pag. 85, se Windows 98, fare riferimento a pag. 87. Accendere il computer e avviare Windows. Utilizzare un cavo USB per collegare l’UA-1A al computer. L’UA-1A è riconosciuto dal computer e il driver è installato automaticamente.
- Page 87 CD-ROM di Microsoft Windows nell’unità corrispondente e utilizzare un cavo USB per collegare l’UA-1A al computer. Poiché alcuni computer sono venduti con il contenuto del CD-ROM di Microsoft Windows già installato sul disco rigido, il CD in questione potrebbe non essere stato fornito. In questo caso il Se questa finestra non driver potrà...
- Page 88 Collegamenti e installazione del driver (Windows) fig. 02-07.e Appare la seguente finestra di dialogo. Selezionare la casella CD-ROM drive [Unità CD-ROM] e fare clic su [Next][Avanti]. fig. 02-08.e Appare la seguente finestra di dialogo. Fare Al passo 4, la finestra clic su [Next].
- Page 89 Collegamenti e installazione del driver (Windows) fig. 02-10.e Alla fine dell’installazione del driver USB Composite Device [Periferica composita USB] , appare la seguente finestra di dialogo. Fare clic su [Finish]. fig. 02-13.e Nella tappa successiva, il dispositivo USB Audio Device [Periferica audio USB] viene rilevato automaticamente e appare la finestra di dialogo Add...
- Page 90 Collegamenti e installazione del driver (Windows) Indicazione del dispositivo audio d’ingresso/uscita In Windows, fare clic sul pulsante [Start] e in [Impostazioni] scegliere [Pannello di controllo]. Win 98 / Win 98SE: NelPannello di controllo, fare doppio clic sull’icona [Multimedia] per aprire la finestra Proprietà multimediali . Win 2000 / Me: NelPannello di controllo, fare doppio clic sull’icona [Suoni e multimedia] per aprire la finestra Proprietà...
- Page 91 Collegamenti e installazione del driver (Windows) Nella sezione Registrazione, Periferica preferenziale, fare clic su . Nell’elenco di A seconda del sistema riepilogo, fare clic su [USB Audio Device [Periferica utilizzato, “USB Audio audio USB]] per selezionarla. Device [Periferica audio USB]” è seguito da un numero, ad esempio Windows 98 / Windows 98SE Windows 2000 /Windows Me...
- Page 92 Collegamenti e installazione del driver (Windows) Impostazioni Controllo volume Il volume dell’UA-1A può essere regolato tramite il Controllo volume di Windows. Se il Controllo volume non è installato sul computer, utilizzare Installazione applicazioni nel Pannello di Fare clic sul pulsante [Start] in Windows e selezionare controllo per installarlo.
- Page 93 Collegamenti e installazione del driver (Windows) Se si utilizza l’unità CD-ROM del computer per riprodurre un CD audio o se si riproduce musica di sottofondo per i giochi con l’UA-1A. Se si utilizza Windows Me: Selezionare [Start] - [mpostazioni] - [Pannello di controllo].
- Page 94 è già stato installato. potrebbero avere nomi diversi da quelli qui menzionati. Utilizzare un cavo USB per collegare l’UA-1A al computer. In Windows, fare clic sul pulsante [Start] e in [Impostazioni] scegliere [Pannello di controllo]. Nel [Pannello di controllo], fare doppio clic sull’icona [Sistema] per aprire la finestra Proprietà...
- Page 95 Collegamenti e installazione del driver (Windows) Accertarsi che USB Audio Device [Periferica audio USB] non figuri nell’elenco Controller audio, video e Se appare un giochi e fare clic su [Chiudi] per chiudere la finestra messaggio richiedente di dialogo Proprietà sistema. l’avvio di Windows, conformarsi a tale richiesta e riavviare il...
-
Page 96: Collegamenti E Installazione Del Driver (Macintosh)
Collegamenti e installazione del driver (Macintosh) * Per gli utenti Windows, fare riferimento a pag. 9. Per poter utilizzare l’UA-1A, è necessario installare prima il Definizione di un driver driver. L'UA-1A utilizza un driver fornito con Mac OS. -> pag. 84 Problemi noti: UA-1A •... - Page 97 Selezionare [Quit] nel menu [File] per chiudere la finestra di dialogo Apple System Profiler, quindi configurare i parametri audio come sotto indicato. Se l’indicazione non è corretta, provare a scollegare l’UA-1A dalla porta USB e aspettare circa dieci secondi. Riprendere...
- Page 98 Panels] - [Sound] per aprire la finestra audio. Fare clic sulla linguetta [Speakers]. fig. 03-06.e Abbassare al minimo il volume dell’UA-1A e degli apparecchi audio e fare clic su [Start Test]. fig. 03-07.e Verranno emessi alcuni segnali acustici di prova da sinistra a destra secondo quanto visualizzato;...
- Page 99 03-08.e Se l'USB Audio non è Selezionare la linguetta visualizzato, chiudere la finestra Sound. Scollegare [Input] nella finestra poi l’UA-1A e attendere Sound. In Choose a circa dieci secondi. source for sound input:, Riprendere quindi la procedura a partire dal scegliere USB Audio.
-
Page 100: Ricerca E Soluzione Dei Problemi
Quando il cavo USB è collegato o scollegato, ci vogliono circa 15 secondi (o più) perché il computer riconosca l’UA-1A. • Il cavo USB è collegato correttamente? Accertarsi che l’UA-1A e il computer siano collegati correttamente tramite il cavo USB. • Il computer utilizzato permette l’uso di un cavo USB? Fare riferimento al manuale utente del computer per verificare la possibilità... - Page 101 La modalità di gestione dell’alimentazione potrebbe limitare l’energia fornita all’USB. Controllare la configurazione del computer. In alcuni casi non è possibile utilizzare l’UA-1A con un hub alimentato dal bus, ovvero un hub sprovvisto di una fonte di alimentazione). Utilizzare un hub alimentato in modo autonomo, ovvero un hub che contiene una fonte di alimentazione.
- Page 102 Se il computer utilizzato o l’hub USB sono equipaggiati di due o più connettori USB e l’UA-1A viene collegato a un connettore USB al quale non è mai stato collegato prima, potrebbe apparire la finestra di dialogo Add New Hardware Wizard [Installazione guidata Nuovo hardware] anche se i driver sono già...
- Page 103 • L’avvio del computer con l’UA-1A già collegato potrebbe rendere instabile il computer. In questo caso collegare l’UA-1A solo dopo aver avviato il computer. L'audio non viene riprodotto • Si sta cercando di utilizzare l’unità CD-ROM del computer per riprodurre un CD audio? Per riprodurre un CD audio sull’unità...
- Page 104 Ricerca e soluzione dei problemi • I driver sono stati installati correttamente? Per poter riprodurre i dati audio con l’UA-1A, deve essere installato il driver USB Audio Device [Periferica audio USB]. Per ulteriori dettagli sull’installazione e la configurazione, fare riferimento a Collegamenti e installazione del driver (Windows pag.
- Page 105 Ricerca e soluzione dei problemi • L’audio è disturbato nell’ingresso linea Se, sullo stesso computer, sono collegati un modulo sonoro MIDI e l’UA-1A tramite un collegamento USB e l’uscita del modulo sonoro MIDI è collegata alle prese d’ingresso linea dell’UA-1A, quest’ultimo potrebbe emettere un audio disturbato a causa delle interferenze trasmesse dal computer attraverso il modulo sonoro MIDI.
- Page 106 Ricerca e soluzione dei problemi • Provare a cambiare quanto segue nelle impostazioni dell’unità disco. Le seguenti impostazioni potrebbero essere inesistenti sul computer utilizzato. Nel Pannello di controllo di Windows, fare doppio clic su [Sistema] per aprire la finestra di dialogo Proprietà sistema, quindi fare clic sulla scheda [Gestione periferiche].
- Page 107 • Nel pannello di controllo "Memory", impostare Virtual Memory su "Off." • A seconda del tipo di connessione Internet, utilizzare l’UA-1A con le seguenti impostazioni. •Se per la connessione Internet si utilizza un cavo LAN Utilizzare l’apparecchio quando il cavo LAN è collegato.
- Page 108 “16 bit”. Impossibile registrare CD musicali • L’UA-1A non è in grado di registrare CD musicali nell’unità CD- ROM del computer con CoolEdit Pro LE o altri programmi. Dopo aver ripreso l’attività dallo stato di sospensione (Suspend o Hibernation), il volume è...
-
Page 109: Introducción
Introducción Contenido del paquete El paquete UA-1A contiene los siguientes artículos. Tan pronto como abra el paquete, compruebe que no falte ningún artículo. Si falta alguno de ellos, póngase en contacto con el distribuidor al que compró el paquete. Interfaz de audio UA-1A USB fig.UA1A... -
Page 110: Instalación Del Controlador Y Conexiones (Para Windows)
Un controlador es software que permite que un programa de aplicaciones ejecutado en el PC transfiera datos del UA-1A y viceversa cuando esté conectado al PC mediante un cable USB. El controlador pasa los datos de la aplicación al UA-1A y del UA-1A a la aplicación. fig.P10-1 Aplicación... - Page 111 * Si utiliza un sistema con Windows 2000, consulte la pág. 112; si utiliza un sistema con Windows 98, consulte la pág. 113. Encienda el PC e inicie Windows; utilice un cable USB para conectar el UA-1A al PC. fig.02-03.e Cuando Windows detecte el UA-1A y aparezca el cuadro de diálogo...
- Page 112 * Si utiliza un sistema con Windows Me, consulte la pág. 111; si utiliza un sistema con Windows 98, consulte la pág. 113. Encienda el PC e inicie Windows. Utilice un cable USB para conectar el UA-1A al PC. El PC reconoce el UA-1A y el controlador se instala automáticamente.
- Page 113 CD-ROM de Microsoft Windows en la unidad de CD-ROM y utilice un cable USB para conectar el UA-1A al PC. Puesto que algunos PC se venden con el contenido del CD-ROM de Microsoft Windows instalado previamente en el disco duro, puede que el CD-ROM de Microsoft Windows no venga incluido.
- Page 114 Instalación del controlador y conexiones (para Windows) fig.02-07.e Aparecerá el siguiente cuadro de diálogo. Active Unidad de CD-ROM y haga clic en [Siguiente]. fig.02-08.e Aparece el siguiente En el paso 4, la pantalla cuadro de diálogo. Haga indicará “Windows clic en [Siguiente]. driver file search for the device: USB Audio Device.”...
- Page 115 Instalación del controlador y conexiones (para Windows) fig.02-10.e Cuando haya finalizado la instalación del controlador del Dispositivo USB Composite, aparecerá el siguiente cuadro de diálogo. Haga clic en [Fin]. fig.02-13.e A continuación, se detectará automáticamente el Dispositivo de audio USB y aparecerá el cuadro de diálogo Asistente para agregar nuevo hardware.
- Page 116 Instalación del controlador y conexiones (para Windows) Especificación del aparato de entrada/ salida de audio Haga clic en el botón [Inicio] de Windows y seleccione [Configuración] - [Panel de control]. Win 98 / Win 98SE: En Panel de control, haga doble clic en el icono [Multimedia] para abrir el cuadro de diálogo Propiedades multimedia.
- Page 117 Instalación del controlador y conexiones (para Windows) Para el elemento de Recording (Grabación)Preferred device (Dispositivo En función del sistema, preferido), haga clic en . En la lista que aparece, “USB Audio Device” haga clic en (Dispositivo de audio USB) para (Dispositivo de audio seleccionarlo.
- Page 118 Instalación del controlador y conexiones (para Windows) Configuración del control de volumen El volumen de salida del UA-1A se puede controlar mediante el Control de volumen de Windows. Si no tiene instalada en su PC la opción Control de volumen, utilice la opción Agregar o quitar Haga clic en el botón [Inicio] de Windows y seleccione...
- Page 119 Cuando utilice la unidad de CD-ROM del PC para escuchar un CD de audio o cuando reproduzca música de fondo para juegos con el UA-1A Si utiliza Windows Me: Seleccione [Inicio] - [Configuración] - [Panel de control]. En [Panel de control], haga doble clic en el icono [Sistema] para acceder al cuadro de diálogo Propiedades del sistema.
- Page 120 Utilice el siguiente procedimiento para eliminar el pueden ser diferentes. controlador que ya está instalado. Utilice un cable USB para conectar el UA-1A al PC. Haga clic en el botón [Inicio] de Windows y seleccione [Configuración] - [Panel de control].
- Page 121 Instalación del controlador y conexiones (para Windows) Asegúrese de que el Dispositivo de audio USB no esté en la lista Dispositivos de sonido, vídeo y Si aparece un cuadro de juegos, y haga clic en [Cerrar] para cerrar el cuadro diálogo donde se le de diálogo Propiedades del sistema .
-
Page 122: Instalación Del Controlador Y Conexiones (Para Macintosh)
• El controlador estándar que viene con el sistema operativo MAC no es compatible con ASIO. • Cuando inicie el PC con la unidad UA-1A conectada, el PC puede volverse inestable. Si esto sucede, inicie el PC antes de conectar el UA-1A y conéctelo... - Page 123 Haga clic en laficha de control [Devices and Volumes]. Asegúrese de salir de todas Utilice un cable USB para conectar el UA-1A al PC. las aplicaciones que se estén ejecutando antes de realizar la conexión. Para asegurarse de que se ha reconocido satisfactoriamente, seleccione [Update all information] del menú...
- Page 124 Instalación del controlador y conexiones (para Macintosh) Si la indicación es correcta, la instalación del UA-1A se ha realizado con éxito. Seleccione [Quit] del menú [File] para cerrar el cuadro de diálogo Apple System Profiler y efectúe las configuraciones de sonido que se explican a continuación.
- Page 125 Seleccione [Input] en el cuadro de diálogo Sound. cuadro de diálogo Sound. Luego desconecte el A continuación, en UA-1A y espere unos diez Choose a source for segundos. Intente realizar de nuevo el procedimiento, sound input:, seleccione empezando a partir del USB Audio.
-
Page 126: Resolución De Problemas
15 segundos (o más) para que el sistema reconozca el UA-1A. • ¿El cable USB está conectado correctamente? Asegúrese de que el UA-1A y el PC estén conectados correctamente con el cable USB. • ¿Se puede utilizar el cable USB en el PC? Consulte el manual del usuario del PC y asegúrese de que pueda utilizar el... - Page 127 La unidad UA-1A no se puede conectar si no se suministra suficiente electricidad. Compruebe si se produce alguno de los casos siguientes. Si utiliza la unidad UA-1A con un portátil que funciona con baterías, su funcionamiento puede no ser fiable con algunos modelos de PC. Si éste es el caso, conecte el adaptador de CA al portátil.
- Page 128 Si el PC o el concentrador USB tienen dos o más conectores USB y conecta la unidad UA-1A a un conector USB al que no se haya conectado nunca la unidad UA-1A, puede que aparezca el cuadro de diálogo Asistente para agregar nuevo hardware aunque los controladores ya se hayan instalado.
- Page 129 • Si inicia el PC cuando la unidad UA-1A ya está conectada, puede que el PC se vuelva inestable. Si esto sucede, inicie el PC con la unidad UA-1A desconectada y, a continuación, conéctela. No hay sonido • ¿Está intentando escuchar un CD de audio en la unidad de CD del...
- Page 130 • ¿El nivel de volumen del instrumento conectado a LINE IN (ENTRADA DE LÍNEA) es demasiado alto? Utilice el Deslizador de ajuste de entrada de línea del UA-1A para reducir el nivel de entrada. El nivel de volumen del instrumento conectado a LINE IN (ENTRADA DE LÍNEA) es demasiado bajo.
- Page 131 USB al mismo PC y la salida del módulo de sonido MIDI está conectada a los jacks de entrada de línea de la unidad UA-1A, puede entrar ruido del PC a través del módulo de sonido MIDI, que se puede oír desde la unidad UA-1A.
- Page 132 Resolución de problemas El sonido se interrumpe durante la reproducción de audio • Intente aumentar la memoria Puede aumentar la potencia de procesamiento de su PC añadiendo más memoria. Para obtener detalles sobre cómo añadir memoria, consulte el manual de usuario de su PC. •...
- Page 133 Resolución de problemas La reproducción de audio se detiene • En algunos PC, la configuración de la Administración de energía del Panel de control puede ocasionar detenciones en la reproducción de audio. Las Propiedades de Administración de energía que aparecen si hace doble clic en Administración de energía variarán en función del sistema de su PC.
- Page 134 • En el Panel de control "Memoria", establezca la memoria virtual en "Off". • En función del tipo de conexión a Internet, utilice el UA-1A con las siguientes configuraciones. •Si se conecta a Internet mediante un cable LAN Utilícelo mientras esté conectado el cable LAN.
- Page 135 "16 bits". No se pueden grabar CD de música • El UA-1A no puede grabar CD de música en la unidad de CD-ROM del PC. El volumen ha cambiado cuando ha reanudado el sistema después de haber estado en modo...
-
Page 136: Specifications
Specifications UA-1A: USB Audio Interface Number of Audio Record/Playback Channels Record: 1 pair of stereo Playback: 1 pair of stereo Signal Processing PC interface: 16 bit Line Input Nominal Input level: -10 dBu Input impedance: 17 k-ohm Line Output Nominal Output level: 0 dBu... - Page 137 MEMO...
- Page 138 MEMO...
- Page 139 Information When you need repair service, call your nearest EDIROL/Roland Service Center or authorized EDIROL/Roland distributor in your country as shown below. IRELAND HONG KONG BARBADOS PERU CYPRUS Roland Ireland Parsons Music Ltd. A&B Music Supplies LTD Audionet Radex Sound Equipment Ltd.
- Page 140 02784990 1*KG...
Need help?
Do you have a question about the UA-1A and is the answer not in the manual?
Questions and answers