Table of Contents
Advertisement
Owner's Manual
Thank you for purchasing the MIDI keyboard controller PC-50.
Before using this unit, carefully read the sections entitled:
"USING THE UNIT SAFELY" and "IMPORTANT NOTES"
(OWNER'S MANUAL pp. 2–4). These sections provide
important information concerning the proper operation of
the unit. Additionally, in order to feel assured that you have
gained a good grasp of every feature provided by your new
unit, Owner's manual should be read in its entirety. The
manual should be saved and kept on hand as a convenient
reference.
Copyright © 2005 ROLAND CORPORATION
All rights reserved. No part of this publication may be reproduced in
any form without the written permission of ROLAND CORPORATION.
Advertisement
Table of Contents

Related Manuals for Edirol PC-50


Summary of Contents for Edirol PC-50
- Page 1 Owner’s Manual Thank you for purchasing the MIDI keyboard controller PC-50. Before using this unit, carefully read the sections entitled: “USING THE UNIT SAFELY” and “IMPORTANT NOTES” (OWNER’S MANUAL pp. 2–4). These sections provide important information concerning the proper operation of the unit.
- Page 2 Do not attempt to repair the unit, or replace parts within it (except when this manual provides specific instructions directing you to do so). Refer all servicing to your retailer, the nearest Roland Service Center, or an authorized Roland distributor, as listed on the “Information” page.
- Page 3 • Before using the unit in a foreign country, consult with your retailer, the nearest Roland Service Center, or an authorized Roland distributor, as listed on the “Information” page. • Batteries must never be recharged, heated, taken apart, or thrown into fire or water.
-
Page 4: Important Notes
During repairs, due care is taken to avoid the loss of data. However, in certain cases (such as when circuitry related to memory itself is out of order), we regret that it may not be possible to restore the data, and Roland assumes no liability concerning such loss of data. -
Page 5: Additional Precautions
• Unfortunately, it may be impossible to restore the contents of data that was stored in the unit’s memory once it has been lost. Roland Corporation assumes no liability concerning such loss of data. • Use a reasonable amount of care when using the unit’s buttons, sliders, or other controls;... -
Page 6: Table Of Contents
USB connections with your computer—Transmitting MIDI messages to your software ... 38 Basic connections... 38 MIDI flow ... 38 USB connections with your computer—Using the PC-50 as a MIDI interface... 39 Basic connections... 39 MIDI flow ... 39 When using a MIDI connection—Transmitting MIDI messages to an external MIDI sound module, etc..40 Basic connections... - Page 7 MIDI I/F MODE... 65 VALUE ENCODER... 66 FACTORY RESET ... 68 Set the ADVANCED DRIVER ... 69 Appendices Troubleshooting ... 72 Problems related to the USB driver... 72 Problems when using the PC-50... 77 MIDI implementation... 79 Main specifications... 83 INDEX... 84...
-
Page 8: Contents Of The Package
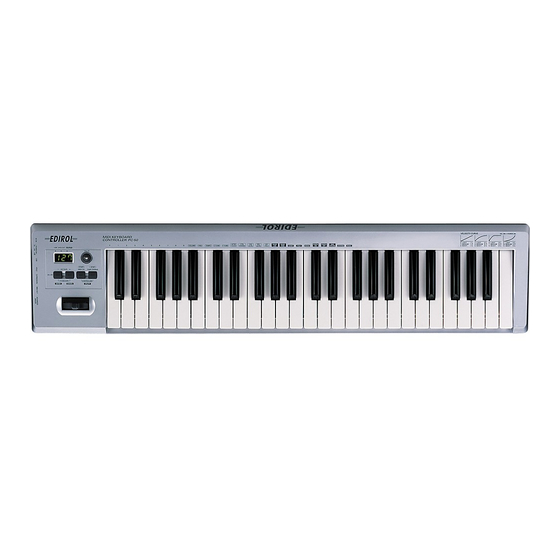
Contents of the package The PC-50 includes the following items. When you open the package, first make sure that all items are included. If any are missing, contact the dealer where you purchased the PC-50. ● MIDI Keyboard Controller PC-50 fig.PC-50-all... -
Page 9: Quick Page Reference Table
Driver Installation Input/output device settings Basic connections and MIDI flow System settings Using the MIDI functionality Explanation of the PC-50’s operating modes Play Setting the MIDI Transmit Channel Selecting Sounds on a Sound Module Starting/stopping playback of the performance data of a sequencer or other device p. 50 Transmitting messages to an external MIDI sound module. -
Page 10: Names Of Things And What They Do
Names of things and what they do Panel fig.panelA_60 * If you do not operate or play the PC-50 for a certain length of time, the display and buttons will automatically dim. OCTAVE -/+ Button Press [OCTAVE -/+] button to shift the pitch of the keyboard up or down in steps of an octave. -
Page 11: Side Panel
In this case, the power will be supplied from your computer via the USB cable. To use the PC- 50 with bus power, set the power switch to USB. * For some computers, the PC-50 may not operate if bus power is used. In this case, use the AC adaptor (sold separately) or batteries. -
Page 12: Inserting Batteries
Inserting batteries Make sure that the power switch is turned off. Remove the battery cover located on the rear panel of the PC-50. * When turning the unit upside-down, get a bunch of newspapers or magazines, and place them under the four corners or at both ends to prevent damage to the buttons and controls. -
Page 13: Setup
This section explains how to install the drivers needed for connecting the PC-50 to a computer, and make the necessary settings. Getting Connected and Installing Drivers (Windows)... (p. 14) Getting Connected and Installing Drivers (Macintosh) ... (p. 27) What is a driver? A “driver”... -
Page 14: Getting Connected And Installing Drivers (Windows)
Getting Connected and Installing Drivers (Windows) Installing the driver The installation procedure will differ depending on your system. Please proceed to one of the following sections, depending on the system you use. • Windows XP users ... (p. 14) • Windows 2000 users ... (p. 19) •... - Page 15 Use the USB cable to connect the PC-50 to your computer. 1. Set the PC-50’s power switch to the OFF position. 2. Use the USB cable to connect the PC-50 to your computer. Getting Connected and Installing Drivers (Windows) If the screen indicates “Windows can perform...
- Page 16 Select “Don’t search. I will choose the driver to install,” and click [Next]. Make sure that the “Model” field indicates “EDIROL PC-50,” and click [Next]. Driver installation will begin. If the “What action do you want Windows to take?” (Step 4) (p. 14)setting was not set to “Ignore,” a “Hardware Installation”...
- Page 17 2. Continue the installation. The screen will indicate “Completing the Found New Hardware Wizard.” Make sure that the “Model” field indicates “EDIROL PC-50,” click [Finish]. Wait until “Found New Hardware” appears near the taskbar. When driver installation has been completed, the System Settings Change dialog box will appear.
- Page 18 Getting Connected and Installing Drivers (Windows) ■ Giving priority to background services In Windows XP, make settings to give priority to background services. To ensure that MIDI processing occurs smoothly, use the following procedure to make settings. Open the System Properties dialog box. 1.
-
Page 19: Windows 2000 Users
Windows 2000 users Disconnect all USB cables except for a USB keyboard and USB mouse (if used). Open the System Properties dialog box. 1. Click the Windows Start menu, and from the menu that appears, select Settings | Control Panel. 2. - Page 20 Use the USB cable to connect the PC-50 to your computer. 1. Set the PC-50’s power switch to the OFF position. 2. Use the USB cable to connect the PC-50 to your computer. Set the PC-50’s power switch to the USB position.
- Page 21 1. Click [Yes]. 2. Continue the installation. The screen will indicate “Completing the Found New Hardware Wizard.” Make sure that the “Model” field indicates “EDIROL PC-50,” click [Finish]. The System Settings Change dialog box may appear. Click [Yes]. Windows will restart automatically.
- Page 22 Getting Connected and Installing Drivers (Windows) ■ Giving priority to background services In Windows 2000, make settings to give priority to background services. To ensure that MIDI processing occurs smoothly, use the following procedure to make settings. Click the Windows Start menu, and from the menu that appears, select Settings | Control Panel.
-
Page 23: Windows Me/98 Users
Use the USB cable to connect the PC-50 to your computer. 1. Set the PC-50’s power switch to the OFF position. 2. Use the USB cable to connect the PC-50 to your computer. Set the PC-50’s power switch to the USB position. -
Page 24: Setting The Driver-Specifying The Midi Output Destination
Close the Sounds and Audio Devices Properties dialog box. Click [OK] to complete the settings. This completes settings for using the PC-50 with an software that uses the standard Windows device settings, such as Media Player. For details on how to make these settings, refer to the owner’s manual for your software. -
Page 25: Windows 2000 / Me Users
Close the Sounds and Multimedia Properties dialog box. Click [OK] to complete the settings. This completes settings for using the PC-50 with an software that uses the standard Windows device settings, such as Media Player. For details on how to make these settings, refer to the owner’s manual for your software. -
Page 26: Windows 98 Users
Close the Multimedia Properties dialog box. Click [OK] to complete the settings. This completes settings for using the PC-50 with an software that uses the standard Windows device settings, such as Media Player. For details on how to make these settings, refer to the owner’s manual for your software. -
Page 27: Getting Connected And Installing Drivers (Macintosh)
PC50USBDriver.pkg. * A message such as “This Installer package needs to...” may appear. Click “Continue.” The display will indicate “Welcome to the EDIROL PC-50 Driver Installer.” Click [Continue]. The display will indicate “Select a Destination.” Click the drive in which the operating system is installed to select it, and then click [Continue]. -
Page 28: Setting The Driver
Setting the driver ■ Mac OS settings Make the following settings so that you can use the MIDI functionality of the PC-50. For details on connections, refer to “Basic connections and MIDI flow” (p. 38). Set the PC-50’s ADVANCED DRIVER Switch to the ON position. -
Page 29: Software Settings
• Quit your software before you disconnect the USB cable from the PC-50. • Turn off the Sleep function of your Macintosh. • The PC-50 will not operate in the Mac OS X Classic environment. Use the PC-50 when the Classic environment is not running. -
Page 30: Mac Os 9 Users
Mac OS 9 users Setting the PC-50 to OS 9 mode If you're using the PC-50 with Mac OS 9, you must set the PC-50 to OS 9 mode, you must use the following procedure to set the PC-50 to OS 9 mode. -
Page 31: Installing The Driver
* Either OMS or FreeMIDI must be installed in your Macintosh, as appropriate for the sequencer software you are using. If a PC-50 is already connected to your Macintosh when you install the driver, a message like the following will appear when the Macintosh is started up. -
Page 32: Setting The Driver
Use the USB cable to connect the PC-50 to your computer. 1. Set the PC-50’s power switch to the OFF position. 2. Use the USB cable to connect the PC-50 to your computer. Set the PC-50’s power switch to the USB position. - Page 33 Choose “Open” from the File menu. From the OMS Setting folder that you copied in step 4, select the PC-50 file, and click [Open]. A screen like the one shown here will appear. fig.3-9_35 From the Edit menu, select OMS MIDI Setup.
-
Page 34: Freemidi Settings
Next, make MIDI device settings in your sequencer or other software. For details on how to make these settings, refer to the owner’s manual for your software. For details on the PC-50’s input / output devices, refer to “Input / output devices” (p. 36). ■ FreeMIDI settings Set the PC-50’s ADVANCED DRIVER Switch to the ON position. - Page 35 Next, make MIDI device settings in your sequencer or other software. For details on how to make these settings, refer to the owner’s manual for your software. For details on the PC-50’s output devices, refer to “Input / output devices” (p. 36). Getting Connected and Installing Drivers (Macintosh)
-
Page 36: Input / Output Devices
For details on these settings, refer to the owner’s manual for your software. * If you are unable to select the PC-50 in the device settings for your software, it is possible that the driver was not installed correctly. Please reinstall the driver. -
Page 37: Operation
Operation The PC-50 is a controller that transmits MIDI messages. You cannot perform using only the PC-50 by itself. You will need to connect it to a sound module or computer. -
Page 38: Basic Connections And Midi Flow
(sold separately) It is not necessary to connect the AC adaptor if you are using a USB connection. However, with some computers, the PC-50 may not operate when powered from the USB bus. In this case, set the power switch to the DC position and connect the AC adaptor. -
Page 39: Usb Connections With Your Computer-Using The Pc-50 As A Midi Interface
USB connections with your computer * If you want to use Media Player to play a sound module connected to the PC-50’s MIDI OUT connector, make driver settings.(Windows: p. 24 / Macintosh: p. 28, p. 32). Basic connections fig.connect-MIDI-IF It is not necessary to connect the AC adaptor if you are using a USB connection. -
Page 40: When Using A Midi Connection-Transmitting Midi Messages To An External Midi Sound Module, Etc
MIDI flow fig.flow-midi-e The messages of the keyboard, Pitch Bend/Modulation Lever, and VALUE encoder will be PC-50 KEYBOARD transmitted from here. —Transmitting MIDI messages to an external MIDI sound module, etc. AC adaptor... -
Page 41: Use Midi Functionality
■ To switch the PC-50 to PLAY mode... When you turn on the power, the PC-50 will start up in PLAY mode. fig.util To switch the PC-50 to PLAY mode from UTILITY mode (p. 42), simultaneously hold the [MIDI CH] button and [PGM CHANGE] button down or press the [CANCEL] button. -
Page 42: Functions In Utility Mode
■ To switch the PC-50 to UTILITY mode... fig.util* To switch the PC-50 to UTILITY mode from PLAY mode, simultaneously hold the [MIDI CH] button and [PGM CHANGE] button down. The display will indicate “UTL,” and the PC-50 enters UTILITY mode. -
Page 43: Play
When you play the keyboard in PLAY mode, MIDI messages are sent to the sound module (software). * Since the PC-50 does not contain a sound generator, you cannot play MIDI data using the PC-50 alone. Use MIDI functionality PLAY... -
Page 44: Features Useful When Playing
Use MIDI functionality Features Useful When Playing Applying Pitch Changes to Notes (Pitch Bend) Modifying the Sound of Notes (Modulation) Adding a Sustain Effect to Notes (Hold) Controlling the Volume or Timbre of the Sound (Expression) Changing Octaves (Octave Shift) While playing the keyboard, move the Pitch Bend/Modulation Lever to the left to lower the pitch of the currently selected patch, or to the right to raise its pitch. -
Page 45: Setting The Midi Transmit Channel
Setting the MIDI Transmit Channel To control your sound module, set the PC-50’s current channel to the MIDI receive channel that’s selected on your sound module. ■ Current channel The current channel is the transmit channel for the keyboard, Pitch Bend/Modulation Lever, VALUE encoder, hold pedal and expression pedal. -
Page 46: Selecting Sounds On A Sound Module-Transmitting Program Change / Bank Select Massages
Use MIDI functionality Selecting Sounds on a Sound Module —Transmitting Program Change / Bank Select Massages To select a sound on your MIDI sound module, transmit a Program Change. To select a sound from a different bank, first transmit a Bank Select message that switches the bank. Then transmit a program change. -
Page 47: Transmitting A Program Change Message
Transmitting a program change message This lets you transmit a program change message on the Current channel (p. 45). fig.PC-1_75 fig.program Press the [PGM CHANGE] button. The [PGM CHANGE] button will light. The display will indicate the program change that was transmitted most recently. Use the VALUE encoder to specify the program change you want to transmit. -
Page 48: Transmitting A Bank Select Lsb Message
Simultaneously hold the [MIDI CH] button and [PGM CHANGE] button down. The display will indicate “UTL,” and the PC-50 enters UTILITY mode. Press [BANK LSB] key. fig.BANK-3 Use the VALUE encoder or the [0]–[9] keys of the keyboard to specify the bank select LSB that you want to transmit. -
Page 49: Transmitting A Bank Select Msb Message
Simultaneously hold the [MIDI CH] button and [PGM CHANGE] button down. The display will indicate “UTL,” and the PC-50 enters UTILITY mode. Press [BANK MSB] key. fig.BANK-2 Use the VALUE encoder or the [0]–[9] keys of the keyboard to specify the bank select MSB that you want to transmit. -
Page 50: Starting/Stopping Playback-Transmitting Start/Stop Messages
If you again press the [MIDI CH] button and [PGM CHANGE] button simultaneously, the [MIDI CH] button and [PGM CHANGE] button will go dark, and the PC-50 will be in Normal PLAY mode. * CONTROLLER mode works only in PLAY mode. It is not available in UTILITY mode. -
Page 51: Starting Playback-Transmitting A Start Message
A start message (FAh) will be transmitted, and playback or recording will begin. fig.cont-1_80 fig.util If you simultaneously press the [MIDI CH] button and the [PGM CHANGE] button, the [MIDI CH] button and [PGM CHANGE] button will light, and the PC-50 will be in CONTROLLER mode. fig.program Press the [MIDI CH] button. -
Page 52: Stopping Playback-Transmitting A Stop Message
A stop message (FCh) will be transmitted, and playback or recording will stop. g.cont-1_80 fig.util If you simultaneously press the [MIDI CH] button and the [PGM CHANGE] button, the [MIDI CH] button and [PGM CHANGE] button will light, and the PC-50 will be in CONTROLLER mode. fig.program Press the [PGM CHANGE] button. -
Page 53: Continuing Playback From The Current Location-Transmitting A Continue Message
This transmits a continue message (FBh); playback that had been paused will continue from the current location. fig.start-1_80 fig.util* Simultaneously hold the [MIDI CH] button and [PGM CHANGE] button down. The display will indicate “UTL,” and the PC-50 enters UTILITY mode. fig.cont Press the [CONT] key. The display will indicate “CNT” and blink. fig.enter Press the [ENTER] button. -
Page 54: Transmitting Messages To An External Midi Sound Module
Use MIDI functionality Transmitting messages to an external MIDI sound module You can transmit messages from the PC-50 to an external MIDI sound module in order to control it. Messages POLY MODE ON MONO MODE ON PORTAMENTO ON PORTAMENTO OFF... -
Page 55: Transmitting A Mono Mode On Message
Mono mode allows you to play only single notes at a time. fig.mono-1_80 fig.util* Simultaneously hold the [MIDI CH] button and [PGM CHANGE] button down. The display will indicate “UTL,” and the PC-50 enters UTILITY mode. fig.mno Press the [MONO] key. The display will indicate “MNO” and blink. -
Page 56: Transmitting A Portamento On Message
(Portamento On). fig.portaon-1_80 fig.util* Simultaneously hold the [MIDI CH] button and [PGM CHANGE] button down. The display will indicate “UTL,” and the PC-50 enters UTILITY mode. fig.pon Press the [PORTA ON] key. The display will indicate “PON” and blink. fig.enter Press the [ENTER] button. -
Page 57: Transmitting A Portamento Off Message
Turns the portamento function off. fig.portaoff-1_80 fig.util* Simultaneously hold the [MIDI CH] button and [PGM CHANGE] button down. The display will indicate “UTL,” and the PC-50 enters UTILITY mode. fig.pof Press the [PORTA OFF] key. The display will indicate “POF” and blink. -
Page 58: Transmitting A Gm2 System On Message
This lets you transmit a GM2 system on message. fig.gm2-1_80 fig.util* Simultaneously hold the [MIDI CH] button and [PGM CHANGE] button down. The display will indicate “UTL,” and the PC-50 enters UTILITY mode. fig.gm2 Press the [GM2 SYS ON] key. The display will indicate “GM2” and blink. -
Page 59: Transmitting A Reset Message
Simultaneously hold the [MIDI CH] button and [PGM CHANGE] button down. The display will indicate “UTL,” and the PC-50 enters UTILITY mode. fig.pnc Press the [PANIC] key. The display will indicate “PNC” and blink. -
Page 60: Transmitting The Value Of A Specific Parameter
Transmitting the value of a specific parameter ■ Specified parameters The PC-50 lets you assign a specific parameter to the VALUE encoder so that the value of that parameter will be transmitted when you operate the VALUE encoder. ■ To assign a parameter In UTILITY mode System settings, specify the parameter you want to assign to the VALUE encoder. -
Page 61: System Settings
System settings Set the system settings Use UTILITY mode (p. 42) to make various system settings for the PC-50. fig.util* Simultaneously hold the [MIDI CH] button and [PGM CHANGE] button down. The display will indicate “UTL,” and the PC-50 enters UTILITY mode. -
Page 62: F8 Clock On / Off
System settings F8 CLOCK ON / OFF (Keyboard: 0) Perform steps 1–3 (p. 61). fig.hyo Use the VALUE encoder or the [0] or [1] keys to switch F8 CLOCK ON / OFF. The display will indicate either “ON” or “OFF.” Press the [ENTER] button. -
Page 63: Velocity Curve
VELOCITY CURVE (Keyboard: 2) Perform steps 1–3 (p. 61). Use the VALUE encoder or the keyboard to specify Keyboard Display Press the [ENTER] button. ■ VELOCITY CURVE setting You can also access the VELOCITY CURVE setting screen by holding down the [VELCRV] button while you turn on the power. -
Page 64: Key Velocity
“VELOCITY CURVE” (p. 63), or will always be transmitted at a fixed value. The PC-50 detects the strength with which you play a key, and transmits the velocity value accordingly. However, if you set Key Velocity mode to a fixed value, the velocity will be transmitted at this fixed value regardless of how strongly you play the keys. -
Page 65: Midi I/F Mode
The MIDI connectors on the PC-50 will function as a MIDI interface. MIDI messages from a computer connected via USB to the PC-50 will be sent to the MIDI device connected to the PC-50’s MIDI OUT con- nector. MIDI I/F MODE ON... -
Page 66: Value Encoder
You can assign a specific parameter to the VALUE encoder. ■ Specified parameters The PC-50 lets you assign a specific parameter to the VALUE encoder so that the value of that parameter will be transmitted when you operate the VALUE encoder. - Page 67 Assigns the KEY VELOCITY parameter to the VALUE encoder. In KEY VELOCITY MODE, the velocity value is fixed. The PC-50 transmits velocity values that correspond to the force with which you play the keyboard, but if KEY VELOC- ITY is assigned to the VALUE encoder, the fixed velocity val- ue you specify using the VALUE encoder will be transmitted regardless of how you actually play the keyboard.
-
Page 68: Factory Reset
System settings FACTORY RESET (Keyboard: 6) Perform steps 1–3 (p. 61). fig.rst The display will indicate “RST.” fig.yes Press the [ENTER] button. The display will blink “YES” and blink. -
Page 69: Set The Advanced Driver
MIDI data processing will always occur optimally. In order for the setting of the ADVANCED DRIVER switch to take effect, you must exit all sequencer software and other softwares that use the PC-50, and turn the PC-50’s power off, then switch it on again. - Page 70 MEMO...
-
Page 71: Appendices
Appendices Troubleshooting... p. 72 MIDI implementation ... p. 79 Main specifications... p. 83... -
Page 72: Troubleshooting
• Is the PC-50 connected correctly? Make sure that the USB connector of your computer is connected to the PC-50 by a USB cable. • Could any other USB device be connected? Before you install, disconnect all USB devices except for your mouse and keyboard. - Page 73 Install the PC-50 driver once again as described in Getting Connected and Installing Drivers (Windows) (p. 14). Then, set the PC-50’s ADVANCED DRIVER Switch (p. 11) to ON (p. 69), power up the PC-50, and install the driver again.
- Page 74 Check the settings of your computer. - In some cases, the PC-50 cannot be used with a bus-powered hub (a hub that does not contain a power supply). Please use a self-powered hub (a hub that contains a power supply).
-
Page 75: Can't Install/Delete/Use The Driver In Windows Xp/2000
• Did you connect the PC-50 to a different USB connector than the one you used when installing the driver? If your computer or USB hub has two or more USB connectors, and you connect the PC-50 to a USB connector to which the PC-50 has never been connected before, the “Unknown device”... -
Page 76: Deleting The Driver
Troubleshooting Deleting the driver If you were unable to install the driver according to the procedure given, the PC-50 may not be recognized correctly by the computer. In this case, use the following procedure to delete the driver, and then follow the procedure to install the driver once again. -
Page 77: Problems When Using The Pc-50
• Did you plug in the USB cable, or unplug it while an software was running? Exit all softwares that are using the PC-50, and exit all softwares that are using the PC-50, and turn the PC-50’s power off, then switch it on again. -
Page 78: Operating System Becomes Unstable
• Operation becomes unstable when the computer is started up with the PC-50 already connected Please start up your computer with the PC-50 disconnected, and then connect the PC-50. On a computer that uses a USB keyboard, starting up the computer with the PC-50 already connected may cause operation to become unstable. -
Page 79: Midi Implementation
0H – FH (Ch.1 – 16) vv = Modulation depth: 00H – 7FH (0 – 127) * Transmitted when you press the Modulation Controller in Play mode. Model: PC-50 Version 1.002005.04.1 ❍RPN MSB/LSB (Controller number 100, 101) Status 2nd byte... -
Page 80: Active Sensing
MIDI implementation ■Channel mode messages In addition to the channel mode messages that can be transmitted in Panic, the PC-50 lets you assign any channel voice message to the VALUE encoder and transmit it. ●Channel mode messages Status 2nd byte... -
Page 81: Decimal And Hexadecimal Table
2. Supplementary material ●Decimal and Hexadecimal table (An “H” is appended to the end of numbers in hexadecimal notation.) In MIDI documentation, data values and addresses/sizes of Exclusive messages, etc. are expressed as hexadecimal values for each 7 bits. The following table shows how these correspond to decimal numbers. fig.11-22e Dec. -
Page 82: Midi Implementation Chart
MIDI implementation fig.midi-chart.e MIDI KEYBOARD CONTROLLER Model PC-50 Function... Basic Default Channel Changed Default Mode Messages Altered Note Number : True Voice Note On Velocity Note Off After Key's Touch Channel's Pitch Bend 0-119 Control Change Program : True Number... -
Page 83: Main Specifications
Main specifications ■ PC-50: MIDI KEYBOARD CONTROLLER ● Keyboard 49 keys (with velocity) ● Controllers MIDI Channel Button Program Change Button Octave Shift Buttons (+/-) Pitch Bend/Modulation Lever VALUE Encoder Knob ● Display 7 segments, 3 characters (LED) ● Side Panel... -
Page 84: Index
Continue Continue playback from the current location Control Change CONTROLLER Mode Starting Playback Stopping Playback To switch the PC-50 to CONTROLLER mode... Transmitting the value of a specific parameter What is CONTROLLER mode? Current Channel Data Out Device Device Settings... - Page 85 PLAY Mode Functions in PLAY mode Play Setting the MIDI Transmit Channel Starting Playback Stopping Playback To switch the PC-50 to PLAY mode – Transmitting a Program Change message – Transmitting the value of a specific parameter – What is PLAY mode? –...
- Page 86 UTILITY Mode Continue playback from the current location Functions in UTILITY mode Make System Settings To switch the PC-50 to UTILITY mode Transmitting a Bank Select LSB message Transmitting a Bank Select MSB message Transmitting a GM2 System On message...
-
Page 87: Declaration Of Conformity
Type of Equipment : Responsible Party : NOTICE AVIS Model Name : PC-50 MIDI KEYBOARD CONTROLLER Roland Corporation U.S. Address : 5100 S. Eastern Avenue, Los Angeles, CA 90040-2938 Telephone : (323) 890 3700 For EU Countries For the USA... - Page 88 Information When you need repair service, call your nearest EDIROL/Roland Service Center or authorized EDIROL/Roland distributor in your country as shown below. HONG KONG Parsons Music Ltd. 8th Floor, Railway Plaza, 39 EUROPE Chatham Road South, T.S.T, EDIROL (Europe) Ltd.
Need help?
Do you have a question about the PC-50 and is the answer not in the manual?
Questions and answers