
Subscribe to Our Youtube Channel
Related Manuals for Weinmann prisma20C

Summary of Contents for Weinmann prisma20C
- Page 1 Sleep therapy devices Instructions for use for devices of type WM 100 TD and type WM 100 TH...
-
Page 2: Table Of Contents
Table of contents Table of contents Introduction Intended use ................. 5 Function ..................6 User qualifications ................. 7 Indications ..................7 Contraindications ................9 Side effects ................. 10 Safety Safety information ............... 11 General information ..............14 Warnings in this document ............15 Product description Therapy device overview .............. - Page 3 Table of contents Setting the alarm ................. 54 5.10 Viewing therapy data and device information ....... 56 5.11 Using the SD card ................ 58 Settings in the menu Setting comfort parameters ............62 Setting accessories parameters ............ 63 Setting time parameters .............. 64 Setting device parameters ............
- Page 4 Table of contents 12.5 Scope of supply ................94 12.6 Warranty ..................99 12.7 Declaration of conformity ............99 WM 100 TD...
-
Page 5: Introduction
1 Introduction Introduction 1.1 Intended use 1.1.1 WM 100 TD therapy devices The WM 100 TD devices are pressure-controlled, non-invasive, non-life-sustaining therapy devices for the treatment of sleep- related respiratory disorders (SRRDs) or intermittent treatment of respiratory insufficiency by means of a mask. The devices can be used on persons weighing above 30 kg. -
Page 6: Function
1 Introduction 1.2 Function 1.2.1 WM 100 TD therapy devices The fan in the therapy device sucks ambient air in through a filter, compresses it, and routes it to the device outlet. From here, the air flows through the hose system and the mask to the patient. -
Page 7: User Qualifications
"user". In contrast, a "patient" is the person receiving the therapy. Always perform all the operating steps in accordance with these instructions for use. 1.4 Indications prisma20C CPAP therapy device for the treatment of patients with obstructive sleep apnea with a constant pressure requirement. prisma20A APAP therapy device for the treatment of patients with obstructive sleep apnea with a variable pressure requirement. - Page 8 1 Introduction prismaCR Therapy device for the treatment of patients with periodic breathing or Cheyne-Stokes respiration (e.g., in cases of heart failure) as well as with central, mixed, or complex sleep apnea. The therapy device adjusts the ventilation automatically and continually to the changing requirements of the patient.
-
Page 9: Contraindications
1 Introduction The device has different pressure levels during inspiration and expiration and a backup frequency for the treatment of central events. prisma30ST, prisma30ST-C BiLevel therapy device for the treatment of patients with obstructive, mixed, or complex sleep apnea and/or •... -
Page 10: Side Effects
1 Introduction • Status following brain surgery or surgical intervention on the pituitary gland or the middle/inner ear • Acute sinus infection (sinusitis), middle ear infection (otitis media) or perforated eardrum • Dehydration • Do not use the respiratory air humidifier on patients who have undergone an airway bypass procedure. -
Page 11: Safety
2 Safety Safety Please read these instructions carefully. They form part of the devices described, and must be available at all times. Use the unit for the designated purpose only (see "Intended use"). For your own safety and that of your patients, and in accordance with the requirements of Directive 93/42/EEC, please observe the following safety instructions. - Page 12 Use a bacteria filter. When the device is used without a bacteria filter: Have the device hygienically prepared by the manufacturer, Weinmann, or an authorized dealer. Treatment prevented due to increased resistance when bacteria filters are used! Misting or moistening can increase the resistance of the bacteria filters, thereby modifying the output of the therapy pressure.
- Page 13 2 Safety 2.1.4 Therapy Warning The use of oxygen in combination with flammable substances poses a fire hazard! Oxygen in combination with flammable substances can result in spontaneous explosions. In cases of insufficient ventilation, oxygen in the surrounding area (e.g., clothes, hair, bedclothes) can become enriched and cause fires and thus injuries to the patient, user, and others in the immediate vicinity.
-
Page 14: General Information
Only have modifications to the unit carried out by the manufacturer, Weinmann, or by a technician expressly authorized by Weinmann. • Please observe the section on hygienic preparation in order to avoid infection or bacterial contamination (see chapter "Hygienic preparation"). -
Page 15: Warnings In This Document
2 Safety 2.3 Warnings in this document Warnings are used to flag up safety-relevant information. You will find a warning preceding any action that entails a hazard for persons or equipment. Warnings consist of • the warning symbol (pictogram), • a signal word designating the hazard level, •... -
Page 16: Product Description
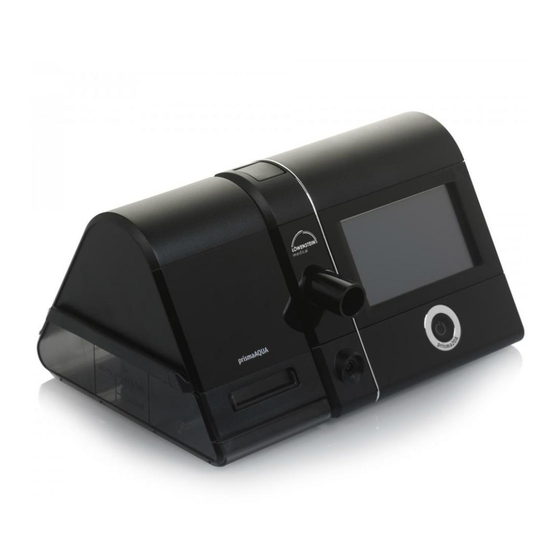
3 Product description Product description 3.1 Therapy device overview 3-1 Therapy device Designation Description Covers the humidifier connection when no respiratory air humidifier Cover is connected. Unlocking button therapy Makes it possible to remove the cover in order to connect the humid- device ifier prismaAQUA. -
Page 17: Display
3 Product description Designation Description Used for point-to-point connection with a PC on which prismaTS is Micro USB port installed. Allows settings to be changed on the therapy device and data to be exported. Switches the therapy device on and off. On/off button Switches the therapy device to standby mode. - Page 18 3 Product description 3.2.1 Display in Standby mode (Start screen) 3-2 Start screen in Standby mode Designation Description Info menu button Provides access to the info menu. Alarm is set. Alarm with wake-up time Displays the set wake-up time. Menu button Provides access to the settings menus.
- Page 19 3 Product description 3.2.2 Display in Therapy mode 3-3 Start screen in Therapy mode Designation Description Time Displays the current time. SD card symbol The SD card is inserted in the therapy device. Provides access to the info screen with detailed information Info button on the therapy currently in progress.
- Page 20 3 Product description Designation Description Displays that the respiratory air humidifier is connected and Humidifier button for respiratory switched on. air humidifier prismaAQUA Shows the set humidifier level of the respiratory air humidifier. Function buttons for the Allow increasing/decreasing of humidifier level. respiratory air humidifier 3.2.3 Symbols on the display Symbol...
- Page 21 3 Product description Symbol Designation Description (Green symbol) Network connection available. Network symbol No network connection available. (Gray symbol) SD card in SD card slot. SD card symbol Symbol flashes: Data is being saved to the SD card or read off the SD card. Symbols on the rest of the display Respiratory air humidifier is connected and switched off.
- Page 22 3 Product description Symbol Designation Description Specifies the menu level that you are currently in: Menu level symbol The more green dots, the deeper you are in the menu structure. Alarm window Alarm symbol Low-priority alarm triggered. Alarm pause symbol Alarm paused for 2 minutes.
-
Page 23: Components
3 Product description 3.3 Components 3-4 Components Designation Description Respiratory mask Supplies the respiratory air to the patient. Power supply unit with Supplies power to the device. connection cable Connects the power supply unit to the therapy device. Power supply cable Connects the power supply unit to the power socket. -
Page 24: Accessories
3 Product description 3.4 Accessories 3-5 Accessories Designation Description Respiration hose with 15 mm Connects the therapy device to the respiratory mask. diameter Filters the suctioned respiratory air and prevents the ingress of fine Pollen filter (white filter) dust particles, pollen and fungal spores. Recommended for patients with allergies. -
Page 25: Labels And Symbols
3 Product description Designation Description Output Connects the respiratory air humidifier to the device output. Element Heats the water in the respiratory air humidifier. Upper recess For lifting and transporting the respiratory air humidifier. 3.5 Labels and symbols 3.5.1 Labels on the therapy device 3-6 Labels on the therapy device Symbol Description... - Page 26 3 Product description Symbol Description Follow the instructions for use. Slot for SD card USB port On/off: Indicates the on/off button Device output: Outlet for room air at 4 hPa to 30 hPa (depending on type of device) Type plate on the underside of the therapy device TYPE: WM 100 TD Type designation of the therapy device 37 V DC Degree of protection against solid foreign bodies.
- Page 27 3 Product description 3.5.2 Labels on the respiratory air humidifier 3-7 Labels on the respiratory air humidifier Symbol Description Fill with water. Respiratory air humidifier is heated. Do not touch the element. Labels and symbols on the underside Do not dispose of device in household waste. CE mark (confirms that the product complies with the applicable European directives).
- Page 28 3 Product description Symbol Description Date of manufacture (month/year) Type: WM100TH Type designation: Device of type WM 100 TH Consult instructions for use. Serial Number 3.5.3 Labels on the type plate of the power supply unit Symbol Description Input: 100-240 V, Input voltage: 100-240 V, 50-400 Hz, 1.5 A 50-400 Hz, 1.5 A Output: 37 V...
- Page 29 3 Product description Symbol Description IP protection class: Degree of protection against solid foreign bodies. The device IP21 is protected against dripping water. 3.5.4 Labels on the therapy device packaging Symbol Description Permissible storage temperature: -25°C to +70°C Permissible storage humidity: 15% to 93% relative humidity 3.5.5 Labels on the respiration hose packaging Symbol Description...
-
Page 30: Preparation
The power supply unit contains a safety device to prevent electric shock. The use of a non-original power supply unit may result in injury to the user and the patient. Only operate the device on line power using the power supply unit recommended by Weinmann. WM 100 TD... - Page 31 4 Preparation 1. Connect the power supply cable with the power supply unit. 2. Insert the free connector of the power supply unit's connection cable into the power supply port on the therapy device. When doing so, pay attention to the alignment of the connector.
- Page 32 4 Preparation 3. Plug the free end of the power supply cable in the power socket. The power supply unit adjusts to the line voltage (110 V or 240 V) automatically. The LED on the power supply unit lights up green. Result The power supply is connected.
- Page 33 4 Preparation Risk of asphyxia when using full face masks without exhalation system! When using full face masks without an integrated exhalation system the CO concentration can increase to critical values and endanger the patient. Use full face masks with an external exhalation system if there is no exhalation system integrated.
-
Page 34: Connecting Optional Accessories
4 Preparation 4.3 Connecting optional accessories 4.3.1 Connecting the oxygen safety valve Risk of injury from burning oxygen! Supplying oxygen without special safety equipment can cause fires and injure people. Always use an oxygen safety valve. Observe the information on the safe handling of oxygen. ... - Page 35 4 Preparation 1. To open the respiratory air humidifier, grip the lower recess on the rear of the housing and press the rear of the housing gently with your thumb. 2. Remove the top of the humidifier. 3. If present: Pour out the water in the base of the humidifier. 4.
- Page 36 4 Preparation 5. Fill the base of the humidifier with fresh, cold water up to the mark (max. 400 ml). Sterile or boiled water is only required in exceptional medical cases when using this device at home. Do not use distilled water for technical purposes, as it could contain microbiological pollution.
- Page 37 4 Preparation Installing the respiratory air humidifier 1. Press the unlocking button on the therapy device to remove the side cover of the therapy device. 2. Fill the respiratory air humidifier with water (see " Filling the respiratory air humidifier", page 34).
- Page 38 4 Preparation • When the therapy device is in Standby mode: The humidifier button is shown in gray on the therapy device's display. • When the therapy device is in Therapy mode: The humidifier button is shown in green on the therapy device's display with the currently set humidifier level.
- Page 39 4 Preparation Risk of infection due to germs in stagnant water! Germs and bacteria can easily take hold and multiply in stagnant water. Remove the water from the respiratory air humidifier after every use. Clean the respiratory air humidifier regularly. ...
- Page 40 4 Preparation 7. To use the therapy device without the respiratory air humidifier in the future, insert the cover in the therapy device from the side until the unlocking button clicks into place audibly. Result The respiratory air humidifier is removed. 4.3.4 Alternative filling for nighttime: Topping up water If there is no more water left in the respiratory air humidifier, the...
- Page 41 4 Preparation 3. The respiratory air humidifier is removed from the side of the therapy device. Risk of injury from hot element! During and shortly after operation, the element of the respiratory air humidifier is hot and touching it can cause burns. ...
- Page 42 4 Preparation Material damage due to hot water and aromatic additives! Hot water or aromatic additives (e.g., eucalyptus oil) can damage the housing of the respiratory air humidifier and the element. Do not fill with hot water. Do not use any aromatic additives. 5.
-
Page 43: Operation
5 Operation Operation 5.1 Navigating the menu You configure all the settings in the menu via the display. Press the required field directly on the display. Button Function Go back a screen Go forward a screen Select values: • If the parameter can have exactly 2 possible values (e.g., on/off): press the button. - Page 44 5 Operation Material damage if power supply is interrupted during configuration! If the power supply is interrupted prematurely, the configuration will not be performed correctly. Leave the therapy device connected to the power supply throughout the configuration. Only disconnect the power supply once the Configuration successful message has appeared.
- Page 45 5 Operation • Select daylight saving time or standard time Click on the symbol with the gray background to select it. The background turns green when the setting is activated. • Use the arrow keys on the right to set the minutes. •...
-
Page 46: Switching Off The Therapy Device
5 Operation 5.3 Switching off the therapy device 1. To save energy during the day, keep the on/off button depressed for 3 seconds. If the automatic energy saving function is activated: the therapy device switches to the Energy saving mode automatically 15 minutes after the user has performed the last action. - Page 47 5 Operation Result The therapy starts. The start screen is shown in the Therapy mode. If you want to view detailed information on your therapy: Press the info button To allow you to sleep undisturbed, the display automatically turns dark after 30 seconds. The therapy continues normally. As soon as you press the display, the start screen is shown in the Therapy mode again.
-
Page 48: Ending The Therapy
5 Operation 5.5 Ending the therapy 1. Press the on/off button If the autoSTART-STOP function is activated: Remove the respiratory mask. The therapy is automatically ended after 5 seconds. You can activate the autoSTART-STOP function in the menu Main menu | Comfort | autoSTART-STOP (see "6.1 Setting comfort parameters", page 62). -
Page 49: Performing A Mask Test
5 Operation 5.6 Performing a mask test The therapy device is equipped with a mask test function. To minimize the risk of leaks and test the correct positioning of the mask even at higher pressures, you can perform a mask test before starting the therapy. -
Page 50: Switching Softstart On/Off
5 Operation 5.7 Switching softSTART on/off The softSTART function makes it easier to get used to the ventilation pressure when falling asleep. You can set a pressure different to the prescribed therapy pressure. When switched on, the therapy device sets this softSTART pressure. The pressure then increases slowly within the specified period or drops after the specified period (maximum 45 minutes) to the therapy level. -
Page 51: Setting The Respiratory Air Humidifier
5 Operation 5.8 Setting the respiratory air humidifier 5.8.1 Switching on the respiratory air humidifier The respiratory air humidifier switches on automatically when you start the therapy (see "5.4 Starting the therapy", page 46). You can also preheat the humidifier to ensure that the water in the respiratory air humidifier has already reached the required temperature by the start of the therapy. - Page 52 5 Operation 5.8.2 Switching off the respiratory air humidifier The respiratory air humidifier switches off automatically when you end the therapy (see "5.5 Ending the therapy", page 48). You can also switch the respiratory air humidifier off during the therapy. Requirement •...
- Page 53 5 Operation 5.8.3 Setting the humidifier level Requirement • The therapy device is in the Standby or Therapy mode. • The respiratory air humidifier is filled with water (see " Filling the respiratory air humidifier", page 34). • The respiratory air humidifier is connected to the therapy device (see "...
-
Page 54: Setting The Alarm
5 Operation 5.9 Setting the alarm 5.9.1 Setting the wake-up time and switching on the alarm Requirement The therapy device is in Standby mode. 1. Press the time display on the start screen. Press the menu button Press the Time field. - Page 55 5 Operation 5.9.2 Switching off the alarm Requirement The alarm is ringing. 1. To snooze the alarm for 5 minutes, press the Pause field. 2. To turn the alarm off for today, press the Off field. The alarm will go off the following day again at the set wake- up time.
-
Page 56: Viewing Therapy Data And Device Information
5 Operation 5.10 Viewing therapy data and device information In the info menu you can view information about the therapy (usage time, mask fit, therapy quality) within a selectable period of time and general information about the device and network. If your device only displays the usage time and not the mask fit and the therapy quality, your physician or authorized dealer will need to enable this function. - Page 57 5 Operation 3. If necessary: To view a longer period of time, navigate to the second screen 4. Select the required period. 5. To go back a screen, press the arrow key WM 100 TD...
-
Page 58: Using The Sd Card
The therapy data and settings are stored internally in the device. Loss of data due to incorrect SD card! SD cards not purchased from Weinmann may have reduced functionality or result in the loss of data. Only use SD cards from brand manufacturers which comply with the specifications (see "12.1 Technical data",... - Page 59 5 Operation 2. Slide the SD card into the SD card slot until it audibly clicks into place. When doing so, note: The beveled corner of the SD card must be at the top and facing the device during insertion. 3.
- Page 60 5 Operation Saving the therapy data manually Requirement • The SD card is inserted in the therapy device (see "5.11.1 Inserting the SD card", page 58). • The info menu with the therapy data for the requested period is open (see "5.10 Viewing therapy data and device information", page 56).
- Page 61 2. Label the SD card with the name and date of birth in order to avoid confusion when it reaches the physician or authorized dealer. The SD cards available from Weinmann have a field that you can write in. 3. Insert the SD card in the protective wallet included in the scope of supply.
-
Page 62: Settings In The Menu
6 Settings in the menu Settings in the menu You can configure settings for the comfort, accessories, and time parameters in the settings menu when the therapy device is in Standby mode. 6.1 Setting comfort parameters Comfort parameters facilitate handling of the therapy device and components for the patient and ensure a comfortable therapy. -
Page 63: Setting Accessories Parameters
6 Settings in the menu Parameter Possible values Description Intervals of 5 minutes in the Here you can set the period of time during which the ventilation range prescribed by pressure increases to the therapy pressure in the scope of the softSTART time the physician or softSTART. -
Page 64: Setting Time Parameters
6 Settings in the menu Parameter Possible values Description Here you specify whether you have changed the air filter. Changed Change For this function, the authorized dealer must have activated the air filter Cancel air filter reminder. 6.3 Setting time parameters In the time parameters you set the minutes of the current time, the time zone, and the required wake-up time. -
Page 65: Setting Device Parameters
6 Settings in the menu 6.4 Setting device parameters You can use the device parameters to set the brightness of the display and the volume of the acoustic signals among other things as you wish. Requirement The therapy device is in Standby mode. 1. -
Page 66: Hygienic Preparation
7 Hygienic preparation Hygienic preparation 7.1 General information • This product may contain disposable items. Disposable items are intended to be used only once. So use these items only once and do not reprocess them. Reprocessing disposable items may impair the functionality and safety of the product and lead to unforeseeable reactions as a result of aging, embrittlement, wear, thermal load, the effects of chemical processes, etc. -
Page 67: Hygienic Preparation Of The Therapy Device
7 Hygienic preparation Interval Action Annually Replace the respiration hose Descale the respiratory air humidifier (see "7.5.1 Descaling the respiratory air humidifier", page 74) In clinical areas: Disinfect the respiration hose (see "7.4 Hygienic preparation of As necessary the respiration hose", page 69) For reasons of hygiene: Replace the housing components of the respiratory air humidifier if they are in poor condition (e.g., if cracks appear). - Page 68 7 Hygienic preparation Part Cleaning Disinfection Sterilization Wipe with a damp Housing cloth: use water or mild soap Wipe with a damp High-gloss cloth: use water or Wipe disinfection surfaces mild soap; do not use (Recommendation: on the housing ® microfiber cloths terralin protect or...
-
Page 69: Hygienic Preparation Of The Respiration Hose
7 Hygienic preparation 3. Leave the air filter to dry. 4. Replace the air filter in the holding bracket. Result The air filter is clean. 7.3.2 Replacing the optional pollen filter (white filter) 1. Remove the air filter. 2. Remove and dispose of the pollen filter. 3. -
Page 70: Hygienic Preparation Of The Respiratory Air Humidifier
7 Hygienic preparation Part Cleaning Disinfection Sterilization Immersion With warm water Respiration disinfection and washing-up Not permitted hose (Recommendation: liquid ® gigasept FF 3. Rinse respiration hose off with clean water. 4. Shake respiration hose out thoroughly. 5. Hang up the respiration hose and leave it to drip dry. 6. - Page 71 7 Hygienic preparation 1. To open the respiratory air humidifier, grip the lower recess on the rear of the housing and press the rear of the housing gently with your thumb. 2. Remove the top of the humidifier. 3. Pour out any water remaining in the base of the humidifier. 4.
- Page 72 7 Hygienic preparation Part Cleaning Disinfection Sterilization With warm water and washing-up liquid. Recommendation: Clean the housing Immersion disinfection Base of the components in the top rack of the (Recommendation: ® humidifier dishwasher every week (maximum 65°C). gigasept FF ) or boil out for If necessary: Descale (see "7.5.1 Descaling 5 minutes...
- Page 73 7 Hygienic preparation 10. Place the top of the humidifier on the base of the humidifier from the back and press down gently until it clicks into place. 11. Ensure that the input and output of the humidifier insert fit exactly in the openings on the top of the humidifier.
- Page 74 7 Hygienic preparation 7.5.1 Descaling the respiratory air humidifier Requirement The respiratory air humidifier is removed from the therapy device (see "4.3.3 Removing the respiratory air humidifier after use", page 38). 1. To open the respiratory air humidifier, grip the lower recess on the rear of the housing and press the rear of the housing gently with your thumb.
- Page 75 7 Hygienic preparation 1. Unscrew the element from the base of the humidifier. 2. Remove the sealing ring carefully with a screwdriver, without damaging the groove. 3. Insert a new sealing ring in the groove on the element. 4. Screw the element back into the base of the humidifier. 5.
-
Page 76: Function Check
8 Function check Function check 8.1 Intervals Carry out a function check at regular intervals: • After each hygienic preparation • After each repair • At least every 6 months 8.2 Checking the therapy device Requirement • The therapy device is disconnected from the patient. •... -
Page 77: Checking The Respiratory Air Humidifier
8 Function check 8.3 Checking the respiratory air humidifier Requirement • The therapy device is disconnected from the patient. • The therapy device is connected to the power supply. • The therapy device is in Standby mode. 1. Check the housing for cracks, damage, and severe soiling. 2. -
Page 78: Alarms And Error Messages
Alarms and error messages If you are not able to clear an error message with the aid of the table below, you should have the device repaired by Weinmann or your authorized dealer. To avoid serious damage, do not continue using the device. - Page 79 9 Alarms and error messages Alarm message Cause Remedy Connect the mask and respiration hose No respiration hose and/or mask Pressure build-up not possible! correctly (see "4.2.2 Connecting up the connected. Please connect the mask and respiration hose", page 32). hose.
-
Page 80: Faults In The Therapy Device
9 Alarms and error messages 9.2 Faults in the therapy device Fault Cause Remedy Check that the power supply cable is No power supply. connected properly. Check the function of the socket. Remove the SD card (see 5.11.3, p. 60), No running noise, no disconnect the device from the power information on the display. -
Page 81: Faults In The Respiratory Air Humidifier
9 Alarms and error messages 9.3 Faults in the respiratory air humidifier Fault Cause Remedy Set the humidifier level (see 5.8.3, Humidifier level switched off p. 53). The respiratory air humidifier is not heating up. The respiratory air humidifier is Have therapy device repaired. defective The seal on the element is defective. - Page 82 9 Alarms and error messages Error code Cause Remedy Remove and reconnect the prismaCONNECT module. If the Error in the (206) fault persists: Contact the authorized dealer and have the prismaCONNECT module. prismaCONNECT module replaced. Ensure that the respiration hose and device output are not blocked.
-
Page 83: Maintenance
10 Maintenance 10 Maintenance The therapy device is designed to have a useful service life of 6 years. If the therapy device is used as intended in accordance with the instructions for use, it does not require any maintenance within this period. -
Page 84: Storage And Disposal
11 Storage and disposal 11 Storage and disposal 11.1 Storage 11.1.1 General information Store the device under the prescribed ambient conditions (see "12.1 Technical data", page 85). 11.1.2 Storing the therapy device 1. Switch off the therapy device (see "5.3 Switching off the therapy device", page 46). -
Page 85: Appendix
12 Appendix 12 Appendix 12.1 Technical data 12.1.1 Technical data on therapy device Specification Therapy device Product class according to 93/42/EEC Dimensions W x H x D in cm 17 x 13.5 x 18 Weight 1.4 kg Temperature range - Operation +5°C to +40°C - Storage -25°C to +70°C... - Page 86 12 Appendix Specification Therapy device Test parameters and limit values can be requested from the Electromagnetic compatibility (EMC) as per DIN manufacturer if required. EN 60601-1-2 EN55011 B Radio interference suppression IEC61000-4 Parts 2 to 6, Part 11, Part 8 Radio interference immunity IEC61000-3 Parts 2 and 3 Average sound pressure level in operation as...
- Page 87 12 Appendix Specification Therapy device prisma25S - Inspiratory positive airway pressure (IPAP) 4 hPa to 25 hPa - Expiratory positive airway pressure (EPAP) 4 hPa to 25 hPa - Relative inspiration duration Ti/Tset 20% to 67% - Trigger Auto, can be set to 3 levels - Pressure rise rate Can be set to 3 levels - Available modes...
- Page 88 12 Appendix Specification Therapy device Peak flow as per ISO 80601-2-70 Pressure measured at the Average flow at the patient patient connection opening connection opening with a flow of 40 l/min CPAP and APAP mode Test pressures: 4 hPa 4.0 hPa 235 l/min 8 hPa 8.0 hPa...
- Page 89 12 Appendix Specification Therapy device Stability of the dynamic pressure (short-term accuracy) as per ISO 80601-2-70 in CPAP and APAP mode - when using the 19 mm hose Δ p < 0.68 hPa 4 hPa Δ p < 0.58 hPa 8 hPa Δ...
- Page 90 12 Appendix Specification Therapy device • Target volume that can be set: In the "slow" level, the device checks after every 8 breaths if the target volume has been reached and changes the pressure by 0.5 hPa. If the pressure reaches a corridor around the target volume, the device switches to exact regulation.
- Page 91 12 Appendix Tolerances for measurements Pressure: ± 0.75% of measurement or ± 0.1 hPa Flow: ± 4 l/min Temperature: ± 1.5°C Sound pressure level and ± 2dB(A) sound power level The right to make design modifications is reserved. All flow and volume values are determined under STPD conditions. All the parts of the therapy device are free from latex.
- Page 92 12 Appendix Specification prismaAQUA Classification acc. to DIN EN 60601-1-11: Protection class II Type of protection against elec. shock Degree of protection against elec. shock Type BF Protection against harmful ingress of water and foreign IP22 bodies Classification as per DIN EN 60601-1: Operating mode Continuous operation Test parameters and limit values can be requested...
-
Page 93: Pressure Volume Curve
12 Appendix 12.2 Pressure volume curve pV curve at AV=0.5 l and f=20/min 0.00 5.00 10.00 15.00 20.00 Pressure [hPa] 12.3 Pneumatic system diagram pressure Flow regulator source Patient mask Nasal or full face mask Inlet for Respiration ambient air Optional Optional O Optional... -
Page 94: Separation Distances
A current list of the products included in delivery can be found on the Internet at www.weinmann.de or requested from your authorized dealer. Not all device versions and delivery contents are available in all countries. - Page 95 12 Appendix Part Article number Protective wallet for SD card WM 29779 Instructions for use WM 67841 Patient compass WM 67871 prisma20A, complete WM 29600-XXXX Part Article number Basic device prisma20A, WM 100 TD WM 29605 Respiration hose WM 24445 Power supply unit WM 29657 Power supply cable...
- Page 96 12 Appendix prisma25ST, complete WM 29920-XXXX Part Article number Basic device prisma25ST, WM 100 TD WM 29925 Respiration hose WM 24445 Power supply unit WM 29657 Power supply cable WM 24133 Set, 2 air filters WM 29928 Transport bag WM 29659 SD card WM 29794 Protective wallet for SD card...
- Page 97 12 Appendix Part Article number Transport bag WM 29659 SD card WM 29794 Protective wallet for SD card WM 29779 Instructions for use WM 67841 Patient compass WM 67871 prisma30ST-C, complete WM 29940-XXXX Part Article number Basic device prisma30ST-C, WM 100 TD WM 29942 Respiration hose WM 24445...
- Page 98 Internet at www.weinmann.de or from your authorized dealer. 12.5.3 Spare parts Replacement parts can be ordered separately, if required. A current list of accessories is available on the Internet at www.weinmann.de or from your authorized dealer. WM 100 TD...
-
Page 99: Warranty
12 Appendix 12.6 Warranty Starting from the date of purchase, Weinmann offers the customer a limited manufacturer’s warranty on a new original Weinmann product or replacement parts installed by Weinmann in accordance with applicable warranty terms and conditions for the particular product and the warranty periods listed below. - Page 100 Weinmann Geräte für Medizin GmbH + Co. KG P.O.Box 540268 22502 Hamburg Kronsaalsweg 40 22525 Hamburg T: +49-(0)40-5 47 02-0 F: +49-(0)40-5 47 02-461 E: info@weinmann-medical.com www.weinmann-medical.com medical technology made in germany...
Need help?
Do you have a question about the prisma20C and is the answer not in the manual?
Questions and answers