Table of Contents
Advertisement
Available languages
Available languages
Quick Links
Advertisement
Chapters
Table of Contents

Related Manuals for Leviton VRCPG


Summary of Contents for Leviton VRCPG
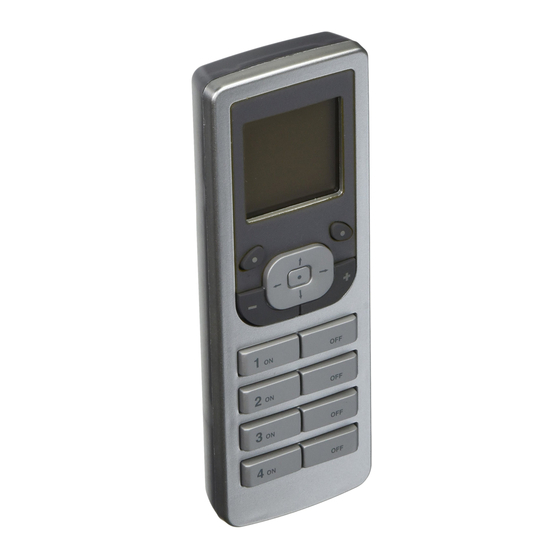
- Page 1 Programmer/Remote Cat. No. VRCPG USER GUIDE...
-
Page 2: Table Of Contents
TABLE OF CONTENTS INTRODUCTION ............3 MENU NAVIGATION & ICONS ......4-6 STARTUP ..............7 Time ................7 INSTALLATION CHECKLIST ........8 Include Dimmers/Switches ........8 TEXT EDITOR ............9 Include Controller ..........10 Update Controller ........10, 11 Create Areas ..........11, 12 Set Associations .........12, 13 Install Complete..........14 MAIN MENU SCREEN ..........15 DEVICE LIST ............15 WHO IS.. -
Page 3: Introduction
This manual will guide you through the understanding of your VRCPG functions as a setup controller. Once your network is installed, your VRCPG may also be used as a wireless controller for activating events, and controlling your lighting system. -
Page 4: Menu Navigation & Icons
MENU NAVIGATION and ICONS Navigating screens and menus on your VRCPG is accomplished using the following buttons: Display 8:35A (HOME screen - VRCPG - 08:35 AM depicted) M on 04. 28.2 00 8 Left Default Profile Soft Key Right Soft... - Page 5 Who Is checked, unchecked or all (no filter). Leviton also provides various icons that appear on the screens to provide quick review of the state of your network, selections made and to assist in identification of devices (refer to Icon Description...
- Page 6 ICON DESCRIPTION Action in process Undefined device Center button Single choice (radio button) - not chosen Single choice (radio button) - chosen Multiple selection (checkbox) - not selected Multiple selection (checkbox) - selected Remote Control Zone/Scene Controller (Single or Multibutton) Dimmer Switch Thermostat...
-
Page 7: Startup
Failure to do so will disable your events (refer to EVENTS pg. 17). NOTE: The time will blink if the VRCPG loses power to indicate there may be an error. Set the date and time for your VRCPG as follows:... -
Page 8: Installation Checklist
When a step is completed, to select NEXT simply press the right soft key STEP and the VRCPG will bring you to the next screen. NOTE: Installation checklist can be accessed any time using option 8. System on the Main Menu. -
Page 9: Text Editor
Default Pr ofil e Mon 05.01.200 6 to select a name. Leviton Stand By Menu Bedroom The VRCPG offers a list of over 100 commonly used names to choose Default Pr ofil e Save? Press from. NOTE: The template names Stand By Menu... -
Page 10: Include Controller
Once your controller has been placed in program mode, press the center button on the VRCPG. The VRCPG will go through the communication process and assign the node information for that device. The TEXT EDITOR will display where you can name your device (refer to TEXT EDITOR pg. -
Page 11: Create Areas
With the selection box around the first controller listed Back Who Is press the center button . The VRCPG will prompt you to stand 8:35A within 3 feet of that controller. UPDATE (YES) Press the right soft key Please stand within to update your controller. -
Page 12: Set Associations
AREA << NEW >> NOTE: You can use the Area #1 4 ON button on the bottom of the VRCPG to select ALL devices simultaneously. The Select? Press Back Home 4 OFF button deselects ALL devices. This feature will work whenever you encounter check box lists. - Page 13 Press the center button 8:35A bring up the ASSOCIATION ASSOCIATION screen. A list of controllers Room Controller Hall Controller included in Step 2 that support Den Controller association will be displayed. Scroll to and press the center Back Next Step button to select the controller you wish to associate an area or...
-
Page 14: Install Complete
Press button to start using Primary the VRCPG. The HOME screen of the VRCPG will be displayed. 8:35A - VRCPG - 08:35 AM Mo n 12 .0 7.2 0 09 Default Profile Menu Stand By... -
Page 15: Main Menu Screen
Back information. 8:35A After the information is received WHO IS... by the VRCPG, it will display the This is node #7 device ID and the NAME assigned Dimmer Scene Cap RT Slave to the device you activated. -
Page 16: Area
PROFILE screen. Up to 16 profiles can be created to control different areas of your house with your VRCPG. Each device may be controlled by assigning an area to one of the four buttons on the VRCPG. NOTE: Default profile will control the first... -
Page 17: Events
Default Pr ofil e Stand By Menu The PROFILE screen will display 8:35A with your newly created profile. - VRCPG - NOTE: Using the button to 8:35 AM select a profile will make it your Mon 04.28.2008 default profile and be displayed on the HOME screen. -
Page 18: Thermostats
Selecting 4. Recurrence allows 8:35A you to set the recurrence of the RECURRENCE event. Use the side arrow buttons Daily to toggle between choices (DAILY, WEEKDAYS, WEEKENDS, ONE TIME, MONTHLY, or WEEKLY). Press right soft key Cancel Save (Save) to complete your choice. 8:35A Selecting 5. -
Page 19: Settings
5. Security Ba ck Home Ba ck Home Ba ck Home TIME Sets the date and time for your VRCPG (refer to STARTUP pg. 7) CONTRAST 12:00 PM Mon 04.07.2008 Sets the contrast for your 8:35A Default Pr ofil e... -
Page 20: Beep
BEEP Turns the beeper on the VRCPG keypad ON or OFF. When the beeper is ON, a beep will be heard when pressing the keypad. When the beeper is OFF, a click will be heard when pressing the keypad. The default setting is beeper ON. Adjust the... -
Page 21: Security
System Lock. (Save) to complete. Press right soft key NOTE: Selecting < VRCPG Lock > will lock the VRCPG. When you return to the HOME screen you will not have access to the MAIN MENU nor any screens until you press the right soft key enter your password. -
Page 22: Events Setup
Stand By Menu EVENTS SETUP Default Pr ofil e Stand By Menu Allows you to enable or disable 8:35A ALL events for your VRCPG as EVENT SETUP follows: Enable ALL 1. Select Events Setup. Disable ALL 2. Use up and down... -
Page 23: Network Type
DEFAULT Network Type unless instructed SYSTEM ASSIGNE to by a Leviton technician. Cancel Save NETWORK SETUP The VRCPG is by default set up 8:35A with Two-Way communication. NETWORK SETUP One-Way communication is TWO WAY only recommended for larger ONE WAY... -
Page 24: System (Advanced Settings)
SYSTEM Selecting 8. System from the 8:35A MAIN MENU screen will bring SYSTEM you to the SYSTEM screen. 1. Install Checklist 2. Advanced Selecting 1. Install Checklist brings you to the Installation Checklist (refer to pg. 8). Back Home NOTE: This feature is not available on secondary remotes. -
Page 25: Rs232 Setup
5. Advanced Associations NOTE: Consult Vizia RF + system guide for advanced Association options. 6. Network Rediscovery 8:35A This feature is used for REDISCOVER NTWK Powerlevel -3DB updating your network, specifically if nodes have press [ 4 OFF ] moved or the network Start? Press environment has changed. - Page 26 REPLACE NODE replacement process by Bedroom Bathroom pressing the center button Hall on the VRCPG. After Room Controller replacement you can name the replacing device (refer to Ba ck Home TEXT EDITOR pg. 9). Once your name is saved, you will receive confirmation...
-
Page 27: Device Properties
8:35A PROPERTIES PROPERTY VRCPG Name: VRCPG Bedroom NID: 001 Cntrl Room Hall Portable Remote Room Controller Mfg. by Leviton Select? Press ( 4 ) Back Home Back Home WARNING: 7. Factory Test - FOR FACTORY USE ONLY! DO NOT USE. -
Page 28: Primary Utilities
5. Reset Back Home Back Home This feature allows you to duplicate all necessary network data from a primary VRCPG remote into your secondary VRCPG remotes. 1. Version 8:35A This feature displays the VIZIA RF + A2.4.2 Vizia RF + and Z-Wave ®... - Page 29 (not Areas, Profiles, Events). You can create new Areas, Profiles and Events with your secondary remote. If you wish to duplicate the secondary VRCPG remote with the primary VRCPG remote's application information, use Get Primary Data and Send Primary Data.
- Page 30 Leviton warrants to the original consumer purchaser and not for the benefit of anyone else that this product at the time of its sale by Leviton is free of defects in materials and workmanship under normal and proper use for five years from the purchase date.
- Page 31 Téléprogrammateur N° de cat. VRCPG GUIDE DE L’UTILISATEUR...
- Page 32 TABLE DES MATIÈRES INTRODUCTION .............33 ICÔNES ET MENUS DE NAVIGATION ....34–36 CONFIGURATION INITIALE ........37 Heure ..............37 LISTE DES ÉTAPES À SUIVRE ......38 Inclusion de gradateurs/d’interrupteurs....39 ÉDITEUR DE TEXTE .........39, 40 Inclusion de contrôleurs ......40, 41 Mise à jour de contrôleurs ......41, 42 Création d’aires ..........42, 43 Association de dispositifs ......43, 44 Fin de l’installation ........44, 45...
-
Page 33: Introduction
• consulter le détaillant ou un technicien expérimenté en matière de radios ou de téléviseurs. MISE EN GARDE DE LA FCC AMÉRICAINE : toute modification apportée sans l’autorisation expresse de Leviton Manufacturing Co. Inc. pourrait avoir pour effet d’annuler les droits d’utilisation du produit. -
Page 34: Icônes Et Menus De Navigation
ICÔNES ET MENUS DE NAVIGATION On peut atteindre les menus et écrans de navigation du VRCPG au moyen des boutons apparaissant sur l’image suivante. Affichage à cristaux liquides 12:00 PM (écran d’accueil M on 04 .07 .20 08 Touche affiché) - Page 35 Who Is ceux qui ont été cochés ou Select? Press décochés. Back Who Is Leviton a en outre conçu diverses icônes permettant d’évaluer rapidement l’état du réseau, de revoir les sélections effectuées ou d’identifier des dispositifs (se reporter à la légende).
- Page 36 ICÔNE DESCRIPTION Action en cours Dispositif non défini Bouton central Sélection unique (bouton d’option non choisi) Sélection unique (bouton d’option choisi) Sélections multiples (boîte décochée) Sélections multiples (boîte cochée) Télécommande Contrôleur de zones/d’ambiances Gradateur Interrupteur Thermostat Événement activé Un ou plusieurs événements désactivés Bips désactivés (indication) Bips désactivés (sélection) Bips activés (sélection)
-
Page 37: Configuration Initiale
(se reporter à la section ÉVÉNEMENTS de la page 48). REMARQUE : l’heure se met à clignoter quand le VRCPG n’est plus alimenté de manière à indiquer une erreur possible. Régler la date et l’heure de la manière suivante : 12:00 PM Mo n 04.07.2008... -
Page 38: Liste Des Étapes À Suivre
LISTE DES ÉTAPES À SUIVRE Leviton suggère une série d’étapes à suivre pour configurer un réseau Vizia RF + ; on recommande qu’elles soient effectuées dans l’ordre, surtout si on est néophyte en la matière. La façon de concevoir le système peut en effet avoir des répercussions sur son rendement et son efficacité;... -
Page 39: Inclusion De Gradateurs/D'interrupteurs
flèches vers le haut Save? Press vers le bas pour sélectionner l’élément désiré de la liste. Le VRCPG y suggère 100 appellations parmi les plus souvent utilisées. REMARQUE : on peut modifier les noms de la liste au besoin. -
Page 40: Inclusion De Contrôleurs
Une fois le nom affiché, appuyer sur le bouton central . Le dispositif a été intégré au réseau sous l'appellation choisie. Le VRCPG le confirme en affichant les données associées, puis invite l’utilisateur à continuer le 8:35A processus d’intégration en... -
Page 41: Mise À Jour De Contrôleurs
REMARQUE : les contrôleurs de Leviton ne s’intègrent pas de la même manière que les gradateurs, interrupteurs et modules. On doit les mettre en mode de programmation avant de procéder (se reporter aux directives de chacun). Une fois le contrôleur en mode de programmation, appuyer sur le bouton central du VRCPG. -
Page 42: Création D'aires
à Node Updated! jour, confirmant l’opération Node ID #4 aux yeux de l’utilisateur. Room controller Le VRCPG confirme la mise Finalize? Press à jour en affichant l’écran UPDATE, où apparaissent les renseignements relatifs au nœud. Appuyer sur le bouton central pour terminer l'étape. -
Page 43: Association De Dispositifs
à la prochaine étape en appuyant sur la touche (Next Step). droite REMARQUE : on peut se servir du bouton de commutation 1 ON ou 1 OFF VRCPG pour allumer ou éteindre les lumières d’une aire encadrée. Association de dispositifs ÉTAPE 5 REMARQUE : quand on passe 8:35A de l’étape 4 à... -
Page 44: Fin De L'installation
(SCENE) au bouton en question (se reporter à la section relative aux ambiances dans les Réglages avancés). Appuyer sur la touche droite (Save) pour enregistrer l’association. Le VRCPG invite ensuite l’utilisateur à en effectuer d’autres ou à passer à la prochaine étape en appuyant (Next Step). -
Page 45: Menu Principal
8:35A commencer à utiliser le VRCPG. - VRCPG - 08:35 AM L’écran d’accueil s’affiche. Mo n 12 .0 7.2 0 09 Default Profile Menu Stand By MENU PRINCIPAL (Menu) depuis En appuyant sur la touche droite l’écran d’accueil, on accède au menu principal (MAIN MENU), par l’entremise duquel on peut... -
Page 46: Identification Des Dispositifs
élément intégré au réseau pour en afficher les 8:35A renseignements. WHO IS... This is node #7 Le VRCPG présente alors le Dimmer Scene Cap numéro, le type et le nom du RT Slave Name: Hall dimmer dispositif en question. - Page 47 flèches vers la gauche ou la droite pour sélectionner le bon. Le bouton choisi sera celui qui commandera le profil visé depuis le VRCPG. Passer à l’option Area et se servir des flèches vers la gauche ou la droite pour choisir l’aire qu’on veut affecter au profil.
-
Page 48: Événements
ÉVÉNEMENTS De l’écran MAIN MENU, 8:35A sélectionner Events pour accéder EVENTS à l'écran du même nom, duquel << NEW >> on peut programmer jusqu’à 64 événements. On peut ainsi régler une aire de manière à allumer Back Home l’éclairage au maximum (MAX), à... -
Page 49: Thermostats
(quotidienne DAILY, jours de la semaine WEEKDAYS, les fins de semaine WEEKENDS, une seule fois ONE TIME, mensuelle MONTHLY ou hebdomadaire WEEKLY). (Save) pour Appuyer sur la touche droite enregistrer le réglage. 8:35A Sélectionner 12:00P pour régler EVENT TIME l’heure de l’événement. Se servir Time of Day des flèches vers la gauche 12:00P... -
Page 50: Réglages
Mon 04. 07. 2008 Mon 04.07.2008 de l’écran à cristaux liquides du CONTRAST Default Pr ofil e Default Pr ofil e Stand By Menu VRCPG. Stand By Menu 1. Choisir Contrast. 2. Se servir des boutons pour régler le pourcentage. Save Cancel 3. -
Page 51: Bips Sonores
SÉCURITÉ Ce menu permet de choisir un mot de passe et un niveau de verrouillage pour le VRCPG ou ses réglages. Effectuer les réglages de sécurité comme suit.On peut afficher le niveau des piles et l’état de... -
Page 52: Niveau Des Piles
Sélectionner <OPEN> et se servir des flèches vers la gauche ou la droite pour choisir parmi les options <OPEN>, <VRCPG Lock> et <System Lock>. (Save) pour Appuyer sur la touche droite enregistrer le réglage. REMARQUE : l’option <VRCPG Lock> verrouille le téléprogrammateur. -
Page 53: Activation/Désactivation Des
- VRCPG - - VRCPG - 08:35 AM 08:35 AM Mo n 04. 28. 2008 Mon 04. 28.2008 Réglage en secondes du délai 8:35A après lequel l’écran du VRCPG Default Profile Default Profile LCD TIMEOUT Stand By Menu Stand By Menu s’éteint;... -
Page 54: Type De Réseau
à moins d’en avoir reçu SYSTEM ASSIGNE l’autorisation d’un technicien de Leviton. Cancel Save MODE DE COMMUNICATION DU RÉSEAU Par défaut, le VRCPG fonctionne 8:35A de manière bidirectionnelle. NETWORK SETUP On ne recommande la TWO WAY communication unidirectionnelle ONE WAY que dans le cas de grands réseaux comptant plus de 50... -
Page 55: Système (Réglages Avancés)
SYSTÈME De l’écran MAIN MENU, 8:35A sélectionner System pour SYSTEM accéder à l'écran du même nom. 1. Install Checklist 2. Advanced Sélectionner Install Checklist pour accéder à l'écran du même nom (se reporter à la page 38). Back Home REMARQUE : cette option n’est pas disponible en mode de 8:35A télécommande secondaire. -
Page 56: Connexions Rs232
4. Création d’aires (Create Areas, se reporter au menu INSTALLATION CHECKLIST, page 42). 5. Associations avancées (Adv Associations) REMARQUE : consulter le guide Vizia RF+ (en anglais seulement) pour connaître les options d’associations avancées. 6. Exploration du réseau (Ntwk Rediscovery) Cette fonction sert à... - Page 57 Room Controller dispositif (se reporter à la section relative à l’éditeur Home Ba ck de texte, à la page 39). Le VRCPG confirme ensuite le remplacement. 8:35A 8:35A REPLACE NODE REPLACE NODE Node replaced! Prepare replacing...
- Page 58 PROPERTIES PROPERTY VRCPG Name: VRCPG Bedroom NID: 001 Cntrl Room Hall Portable Remote Room Controller Mfg. by Leviton Select? Press ( 4 ) Back Home Back Home 7. Vérification en usine (Factory Test). AVERTISSEMENT : FONCTION EXCLUSIVEMENT RÉSERVÉE AU FABRICANT; NE PAS S’EN SERVIR!
-
Page 59: Utilitaires D'unités Secondaires
2. Télécommande secondaire 8:35A (Join as Secondary) JOIN AS SECONDARY Ici, on peut joindre le WARNING! VRCPG au réseau à titre de This step will erase all the data télécommande secondaire. Continue? Appuyer sur la touche droite (YES) après la sollicitation à... - Page 60 à l’inclusion/la copie de ce dernier (dans le cas des VRCPG, se reporter à la page 40). Une fois transformé en unité secondaire, le VRCPG invite l'utilisateur à élaborer une liste de nœuds à commander. Appuyer sur la touche droite (YES) pour procéder.
- Page 61 REMARQUE : le fait de réinitialiser le VRCPG n’affecte en rien les autres dispositifs du réseau. Pour redonner à ces derniers leurs valeurs d’origine, il faut se reporter aux directives se rapportant à chacun.
- Page 62 à une durée de 5 ans. Leviton décline toute responsabilité envers les dommages indirects, particuliers ou consécutifs, incluant, sans restriction, la perte d’usage d’équipement, la perte de ventes...
- Page 63 CONTROL REMOTO PROGRAMADOR NO. DE CAT. VRCPG GUIA DEL USUARIO...
- Page 64 TABLA DE CONTENIDO INTRODUCCION .............65 MENU DE NAVEGACION E ICONOS ....66–68 INICIO ..............69 Fecha y Hora ............69 LISTA DE COMPROBACION PARA INSTALAR ...70 Inclusión Atenuadores/Interruptores ....71 EDITOR DE TEXTO ..........71, 72 Inclusión de Control ........72, 73 Actualización del Control .......73, 74 Creación de Areas ..........74, 75 Programación de Asociaciones ....75, 76 Instalación Terminada ..........77...
-
Page 65: Introduccion
. Este manual lo guiará para que entienda las ® funciones del VRCPG como control programado. Una vez que esté instalada la red su VRCPG también se puede usar como control inalámbrico para activar eventos y controlar su sistema de iluminación. -
Page 66: Menu De Navegacion E Iconos
Botón de Selección a cada una de las opciones (1. Device List) Botón del centro NOTA: Las selecciones se hacen en cada pantalla presionando el botón del centro en el VRCPG a no ser que esté programado de otra manera. - Page 67 (filtrados). Select? Press Back Who Is Leviton también le provee varios íconos que aparecen en la pantalla para darle una revisión rápida al estado de su red, las selecciones hechas y asistirlo en la identificación de sus productos (Vea...
- Page 68 ICONOS DESCRIPCION Acción en proceso Producto indefinido Botón del centro Opción Sencilla (botón radio) – no elegida Opción Sencilla (botón radio) – elegida Selección Múltiple no seleccionada Selección Múltiple seleccionada Control Remoto Control Zona/Ambiente (Sencillo o Botón múltiple) Atenuador Interruptor Termostato Evento programado Evento o Todos los Eventos Deshabilitados...
-
Page 69: Inicio
(vea EVENTOS en la Página 80). NOTA: El tiempo oscilará si el VRCPG pierde energía para indicar que puede haber un error. Programe la fecha y la hora en su VRCPG como sigue: FECHA Y HORA 12:00 PM 12:00 PM Mon 04.07.2008... -
Page 70: Lista De Comprobacion Para Instalar
Cuando termine un paso, simplemente presione el botón suave de la derecha para seleccionar NEXT STEP y el VRCPG lo llevará a la siguiente pantalla. NOTA: Puede tener acceso a la lista de comprobación para instalar en cualquier momento, usando la opción 8. Sistema en el menú... -
Page 71: Inclusión Atenuadores/Interruptores
Aparecerá TEXT EDITOR (EDITOR DE TEXTO). Ahora puede nombrar su producto. NOTA: El VRCPG viene asignado de fábrica con #1. EDITOR DE TEXTO Usando el EDITOR DE TEXTO 8:35A... -
Page 72: Inclusión De Control
Default Pr ofil e Mon 05.01.200 6 Dormitorio para seleccionar un nombre. El Stand By Menu VRCPG ofrece una lista con más Guardar? Pres de 100 nombres comúnmente Default Pr ofil e usados para elegir. NOTA: Los Menu Stand By nombres modelos se pueden alterar para arreglos particulares. -
Page 73: Actualización Del Control
Una vez que ha colocado su control en el modo programa, presione el botón del centro en el VRCPG. El VRCPG pasará por un proceso de comunicación y asignará la información del nodo para ese producto. El TEXT EDITOR (EDITOR DE TEXTO) mostrará... -
Page 74: Creación De Areas
"Who Is" (Quién es) (vea Página 78). Los controles de Leviton oscilan durante el proceso de actualización, confirmando que están actualizando el control correcto. Una vez que el VRCPG confirme la ACTUALIZACION mostrará la información actualizada del nodo. Presione el botón del centro para terminar. -
Page 75: Programación De Asociaciones
<< NEW >> o presionando el botón suave de la para continuar con SIGUIENTE PASO. derecha NOTA: Puede usar en el VRCPG el botón ENCENDIDO 1 y el botón APAGADO 1 para ENCENDER o APAGAR las luces en el área que tiene la caja de selección alrededor. - Page 76 Pase y presione el botón del 8:35A centro para seleccionar el ASOCIACION control que desea asociar a una Dormitorio Control área o áreas. Pasillo Controller Bano Controller En la pantalla aparecerá CONTROLLER ASSOC (CONTROL ASOC) con una Volver Sig. Paso caja de selección alrededor 8:35A del Botón 1, incitándolo a...
-
Page 77: Instalación Terminada
Primario. LISTA DE COMPROBACION DE INSTALACION está terminada. Presione el botón de centro otra vez para empezar a usar el - VRCPG - VRCPG. 8:35 AM Aparecerá la pantalla BASE del Lun 04.28.2008 VRCPG. -
Page 78: Pantalla Del Menu Principal
LISTA DE PRODUCTOS Seleccionar 1. Device List, 8:35A de la pantalla del MENU lo LISTA PRODUCTO llevará a la pantalla LISTA de VRCPG Dormitorio PRODUCTOS donde aparecerá Bano la lista de productos incluidos Pres en la red. Puede volver a... -
Page 79: Quien Es
PROFILE. Se pueden crear hasta 16 perfiles para controlar las diferentes áreas de su casa con su VRCPG. Cada producto se puede controlar asignando un área a uno de los cuatro botones en el VRCPG. NOTA: El perfil de fábrica puede controlar las cuatro primeras áreas creadas... -
Page 80: Eventos
Default Pr ofil e Stand By Menu La pantalla PERFIL 8:35A mostrará el nuevo perfil creado. - VRCPG - 08:35 AM NOTA: Use el botón para L u n 04 .2 8.2 00 8 seleccionar un perfil que determinará su perfil y se verá en la pantalla BASE. - Page 81 A continuación se explica cómo 8:35A crear un evento: EVENTO Con la caja de selección 1. Evento #1 2. Activar alrededor de « NEW » (NUEVO) 3. Accion presione el botón del centro 4. Repetir 5. 12:00P . Puede nombrar un nuevo evento presionando el botón del Cancelar Guardar...
-
Page 82: Termostatos
12:00 PM 12:00 PM Mon 04.07.2008 Mon 04. 07.2 00 8 También hay una caja Random 8:35A Default Pr ofil e Default Pr ofil e Stand By Menu Stand By Menu (Azar) - con la cual puede EVENTOS chequear o no, usando <<... -
Page 83: Programacion
4. Ubicacion 11. Programa Red 5. Seguridad Inicio Inicio Volver Volver FECHA Y HORA Fije la fecha y la hora para su VRCPG (vea INICIO Página 69). CONTRASTE 12:00 PM 12:00 PM Mon 04.07.2008 Fije el contraste para la pantalla 8:35A Mon 04.07.2008... -
Page 84: Ubicacion
AURORA u OCASO para EVENTOS que Default Pr ofil e necesitan habilitar o deshabilitar tiempo de Ahorro Stand By Menu de Luz de Día. Programe la ubicación de su VRCPG como sigue: 1. Seleccione el lugar. 8:35A 12:00 PM 12:00 PM Mon 04. -
Page 85: Nivel De Bateria
NIVEL de BATERIA Muestra el nivel de la batería y 8:35A el estado del cargador para su NIVEL DE BATERIA VRCPG como sigue: - 2.88 + 1. Seleccione Battery Level (Nivel de Batería). Bateria Energia 2. El nivel de batería se... -
Page 86: Descanso Del Lcd
Default Pr ofil e Le permite fijar el idioma que 8:35A Menu Stand By quiere que la pantalla LCD IDIOMA muestre en su VRCPG como INGLES sigue: ESPANOL 1. Seleccione el Idiomas. Guardar? Pres 2. Use las flechas de arriba... -
Page 87: Tipo De Red
SISTEMA ASIGNA técnico de Leviton. Guardar Cancelar PROGRAMACION DE LA RED EL VRCPG viene programado 8:35A de fábrica con dos vías PROGRAMA RED de comunicación. Sólo se BIDIRECCIONAL recomienda usar una vía en... -
Page 88: Programacion De La Red Sistema (Programación Avanzada)
SISTEMA Seleccionar 8. Sistema de la 8:35A pantalla del MAIN MENU lo INST. SISTEMA llevará a la pantalla de SYSTEM 1. Lista de Instalacion 2. Avanzado (PROGRAMACION DEL SISTEMA). Seleccionar 1. Install Volver Inicio Checklist le traerá la Lista de Comprobación de Instalación 8:35A (vea Página 62). -
Page 89: Programacion Rs232
3. Actualización del Control (vea LISTA DE COMPROBACION PARA INSTALAR - Actualización del Control página 73). 4. Creación de Areas (vea LISTA DE COMPROBACION PARA INSTALAR - Creación de Areas página 74). 5. Asociaciones Avanzadas NOTA: Consulte la guía de aplicación ViziaRF + para opciones avanzadas de Asociación. - Page 90 Inicio Volver que inicie el proceso de reemplazo presionando el botón de centro en el VRCPG. Después del reemplazo puede darle nombre al producto reemplazado (vea EDITOR DE TEXTO, Página 71). Una vez que guarde el nombre, recibirá una confirmación que el nodo ha sido reemplazado.
- Page 91 (Nombre, ID del Nodo y Descripción) cuando lo seleccione de la lista. 8:35A 8:35A PROPIEDADES APROPIADO VRCPG Nombre: Cntrl #2 Dormitorio NID: 001 Cntrl Fiso Bib Pasillo Escana Cntrl Dormitorio Control Mfc. por Leviton Pres ( 4 ) Volver Inicio Volver Inicio...
-
Page 92: Utilidades Primarias
Z-Wave , la identificación de ® HID: 00989680 casa, identificación del nodo NID: 1 y No. de serie de su VRCPG. S/N: 007358DH También puede tener acceso Volver a esta pantalla presionando el botón del centro mientras esta en la pantalla... - Page 93 Siga el proceso de inclusión/ duplicado de su control primario (para el VRCPG vea la Página 72). Este control remoto secundario lo incitará a crear la lista del nodo. Presione el botón suave de la derecha (SI) para terminar.
- Page 94 • Para ayuda consulte con el vendedor o técnico con experiencia en radio/ televisión PRECAUCION FCC: Cualquier cambio o modificación no aprobada expresamente por Leviton Manufacturing Co., Inc., puede anular la autoridad del usuario que opera el equipo.
- Page 95 SOLO PARA MEXICO POLIZA DE GARANTIA: LEVITON S. de R.L. de C. V., LAGO TANA NO. 43 COL. HUICHAPAN, DEL. M. HIDALGO MÉXICO D. F., MÉXICO. CP 11290 Tel (55) 5082-1040. Garantiza este producto por el término de un año en todas sus partes y mano de obra contra cualquier defecto de fabricación y funcionamiento a...
- Page 96 Leviton garantiza al consumidor original de sus productos y no para beneficio de nadie más que este producto en el momento de su venta por Leviton está libre de defectos en materiales o fabricación por un período de cinco años desde la fecha de la compra original. La única obligación de Leviton es corregir tales defectos ya sea...
Need help?
Do you have a question about the VRCPG and is the answer not in the manual?
Questions and answers