Table of Contents
Advertisement
Advertisement
Table of Contents

Related Manuals for Gorenje WA 72145 BK


Summary of Contents for Gorenje WA 72145 BK
- Page 1 Instructions for Use Washing machine...
-
Page 2: Table Of Contents
Thank you for your confi dence in purchasing our washing machine, and congratulations on the excellent choice. Your new washing machine meets the requirements of modern treatment of laundry. It is rational in the consumption of energy, water and washing agents. Our appliances are friendly to the environment. -
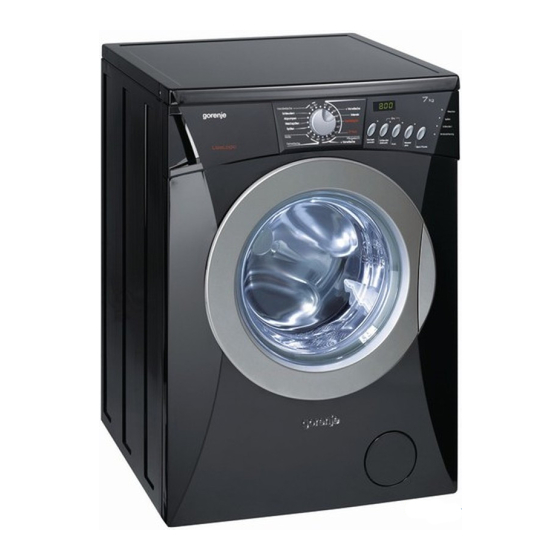
Page 3: Description Of Washing Machine
Description of washing machine 1. Front panel 5. Adjustable legs 2. Detergent dispenser 6. Water outlet hose 3. Door 7. Water inlet hose 4. Filter lid 8. Mains power cable Technical information Dimensions (w x d x h): 600 mm x 600 mm x 850 mm (depending on model) Dimensions (w x d x h): 600 mm x 440 mm x 850 mm Depth with door open: 106 cm / 88 cm (depending on model) -
Page 4: Cautions
Cautions • Be sure to remove transport brackets prior fi rst use of the appliance. Attempted operation of the blocked machine may result in irreparable damage which is not covered by the manufacturer’s warranty! • When connecting your washing machine to water supply, be sure to use brand new water inlet hose and appropriate sealing gaskets (attached). -
Page 5: Installation And Connection
Installation and connection Package removal In removing the wrapping be careful not to damage the appliance with a sharp object. Before connecting the appliance, let it warm up to room temperature (wait for two hours). • Our appliances are packed in environmentally friendly materials which may be recycled, deposited or decomposed without any threat to the environment. - Page 6 • If you have a tumble dryer of the same dimensions, you can place it on top of the washing machine. To ensure correct operation of the appliance, water Water inlet connection pressure inlet must be between 0,05 and 0,8 MPa. Minimum water pressure can be established by measuring the quantity of poured out water.
- Page 7 Do not immerse the Aqua-stop system inlet pipe into the water, because it contains the electric valve! Water outlet connection • Fix the outlet hose to run into the sink or the bathtub, or connect it directly to the wall drain outlet (diameter min. 4 cm). •...
- Page 8 This appliance must be earthed! Connect the appliance with the cable and plug to a suitable 13 amp socket which is properly earthed. Required nominal voltage and frequency are indicated on the rating plate. The connection to the mains supply and earthing have to be made according to current standards and regulations.
-
Page 9: Operation
Operation A - program selector knob Signal LED’s: B - delayed start - washing program stages C - setting the spinning speed (rpm) / stop • wash pump • rinse D - quick program or cold wash (depending • spin on the model) - Child lock E - higher water level... - Page 10 - Open the door of the machine. Door is opened by pulling the handle (lever) on the right hand side of the door towards you. - Sort the laundry by the type of fabrics. Do the buttons and zippers, tie the strings and pull out the pockets.
- Page 11 If you wish the laundry not to be excessively creased at the end of washing, use easy ironing program Synthetics Normally stained shirts, blouses and other polyester and polyamide garments, or a mixture of these fabrics with cotton. For heavily stained permanent press use program with pre-wash Delicate This is a program for delicate fabrics (dresses, skirts, blouses) and curtains.
- Page 12 within fi ve minutes after turning on the machine, the display will be automatically turned off to save energy. The display will turn on again when you rotate the program selector dial or press any button. If no action is taken after the end of the program, the display will also turn off after fi...
- Page 13 Quick program (selection with a button) • energy-saving program • appropriate for washing lightly soiled laundry or smaller quantities of clothes • reduces washing and rinsing time • reduces water consumption (with some programs) • by pressing the key quick program on the program Cotton 30°C, activate the program Cotton 30°C-quick Cold wash (only available with some models)
- Page 14 - Adding washing and softening agents (see Tips for washing and energy saving) • pre-wash compartment • main wash compartment • softener compartment If you do not apply the program which includes the pre-wash feature, you may add washing detergent directly into the drum, using the measuring vessel.
- Page 15 • After the end of washing program, power supply should be turned off by pulling the mains cord plug out of the outlet. Interruptions • By the user Selecting PUMP STOP function The program stops when it reaches the PUMP STOP position (if this additional function was previously selected);...
- Page 16 Special functions • Child lock - To activate the child lock, simultaneously press the spinning speed setting button (C) and short program (or cold wash ) button (D) and hold them for at least three seconds. If the child lock is successfully activated, a sound is emitted and a signal LED lights up.
-
Page 17: Tips For Washing And Energy Saving
Tips for washing and energy saving • Before washing sort out the laundry according to the type, degree of dirtiness and color resistance. • Prior selecting the washing program consult the sewn tab with information on a particular piece of laundry (see Maintenance Chart on the last page). •... -
Page 18: Cleaning And Maintenance
• Liquid detergents are intended for main wash only, without pre-wash. • Insert particularly delicate linen (stockings, delicate female underwear, etc.) into the special bag. • High spin RPM leave less moisture in laundry which dries out much quicker in the tumble dryer, thereby saving energy. Do not put clods of detergent into the soap dispenser as the tube in the washing machine may clog. - Page 19 • If necessary, clean the cover of the bung under the running water. • Wash it under running water using a brush, and dry it. Remove any leftover dried detergent from the bottom of the casing. • Clean the entire rinsing area of the washing machine with a brush, especially the nozzles on the upper side of the rinsing chamber.
- Page 20 • Open the fi lter lid using fl at screwdriver or similar tool. • Filter needs occasional cleaning, especially following heavily shaggy or old laundry. Before cleaning, drain any water from the machine via drain pipe. • Turn it anti-clockwise, pull it out and clean under running water.
-
Page 21: Troubleshooting
Troubleshooting Washing machine controls the operation of particular functions during washing. If irregularities are detected, the fault is signaled by displaying a message (Fx) on the display, and by rhythmical fl ashing of the LEDs. Simultaneously with the fl ashing of the LEDs, a sound signal is emitted several times, in the same rhythm. - Page 22 Failure Possible cause Remedy The machine does not work Machine is not powered. Check if: (indicator LED’s are not • power in the socket, illuminated). • the fuse is OK, • plug is in the socket. FAILURE 2 Washing program does not Door is not properly closed.
- Page 23 Failure Possible cause Remedy Greasy wads appear on the Too little detergent (laundry was Wash the laundry again. laundry. very greasy). Add more detergent for such soiled laundry, or use liquid detergent. Laundry is stained after You used liquid detergent or Use the detergent containing washing.
- Page 24 Failure Possible cause Remedy FAILURE 5 Motor operation interrupted; Motor overload or motor failure. • Turn off the appliance and wait or motor does not operate for a few seconds; (the machine reports • turn the appliance back on and a failure F5 - the LEDs repeat the washing program.
-
Page 25: Tables
Tables Program chart - 6/7 kg o Water cons. Energy cons. Basic programs 6kg 7kg 6kg 7kg Cotton 2,05/2,10** 2,19/2,31** Cotton 1,00/1,12** 1,17/1,31** 1400 Cotton + prewash 1,22/1,34** 1,32/1,45** Cotton - heavy * 1,02/1,14** 1,19/1,33** Cotton - easy ironing 3 3,5 60 1000 1,10 1,14... - Page 26 Program chart - 6/7 kg n Water cons. Energy cons. [kWh] Basic programs 800-1400 800-1400 Cotton 2,05 2,31 Cotton 1,12 1,17 1400 Cotton + prewash 1,22 1,32 Cotton - heavy * 6/3** 7/3,5** 60 1,14/1,01** 1,33/1,09** Cotton - easy ironing 1000 1,10 1,14...
- Page 27 Program chart - 6/7 kg (A-10%) n Water cons. Energy cons. [kWh] Basic programs 800-1400 800-1400 Cotton 2,05 2,31 Cotton 1,12 1,17 1400 Cotton + prewash 1,22 1,32 Cotton - heavy * 6/3** 7/3,5** 60 1,02/0,87** 1,19/0,97** Cotton - easy ironing 1000 1,10 1,14...
- Page 28 Program chart - 4,5 kg o Water cons. Basic programs Cotton 1,80 Cotton 0,82 1400 Cotton + prewash 0,99 Cotton - heavy * 0,85 Cotton - easy ironing 1000 0,70 Cotton 0,51 1400 Cotton 0,15 Cotton - quick 17’ 1000 0,13 Synthetics 0,61...
- Page 29 Program chart - 4,5 kg n Water cons. Basic programs Cotton 1,80 Cotton 0,82 1400 Cotton + prewash 0,99 Cotton - heavy * 4,5/2,75** 0,85/0,74** Cotton - easy ironing 1000 0,70 Cotton* 4,5/2,75** 0,51/0,49** 1400 Cotton 0,15 Cotton - quick 17’ 1000 0,13 Synthetics...
- Page 30 Program chart - 4,5 kg (A-10%) n Water cons. Basic programs Cotton 1,80 Cotton 0,82 1400 Cotton + prewash 0,99 Cotton - heavy * 4,5/2,75** 0,81/0,65** Cotton - easy ironing 1000 0,70 Cotton* 4,5/2,75** 0,51/0,49** 1400 Cotton 0,15 Cotton - quick 17’ 1000 0,13 Synthetics...
- Page 31 Program chart/Additional functions Program Basic programs Cotton / / Cotton with prewash / Cotton heavy / Cotton / / Cotton - quick 17’ / Synthetics with pre-wash / Synthetics / / Delicate /...
- Page 32 Maintenance chart Normal wash Max. Max. Max. Max. washing washing washing washing temp. temp. temp. Washing temp. 95°C Manual 60°C 40°C 30°C Delicate wash washing allowed Whitening Whitening in cold water Whitening not allowed Ironing Hot iron max. Hot iron max. Hot iron max.
Need help?
Do you have a question about the WA 72145 BK and is the answer not in the manual?
Questions and answers