
Related Manuals for Windsor 10020430


Summary of Contents for Windsor 10020430
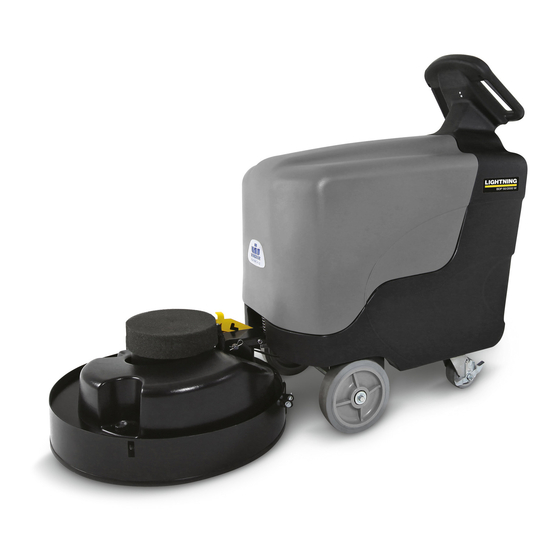
- Page 1 Lightning BDP 50/2000 W Burnisher Operating Instructions (ENG) MODELS: 10020430 10020440 86408910-A 07/23/15...
-
Page 2: Machine Data Label
Machine Data Label Overview The Lightning BDP 50/2000 W is a battery powered burnisher, designed to burnish most modern types of non-carpeted floors. Warranty Registration Thank you for purchasing a Kärcher North America product. Warranty registration is quick and easy. Your registration will allow us to serve you better over the lifetime of the product. To register your product go to : http://warranty.karcherna.com/ For customer assistance:... -
Page 3: Table Of Contents
Table of Contents Parts Machine Data Label ......2 Overview ........2 Pad Driver . -
Page 4: How To Use This Manual
How To Use This Manual This manual contains the following sections: The SAFETY section contains important information regarding hazardous or unsafe practices of the • How to Use This Manual machine. Levels of hazards are identified that could • Safety result in product damage, personal injury, or severe •... -
Page 5: Safety
Safety IMPORTANT SAFETY INSTRUCTIONS When using this machine, basic precaution must always be followed, including the following: READ ALL INSTRUCTIONS BEFORE USING THIS MACHINE. To reduce the risk of fire, electric shock, or injury: • This machine has parts including the pad/brush assemblies that can cause severe injury if these parts are contacted while they are moving. - Page 6 Safety IMPORTANT SAFETY INSTRUCTIONS When using this machine, basic precaution must always be followed, including the following: READ ALL INSTRUCTIONS BEFORE USING THIS MACHINE. To reduce the risk of fire, electric shock, or injury: • Batteries emit hydrogen gas. Explosion or fire can result. •...
-
Page 7: Important Safety Instructions
Safety IMPORTANT SAFETY INSTRUCTIONS When using this machine, basic precaution must always be followed, including the following: READ ALL INSTRUCTIONS BEFORE USING THIS MACHINE. To reduce the risk of fire, electric shock, or injury: • Do not operate machine unless trained and authorized. •... -
Page 8: (French)
Safety CONSIGNES DE SÉCURITÉ IMPORTANTES Lors de l'utilisation de cette machine, des précautions de base doivent toujours être prises, y compris les précautions suivantes : LIRE TOUTES LES INSTRUCTIONS AVANT D'UTILISER CETTE MACHINE. Pour réduire le risque d'incendie, d'électrocution ou de blessure : •... - Page 9 Safety CONSIGNES DE SÉCURITÉ IMPORTANTES Lors de l'utilisation de cette machine, des précautions de base doivent toujours être prises, y compris les précautions suivantes : LIRE TOUTES LES INSTRUCTIONS AVANT D'UTILISER CETTE MACHINE. Pour réduire le risque d'incendie, d'électrocution ou de blessure : •...
- Page 10 Safety CONSIGNES DE SÉCURITÉ IMPORTANTES Lors de l'utilisation de cette machine, des précautions de base doivent toujours être prises, y compris les précautions suivantes : LIRE TOUTES LES INSTRUCTIONS AVANT D'UTILISER CETTE MACHINE. Pour réduire le risque d'incendie, d'électrocution ou de blessure : •...
-
Page 11: Hazard Intensity Level
Safety The following symbols are used throughout this guide as indicated in their descriptions: HAZARD INTENSITY LEVEL There are three levels of hazard intensity identified by signal words -DANGER, WARNING and CAUTION and FOR SAFETY. The level of hazard intensity is determined by the following definitions: DANGER - Hazards or unsafe practices which COULD result in severe personal injury or death. - Page 12 Safety Les symboles suivants sont utilisés dans tout ce manuel, tels que décrits ici : NIVEAU D'INTENSITÉ DU DANGER Il existe trois niveaux d'intensité du danger, identifiés par des termes d'avertissement - AVERTISSEMENT, ATTENTION et POUR VOTRE SÉCURITÉ. Le niveau d'intensité du danger est déterminé par les définitions suivantes : DANGER - Les dangers ou des pratiques contraires à...
-
Page 13: Safety Labels
Safety Safety Labels NOTE: These drawings indicate the location of safety labels on the machine. If at any time the labels become illegible, promptly replace them. EMPLACEMENT DE L'ÉTIQUETTE DE SÉCURITÉ REMARQUE : Ces dessins indiquent l'emplacement des étiquettes de sécurité sur la machine. Si, à tout moment, les étiquettes deviennent illisibles, contactez votre représentant autorisé... -
Page 14: Operations
Operations Technical Specifications ITEM DIMENSION/CAPACITY Voltage 36VDC (3 - 12 VDC Batteries) 12 VDC Lead Acid 228 Ah Batteries 12 VDC AMG 235 Ah (3) Sealed 418 lbs Battery Weight (3) Lead Acid 378 lbs Burnish Rate ±26,000 ft /hr (2415 m /hr) Burnish Width 20 in (51cm) - Page 15 Operations ITEM MEASURE Length 20in (Deck Up) 49in (124cm) Length 20in (Deck Down) 58in (147cm) Deck Width 22in (56cm) Frame Width 22in (56cm) Height 45in (114cm) Frame Width Height Length Deck (Deck Down) Width This appliance is not intended for use by persons (including children) with reduced physical, sensory or mental capabilities, or lack of experience and knowledge, unless they have been given supervision or instruction concerning use of the appliance by a person responsible for their safety.
-
Page 16: How The Machine Works
Operations How the Machine Works • The test surface is a single sheet of floor covering at least 1m (3.3ft) wider and longer This machine is designed and manufactured for than the equipment being tested. In order to not burnishing indoor hard floor surfaces. Kärcher North affect the sound reading, the observer taking America does not recommend use of this machine in readings is at least 2m (6.6ft) from the... -
Page 17: Machine Preparation
Operations Machine Preparation Installing Steel Skirt Unpacking the Machine 1. Lift the deck upward about 90 degrees by pulling up on the front of the deck. At this point, the tilt 1. Cut and remove green bands holding the box to latch will hold the deck in the pad change position. -
Page 18: Controls
Operations Controls 1. Key Switch 2. Handle Lever 3. Burnish Switch 4. Reverse Switch 5. Traction Speed Control 6. Hour Meter / Battery Discharge Indicator 7. Alarm LED 86408910 Lightning BDP 50-2000 W... - Page 19 Operations 1. Key Switch - Turns the machine on/off. 2. Handle Lever - When the lever is engaged the machine will move forward. If the Burnish switch is on, the pad will also start turning. If the burnish head is tilted up into the pad change position, the burnish motor will not engage.
-
Page 20: Over Current Protection
Operations Over Current Protection 70A Breaker - Over current protection for the Burnish Motor. Push to reset. When servicing machine, wear protective gloves and 40A Breaker - Over current protection for the Traction goggles. Avoid contact with battery acid. Drive. Push to reset. 3A Fuse In-Line holder - Over current protection for key switch. -
Page 21: Charger Settings
Operations Charger Settings The On-Board battery charger settings need to be set for your battery type before charging. Failure to properly set will result in battery damage. To determine your battery type, see battery label or contact your battery supplier. To change charger settings: 1. -
Page 22: Battery Charger Fault Codes
Operations Battery Charger Fault Codes Fault Description Remedy Check that plug is connected to an operating No Display No display on charger, no LED indicators. wall outlet. Check 20A fuse. Incorrect battery connection or no battery Check the connection and the polarity of the connection battery connection. - Page 23 Notes 86408910 Lightning BDP 50-2000 W...
-
Page 24: Pre-Operation Checklist
Operations Installing/Changing Burnishing Pad The Burnish components of the machine are: • Burnish pad holder 1. Make sure the Burnish Switch is OFF. • Burnish pad 2. Lift on the front of the deck and tilt deck into the • Burnish motor pad change position. -
Page 25: Dust Bag Removal
Operations Dust Bag Removal 5. Press pad firmly onto Velcro. The machine has two dust bag options. A re-usable cloth bag and a disposable paper bag. Monitor the dust bag carefully and empty/change as needed. The dust collection system will not operate effectively when the dust bag is full. -
Page 26: Pad Pressure Adjustment
Operations Pad Pressure Adjustment Storage The pad pressure is set at the factory for optimal 1. Machine should be stored in a dry environment. burnish performance in most conditions. If the pad 2. Store machine away from objects that may fall and pressure needs to be adjusted, follow the procedure damage it. -
Page 27: Post Operation Checklist
Operations Post Operation Checklist Caster Parking Brake Turn the machine OFF and perform the following The two rear casters are equipped with brakes. To set checks: the brake, push down the "ON" side of the brake lever. To release the brake push down the "OFF" side of the •... -
Page 28: Maintenance
Maintenance Battery Maintenance The batteries are deep cycle 12 volt batteries. The lifetime of the batteries is limited by the number of When working with batteries, always wear eye charges the batteries receive. To get the most life from protection and protective clothing. the batteries, charge them when the battery discharge LED (Red) starts to blink (20% charge left). -
Page 29: Body Maintenance
Maintenance Body Maintenance The body may be cleaned with a damp cloth to remove dust and scuff marks. More stubborn scuff marks on the Never use tap water to fill battery cells. Tap water tank exterior can be removed with a vinyl cleaner. contains contaminants that will damage the battery. -
Page 30: Service Schedule
Maintenance Service Schedule Perform at marked interval Maintenance 1000 Daily Hours Hours Hours Hours Hours Empty/Clean Dust Bag Inspect Pad Holder Check for loose/missing nuts or screws Check wiring harness for frays or cuts Inspect Battery water level (Lead Acid Only) Tighten nuts and screws Lubricate rear casters Check Burnish Motor ampere draw... -
Page 31: Troubleshooting
Maintenance Troubleshooting Problem Possible Cause Remedy Breaker tripped Push breaker button to reset. Check batteries are wired together correctly via Incorrect battery connection the battery connection diagram, check that the Anderson connectors are plugged together. Machine will not turn on. On-board battery charger plugged in Unplug the charging cord from the machine. - Page 32 Notes: 86408910 Lightning BDP 50-2000 W...
-
Page 33: Parts
Parts Spare Parts List (1.002-043.0, 1.002-044.0) Lightning BDP 50/2000 W 86408910 Lightning BDP 50-2000 W... -
Page 34: Pad Driver
Pad Driver 86408910 Lightning BDP 50-2000 W... - Page 35 BREAKER, CIRCUIT, 40 AMP 86406850 MP427200 CABLE, BATT, 2 AWG, ASM. 86407490 NB6535 SCREW, CAP, HH, 1/4-20 X 3/4 86407590 NB9845 NUT, KEPS, 1/4-20 86407520 NB9000 SCREW, CAP, 1/4”-20 X 1 1/2”, GD5 86395400 LABEL, WINDSOR LOGO DOMED 86408910 Lightning BDP 50-2000 W...
-
Page 36: Charger
Charger 86408910 Lightning BDP 50-2000 W... - Page 37 Charger PART NO. REF NO. DESCRIPTION 86406700 MP422901 PLATE, MOUNT, SHOCK 86406420 MP206000 BALL, STUD, 10MM 86407390 NB3265 NUT, LOCK, 5/16”-18, NC 86406660 MP415200 SPRING, GAS 86407530 NB9267 WASHER, FLAT, 5/16” 86407460 NB6111 WASHER, LOCK, 5/16” 86409150 NB9745 SCREW, CAP, 5/16”-18 X 3/4” 86407080 NB005700 NUT, 5/16-24, JAM...
-
Page 38: Control Panel
Control Panel 86408910 Lightning BDP 50-2000 W... - Page 39 Control Panel PART NO. REF NO. DESCRIPTION NOTES 86406710 MP423201 LEVER, HANDLE, LEFT 86406720 MP423202 LEVER, HANDLE, RIGHT 86407470 NB6390 PIN, ROLL, 1/4 X 1 1/8 86406910 MP431401 PLATE, COVER, REAR, W/ SLOT 86407530 NB9267 WASHER, FLAT, 5/16” 86407460 NB6111 WASHER, LOCK, 5/16”...
-
Page 40: Sub Assemblies
Sub Assemblies 86408910 Lightning BDP 50-2000 W... - Page 41 Sub Assemblies PART NO. REF NO. DESCRIPTION 86406800 MP425200 SKIRT, 20", ASM 86407290 NB050600 BOLT, HEX, TAP, 1/4-20 x 2-1/2" 86407410 NB3350 WASHER, FLAT, 1/4" 86407050 MX1045 NUT, HEX, 1/4-20 86406390 MP139800 EDGING, SKIRT, (20") 86407010 MP6600 VELCRO, FELT, BLACK 86406740 MP423700 BRACKET, MNT, AXLE/TRANSAXLE...
-
Page 42: Wheels
Wheels 86408910 Lightning BDP 50-2000 W... - Page 43 Wheels PART NO. REF NO. DESCRIPTION 86406780 MP424400 BRACKET, TRANSAXLE, ASM. 86406790 MP424500 TRANSAXLE, 36 VDC, ASM. 86407600 PG001801 BRACKET, TRANSAXLE, PAINTED 86407500 NB6545 SCREW, CAP, HH, 5/16"-18 X 1" 86407390 NB3265 NUT, LOCK, 5/16"-18, NC 86406350 BA003300 KEY, 3/16 X 1.50 86407130 NB018500 RING, RETAINER, 3/4"...
-
Page 44: Connections 1
Connections 1 86408910 Lightning BDP 50-2000 W... -
Page 45: Connections 2
Connections 1 86408910 Lightning BDP 50-2000 W... - Page 46 Connections 2 PART NO. REF NO. DESCRIPTION 86406940 MP432200 HARNESS, MAIN, TRACTION 86406930 MP432100 HARNESS, CONT. PAN., TRAC. 86406820 MP426800 HARNESS, MOTOR, BURNISH 86406840 MP427000 HARNESS, SWITCH, TILT, HEAD 86406850 MP427200 CABLE, BATTERY, 2 AWG, ASM. 86406770 MP424200 MOTOR, 2000 RPM, ASM. 86406620 MP414800 BREAKER, CIRCUIT, 70A...
-
Page 47: Wiring Diagram
Wiring Diagram 86408910 Lightning BDP 50-2000 W... -
Page 48: Suggested Spare Parts
Suggested Spare Parts PART NO. REF NO. DESCRIPTION NOTES 86406560 MP414000 PADHOLDER, 20”, W/ PAD RETAINER PAD DRIVER 86406950 MP432400 RETAINER, PAD, BLUE PAD DRIVER 86406800 MP425200 SKIRT, STEEL, 20”, ASM PAD DRIVER 86406570 MP414100 BAG, DUST, CLOTH PAD DRIVER 86406580 MP414200 BAG, DUST, PAPER, 3 PACK... - Page 49 Notes 86408910 Lightning BDP 50-2000 W...
Need help?
Do you have a question about the 10020430 and is the answer not in the manual?
Questions and answers