
Related Manuals for Everlast 16805539960


Summary of Contents for Everlast 16805539960
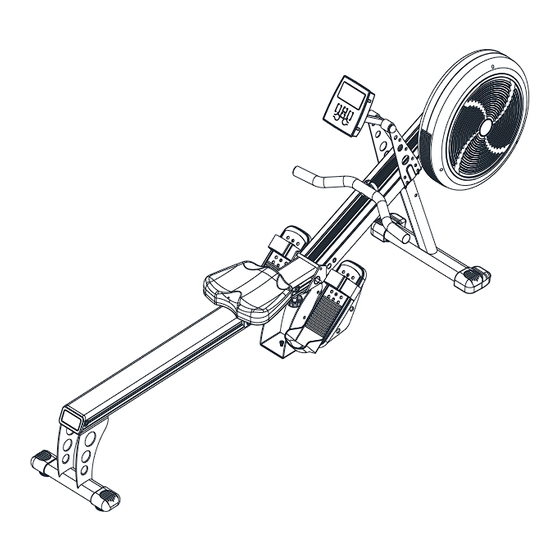
- Page 1 OWNER`S MANUAL Model No. 16805539960 Everlast Rower Assembly Operation Exercise Parts Warranty Retain for Future reference CAUTION: You must read and understand this owner’s manual before operating unit.
-
Page 2: Table Of Contents
TABLE OF CONTENTS Manufacturer’s Limited Warranty……………………..……..Safety Precautions…………………………………….…..…..3-4 Hardware Packing List.…………………………………..……. Pre-assembly Check List……………………………..……..… Assembly Instruction……………………….………………..…. 7-12 Monitor Instruction………………………...……………………. 13-15 Using Heart Rate Transmitter (Optional)…………………….. Part List / Diagram……………………………………………… 17-21 How to Row……………………………………………………… 22 Trouble Shooting…………………………….……...………….. 23 Training Guideline………………………………….…………… 24-26 Stretching…………………………………………..……………. -
Page 3: Manufacturer's Limited Warranty
MANUFACTURE’S ONE-YEAR LIMITED WARRANTY Your Everlast is warranted for one year from the date of purchase against defects in material, when used for the purpose intended, under normal conditions, and provided is receives proper care. Any part found defective or missing will be sent at no cost when returned in accordance with the terms of this warranty. -
Page 4: Safety Precautions
SAFETY PRECAUTIONS Thank you for purchasing our product. Even though we go to great efforts to ensure the quality of each product we produce, occasional errors and /or omissions do occur. In any event should you find this product to have either a defective or a missing part please contact us for a replacement. This product has been designed for home use only. - Page 5 19. Care must be taken when lifting or moving the equipment, so as not to injure your back. Always use proper lifting techniques Do not use the seat to move the Everlast Rower. The seat will move and the seat carriage may pinch your hands or fingers. When folding or unfolding the unit, keep all children away and make sure hands are clear of any folding or pinch point.
-
Page 6: Hardware Packing List
HARDWARE PACKING LIST Q’TY PART DESCRIPTION SKETCH Seat track end cap Spacer Knob Flat washer M8 Cap nut M10 Nylon nut M10 Flat washer M10 Spring washer M8 Round head bolt M8x25mm Flat washer M8 Spring washer M10 Allen head bolt M8x15mm Nut M8 Hex head bolt M8*85mm Seat Carriage Stopper... -
Page 7: Pre-Assembly Check List
PRE-ASSEMBLY CHECK LIST 7/12/113(R/L)125 6/28(R/L)/124 2/27/105/122 5/20/98 83/84 13/8 PART NO. DESCRIPTION Front frame with air mag. drive system set 6/28(R/L)/124 Front stabilizer w/transportation wheels, anti-slippery pads 5/20(R(L)/98 Rear stabilizer w/end caps, level knobs 12/7/113(R/L)/125 Foot plate w/foot pedal, pedal straps, elastic velcro straps 4/3/120 Seat track w/connected bracket, count sensor wire 13/8/17... -
Page 8: Assembly Instruction
ASSEMBLY INSTRUCTION This manual is designed to help you easily assemble, adjust and use this machine. Please read this manual carefully. For the sake of familiarizing yourself with the parts identified in the instruction, first study the overview drawing. Set all parts in a clear area on the floor and remove the packing material. Refer to the parts list for help to identify the parts. - Page 9 STEP 2 1) Slide the seat (13) with seat carriage set (8) into the rower seat track (4) which direction is from end of seat track (4). 2) Put one bolt (123) with one stopper (22) through the two side hole of rower seat track (4) and tighten with another stopper (22) and nut (122).
- Page 10 STEP 4 1) Connect the socket of count sensor wire (120) of seat track (4) to the plug of count sensor wire (129) of front main frame (1). 2) Attach front connected bracket (3) of seat track (4) to the “U” shape welded bracket of front main frame (1) and tighten with round head bolts (110) and flat washers (26) on two...
- Page 11 STEP 5 1) Put white pivot shaft (75) through the upper welded sleeve tube of U support bracket (2). 2) Put black pivot shaft (109) through the lower welded sleeve tube of U support bracket (2). 3) Attach right side foot plate (7) with foot pedal (12) which is pre-assembled with elastic velcro straps (125) and right pedal straps (113R) to the two pivot shaft (75/109) and tighten them with two washers (78) and two bolts (117).
- Page 12 STEP 6 Remove the pre-assembled four screws (83) from back of monitor (84). Insert plug of system wire cable (102) to the socket of monitor (84). Attach monitor (84) to the top adjustable monitor bracket (11) and tighten with previously removed four screws (83) again.
- Page 13 Now the rower is assembled completely. HOW TO STORE YOUR ROWER 1) Loosen knob (24) with spacer (23) to leave 20mm distance and slide seat (13) to the front end of seat track (4). 2) Push the two monitor support bracket (11) with monitor (84) forward a little bit to front main frame (1).
-
Page 14: Monitor Instruction
MONITOR INSTRUCTION QUICK START: 1. Press “display mode” button and then press “set” button until time is flashing to enter the “time” mode. 2. Begin rowing. 3. Adjust the resistance level with the “+” / “-‘ key 4. The values of time, distance, calories, count, will start counting upwards. DISPLAY AND FEEDBACK: The user age has been set. - Page 15 BUTTON FUNCTIONS: Button Pre-workout During workout Display Switch different mode values Select display mode Mode Program Press repeatedly to select a program (p1~p8) Confirm current target values setting reset Reset current setting value, press & hold total reset Increase values setting in “target setting” mode Increase the resistance level Decrease values setting in “target setting”...
- Page 16 H.R.C. (Heart Rate Control): HRC program works by automatically adjusting the resistance to keep you working out at your target heart rate. To do this the console will need your pulse reading throughout the exercise, which it gets from you wearing a chest strap transmitter. If your heart rate is too high the resistance is decreased.
-
Page 17: Using Heart Rate Transmitter (Optional)
USING HEART RATE TRANSMITTER (Optional) How to wear your wireless chest strap transmitter: 1. Attach the transmitter to the elastic strap using the locking parts. 2. Adjust the strap as tightly as possible as long as the strap is not too tight to remain comfortable. -
Page 18: Part List / Diagram
PARTS LIST KEY NO. PART NO. DESCRIPTION 5399601 MAIN FRAME 5399602 MAIN FRAME SUPPORT BRACKET 5399603 CONNECTED BRACKET 5399604 ROWER SEAT TRACK 5399605 REAR STABILIZER 5399606 FRONT STABILIZER 5399607 FOOT PLATE 5399608 SEAT CARRIAGE BRACKET 5399609 MONITOR POST BRACKET 5399610 MONITOR POST 5399611 MONITOR BRACKET... - Page 19 KEY NO. PART NO. DESCRIPTION 5399641 SHORT ELASTIC TUBE 5399642 FLAT WASHER 5399643 CLIP 5399644 BUSHING 5399645 ELASTIC CORD GUIDE PULLEY 5399646 5399647 U BRACKET 5399648 M8x95 ALLEN HEAD BOLT 5399649 BUSHING 5399650 BUSHING 5399651 CLIP 5399652 SILENCER 5399653 GEAR 5399654 CLIP 5399655...
- Page 20 KEY NO. PART NO. DESCRIPTION 5399676 NYLON NUT M10 5399677 FLAT WASHER M10 5399678 FLAT WASHER M8 5399679 M10x130 HEX HEAD BOLT 5399680 M10x75 HEX HEAD BOLT 5399681 WIRE CLIP 5399682 ZIP TIE 5399683 M5x15 ACROSS HEAD SCREW 5399684 MONITOR 5399685 M4x10 ACROSS HEAD SCREW 5399686...
- Page 21 KEY NO. PART NO. DESCRIPTION 53996111 53996112 BRACKET 53996113 PEDAL STRAPS (R/L) 53996114 M10 SPRING WASHER 53996115 POWER SUPPLY CABLE 53996116 ADAPTOR W/CABLE 53996117 M8x5 ALLEN HEAD BOLT 53996118 M5x10 MACHINE SCREW 53996119 COUNTSENSOR BRACKET 53996120 COUNTSENSOR WITH WIRE 53996121 ROWER SEAT TRACK FIX PLATE 53996122 M8 NUT...
- Page 22 DIAGRAM 108 97 链条活目 49 18 链条活目 113R 161718 114 76 16 17 113L - 21 - Customer Service 1-888-707-1880 Or email customerservice@dyaco.ca Dyaco Canada Inc.© 2015...
-
Page 23: How To Row
HOW TO ROW: EXERCISE No. 1 THE COMPLETE ROWING ACTION This exercise will help tone and strengthen the muscle groups in your legs, arms, shoulders, back and stomach. Start as shown in Fig.1 with the rowing-grip fully ‘home’. Slide down on the seat, knees bent and grasp the rowing- grip. -
Page 24: Trouble Shooting
TROUBLE SHOOTING Problem Cause Correction Power supply doesn’t Insert the plug of adaptor into Monitor doesn’t display connect well between the wall supply. monitor and wall power. Securely plug sending unit into Sending unit not connected the socket of monitor No speed or distance Sending unit not working Replace sending unit... -
Page 25: Training Guideline
TRAINING GUIDELINES Exercise Exercise is one of the most important factors in the overall health of an individual. Listed among its benefits are: Increased capacity for physical work (strength endurance) Increased cardiovascular (heart and arteries/veins) and respiratory efficiency ... - Page 26 Specificity Different forms of exercise produce different results. The type of exercise that is carried out is specific both to the muscle groups being used and to the energy source involved. There is little transfer of the effects of exercise, i.e. from strength training to cardiovascular fitness.
-
Page 27: Or Email Customerservice@Dyaco.ca Dyaco Canada Inc
Don’t push yourself too hard to reach the figures on this table. It can be very uncomfortable if you overdo it. Let it happen naturally as you work through your program. Remember, the target is a guide, not a rule, a little above or below is just fine. Two final comments: (1) don’t be concerned with day to day variations in your pulse rate, being under pressure or not enough sleep can affect it;(2) your pulse rate is a guide, don’t become a slave to it. -
Page 28: Stretching
STRETCHING Stretching should be included in both your warm up and cool down, and should be performed after 3-5 minutes of low intensity aerobic activity or callisthenic type exercise. Movements should be performed slowly and smoothly, with no bouncing or jerking. Move into the stretch until slight tension, not pain, is felt in the muscle and hold for 20-30 seconds. - Page 29 INNER THIGH STRETCH TOE TOUCHES Sit with the soles of your feet together with your Slowly bend forward from your waist, letting knees pointing outward. Pull your feet as close your back and shoulders relax as you stretch Into your groin as possible. Gently push your toward your toes.
-
Page 30: Dyaco Brand
- 29 - Customer Service 1-888-707-1880 Or email customerservice@dyaco.ca Dyaco Canada Inc.© 2015...
Need help?
Do you have a question about the 16805539960 and is the answer not in the manual?
Questions and answers