Table of Contents
Advertisement
Quick Links
Advertisement
Table of Contents

Subscribe to Our Youtube Channel
Related Manuals for Everlast EV100RM


Summary of Contents for Everlast EV100RM
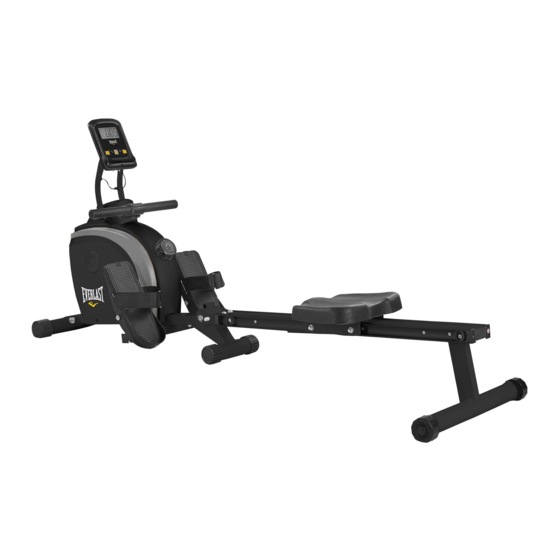
- Page 1 OWNER`S MANUAL CROSS-FIT ROWER Model No. 16805931000 Assembly Operation Exercise Parts Warranty CAUTION: You must read and understand this owner’s manual before operating unit. RETAIN FOR FUTURE REFERENCE Dyaco Canada Inc. 5955 DON MURIE STREET, NIAGARA FALLS, ONTARIO L2G 0A9...
-
Page 2: Table Of Contents
Manufacture’s One-Year Limited Warranty Your EVERLAST Cross-Fit Rower is warranted for one year from the date of purchase against defects in material when used for the purpose intended, under normal conditions and provided it receives proper care. Any part found defective or missing will be sent at no cost when returned in accordance with the terms of this warranty. -
Page 3: Safety Precaution
SAFETY PRECAUTIONS Thank you for purchasing our product. Even though we go to great efforts to ensure the quality of each product we produce, occasional errors and /or omissions do occur. In any event should you find this product to have either a defective or a missing part please contact us for a replacement. This product has been designed for home use only. -
Page 4: Before You Begin
It's a proven fact that a regular exercise program can improve your physical and mental health. Too often, our busy lifestyles limit our time and opportunity to exercise. The Everlast rower provides a convenient and simple method to begin your assault on getting your body in shape and achieving a happier and healthier lifestyle. -
Page 5: Pre-Assembly Check List
PRE-ASSEMBLY CHECK LIST NO.9 NO.14 L/R NO.3 NO.1 NO.38 NO.26 NO.18 NO.24 PART NO. DESCRIPTION Q’TY Main frame Front stabilizer Computer 14L/R Pedal L/R Pedal support tube Slide rail Seat Rear stabilizer Hardware Pack Manual Customer Service 1-888-707-1880 Or email customerservice@dyaco.ca Dyaco Canada Inc.©2019... -
Page 6: Hardware Packing List
HARDWARE PACKING LIST M8*45mm 20mm 17mm M8*20mm M6*12mm 17mm 25mm M8*20mm M8*65mm M6*20mm PART NO. DESCRIPTION Q’TY PART NO. DESCRIPTION Q’TY Carriage bolt M8*65 Washer Φ8*Φ25 Washer Φ8*Φ20 Allen screw M8*20 Domed nut M8 Spring washer Φ8 Allen screw M6*12 Limit pad Washer Φ6*Φ17 Allen screw M6*20... -
Page 7: Assembly Instructions
ASSEMBLY INSTRUCTIONS This manual is designed to help you easily assemble, adjust and use this machine. Please read this manual carefully. For the sake of familiarizing yourself with the parts identified in the instruction, first study the overview drawing. Set all parts in a clear area on the floor and remove the packing material. Refer to the parts list for help to identify the parts. - Page 8 STEP 2 Attach the left pedal (14L) to the left bracket of pedal support tube (18). Secure using one axle for pedal (15),two allen screws (12) and two washer (13). Repeat the same procedure for right pedal. Attach the pedal support tube (18) to the bottom of main frame(1). Secure using two carriage bolts (19),two washer (17)and two domed nuts (7).
- Page 9 STEP 3 Pull out the lock pin (23) from slide rail (24). Insert the slide rail (24) to the main frame (1).Secure using one axle (16), two washers(20), two allen screws (21) and two spring washers (22). Insert the lock pin (23)back to the pivot to lock the slide rail in vertical position. Slide the Seat (26) onto the slide rail.
- Page 10 STEP 5 Pull out the lock pin (23) to lower the the sliding rail (24) to unfold the rower. Insert the pock pin (23) to secure the sliding rail (24). You have completed the assembly of your rower. Your rower is equipped with adjustable end caps. If the unit is wobbly, please turn the leveling caps on the rear stabilizer to level the unit.
-
Page 11: Parts List
PARTS LIST Part No. Description 9310001 Main frame 9310002 Carriage bolt M8*65 9310003 Front sbtabilizer 9310004 Transportation wheel 9310005 Round head self tapping screw ST4*15 9310006 Washer Φ8*Φ20 9310007 Domed nut M8 9310008 8-Level tension knob 9310009 Computer 9310010 Screw M5*10 9310011 Sensor wire 9310012... - Page 12 PARTS LIST Part No. Description 9310043 Chain cover L&R 9310044 Flywheel adjustor 9310045 Clip Φ12 9310046 Bearing 6001 9310047 France nut 9310048 Flywheel 9310049 Hex headbolt M8*105 9310050 Round head self tapping screw ST5*15 9310051 Bushing 9310052 Magnet assembly 9310053 Rope pulley cover 9310054 Hex head bolt M6*25...
-
Page 13: Diagram
DIAGRAM 33 31 33 31 79 34 Customer Service 1-888-707-1880 Or email customerservice@dyaco.ca Dyaco Canada Inc.©2019... -
Page 14: Monitor Instructions
COMPUTER INSTRUCTIONS FUNCTION BUTTONS Press to select the desired function between: Scan, Time, Distance, Count, MODE: Calories, ODM and RMP. Press and hold for 4 seconds to rest all values to zero. FUNCTIONS Displays each function in sequence every 6 seconds. SCAN: The display loop is time, count, calories and total count. -
Page 15: Set Up Instructions
65 inches long x 20 inches wide x 30 inches tall. (These dimensions may vary up to one inch.) An area 4 feet wide x 8.5 feet long is required for safe operation of the Everlast rower. Make sure that adequate space is available for access to and passage around the Everlast rower. -
Page 16: Function Inspection
FUNCTION INSPECTION: Visually inspect the Everlast rower to verify that assembly is as shown in the illustration below. Check the function of the Everlast rower by pulling the handlebar w/rope (68) slowly through one complete revolution to verify that the drive train functions properly. Adjust the TENSION KNOB (8) and verify that it functions properly. - Page 17 FOLDING INSTRUCTIONS To fold the rower Remove the locking pin (23) from the slide rail (24). Lift the slide rail (24) and insert the locking pin (23) into slide rail (24). Unit is now locked into folding position. To un-fold the rower Hold the slide rail (24) and pull out the locking pin (23) from the slide rail (24) and lower the slide rail (24).
-
Page 18: User Direction
7. Only Dyaco Canada supplied components shall be used to maintain/repair the rower. 8. Keep your Everlast rower clean by wiping it off with an absorbent cloth after use. Customer Service 1-888-707-1880 Or email customerservice@dyaco.ca... -
Page 19: Troubleshooting
TROUBLESHOOTING Problem Cause Solution Battery not Installed Install battery Monitor does not display Ensure the sensor wire is connected Sensor wire not connected properly to the computer Ensure the sensor wire is connected Sensor wire not connected properly to the computer No speed or count displays Sensor wire not working properly Replace sensor wire... -
Page 20: General Maintenance
GENERAL MAINTENANCE The safety of this product can be maintained only if regular periodic checks are made. Most checks can be performed once a week. However, some checks should be made before each workout, and are indicated as such below. Checks •... - Page 21 HOW TO ADJUST THE DRIVE BELT If you can feel the flywheel slip while you are pulling, even when the resistance is adjusted to the highest level, the drive belt may need to be adjusted. To adjust the drive belt, the pedal support tube(18) & the chain cover(43) must first be removed. The first step to remove the two sets of carriage bolt (19), washer (17) and domed nut (7).
-
Page 22: Training Guidelines
TRAINING GUIDELINES Exercise Exercise is one of the most important factors in the overall health of an individual. Listed among its benefits are: Increased capacity for physical work (strength endurance) Increased cardiovascular (heart and arteries/veins) and respiratory efficiency ... - Page 23 Overload This is where you exercise at a level above that which can be carried out comfortably. The intensity, duration and frequency of exercise should be above the training threshold and should be gradually increased as the body adapts to the increasing demands. As your fitness level improves, so the training threshold should be raised.
- Page 24 Pulse Count The pulse count (on your wrist or carotid artery in the neck, taken with two index fingers) is done for ten seconds, taken a few seconds after you stop exercising. This is for two reasons: (a) 10 seconds is long enough for accuracy, (b) the pulse count is to approximate your BPM rate at the time you are exercising.
- Page 25 increased your program too rapidly. If you experience PAIN during or after exercise, your body is telling you something. Stop exercising and consult your doctor. What to Wear Wear clothing that will not restrict your movement in any way while exercising. Clothes should be light enough to allow the body to cool.
-
Page 26: Stretching
STRETCHING Stretching should be included in both your warm up and cool down, and should be performed after 3-5 minutes of low intensity aerobic activity or callisthenic type exercise. Movements should be performed slowly and smoothly, with no bouncing or jerking. Move into the stretch until slight tension, not pain, is felt in the muscle and hold for 20-30 seconds. - Page 27 INNER THIGH STRETCH TOE TOUCHES Sit with the soles of your feet together with your Slowly bend forward from your waist, letting knees pointing outward. Pull your feet as close your back and shoulders relax as you stretch Into your groin as possible. Gently push your toward your toes.
- Page 28 Please visit us online for information about our other brands and products manufactured and distributed by Dyaco Canada Inc. spiri�itness.ca solefitness.ca xterrafitness.ca dyaco.ca/products/everlast.html dyaco.ca/UFC/UFC-home.html spiri�itness.ca/johnnyg.html trainorsports.ca For more informa�on, please contact Dyaco Canada Inc. T: 1-888-707-1880 ⏐ 5955 Don Murie St., Niagara Falls, Ontario L2G 0A9 ⏐...
Need help?
Do you have a question about the EV100RM and is the answer not in the manual?
Questions and answers