Table of Contents
Advertisement
AUXD18GALH
AUXD24GALH
AUXA30GALH
AUXA36GALH
AUXA45GALH
AUXA54GALH
TM
INSTALLATION MANUAL
INSTALLATIONSANLEITUNG
MANUEL D'INSTALLATION
APPAREIL INTÉRIEUR (type cassette)
MANUAL DE INSTALACIÓN
Únicamente para personal de servicio autorizado.
MANUALE DI INSTALLAZIONE
A uso esclusivo del personale tecnico autorizzato.
ΕΓΧΕΙΡΙΔΙΟ ΕΓΚΑΤΑΣΤΑΣΗΣ
ΕΣΩΤΕΡΙΚΗ ΜΟΝΑΔΑ (Τύπος Κασέτας)
Μόνο για εξουσιοδοτημένο τεχνικό προσωπικό.
MANUAL DE INSTALAÇÃO
РУКОВОДСТВО ПО УСТАНОВКЕ
ВНУТРЕННИЙ МОДУЛЬ (кассетного типа)
Только для авторизованного обслуживающего персонала.
INDOOR UNIT (Cassette Type)
For authorized service personnel only.
INNENGERÄT (Kassettentyp)
Nur für autorisiertes Fachpersonal.
Pour le personnel agréé uniquement.
UNIDAD INTERIOR (Tipo casete)
UNITÀ INTERNA (tipo a cassetta)
UNIDADE INTERIOR (Tipo Cassete)
Apenas para técnicos autorizados.
MONTAJ KILAVUZU
İÇ ÜNİTE (Kaset Tipi)
Yalnızca yetkili servis personeli için.
PART NO. 9371022260-03
Advertisement
Table of Contents

Related Manuals for AirStage AUXD18GALH


Summary of Contents for AirStage AUXD18GALH
-
Page 1: Installation Manual
For authorized service personnel only. INSTALLATIONSANLEITUNG INNENGERÄT (Kassettentyp) Nur für autorisiertes Fachpersonal. MANUEL D’INSTALLATION APPAREIL INTÉRIEUR (type cassette) Pour le personnel agréé uniquement. AUXD18GALH MANUAL DE INSTALACIÓN AUXD24GALH AUXA30GALH UNIDAD INTERIOR (Tipo casete) AUXA36GALH Únicamente para personal de servicio autorizado. -
Page 2: Table Of Contents
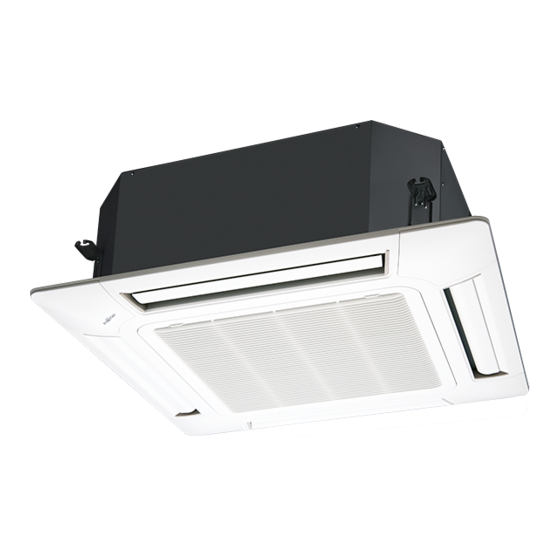
INSTALLATION MANUAL This mark indicates procedures which, if improperly performed, CAUTION might possibly result in personal harm to the user, or damage PART NO. 9371022260-03 to property. VRF system indoor unit (Cassette type) Read carefully all security information before use or install the air conditioner. CONTENTS Do not attempt to install the air conditioner or a part of the air conditioner by yourself. -
Page 3: Accessories
2.3. Accessories 2.4. Optional parts Description Part No. Application WARNING External output wire B 9379529013 For output port For installation purposes, be sure to use the parts supplied by the manufacturer or For control input port External input wire D 9368779016 other prescribed parts. -
Page 4: Installation Dimensions
3.3.1. Position the ceiling hole and hanging bolts 3.2. Installation dimensions (1) Positions of the ceiling opening, hanging bolt pitch, piping and ducts. (unit: mm) Ceiling height is as shown in the fi gure. • Ceiling opening and hanging bolt pitch. 256 mm or more (AUXD18,24) 298 mm or more (AUXA30,36,54) 950 mm (Cassette grille) - Page 5 Distribution duct connecting port 3.3.2. Hanging preparations Fresh air inlet position • Firmly fasten the hanging bolts as shown in the fi gure or by another method. • Install the hanging bolts at a place where they would be capable of holding a weight of at least 490 N per bolt.
-
Page 6: Pipe Installation
4.3. Flare connection (pipe connection) 4. PIPE INSTALLATION WARNING CAUTION Tighten the fl are nuts with a torque wrench using the specifi ed tightening method. Be more careful that foreign matter (oil, water, etc.) does not enter the piping than Otherwise, the fl... -
Page 7: Installing Heat Insulation
4.3.3. Pipe connection 5. INSTALLING DRAIN PIPES CAUTION WARNING Be sure to install the pipe against the port on the indoor unit and the outdoor unit correctly. If the centering is improper, the fl are nut cannot tightened smoothly. If the Do not insert the drain piping into the sewer where sulfurous gas occurs. -
Page 8: Electrical Wiring
Working procedure 6. ELECTRICAL WIRING (1) Install the attached drain hose to the drain port of the body. Install the hose band from the top of the hose within the graphic display area. Secure fi rmly with the hose band. (2) Use vinyl adhesive agent to glue the drain piping (PVC pipe VP25) which is prepared WARNING on site or elbow socket. -
Page 9: Electrical Requirement
When the Transmission control crossover wiring is done, make a connection for indoor units to satisfy conditions A and B Power supply below. A. Current breaker requirements Model AUXD18GALH 0.32 A Breaker Breaker Breaker AUXD24GALH 0.38 A AUXA30GALH 0.51 A... -
Page 10: Connection Of Wiring
WARNING Tightening torque M3 screw When using solid core cables, do not use the ring terminal. If you use the solid core 0.5 to 0.6 N·m (Transmission / X1, X2) cables with the ring terminal, the ring terminal's pressure bonding may malfunction (5 to 6 kgf·cm) (Remote controller / Y1, Y2, Y3) and cause the cables to abnormally heat up. -
Page 11: External Input And External Output (Optional Parts)
CAUTION 6.5. External input and external output (Optional parts) When switching the DIP switch (SW1), be sure to turn off the power supply to the indoor unit. Otherwise, the PC board of the indoor unit may be damaged. Controller PCB DIP switch Apply voltage terminal (SET 2) - Page 12 [In the case of “Pulse” input] ● Dry contact terminal ([CNA02], [CNA04]) When a power supply is unnecessary at the input device you want to connect, use the Dry Connector Input signal Command contact terminal ([CNA02], [CNA04]). OFF → ON Emergency stop P.C.B CNA01 or CNA02...
-
Page 13: Field Setting
Operation behavior Fig. A Connector Output voltage Status Stop External output1 Pins 1-2 DC 12 V Operation Normal External output2 CNB01 Pins 1-3 DC 12 V Error Indoor unit fan stop External output3 Pins 1-4 DC 12 V Indoor unit fan operation (3) Connection methods Screw •... -
Page 14: Custom Code Setting
Custom code setting for indoor unit Table A Set the DIP switch SET 3 SW1, SW2, referring to the Table B. Rotary Switch Address Address Rotary Switch Setting Setting REF AD SW IU AD SW Refrigerant Indoor unit circuit × 10 ×... -
Page 15: Function Setting
7.4.1. Button name and function 7.4. Function setting • FUNCTION SETTING can be performed with the wired or wireless remote controller. (The remote controller is optional equipment) • Refer to the wired or wireless remote controller manual for detailed setting information. (Set IU AD, REF AD SW to 0) •... -
Page 16: Cassette Grille Installation
(2) Others 11. ERROR CODES Indication pattern If you use a wired type remote controller, error codes will appear on the remote controller Indicator Name Indication pattern display. If you use a wireless remote controller, the lamp on the photodetector unit will Function number;... - Page 17 Wired Remote Controller Display UTY-RNKY / UTY-RNKG / UTY-RNKYT (3-wire type) Error code UTY-RNRY / UTY-RNRG (2-wire type) Touch the [Next Page] (or [previous page]) Error icon to switch to other indoor unit information. Touch the [Status]. Touch the [Error Information]. 2-digit numbers are corresponding to the error code in the preceding table.
Need help?
Do you have a question about the AUXD18GALH and is the answer not in the manual?
Questions and answers