Table of Contents
Advertisement
Quick Links
Advertisement
Table of Contents

Subscribe to Our Youtube Channel
Related Manuals for PhaseOne XF


Summary of Contents for PhaseOne XF
-
Page 1: User Manual
XF Camera System User Manual XF Camera System Manual | Table of Contents... - Page 2 Jump to XF Camera System Manual | Table of Contents Table of Contents...
-
Page 3: Table Of Contents
XF Camera Body Navigation Capture One Pro Top Touch Screen Display Tools on the XF Top screen The XF Camera System is bundled with Capture One Pro, IQ Digital Back Navigation Capture One Tethered Use IQ Digital Back Navigation Shortcuts... -
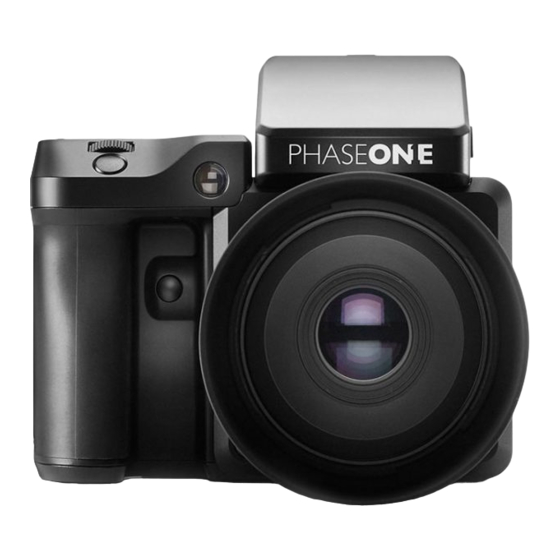
Page 4: Primary Parts Of The Xf Camera System
Primary parts of the XF Camera System Lens, XF Camera Body, IQ Digital Back Focus Distance scale and DOF indicator markings AF/MF selector ring Leaf shutter lens Lens release button Manual focusing ring Detachable hood XF Camera System Manual |... - Page 5 Back release button Back lock slider 8-pin multi-connector port 12-pin multi- connector port CF card Rear touch screen compartment USB 3.0 port On/Off button FireWire 800 port Battery compartment XF Camera System Manual | Primary parts of the XF Camera System...
-
Page 6: Dials, Buttons And Touch Screen Interface
Dials, Buttons and Touch Screen Interface Lens, XF Camera Body, IQ Digital Back XF Camera Body Shutter release buttons and user buttons are all positioned within reach of your fingers. These are all used for photogra- phy applications and are referred to as “buttons” as oposed to “keys”... - Page 7 XF Camera Body The top screen of the XF camera body has a touch- sensitive transflective LED display, providing a mix of direct access to features as well as a menu system navigated using the dials and keys. All the controls are customizable.
-
Page 8: Assembling The Xf Camera System
Turn the Camera System off and remove any interface cables from the Digital Back. 2. Push the IQ Digital Back lock slider toward the XF camera body while simultaneously pressing the IQ Digital Back release button. Note that the lock slider acts as a safety catch. - Page 9 Interchangeable Viewfinders In addition to the Prism Viewfinder, the XF features an optional Waist Level Finder (Part # 73090). Removing the Viewfinder Ensure the power of the XF Camera System is Off.
-
Page 10: Readying The Camera System
6. Remove the batteries and unplug the cable from the charger. Twin Battery System The XF camera body and the IQ Digital Back use identical 7.2 V (3400 mAh) BP-911, 914, 915 type rechargeable Li-on batteries and share the same charger... -
Page 11: General Advice For Using The Battery And Charger
Powering up both the XF and the IQ simultaneously is achieved with a short press of the On/Off button located on top rear of the grip on the the XF camera body. A long press of the same button will power off the XF. The IQ Digital Back will follow and power-off automatically after a few seconds. - Page 12 Loading the battery in the XF camera body Open the battery compartment cover located in the base of the XF camera body grip. 2. Insert the battery with power contacts first. 3. Push the battery up until it locks into position 4.
- Page 13 Setting Language on the IQ Digital Back The XF Camera System is delivered, by default, with the language set to English. Follow the steps below to change the language of the IQ Digital Back to one of nine others available, including German, French, Swedish, Italian, Spanish, Chinese (simplified), Japanese, Korean and Russian.
-
Page 14: Navigating The Xf Camera System
System Top Touch Screen Central to the operation of the Phase One XF Camera System is the XF Camera Top Touch Screen. Sitting at the top of the large, ergonomic hand-grip this touch-sensitive, multi-functional screen displays the camera’s essential settings, keeping you fully informed at all times. -
Page 15: Xf Camera Body Controls
Note the brightness of the Top Touch screen is determined automatically using Top Touch Screen a sensor close to the screen, however the brightness setting can be altered via the Rear Key > UI Setup > Backlight XF Camera System Manual | Navigating on the XF Camera System... - Page 16 (with the Top Front Key used to scroll back up). Note the Front Dial can be used to scroll up and down the menu instead. On/Off Button A quick press will power up the camera. The XF start-up logo appears on the Rear Dial Side Dial Top Touch Screen, followed by the Classic display.
- Page 17 From the factory the Rear User button is programmed to activate the camera’s AE-L (Auto Exposure Lock) function, locking meter readings made in Auto and Manual exposure modes. The Rear User button is customizable, Front User Button Rear User Button XF Camera System Manual | Navigating on the XF Camera System...
-
Page 18: Onetouch User Interface Flow Diagram
1600 3200 6400 Exposure Compensation +/- 0.0 - 5.5 Front FRONT Single Continous Drive Vibr. delay Bracketing Matrix Metering Center Spot Average AF Mode Spot Hyperfocal Mirror Up Down XF Camera System Manual | One Touch User Interface Flow Diagram... -
Page 19: Capture Setup
Histogram ExpComp In Auto None Audio Direction Audio Focus Confirm. Never Screen O Backlight Seismograph Tools BullsEye HyperFocal Point Power O Power Management Auto Never Mirror Position Down About XF Camera System Manual | One Touch User Interface Flow Diagram... -
Page 20: Iq Digital Back Menu Overview
Home Shortcut Thumbnail Shortcut Swipe to browse through images Navigate in image Full Screen Shortcut Click image to view in Tools View Thumbnail View Live View Shortcut Contextual menu XF Camera System Manual | One Touch User Interface Flow Diagram... -
Page 21: Format Card
Ready Beep Single Multi Date and Time English Language Deutch Russian Copyright Korean French Restore to Default Japanese Update Firmware Chinese Firmware Restore Firmware Italian Dump Log Swedish About Spanish XF Camera System Manual | One Touch User Interface Flow Diagram... - Page 22 IQ Digital Back Menu Overview Long Exposure Mode Auto Daylight Fluorescent Tungsten Flash Custom 1 200 S+ Custom 2 400 S+ Custom 3 800 S+ 1600 S+ 3200 S+ XF Camera System Manual | One Touch User Interface Flow Diagram...
-
Page 23: Onetouch User Interface Overview
Overview XF Camera Body Navigation Dials The XF Camera System is supplied from the factory in Manual exposure mode with the three dials assigned to the following primary function: Front Dial – Shutter speeds 2. Side Dial – Aperture values 3. -
Page 24: Top Touch Screen Display
ISO is only changed if a properly exosed image cannot be obtained using Shutter Time range or aperture range. If ISO is set to Auto, the XF camera will always try to make an exposure with lowest possible ISO selection. -
Page 25: Tools On The Xf Top Screen
Change Screen Layout Press the Rear Key on the XF top screen and from the menu select UI Setup > Layout > Classic / Simple / Waist Note with the Simple and Waist layout you can use the same Auto On/Off feature for the Exposure modes and ISO as in the Classic layout, without having the screen cluttered with settings you rarely change. -
Page 26: Iq Digital Back Navigation
Far most to the right is the contextual menu. This gives access to many other functions, depending on the IQ model you are using and where you are in the menu context. XF Camera System Manual | IQ Digital back Navigation... -
Page 27: Iq Digital Back Navigation Shortcuts
Once the shutter is released and providing no keys are depressed in the meantime, an image is displayed on the rear screen for approximately 60 seconds, by default. The display time can be altered under Menu>Display>Display Off Time. Focus Checking (Zooming) XF Camera System Manual | IQ Digital back Navigation... -
Page 28: Iq Digital Back Contextual Menu
(Tool View, Full Screen View, Thumbnail View and Live View). In addition it is also worth noting the Contextual Menu follows the XF system’s general principal of long-pressing icons to access sub-menus. Button icons with a white colored triangle displayed in the upper-right corner denote this ability. - Page 29 • Full Screen View • Live View *IQ3 100MP HDMI output is not Accessible from Full Screen View, please access contextual menu from Thumbnail View, Tool View or Home Screen. XF Camera System Manual | IQ Digital back Contextual Menu...
- Page 30 To exit the Contextual Menu, touch the menu icon a second time or press the Home Key (upper left soft key). *IQ3 100MP HDMI output is not Accessible from within Live View, please access contextual menu from Thumbnail View, Tool View or Home Screen. XF Camera System Manual | IQ Digital back Contextual Menu...
- Page 31 XF Camera System Manual | IQ Digital back Contextual Menu...
-
Page 32: Tools And Settings In View Mode
To re-arrange the order in which the tool is displayed, long press the relevant tool’s thumbnail and press the white arrow in the direction required. Re-arrange Tool order XF Camera System Manual | Tools and settings in View Mode... - Page 33 Ensure that the Roll and Pitch offset check mark box is not enabled to revert to the default horizontal or vertical alignment setting. Please note that above settings also is used by the BulsEye leveler on the XF camera body top screen. XF Camera System Manual |...
- Page 34 This tool will also help to determin when a stabelized temperature is reached after extensive use of Live View. Sensor Temperature XF Camera System Manual | Tools and settings in View Mode...
- Page 35 Exposure Zone Camera Controls When attached to the Phase One XF camera body, the IQ Digital Back can display the camera’s control screen, making it easier when working from behind the camera. All the controls may be activated by touch, including the Live View and shutter release buttons displayed alongside, to the right.
-
Page 36: Prism Viewfinder Display And Functions
Surrounding the AF area is a central spot that denotes the Spot metering area only. The AF area in use is highlighted on the XF Top Touch Screen. To change the AF area mode, touch the icon, and select the appropriate area option from the screen. - Page 37 Part # 70277 Diopter correction lens DE401 (Standard, -2.5 to +0.5 diopter) Removing the Eyecup The eyecup supplied with the XF as standard is suitable for users who intend to use the camera either with or without eyeglasses.To replace the factory diopter, release the eyecup by pulling the small metal latch on the top towards you.
-
Page 38: Xf Camera System Settings Overview
XF Camera Body basic settings The XF is delivered from the factory preconfigured with a set of default settings. The XF camera body can be reset to the default settings from the Camera menu, Load Setup > Restore to Default. - Page 39 Note modes depicted by screen icons can be selected directly by touch or by pressing the front Top Key and then by scrolling through the various icons using the Front Dial. Metering Mode XF Camera System Manual | XF Camera System Settings Overview...
-
Page 40: Iq Digital Back Basic Settings
The IQ Digital Back is supplied preconfigured with a number of default settings ready for use, either when purchased by itself, or with the XF. After adjustment of these settings, the user can restore the back to the factory defaults from the back’s screen by pressing Menu >... - Page 41 However, there is a very small loss of data, and therefore Phase One does not claim that IIQ S is completely lossless, but only what we call “near lossless” XF Camera System Manual | IQ Digital Back Basic Settings...
-
Page 42: Custom White Balance
IIQ S file formats contain all the relevant information required for correction in Capture One, especially when capturing a reference white balance file with a gray card under the intended light source. Custom white balance selected XF Camera System Manual | Custom White Balance... -
Page 43: Hap-1 Af Focusing System
Focus Modes There are two autofocus mode (AF Drive) options available from the XF camera body: Single and Continuous. The camera is delivered with the AF Drive mode set to Single and the AF Priority function set to Release (release priority) by default. - Page 44 AF Area Modes Autofocus precision and accuracy are essential to deliver sharpness at high- speed, and so Phase One developed a proprietary autofocus sensor for the XF camera, the HAP-1, and equipped it with a dedicated processor. For improved focus precision, the XF camera replaces individual line and cross-type sensors in favor of a single CMOS sensor containing a million pixel elements arranged in a multiple honeycomb-shaped pattern.
- Page 45 The AF/MF selector ring on the lens can help you to rapidly switch between AF (Autofocus) and M (Manual) using your left hand, without having to remove your finger from the shutter release button. AF/MF selector ring XF Camera System Manual | HAP-1 AF Focusing system...
-
Page 46: Working With Hyperfocal Distance
While this is sometimes helpful, it is rarely optimal; the precise distance actually depends on many factors, including subject distance, Aperture and focal length. XF Camera System Manual | Working with hyperfocal distance... -
Page 47: Working With Hyperfocal Distance
Saving an XF hyperfocal point: Entering the XF Hyperfocal Point mode – via The XF Rear Key > Tools > Hyperfocal Point Please NOTE that this always assumes that the lens is in AF mode. -
Page 48: Xf Camera System Capture Modes
The maximum capture delay is set using a long press of the Vibration icon in Drive screen or by pressing the Rear Key on the XF top screen and from the Low Vibration mode menu: select Capture Setup > Vibration and then toggle the rear dial to the wanted delay. -
Page 49: Xf Camera System Exposure Modes
Exposure Compensation setting for more details. ISO Setting ISO sensitivity can be set either by scrolling the rear dial on the XF camera body or by selecting ISO with the top right key of the IQ Digital Back. Settings are automatically transferred between the IQ Digital Back and the XF camera body. -
Page 50: Exposure Compensation
Access the XF menu from the top screen (or IQ screen) and select UI Setup > Control Setup >Front / Side Dial > In Auto > ExpComp. -
Page 51: Long Exposure
View, focus and then trigger the shutter release. The shutter remains open for the allotted time and the top screen of the XF will show the elapsed time (in secs). Shutter speeds longer than 1.0 second automatically change the leaf shutter option (if available) over to the camera’s integrated focal plane shutter. -
Page 52: Live View
From the IQ Home screen, touch the context menu icon in the lower right corner of the display. The contextual menu pop-up is displayed. Touch the Movie-camera icon to initiate Live View. The XF camera body opens the shutter and a live preview (Live view image) is displayed on the rear screen. - Page 53 The context menu pop-up is displayed. Touch the HDMI icon to initiate Live View on the external HDMI monitor. The XF camera body opens the shutter and a live preview will be transmitted to the external screen. Select HDMI in the Context Menu...
-
Page 54: Xf Camara Body Custom Presets
Set up the camera with the various settings required, then press the Rear Key on the XF top screen and from the menu select Save Setup > Custom 1 > Save Settings > Yes / No. Two further groups of settings can be stored (to Custom 2 and Custom 3). -
Page 55: Flash Photography
Flash Photography Flash Photography The Phase One XF has been designed to work with a range of flash solutions in manual mode, and the camera offers flash syncing up to an unprecedented 1/1600th sec with the majority of Schneider Kreuznach LS (Leaf Shutter) lenses. -
Page 56: Xf Camera System Lenses
1/1600th of a second Shutter Speed. If using LS lenses, the XF camera body will indicate if LS or FPS is active on the top screen. The shutter preference can be set using the camera menu from the top screen, or from the XF menu on the IQ Digital Back. -
Page 57: Capture One Pro
Capture One Pro The XF Camera System is bundled with Capture One Pro, Installing on Mac Capture One software includes an easy-to-use installer that will install all the software necessary to run the application on a Mac running OS X 10.9 (Mavericks) or 10.10 (Yosemite). - Page 58 • A fast Graphics card from NVIDIA or AMD, e.g. AMD Radeon 7950 (Mac) / AMD R9 290 (Win) or newer, with minimum 2GB RAM. We recommend using the Mac Pro (late 2013) containing the dual AMD D700 GPU. XF Camera System Manual | Capture One Pro...
- Page 59 If you are experiencing problems activating the software, follow the instructions provided in the application, read the Capture One help manual online, or visit our website for inspiration and troubleshooting: http://www.phaseone.com/ support XF Camera System Manual | Capture One Pro...
-
Page 60: Capture One Tethered Use
Settings tool (Digital Back) in Capture One or the IQ menu, select Auto Preview Mode > Off / On), as if shooting untethered. It is also possible to enlarge a section of an image on the IQ screen to help check focus. XF Camera System Manual | Capture One Tethered Use... - Page 61 6. Press “Import” or “Import All”. You can continue working while images are imported in the background. Capture One User Guide Available in the Capture One Help menu or go direct to: http://help.phaseone.com/ XF Camera System Manual | Capture One Tethered Use...
-
Page 62: Built-In Wifi And Capture Pilot
Apple iOS device (iPhone, iPad and iPod touch) running the Capture Pilot app from Phase One. Capture Pilot enables the user to remotely control the camera’s exposure settings and trigger the shutter on XF IQ3 and IQ2 camera systems. In addition, Capture Pilot allows browsing and geotagging of images, and even supports remote live view with the Phase One IQ3 50MP and IQ250 MP backs. - Page 63 Connect iOS device directly to IQ digital back using Ad-hoc mode Power on the XF/ IQ3 and from the rear touch screen, select Menu > WiFi > Mode (Off) > Adhoc. This will start an image server with the network name PhaseOne[serial number].
- Page 64 WiFi > Settings > Capture Pilot > Capture Pilot Permissions > Geotag captures > On. Ensure the data-logging feature of Capture Pilot is enabled (i.e. that the compass needle button visible at the top right corner is colored orange). XF Camera System Manual | Built-In WiFi and Capture Pilot...
-
Page 65: Iq Digital Backs With Third Party Cameras
The standard IQ digital back is equipped with an M mount for use with the Phase One XF or Phase One / Mamiya DF+ camera body, however IQ digital backs may be ordered with specific Hasselblad H or V mounts. In some cases, IQ digital backs can be fitted with an adapter to fit other camera body mounts. -
Page 66: Mounting Iq Digital Backs On Mamiya Rz67 Pro Ii/D
Mounting IQ digital backs on Mamiya RZ67 PRO II/D Mamiya RZ67 PRO IID The IQ digital backs with a standard M mount for use with the Phase One XF or 645DF+ are compatible with the Mamiya RZ67 Pro IID camera, however this will require an additional adaptor plate. -
Page 67: Iq Digital Backs For Hasselblad H-Series Cameras
All the Hasselblad H-series camera auto exposure modes are fully supported by the IQ digital back. Please check the relevant Hasselblad H-series manual for more information on exposure modes. Hasselblad H-series Camera Display XF Camera System Manual | IQ Digital Backs with third party cameras... -
Page 68: Iq Digital Backs For Hasselblad V Cameras
Viewfinder Masking Vertical Mounting On the Hasselblad V it is possible to mount the digital back in vertical position, in order to make portrait oriented images. Vertical Mounting XF Camera System Manual | IQ Digital Backs with third party cameras... - Page 69 Shutter Latency Setting Hasselblad 555 ELD Ensure that the shutter release on the front of the 555 ELD is in the DIG position Hasselblad 555 ELD DIG position XF Camera System Manual | IQ Digital Backs with third party cameras...
-
Page 70: Iq Digital Backs And Technical Cameras
Several vendors make automatic lens controls that are compatible with the IQ digital backs – Please ask your dealer for more information. More information is available by searching for specific camera names in the Phase One Knowledge base at: support.phaseone.com XF Camera System Manual | IQ digital backs and Technical Cameras... -
Page 71: System Maintenance
Keep the electronic contacts and back mount of the XF camera body clean and free of dust, with either a dry micro-fibre cloth or by using a lens brush specifically for the body (do not re-use on the lens’... -
Page 72: Learning More
Learning More Phase One Customer Service The Phase One XF Camera System is a high-performance camera designed to endure the rigors of daily professional use under a wide range of environments. However as a precision made optical and mechanical device it should be protected from harsh use, and stored carefully away from extremes of temperature and humidity when not in use. -
Page 73: Phase One Information
1 Year Warranty Items covered by the 1 Year Warranty: Phase One XF camera body, IQ digital back, XF viewfinders, Phase One and Schneider Kreuznach lenses, when purchased as stand alone items. Phase One XF IQ1 Camera Systems including:... - Page 74 5 Year Warranty Items covered by the 5 Year Warranty and 5 Year Uptime Guarantee: Phase One XF IQ3 or XF IQ2 Camera Systems, including: Phase One IQ3 or IQ2 digital back Phase One XF camera body XF Prism Viewfinder or XF waist level finder An optional number of Phase One or Schneider Kreuznach lenses purchased on the same system order.
-
Page 75: General Conditions
Phase One. of data; additional costs etc. as a Otherwise shipping costs are borne consequence of deficiencies in by you. If you are having image Phase One’s deliveries. quality problems, you should always XF Camera System Manual | General Conditions... -
Page 76: Notices
User guide version: 1.02 This device complies with part 15 of the FCC Rules. Operation is subject to the XF Camera Body firmware 1.07.5.fwr following two conditions: (1) This device may not cause harmful interference, IQ3 100MP Digital back firmware 3.04.9.fwr and (2) this device must accept any interference received, including interference IQ3 80MP and IQ3 60MP Digital Back firmware 1.06.5.fwr...
Need help?
Do you have a question about the XF and is the answer not in the manual?
Questions and answers