Maytag Mgt8885xs Use & Care Manual
Gas double oven range
Hide thumbs
Also See for Mgt8885xs:
- Use & care manual (48 pages) ,
- Installation manual (40 pages) ,
- Installation instructions manual (40 pages)
Table of Contents
Advertisement
Available languages
Available languages
Quick Links
Download this manual
See also:
Installation Manual
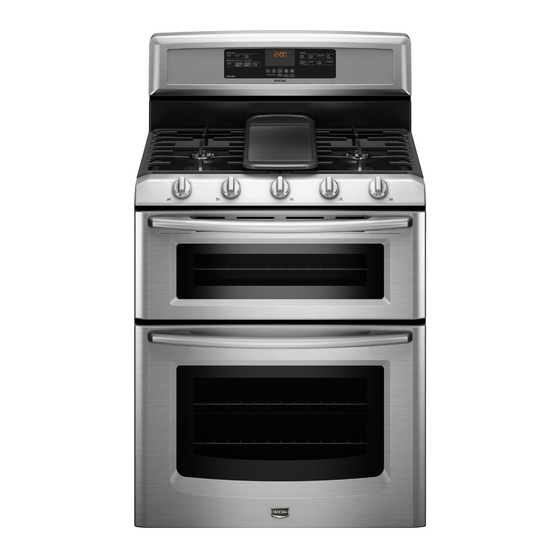
GAS DOUBLE OVEN RANGE
Use & Care Guide
For questions about features, operation/performance, parts, accessories or service, call: 1-800-688-9900
In Canada, call: 1-800-807-6777
or visit our website at
www.maytag.com or www.maytag.ca
CUISINIÈRE À GAZ À DOUBLE FOUR
Guide d'utilisation et d'entretien
Au Canada, pour assistance, installation ou service, composez le : 1-800-807-6777
ou visitez notre site internet
www.maytag.ca
Table of Contents/Table des matières............................................................................. 2
W10345641A
Advertisement
Table of Contents

Related Manuals for Maytag Mgt8885xs


Summary of Contents for Maytag Mgt8885xs
- Page 1 For questions about features, operation/performance, parts, accessories or service, call: 1-800-688-9900 In Canada, call: 1-800-807-6777 or visit our website at www.maytag.com or www.maytag.ca CUISINIÈRE À GAZ À DOUBLE FOUR Guide d’utilisation et d’entretien Au Canada, pour assistance, installation ou service, composez le : 1-800-807-6777 ou visitez notre site internet www.maytag.ca...
-
Page 2: Table Of Contents
TABLE OF CONTENTS TABLE DES MATIÈRES RANGE SAFETY ................3 SÉCURITÉ DE LA CUISINIÈRE ...........25 The Anti-Tip Bracket ..............4 La bride antibasculement............26 COOKTOP USE ................5 UTILISATION DE LA TABLE DE CUISSON ........27 Cooktop Controls.................5 Commandes de la table de cuisson ..........27 Sealed Surface Burners ...............6 Brûleurs de surface scellés ............28 Griddle Accessory................6... -
Page 3: Range Safety
RANGE SAFETY Your safety and the safety of others are very important. We have provided many important safety messages in this manual and on your appliance. Always read and obey all safety messages. This is the safety alert symbol. This symbol alerts you to potential hazards that can kill or hurt you and others. All safety messages will follow the safety alert symbol and either the word “DANGER”... -
Page 4: The Anti-Tip Bracket
The Anti-Tip Bracket The range will not tip during normal use. However, the range can tip if you apply too much force or weight to the open door without the anti-tip bracket fastened down properly. WARNING Tip Over Hazard A child or adult can tip the range and be killed. Connect anti-tip bracket to rear range foot. -
Page 5: Cooktop Use
COOKTOP USE A. Left front control knob C. Center burner (on some models) D. Right rear control knob B. Left rear control knob E. Right front control knob Cooktop Controls To Set: WARNING 1. Push in and turn knob counterclockwise to LIGHT. All the surface burners will click. -
Page 6: Sealed Surface Burners
To Clean: Sealed Surface Burners IMPORTANT: Before cleaning, make sure all controls are off and the oven and cooktop are cool. Do not use oven cleaners, bleach or rust removers. 1. Remove the burner cap from the burner base and clean according to “General Cleaning”... -
Page 7: Home Canning
3. The locating tabs on the bottom side of the griddle at the grease trap end should be placed over the grate fingers Cookware closest to the electronic control. IMPORTANT: Do not leave empty cookware on a hot surface cooking area, element or surface burner. Ideal cookware should have a flat bottom, straight sides and a well-fitting lid, and the material should be of medium-to-heavy thickness. -
Page 8: Electronic Oven Controls
ELECTRONIC OVEN CONTROLS This manual covers different models. The range you have purchased may have some or all of the items listed. The locations and appearances of the items shown here may not match those of your model. A. Upper oven settings F. -
Page 9: Settings
Settings Adjusting End Tone On or Off Fahrenheit and Celsius The end tone is factory preset for On but can be changed to Off. 1. Press SETTINGS four times until “END TONE” appears in the The temperature is factory preset to Fahrenheit, but can be upper text area and “ON. -
Page 10: Oven Temperature Control
ADJUSTMENT °F COOKS FOOD Sabbath Mode (ADJUSTMENT °C) Sabbath Mode is used to configure the oven system so that 10°F (6°C) ...a little more certain features and modes are disabled or defeatured. By enabling Sabbath Mode, the oven will conform to Star-K Jewish 20°F (12°C) ...moderately more Sabbath requirements. -
Page 11: Oven Use
OVEN USE Odors and smoke are normal when the oven is used the first few Rack Positions - Upper Oven times, or when it is heavily soiled. Preheat is recommended for cooking most foods. Food should be placed in the oven when the preheat beep occurs. Some modes use elaborate cycling to achieve best performance. -
Page 12: Bakeware
Convection Cooking (on some models) Meat Thermometer FUNCTION NUMBER OF RACK On models without a temperature probe, use a meat RACKS USED POSITION(S) thermometer to determine whether meat, poultry and fish, are Convection baking or 1, 2 or 3 cooked to the desired degree of doneness. The internal roasting temperature, not appearance, should be used to determine doneness. -
Page 13: Broiling
4. Press START. For proper draining, do not cover the grid with foil. The bottom of the pan may be lined with aluminum foil for easier If the upper oven is used “Preheating” will appear in the cleaning. upper oven text area. If the lower oven is used, depending on the selection, “Rapid preheating for single rack. -
Page 14: Convection Cooking - Lower Oven Only
Convection Cooking - Lower Oven Only (on some models) During convection cooking, the fan provides increased hot air 3. Press START to begin preheating oven. circulation throughout the oven. The movement of heated air “CONVECT BAKE” will scroll in the lower oven text area and around the food helps to speed up cooking by penetrating the “Rapid Preheating for single rack. -
Page 15: Keep Warm™ Feature
Keep Warm™ Feature Automatic Shutoff/Sabbath Mode The oven control is set to automatically shut off the oven WARNING 12 hours after the oven is turned on. This feature can be turned off by using the Sabbath Mode. Food Poisoning Hazard 12 Hour Shutoff Mode is disabled during an active Sabbath Mode. -
Page 16: Favorite
To Activate an Enabled Sabbath Mode: To Recall and Start a Favorite: 1. Press FAVORITE. Sabbath Mode can be activated at any time during an enabled Sabbath Mode. The name of the saved cook function will scroll into the display text area of the oven that it was saved from for 1. -
Page 17: Range Care
To Set a Cook Time: To Set a Delay Cooking Time: 1. Press the button for any cooking function except Self-Clean Before setting, make sure the clock is set to the correct time of or Keep Warm. day. See “Clock” in the “Settings” section. Press the Temp/Time “+”... - Page 18 Prepare Cooktop: When the self-clean cycle ends: Remove plastic items from the cooktop because they may “CLN COMPLETE will scroll in the selected oven text area. melt. “OVEN COOLING” will scroll in the display until the oven temperature falls below 500°F (260°C). NOTE: The cooktop burners will not function during the self- “UNLOCKING”...
-
Page 19: General Cleaning
General Cleaning IMPORTANT: Before cleaning, make sure all controls are off and COOKTOP CONTROLS the oven and cooktop are cool. Always follow label instructions on cleaning products. To avoid damage to the cooktop controls, do not use steel wool, Soap, water and a soft cloth or sponge are suggested first unless abrasive cleansers or oven cleaner. -
Page 20: Oven Light
To Remove: Oven Light 1. Open oven door all the way. 2. Pull forward and down on the hinge latch on each side. The ovens light is a standard 40-watt appliance bulb. Before replacing, make sure the oven and cooktop are cool and the control knobs are off. -
Page 21: Troubleshooting
TROUBLESHOOTING Try the solutions suggested here first in order to avoid the cost of an unnecessary service call. Nothing will operate Excessive heat around cookware on cooktop Is the cookware the proper size? Use cookware about the same size as the surface cooking WARNING area, element or surface burner. -
Page 22: Assistance Or Service
Mississauga, Ontario L5N 0B7 directory Yellow Pages. Please include a daytime phone number in your correspondence. For further assistance If you need further assistance, you can write to Maytag ® appliances with any questions or concerns at: Maytag Brand Home Appliances... -
Page 23: Warranty
YOUR SOLE AND EXCLUSIVE REMEDY UNDER THE LIMITED WARRANTY SHALL BE PRODUCT REPAIR AS PROVIDED HEREIN. Service must be provided by a Maytag designated service company. This limited warranty is valid in the United States or Canada and applies only when the major appliance is used in the country in which it was purchased. This limited warranty is effective from the date of the original consumer purchase. - Page 24 Keep this book and your sales slip together for future Dealer name____________________________________________________ reference. You must provide proof of purchase or installation date for in-warranty service. Address ________________________________________________________ Write down the following information about your major appliance Phone number __________________________________________________ to better help you obtain assistance or service if you ever need it. You will need to know your complete model number and serial Model number __________________________________________________ number.
-
Page 25: Sécurité De La Cuisinière
SÉCURITÉ DE LA CUISINIÈRE Votre sécurité et celle des autres est très importante. Nous donnons de nombreux messages de sécurité importants dans ce manuel et sur votre appareil ménager. Assurez-vous de toujours lire tous les messages de sécurité et de vous y conformer. Voici le symbole d’alerte de sécurité. -
Page 26: La Bride Antibasculement
La bride antibasculement Dans des conditions de service normales, la cuisinière ne bascule pas. Elle peut cependant basculer si une force ou un poids excessif est appliqué sur la porte ouverte alors que la bride antibasculement n’est pas convenablement fixée. AVERTISSEMENT Risque de basculement Un enfant ou une personne adulte peut faire basculer la cuisinière ce qui peut causer un décès. -
Page 27: Utilisation De La Table De Cuisson
UTILISATION DE LA TABLE DE CUISSON A. Bouton de commande avant gauche C. Brûleur central (sur certains modèles) D. Bouton de commande arrière droit B. Bouton de commande arrière gauche E. Bouton de commande avant droit Commandes de la table de cuisson REMARQUE : Vérifier visuellement que le brûleur est allumé. -
Page 28: Brûleurs De Surface Scellés
2. Nettoyer l’ouverture du tube d’arrivée de gaz avec un linge Brûleurs de surface scellés humide. 3. Nettoyer les orifices de brûleur obstrués avec une épingle droite tel qu’indiqué. Ne pas agrandir ni déformer les orifices. Ne pas utiliser un cure-dent en bois. Si le brûleur a besoin d’être ajusté, faire venir un technicien de réparation qualifié. -
Page 29: Préparation De Conserves À La Maison
3. Les onglets de positionnement au bas de la plaque à frire, à l'extrémité du piège à graisse, doivent être placés sur les Ustensiles de cuisson doigts de la grille situés le plus près du module de IMPORTANT : Ne pas laisser un ustensile de cuisson vide sur la commande électronique. -
Page 30: Commandes Électroniques Du Four
COMMANDES ÉLECTRONIQUES DU FOUR Ce manuel couvre différents modèles. La cuisinière que vous avez achetée peut comporter l'ensemble des articles énumérés ou seulement certains d'entre eux. Les emplacements et aspects des articles illustrés ici peuvent ne pas correspondre à ceux de votre modèle. -
Page 31: Réglages
Réglages Réglage du signal de fin - Marche ou arrêt Fahrenheit et Celsius Le signal de fin est préréglé à l'usine sur Marche mais peut être modifié et réglé à Arrêt. La température est préréglée à l'usine pour un affichage en 1. -
Page 32: Commande De La Température Du Four
Réglage de l'horloge : Langue Avant de procéder au réglage, s’assurer que le four et la minuterie de cuisine sont désactivés. La langue est préréglée à l'usine à l'anglais, mais elle peut être 1. Appuyer sur CLOCK (horloge). “Durée rég” apparaît dans la changée vers le français. -
Page 33: Control Lockout (Verrouillage Des Commandes)
Control Lockout (verrouillage des commandes) Le module de commande peut être verrouillé pour éviter Verrouillage des commandes : l’utilisation involontaire du four. 1. Appuyer sur START (mise en marche) pendant 3 secondes ou jusqu'à ce que “COMMANDE VERR” apparaisse sur Le module de commande ne peut pas être verrouillé... -
Page 34: Ustensiles De Cuisson Au Four
NOMBRE POSITION SUR LA GRILLE Positions de grille - Four inférieur D'USTEN- SILES Côte à côte ou légèrement décalés. 3 ou 4 Dans les coins opposés sur chaque grille. S’assurer qu’aucun ustensile de cuisson ne se trouve directement au-dessus d’un autre. Voir “Cuisson au four des gâteaux à... -
Page 35: Évents Du Four
4. Appuyer sur START (mise en marche). Évents du four Si l'on utilise le four supérieur, “Préchauffage” apparaît dans la zone de texte du four supérieur. Si l'on utilise le four inférieur et en fonction de la sélection de l'utilisateur, “Préchauffage rapide sur une seule grille. - Page 36 Sortir la grille jusqu’à la butée d’arrêt avant de tourner ou Pour une cuisson au gril à l'aide des réglages de d’enlever les aliments. Utiliser une pince pour tourner les température Hi/Low (élevé/bas) : aliments et éviter la perte de jus. Il est possible qu’il ne soit 1.
-
Page 37: Cuisson Par Convection - Four Inférieur Uniquement
Cuisson par convection - Four inférieur uniquement (sur certains modèles) Lors de la cuisson par convection, le ventilateur permet une 2. Appuyer sur les touches “+” ou “-” de Temp/Time circulation accrue et uniforme de l'air chaud dans le four. Le (température/durée) jusqu'à... -
Page 38: Caractéristique Keep Warm
5. Une fois le programme de préchauffage terminé, “RÔTISS À 6. Appuyer sur CANCEL (annulation) pour le four sélectionné CONV” défile dans la zone de texte inférieure. La température une fois terminé. réglée est également affichée. 7. Retirer les aliments du four. 6. -
Page 39: Favori
Désactivation du mode Sabbat : Favori 1. Ouvrir la porte du four inférieur. 2. Appuyer sur LOWER CANCEL (annulation four inférieur). AVERTISSEMENT 3. Appuyer sur la touche “+” de Temp/Time (température/durée) pendant 5 secondes ou jusqu'à ce que “Sabbath arr” apparaisse dans la zone de texte supérieure. -
Page 40: Cuisson Minutée/À Mise En Marche Différée
3. Placer les aliments dans le four. Pour annuler un programme favori : 1. Appuyer sur UPPER [annulation four supérieur] ou LOWER 4. Appuyer sur le bouton CANCEL (annulation) correspondant CANCEL [annulation four inférieur] sur le four pour lequel la au four utilisé... -
Page 41: Entretien De La Cuisinière
ENTRETIEN DE LA CUISINIÈRE Programme d'autonettoyage (sur certains modèles) Préparation de la table de cuisson : AVERTISSEMENT Enlever les articles de plastique de la table de cuisson car ils peuvent fondre. REMARQUE : Les brûleurs de la table de cuisson ne fonctionnent pas durant le programme d’autonettoyage. -
Page 42: Nettoyage Général
5. Appuyer sur START (mise en marche). Lorsque le programme d’autonettoyage est terminé : “Sélect niveau” apparaît sur l'affichage. “NETT TERMINÉ” défile dans la zone de texte du four sélectionné. “REFROID FOUR” défile sur l'affichage jusqu'à ce 6. Appuyer sur les touches “+” ou “-” de Temp/Time que la température du four tombe en dessous de 500°F (260°C). -
Page 43: Lampe Du Four
Lave-vaisselle (grilles seulement, pas les chapeaux) : EXTÉRIEUR DE LA PORTE DU FOUR Utiliser le programme le plus intensif. Les saletés cuites doivent être trempées ou frottées avant d'être placées au Méthode de nettoyage : lave-vaisselle. Nettoyant à vitre et essuie-tout ou tampon à récurer en Nettoyant pour grille et plateau d’égouttement –... -
Page 44: Porte Du Four
Porte du four IMPORTANT : 4. Soulever la porte du four en la retenant de chaque côté. Pour éviter de briser la vitre de la porte du four : Continuer de maintenir la porte du four fermée et la dégager du châssis de la porte du four. - Page 45 Les flammes des brûleurs de surface ne sont pas Des messages s'affichent uniformes, sont de teinte jaune et/ou bruyantes L'affichage indique-t-il une heure clignotante? Les orifices des brûleurs sont-ils obstrués? Une panne de courant est survenue. Effacer l'affichage. Sur Voir la section “Brûleurs de surface scellés”. certains modèles, régler de nouveau l'horloge au besoin.
-
Page 46: Assistance Ou Service
Les conviendront et fonctionneront bien parce qu’elles sont ® techniciens de service désignés par Maytag sont formés fabriquées avec la même précision que celles utilisées dans la pour remplir la garantie des produits et fournir un service ®... -
Page 47: Garantie
5. Les défauts apparents, notamment les éraflures, les bosses, fissures ou tout autre dommage au fini du gros appareil ménager, à moins que ces dommages soient dus à des vices de matériaux ou de fabrication et soient signalés à Maytag dans les 30 jours suivant la date d’achat. - Page 48 Date d’achat____________________________________________________ W10345641A ®Registered trademark/™ Trademark of Maytag Corporation or its related companies. © 2010 ®Marque déposée/™ Marque de commerce de Maytag Corporation ou de ses compagnies affiliées. 9/10 All rights reserved. Used under license by Maytag Limited in Canada.
Need help?
Do you have a question about the Mgt8885xs and is the answer not in the manual?
Questions and answers